


Bleacher Boys From Used Batteries

Get rid of the flat batteries rolling around in your drawers by turning them into these cute little guys.
Be honest, you don't recycle your old batteries, you hoard them! They've been languishing in the junk drawer for years because you are scared of them. You think that your flesh will melt if you touch them - like in a sci-fi movie. I know, it takes a neurotic to know one.
No more! I shall confront my exaggerated fear of the miniscule odds that a battery will A) leak and B) by doing so, cause serious damage. It's not rational people.
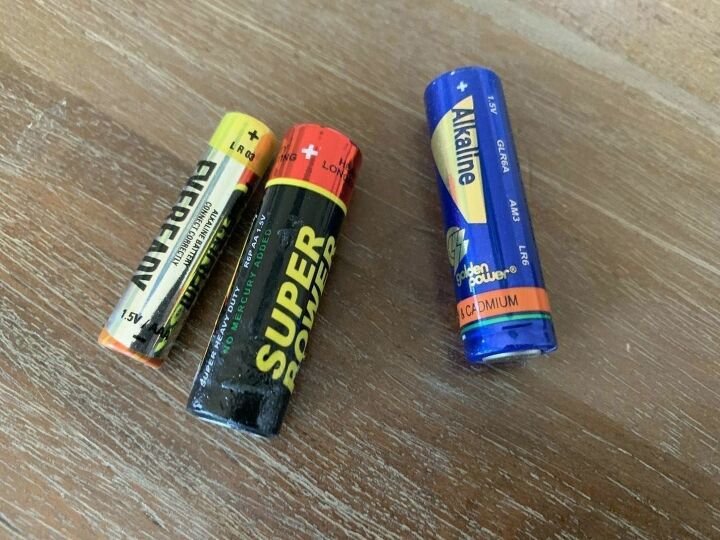
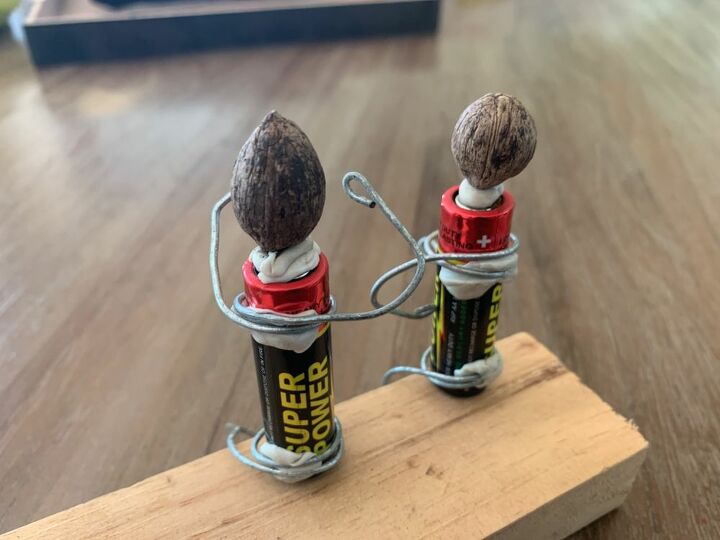
So, for this project I used 3 of at least 9 AA batteries that I had laying around, some 6 X 17cm pieces of wire (thick jewelry wire would do although I picked mine up on a construction site); jewelry pliers, a rectangular block of wood, tack, chalk spray paint, matte varnish, super glue (now there's a real dangerous chap) , gloves and perhaps a glue gun. And something to act as heads e.g. beads or seeds.
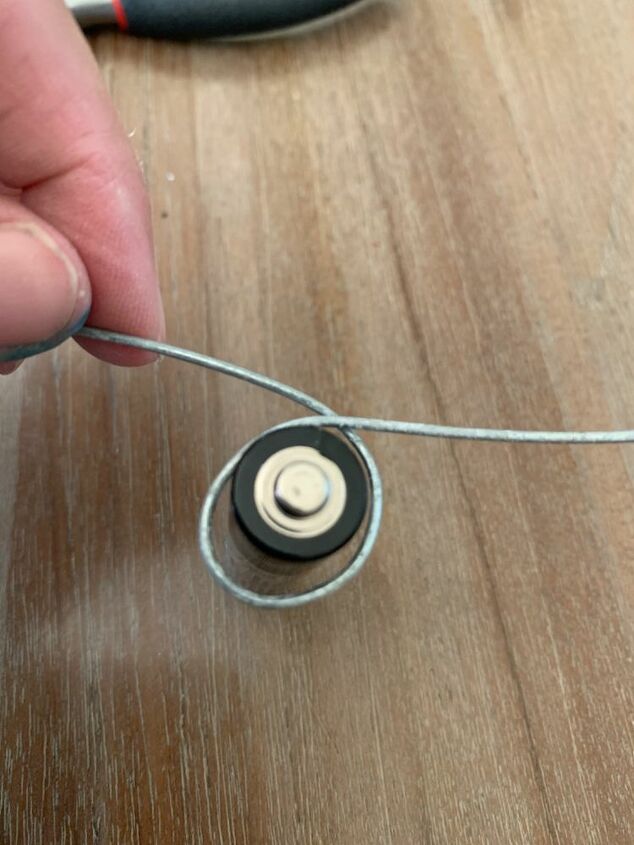
I started by making temporary figures to ensure that I had the proportions correct. For the arms and legs I wrapped the middle of the wire around the battery as tightly as I could and then brought both sides forward. See pictures above and below. It is important that ends are of equal length as these are going to be the limbs.
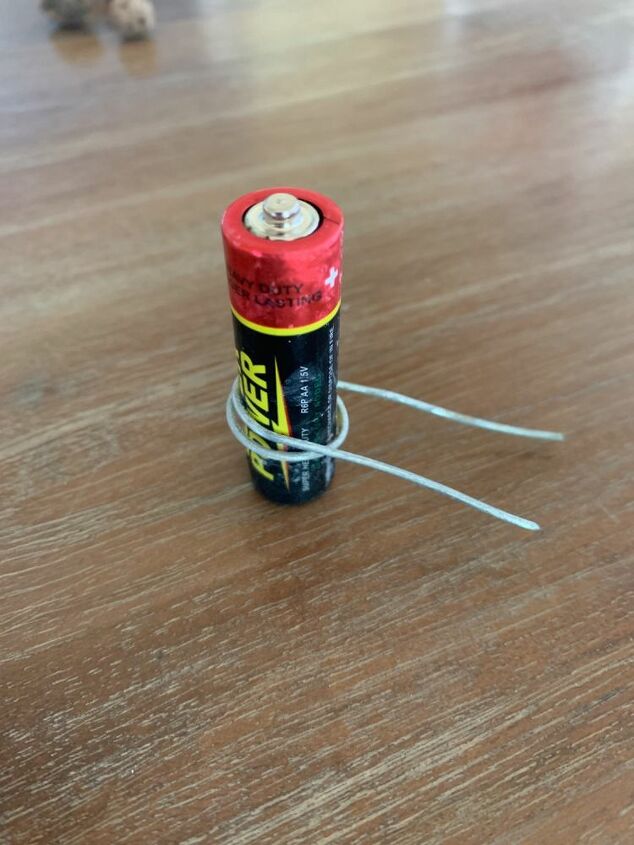
Winding the wire around the battery is a balance act as it is easier to stick it on if it is wound tightly but you also need to remove and then put it back on again later without scratching the paint. You need two wires for each figure, one for the two bottom limbs and one for the top.
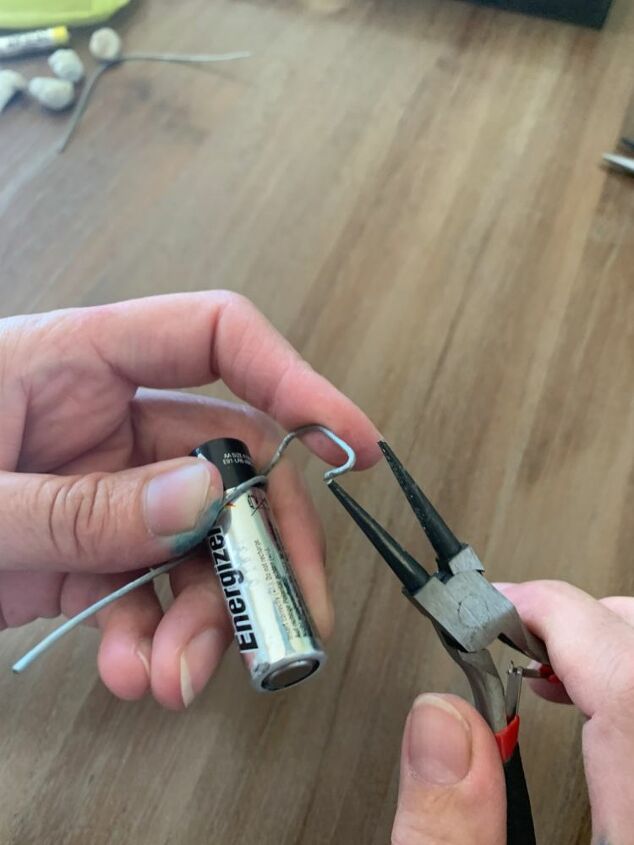
Shaping the limbs is both challenging and fun. I tried as best I could to remember rules regarding limb proportions and to have them strike natural poses.
To ensure that the postures and composition worked, I temporarily stuck everything in place with tack. A tip: it is much easier to have the figures sitting down than standing up unless you make bigger feet.
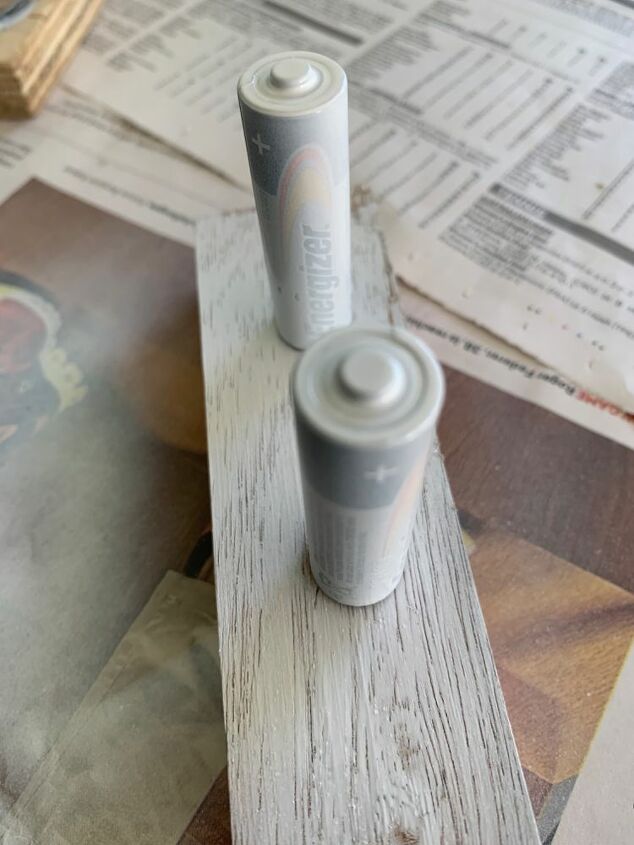
I experimented a bit with painting the batteries (read, I had some flops). In the end I used Marshall White Primer Spray Paint - not sure if this was actually needed but I wasn’t taking any chances; followed by a couple of coats of Rustoleum Chalked in Linen White and finally some Rustoleum Painter’s Touch Ultra Cover Matte. The best way was just to stand the batteries on a flat surface like a block of wood on an even flat surface. This way I could turn them around without touching them. Make sure they are extremely dry between coats.
The seeds and block of wood also got a coat of paint although it was no fun watching the seeds being chased around by the spray paint blast. I suggest you stick them down with tack and then only spray or hand paint them. Let them dry and then flip them to do the tacked parts.
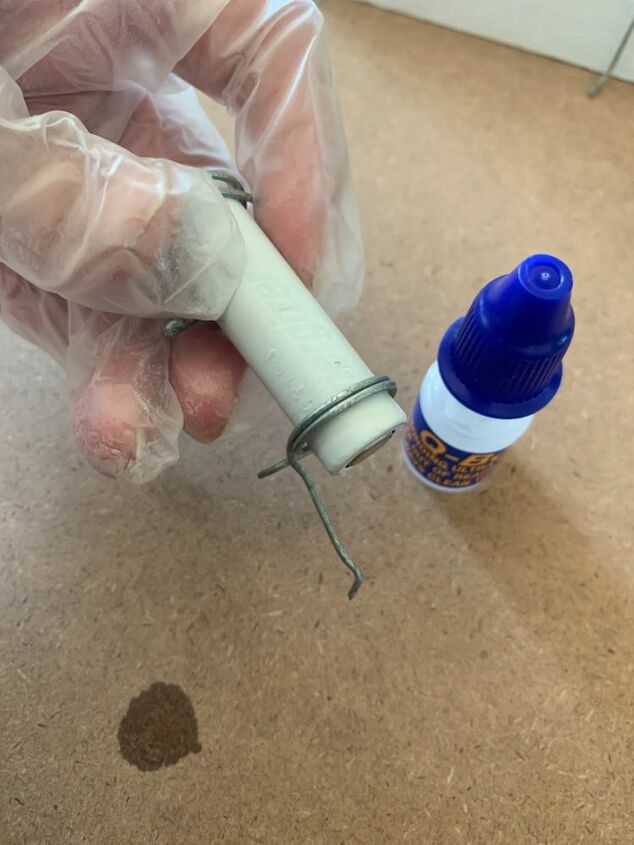
Because my wires didn't always wrap tightly around the batteries, I used Q-Bond to stick the limbs at the back. If you are not used to superglue: the Q-bond is odourless, invisible and scarily effective. It is water-thin so you need to wear gloves and prepare for drips. Do not try to open the lid with your mouth or any part of your body.
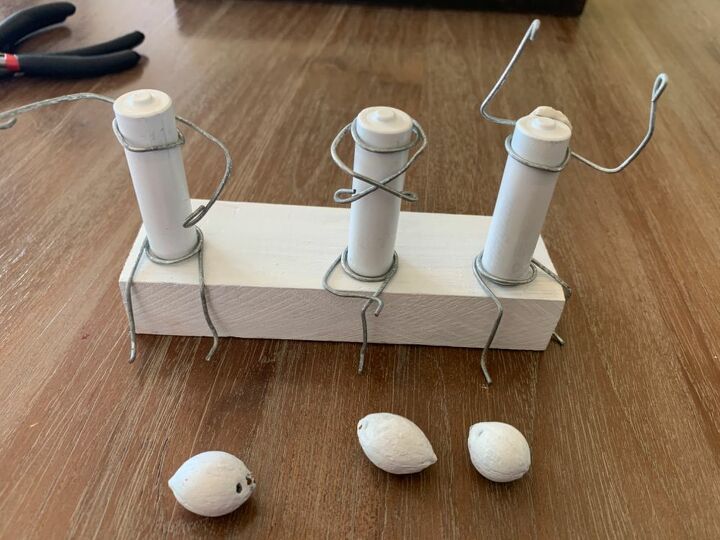
Once the limbs were in place and I was certain that none of my body parts were sticking to inanimate objects, I decided to use the mini-glue gun to stick the heads. My seeds had sharp points and not enough surface to be stuck with super glue, yours may just. I found that a normal glue gun delivered too much glue.
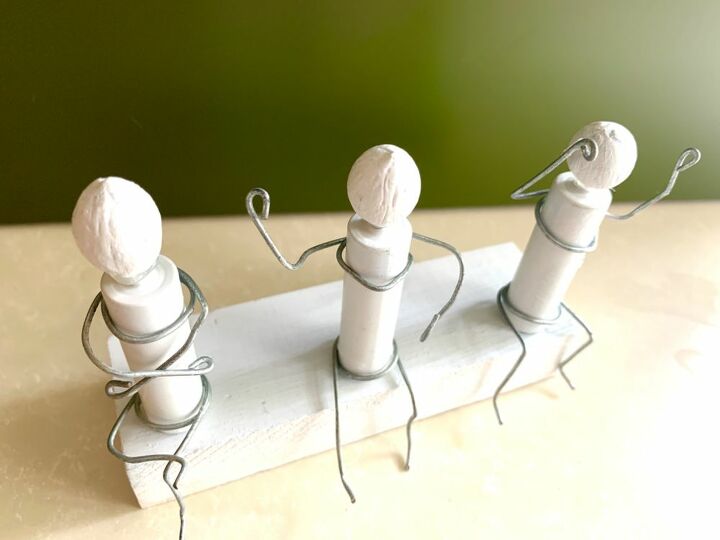
Finally, after clearing loose glue threads I made the battery boys sit on their spot on the wooden bleacher - to forever pass animated but silent commentary on the goings on in the house.
Resources for this project:


Comments
Join the conversation
-
I think the only thing missing is a couple tiny pegs to look like beer cans (See how my mind works?).
-
Try Gorilla GEL glue .It's thicker than the regular Gorilla glue & I 've had better luck at not gluing my fingers together.


Frequently asked questions
Have a question about this project?
What kind of nut did you use?