


Mudroom Makeover--From Trashed to Treasured!
6 Materials
$200
3 Weeks
Medium
This might be my favorite makeover project ever!! We are a large family with a small mudroom/laundry room/pantry storage area. This space has always been a problem for us. We just couldn't come up with a way to make this room function well. There were always boots in the walkway, coats falling off the hooks, hats, gloves and mittens strewn about. Not to mention, the dirty laundry baskets piled in front of the machines. We also have shelves for pantry overflow and storage of bulk items. However, nothing was in the right place and it was a depressing space. You know how that goes, once a space gets neglected, it's easy to just continue to neglect it until it is one GIANT MESS! That's where we started! This is a long post with lots of pictures, even though it is a small room, it was a pretty big project!
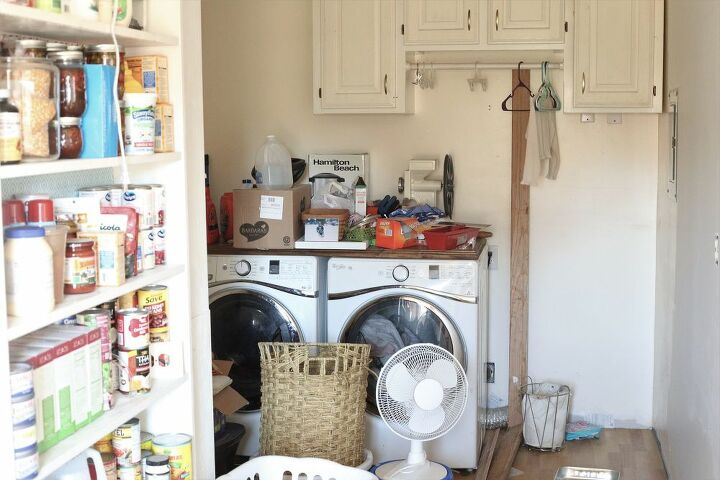
I don't think this picture even truly reflects the disarray, as we had already started clearing some stuff out. In November I partnered with Wagner Paint Sprayers to do an accent wall in our home. I chose to makeover the wall on the right. This gave us a good start for getting this place in order.
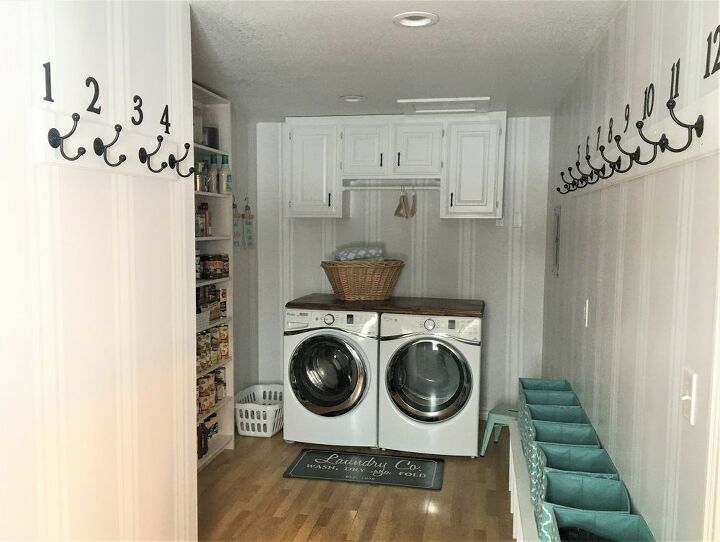
This was the progress made in November, a pretty striped wall with a newly made coat rack and a boot storage area. Pretty good start. However all of the other walls needed help, the ceiling needed to be painted, the cabinets needed to be moved and painted and the pantry storage was in a bad location. The room is a bit of an awkward shape. It is the back entryway to the house, and it is 18.5' long, which doesn't sound too bad. However, it is only 5' wide for the first 9' from the door. Then it opens up to 8' wide at the laundry area. We have 12 people living in our home. This makes for a lot of boots and coats in the winter and wet towels and swimsuits in the summer. So...here is what we did. Also, I will give a cut list on building your own boot storage and coat racks at the end of the post.
Step 1: Nearly everything was taken out of the room. The cabinets, shelves, and the trim were taken out to the barn and spray painted with the Wagner Flexio 5000 paint sprayer. We used Valspar Paint Plus Primer in white. Some of the trim was oak, so it needed two coats, but the cabinets and shelves only needed one with the sprayer. We also painted the ceiling to freshen it up. The walls were also patched and primed as we decided to center the cabinet on the back wall. The cabinets received new pulls as well.
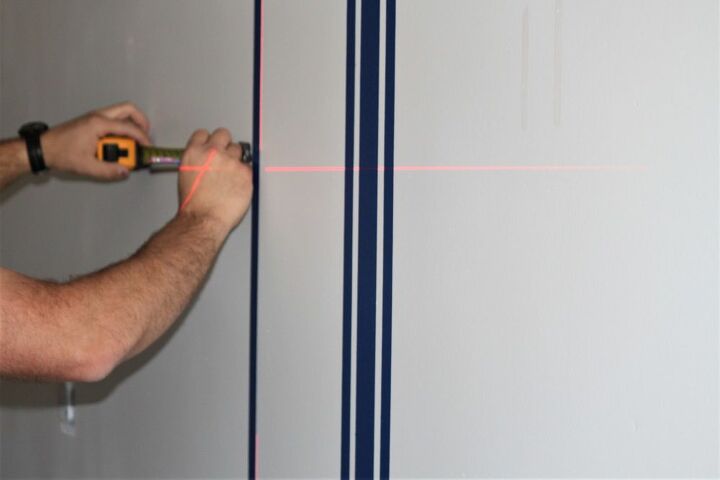
Step 2: The ceiling and floors were papered and taped to protect them from over spray. The walls were all painted Glidden White on White. That base coat needs to dry for about 24 hours. Then, using a tape measure, a self leveling laser, a pencil and lots of blue tape we measured and marked out where the stripes would go. The laser level makes this so easy. You just follow the laser light down with the tape, no need to draw a line on the wall for each stripe. The stripes are 10" apart, then a piece of 1" tape, 1/2" space then a piece of 2" tape, then 1/2" space, then a piece of 1" tape. That is how we did the entire room. It gives kind of a grain sack stripe effect.
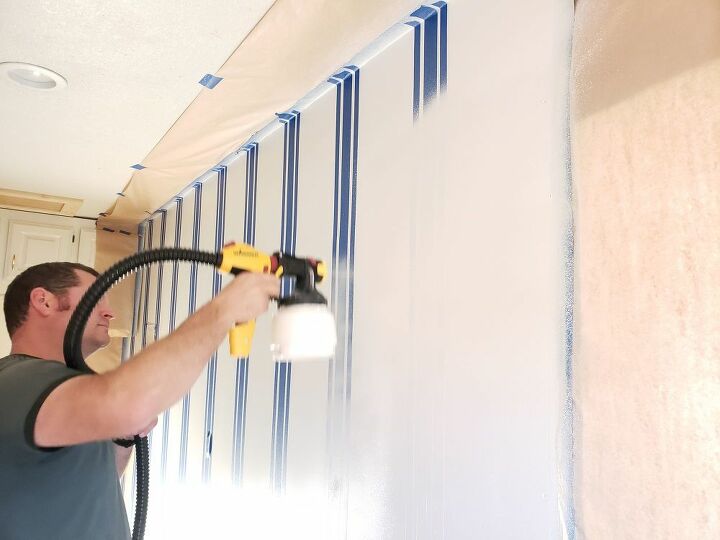
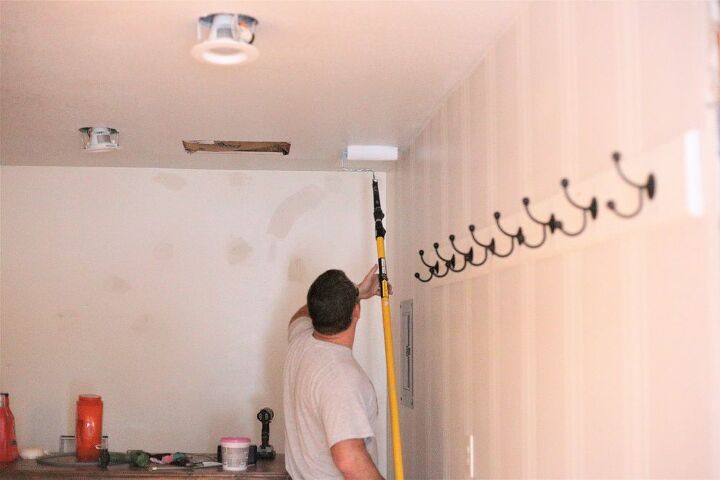
Step 3: This picture was taken when we painted the first wall back in November, but the process for the rest of the room was the same. This picture shows how we taped off the ceiling to protect it. The walls were then painted in Glidden Light Pelican Grey. We find it best to pull the tape off while the paint is still wet, then there is no sticking or bleeding. Your hands get messy, but they will wash!
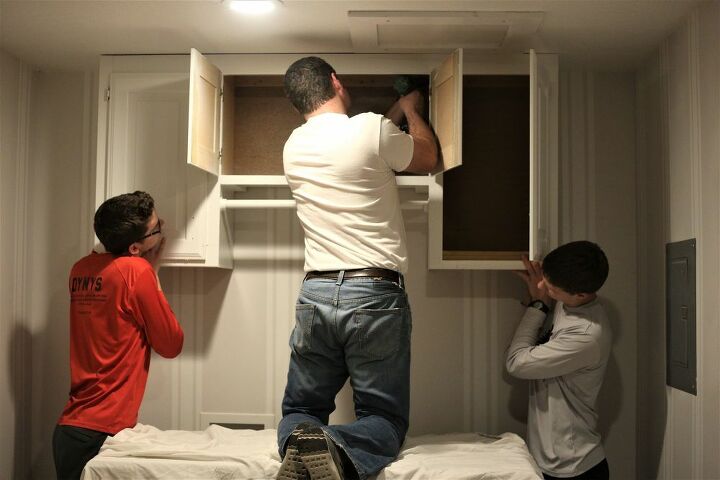
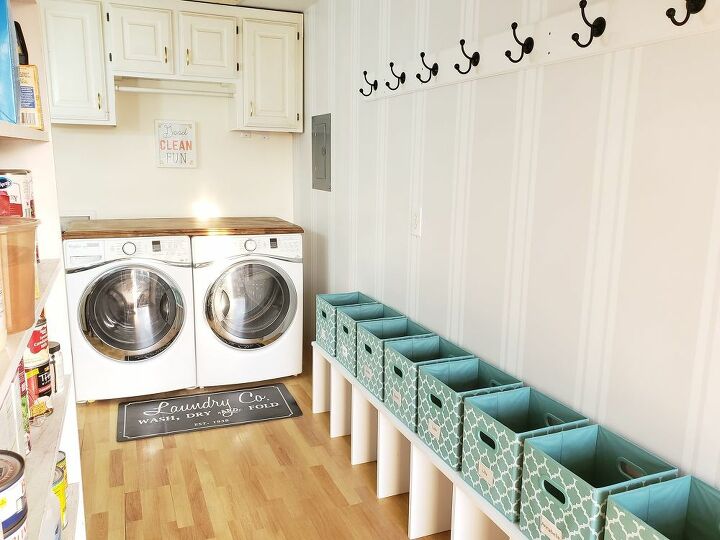
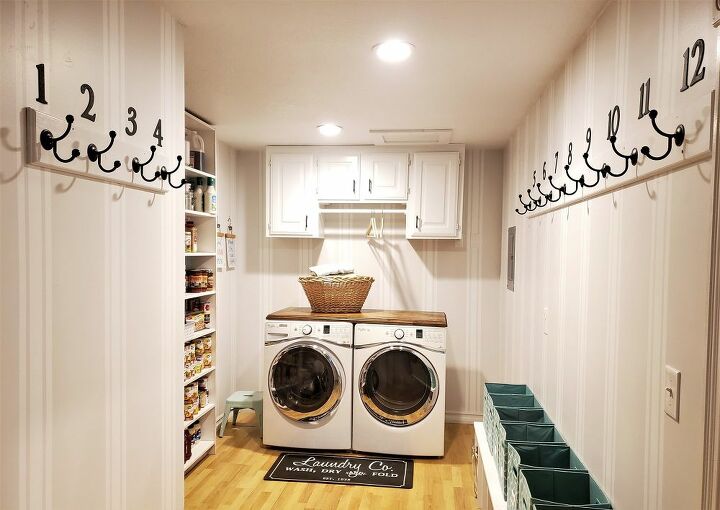
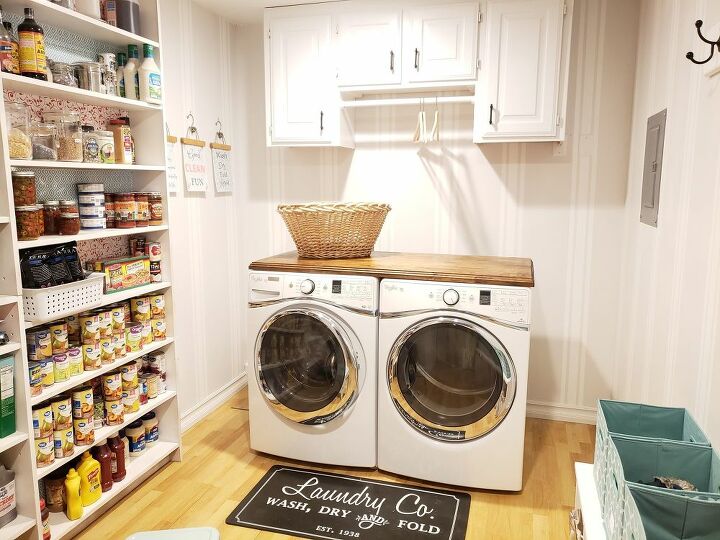
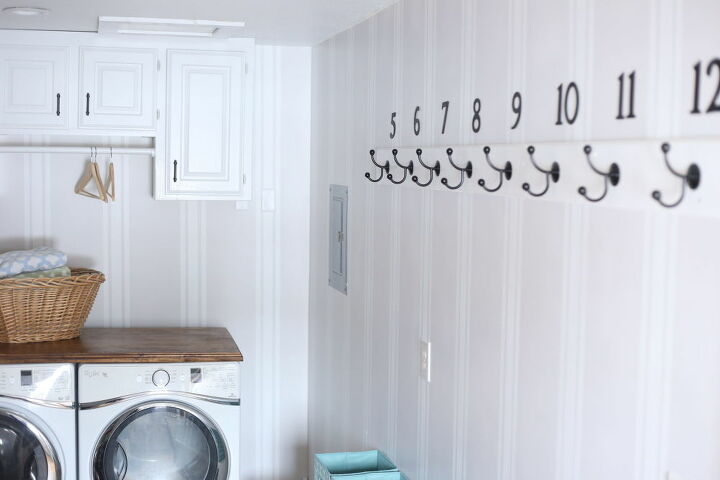
Step 4: Reassemble! Next we put all the newly painted cabinets and shelves back in. This time we centered the cabinet on the back wall. We also moved the pantry storage shelves into the wider laundry area of the the room. This helped to open up the walkway some. This also gave us more wall space for another coat rack.
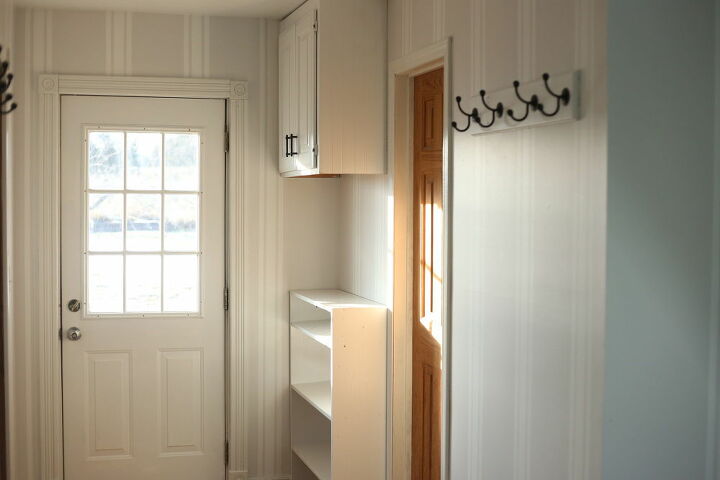
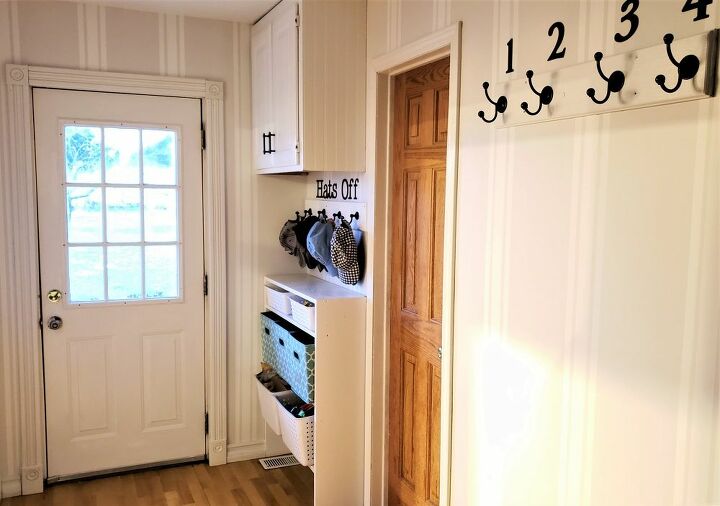
This view is looking at the back entrance. The pantry shelf used to sit on the right wall, now there is another coat rack there. This makes the flow of the room much better. There is a bathroom behind the door on the right. That is why this end of the room is so narrow.
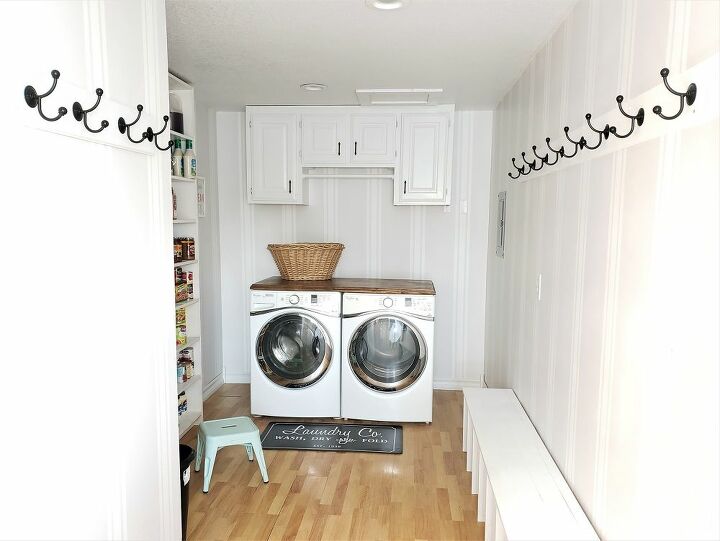
This photo shows the layout a bit better. Narrow and then wide at the back. This is when we were pretty much done, now just to bring in all of the finishing touches!
Step 5: Add the finishing touches! We spray painted some chip board numbers black and put them over the coat hooks.

Again spray painted chip board letters to spell hats off. This is another little rack that my husband made.
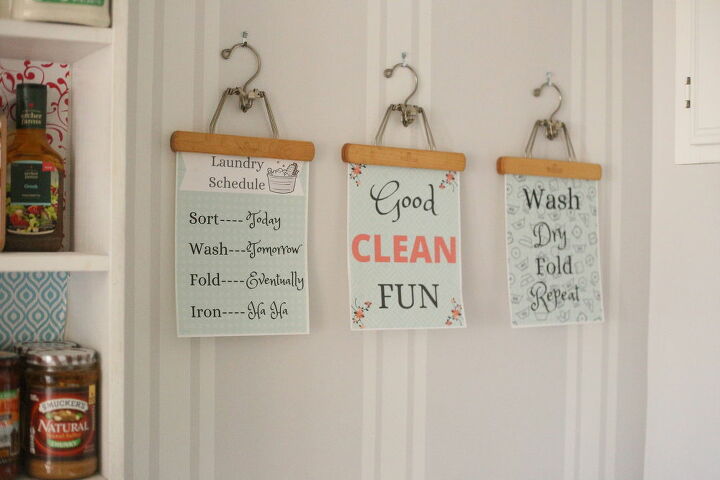
These cute laundry printables are free on my blog for my subscribers. I used vintage hangers to make a little display.
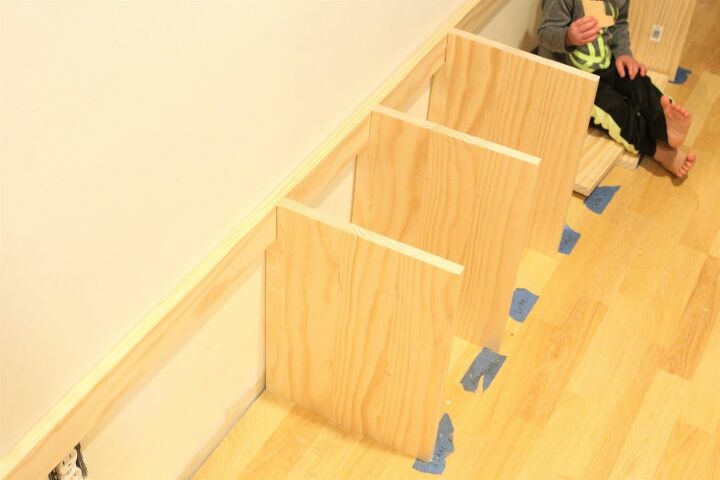
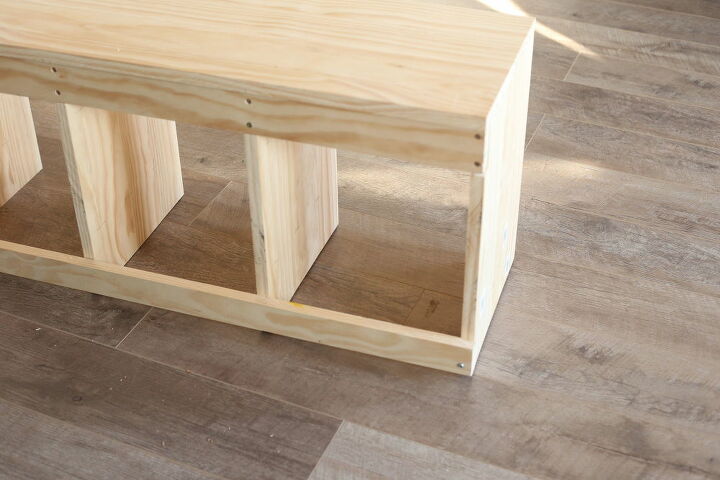
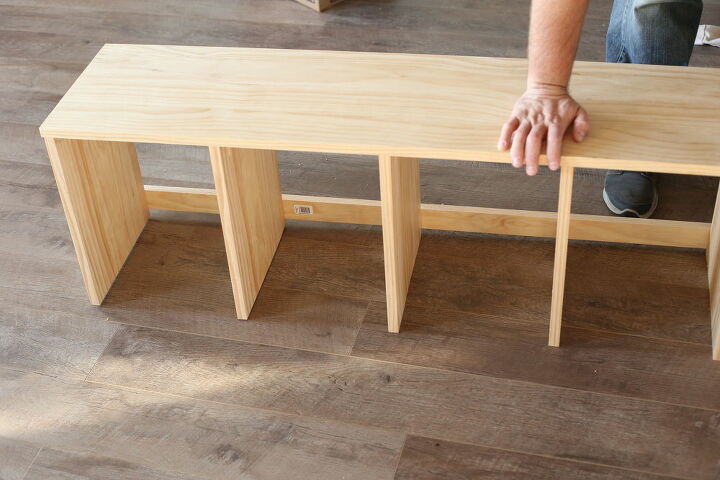
Here is the cut list and a few pictures of the assembly of the boot cubby. See how the dividers are notched so that it can sit flush against the wall. This boot rack is not attached to the wall, it can be pulled out and swept and mopped under.The entire boot cubby is 8' long by 17" tall. This allows for 1-2 pair of boots for each person in the cubby. It keeps them from falling over. This was made with 1x4's biscuit joined together. The top is 3 and a half 1x4x8's joined together, the sides are also three joined.
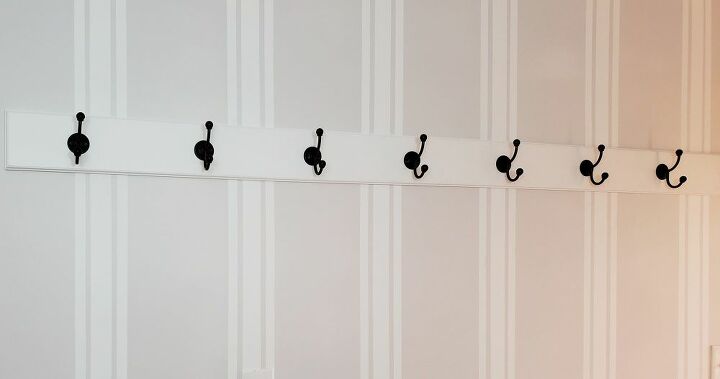
The coat racks are various sizes. The biggest one is 8 ft long with 9 hooks. There are 12" in between each hook, and the first hook starts 7" from the edge. The board is just a 1x6x8 pine board, my husband routed the edge to make it look fancy. Then he pre-drilled the holes and added the hooks. The hooks are from Menards and they were $1.99 each. The board was around $4.29. So, the total cost of this huge coat rack was less than $25. For reference, you could buy a small coat rack with four hooks already assembled for $20! Clearly much cheaper to make your own!!
I hope this project inspires you to rethink a miserable space in your home! There is hope, and you don't have to spend a ton of money! Just a bit of thinking and some elbow grease!
{
"id": "6034111",
"alt": "",
"title": "",
"video_link": "https://www.youtube.com/embed/t2Q-0xHvaB0",
"youtube_video_id": "t2Q-0xHvaB0"
}
{
"width": 634,
"height": 357,
"showRelated": true
}


Any price and availability information displayed on [relevant Amazon Site(s), as applicable] at the time of purchase will apply to the purchase of this product.
Hometalk may collect a small share of sales from the links on this page.More info

Want more details about this and other DIY projects? Check out my blog post!
Comments
Join the conversation
3 of 31 comments
-
Very nice! So neat and organized! I think you deserve "super woman" status for keeping up with laundry for 12 with only one washer and dryer! You are amazing!
-
Great job on the stripes!


Frequently asked questions
Have a question about this project?
Where did u put drying rack.
A lot of mouths to feed.......what are some recipes?