


Window Decals in Any Colour or Design

You could order boring window decals online or you could design and make your own.
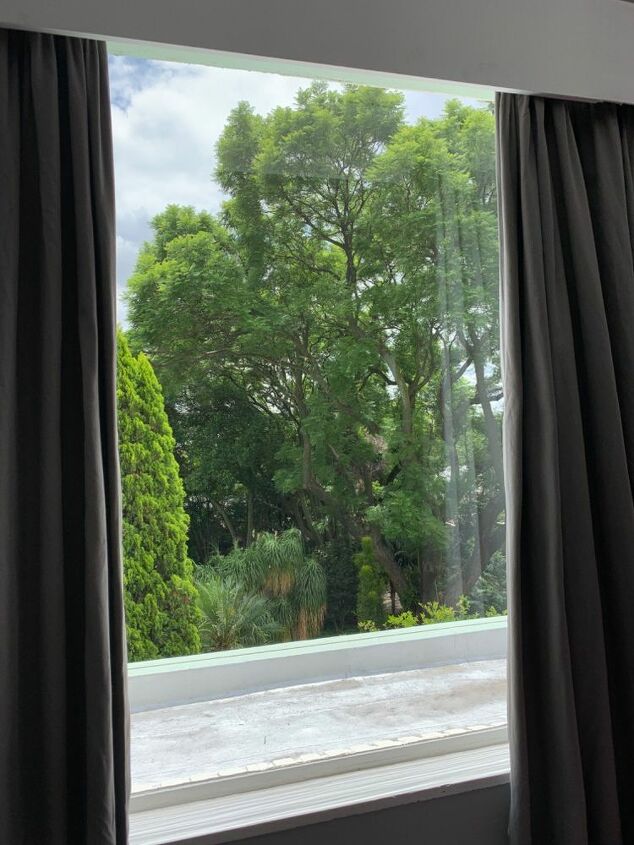
So this is the problem window: great view at the top but not so much lower down over the ground floor veranda with its silver waterproofing. Ordering decals online has some challenges in this part of the world. And I am picky. Also, how am I going to explain to someone who custom makes what I want? Finally, the window has to be replaced at some as yet undetermined stage, so I don’t want to pay real money for anything.
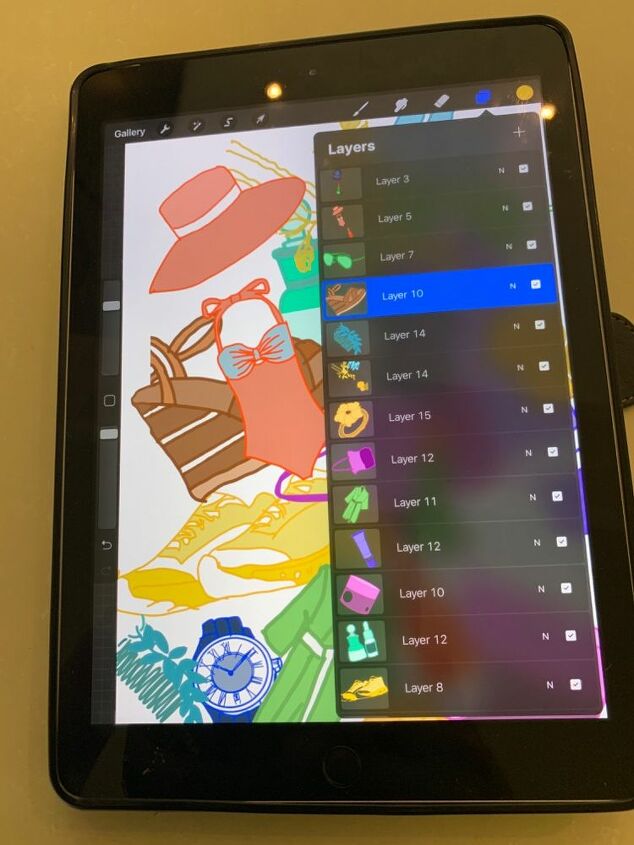
The easiest part is actually designing something. You could just draw something or photocopy an image. I used Procreate on my Ipad. It is a drawing app on Appstore and cheap as chips! If you have any experience working with layers and can operate a stylus, you will be capable of tracing any photo or screen shot. And no, they don’t pay me to say this.
I took screen shots of advertisements from electronic magazine pages, imported them to Procreate and then traced, resized and coloured them. I exported mine as a PDF.
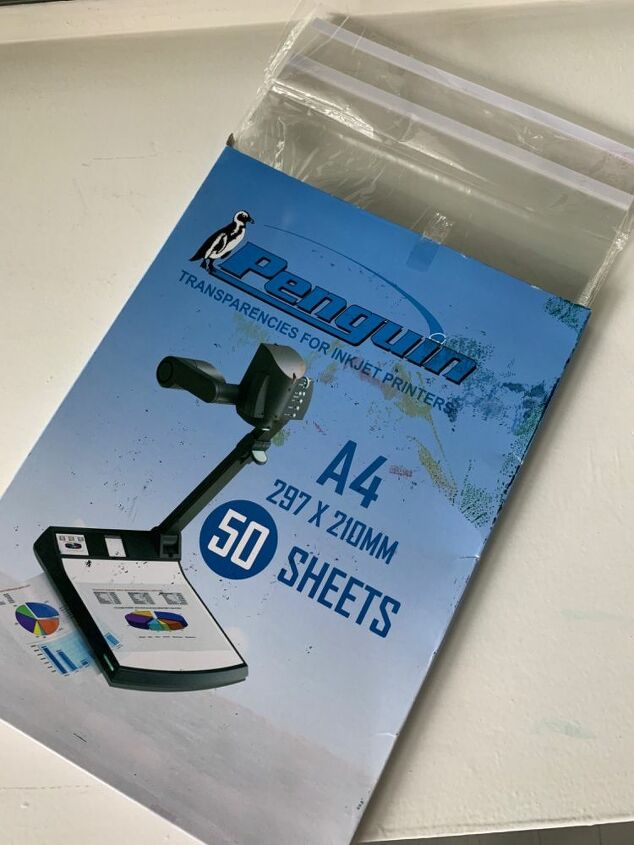
I also bought some A4 Penguin Inkjet transparencies. Make sure that you buy the correct type for your printer otherwise you will break it.
Alternatively you could take you image to a copy shop and have them print it out for you. I did have to experiment a bit though, as you can see from the smudges on the box above.
Make sure you are printing on the rough side of the transparencies and that you have selected ‘photo paper’ or ‘other’. Don’t just press print and assume everything will be the same as printing on paper. For instance, ensure that you have selected a better printing resolution. This varies from printer to printer so do some research.

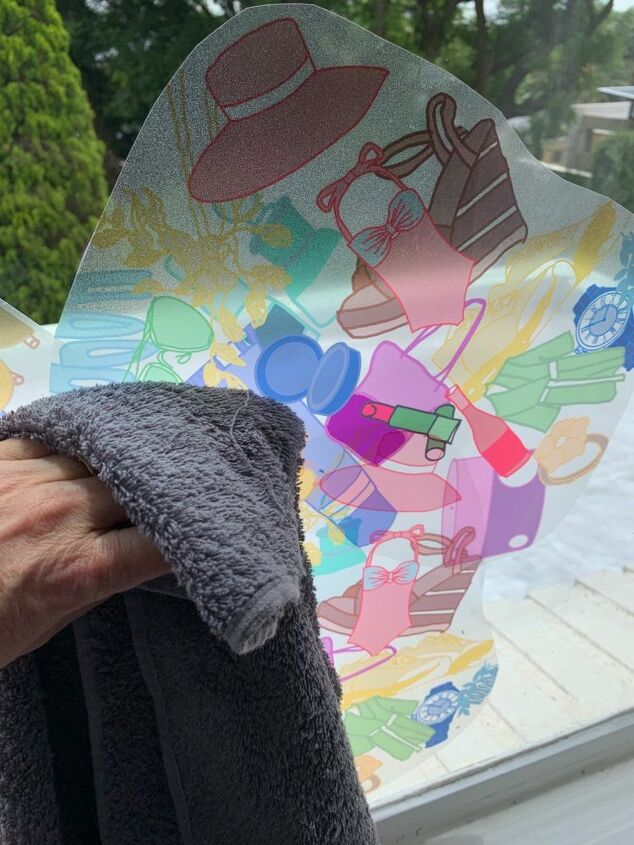
As far as the design is concerned, you will have to experiment and will probably have fails. The images do not print as they appear on screen or on paper (see above) and even more so against the light. Images are also reversed because you are printing on the rough side but then turning it to stick to the glass with the shiny side out. Watch out if you are doing lettering; use the mirroring function.
The opacity may also not be what you are expecting. The images are a lot more see-through when held up against light.That is, everything except the parts that you want to have transparent, such as the negative, white space. I was planning to use this design in my bathroom but soon realized that the neighbors were going to see everything.
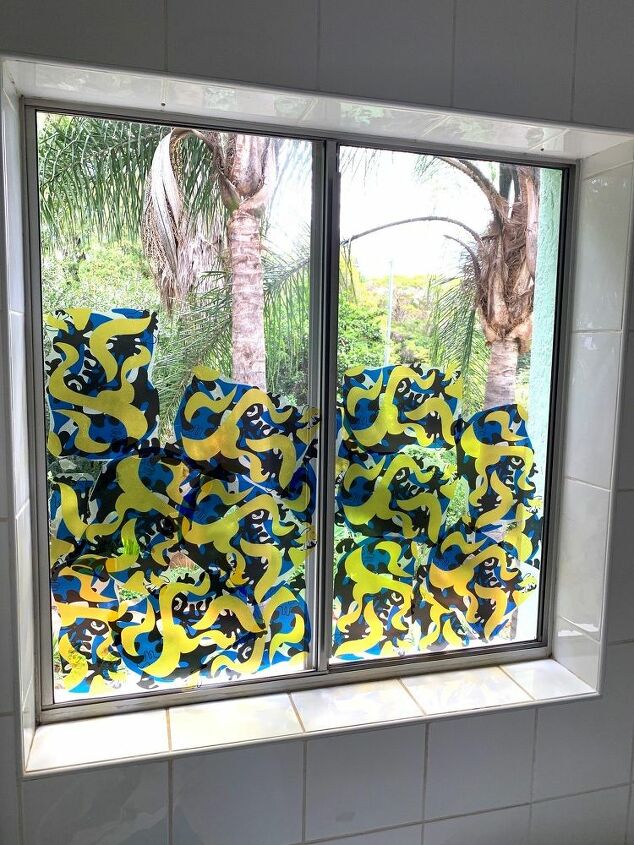
I quickly changed it to something a lot darker and busier.
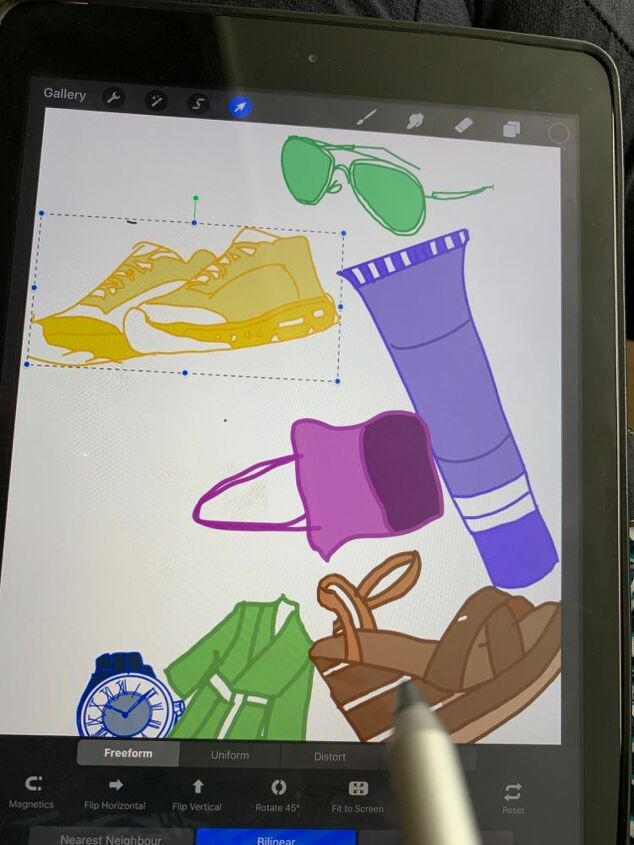
What’s nice about Procreate is that you can also resize and move individual items. I did this and cut out individual elements because I wanted to soften the edges of the final design.
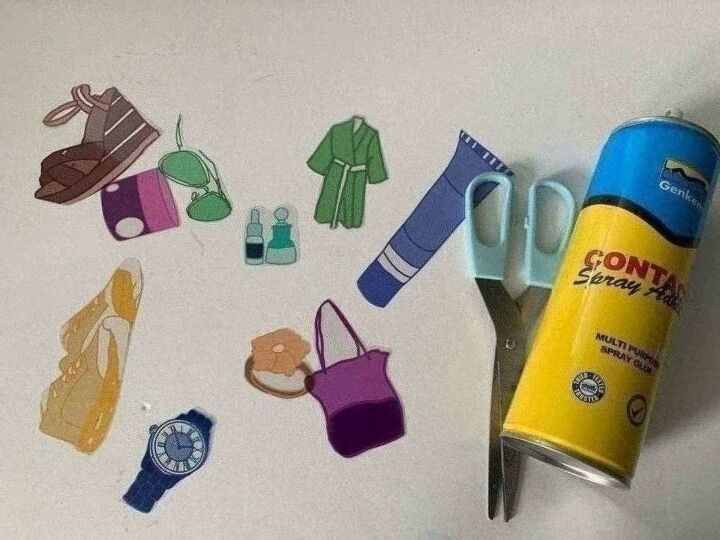
Next, I cut the white line from the transparencies and cut away some of the edges. You could also just leave them in A4 rectangles.
I then laid them down with the rough, printed sides facing up and sprayed them with contact adhesive, then stuck them to a clean window, shiny side facing out, then wiped out any bubbles with a rag.This means that they can be carefully wiped down at a later stage as well.
Having tried a couple of adhesives, I found contact adhesive to work the best. It does however, leave an opaque layer, the consistency of which is determined by how well you can spray. To make things a bit more flop proof, I suggest that you avoid big flat areas in your design. Also, do not be tempted to try glass podge or a solution of detergent and water instead of spray adhesive, both result in the design bleeding.
The contact adhesive also doesn’t like steam. In the bathroom I noticed that the sheets become quite loose and movable when it was damp. They do however, continue to stick, providing I don’t fiddle with them.
You will see from my final photo below that I didn't cut out each item individually. This means that the 'dull' bubble is more obvious. The way around this would be a) to not have too much transparent area around the design or b) to cut around each item (more feasible if they are not tiny) or c) overlap the sheets to make it less visible.
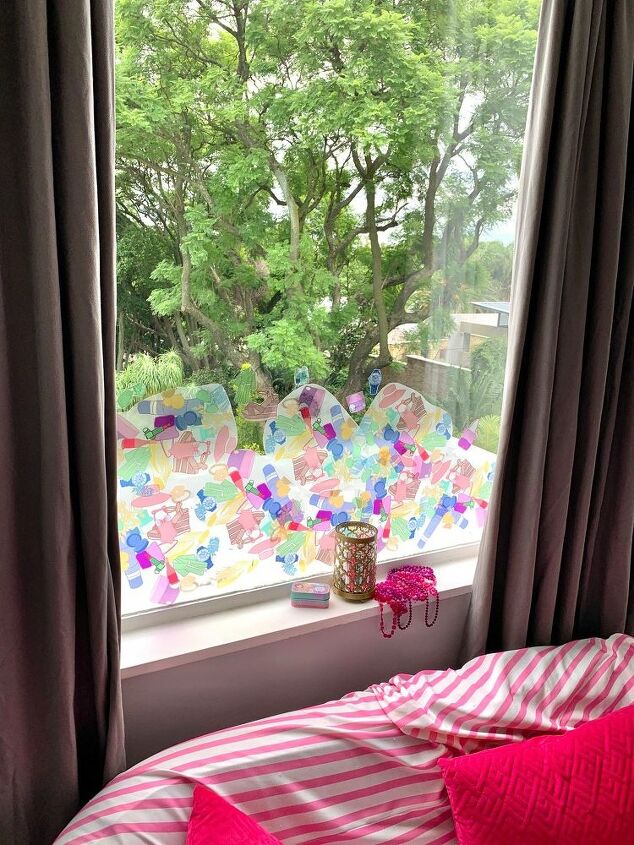
I am so thrilled with the endless possibilities that this technique offers, I may just decide to do all the windows in the house.
Comments
Join the conversation
-
Love your des Moines gun for the bathroom. It's a great idea. Just like cornstarch and lace or some type of opaque fabric. Thank you for the idea. My fiance has a printing machine for vynil which can be used for privacy on windows as well. I just may give this a try. Thank you for the ideas.
-
😅Sorry I don’t quite understand your reference to Des Moines and can’t find it on Google. Is it a logo? Please send a pic. A resemblance would be quite funny.


Frequently asked questions
Have a question about this project?