


Spring Wreath: Outdoor Refresh Spring2020Refresh
Spring is approaching! I'm cautiously excited because it seems too early for so many flowers to be in bloom and for such mild temps. One thing I like to do at the start of a season is clean up my porch area. I wipe down my front door, sweep, clean off the mat, and add some decor. Our vestibule is narrow, so I can't add large pots with plants or anything. However, hanging a wreath is one way I can celebrate the seasons and add some color to the area.
Step 1: Gather materials
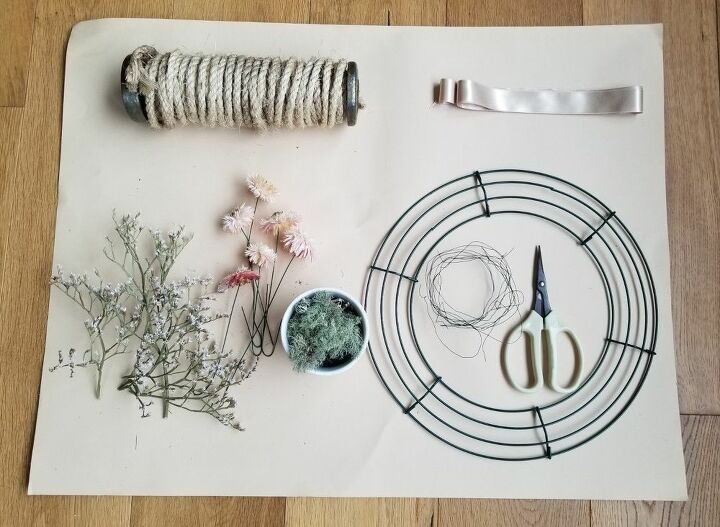
Step 1: Gather materials
All of the materials pictured, were either items I already had, or ones I picked up on walks in my neighborhood! I saved the wreath base, florist wire, and ribbon from a wreath class I took last year. The dried flowers were pulled from a dry bouquet I purchased at a local farmer market. The rope and scissors I keep in my craft stash. Finally, the bits of moss in the white cup/pot I gathered while taking walks with my son. I laid all the materials on a large piece of paper to contain the bits of dried plants that broke off.
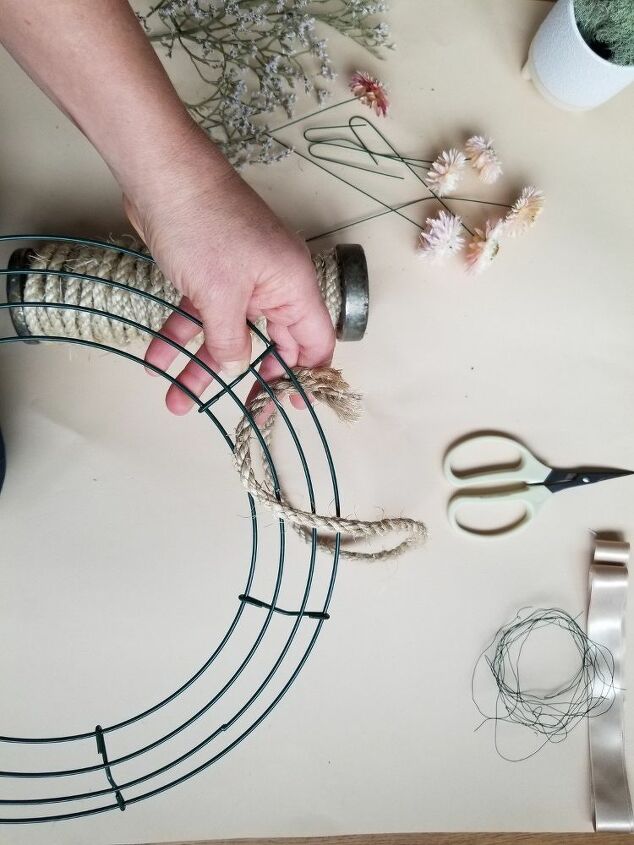
Step 2: Wrap rope around the frame.
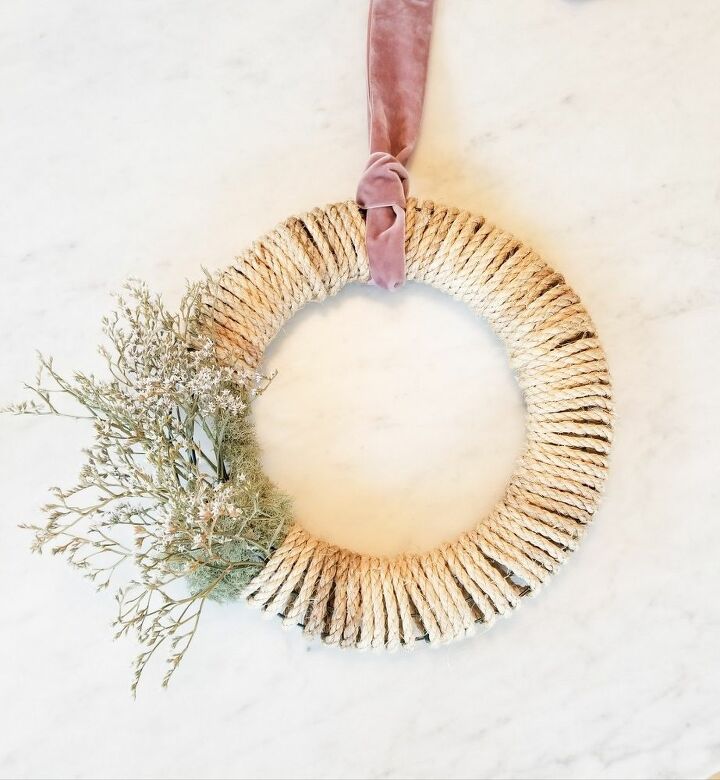
This step is simple, just wrap the rope until you reach the end. I tucked the end of the rope in between the frame and then wrapped around while pulling taut.
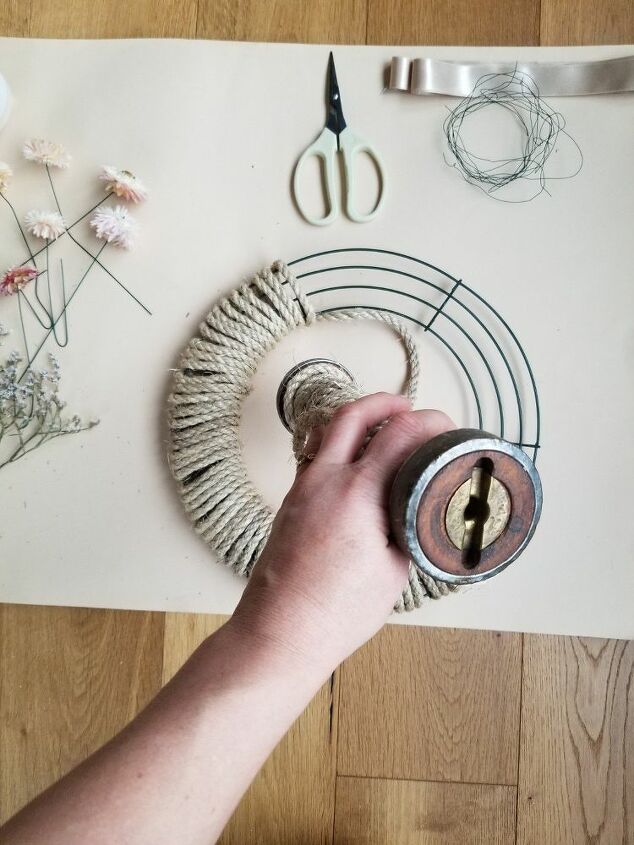
Step 3: Keep wrapping!
While I was gathering my materials, I wrapped my rope around this old spool I have. This made it easier to go around without tangling.
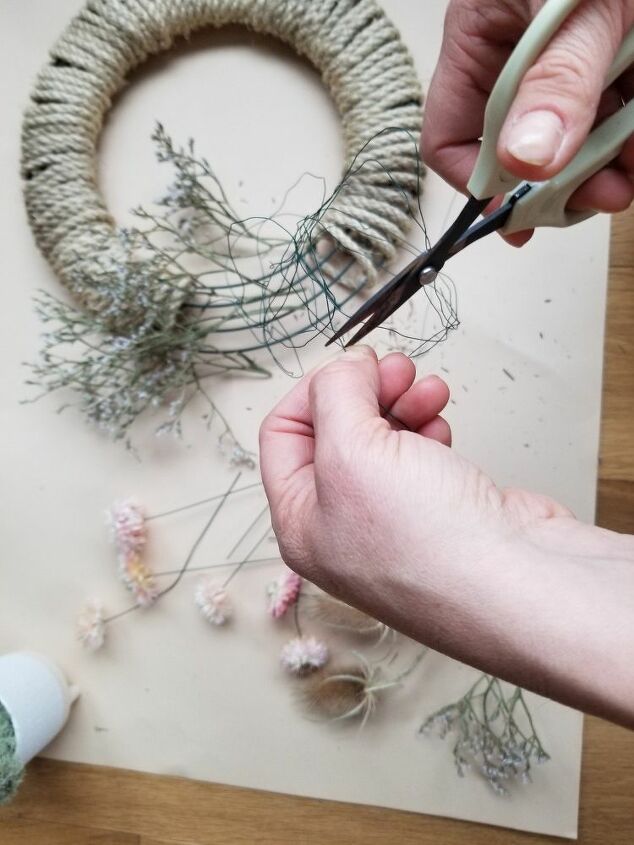
Step 4: Cut wire to 5 or 6 inch pieces.
This step may vary depending on the thickness of your stems. The stems I worked with were very thin, and a 5 inch length seemed to be adequate to attach a few to the frame at once.
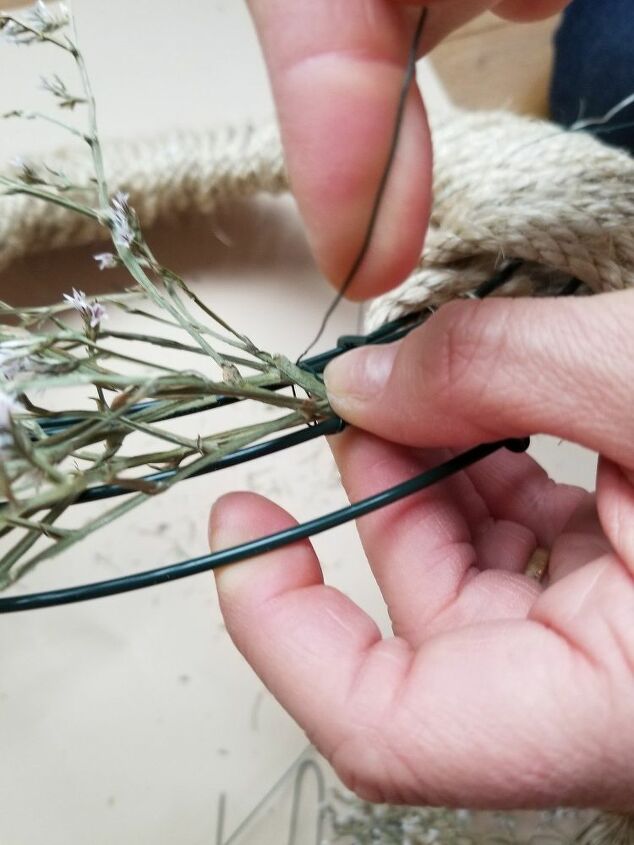
Step 5: Fasten flowers to frame.
After doing a dry run of placing your flowers in place to set up your lay out, start to use the florist wire to attach them. Hold the stems against a section of the frame and wrap the wire until the hold feels firm.
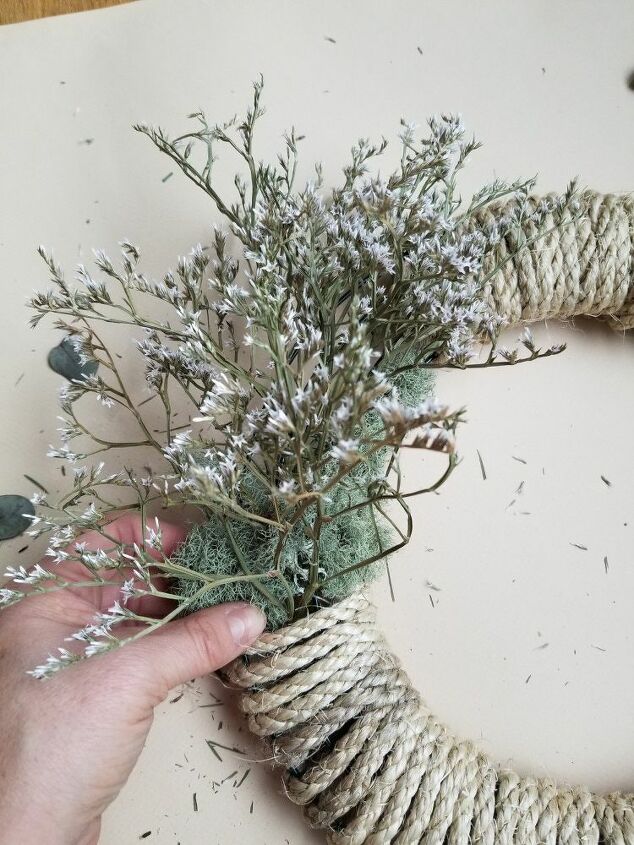
Step 6: Fill in gaps.
Once I fastened the flowers I chose, the wreath frame was still visible. I tried out some of the other flower options, but they didn't look right. When I first picked apart the bouquet, I thought those little pink flowers (sorry, I don't know the name of them!) were going to look great. After wrapping the rope and securing the tiny white flowers, which I also don't know the name of, the pink flowers didn't look good after all. I tried out the moss and liked how well it covered up the frame.

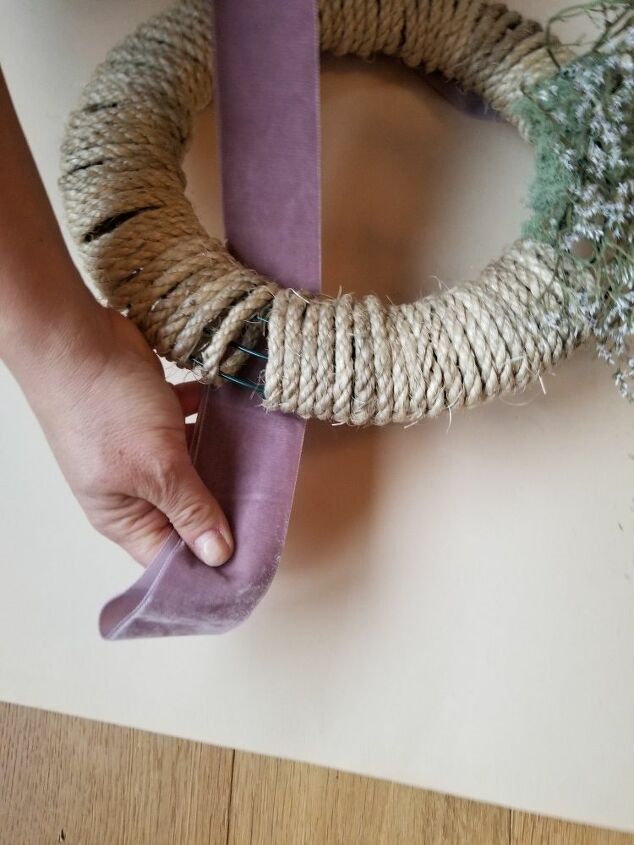
Step 7: Create a loop out of ribbon, so that when you fold the middle, each side is equal.
Another material change happened after seeing all the pieces in place. The original satin ribbon I grabbed, looked too thin and the color didn't provide enough contrast with the rope. I pulled a lilac velvet ribbon that I've had for years. The width is just right and the color pops a bit; definitely more springy!
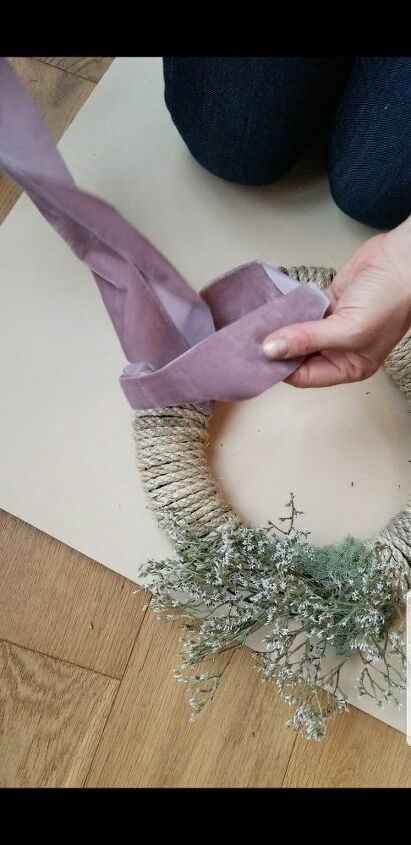
Step 8: Make a slip knot by taking the folded portion of the ribbon behind the wreath.
This will be how you hang the wreath. Of course the wreath can be placed on a wreath hook too. Since my wreath is pretty simple and there are some gaps that show the frame, I went ahead and used this ribbon method. This enabled me to push apart the rope to make room for the knot, and spread out rope to areas that needed coverage.
Step 9: Then push the two "tails" through your loop, until it is knotted.
I took this photo as a screenshot from a video I had done, hence the blur!
Step 10: Fill in gaps, smooth out your bow, spread out the rope.
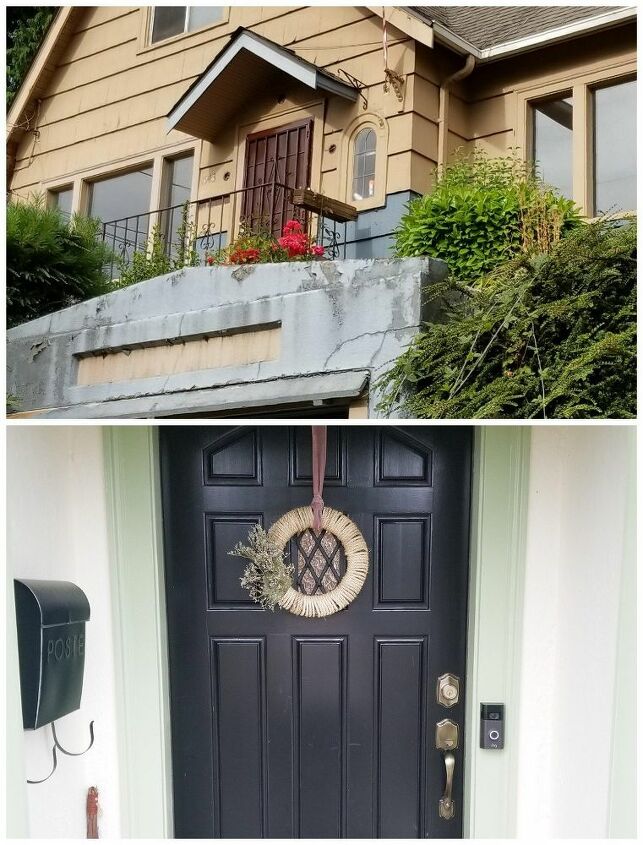
Step 10: Hang your wreath by tacking the ribbon to the top of your door.
I don't have an actual photo of my front door in its "before" state. There was a security door in the vestibule that you had to pass before entering the front door. We always kept it closed so that it wouldn't bang around. This made the vestibule so dark, and it looked very uninviting. We removed the security door and it is now so much more open and fun to decorate! I like the idea of a security door, being able to leave your main door open for circulation and still have privacy, but they look so heavy and just aren't for me.
Since I had all of the materials hanging around my house, this was a free project! I listed all of the materials as though I was starting from scratch. I listed my pricey floral scissors, but any old scissors would work just as well. As I mentioned earlier, the bouquet I pulled the flowers from was $10 at a local farmer market. I had it in a vase since November and to change things up I pulled pieces from it. I found some very pretty bouquets on Etsy for a comparable price. And of course, there is the option to dey your own.
Get creative and see what you can pull from around the house or neighborhood! Have fun refreshing your space and thanks for reading!
Follow me on Instagram for more adventures in home renovation and decor! Check out these other wreath ideas:
Resources for this project:
See all materials


Comments
Join the conversation
-
Beautifully done! 💗
-
Very simple, but very pretty 💕


Frequently asked questions
Have a question about this project?
How much rope did you use and what size frame?