


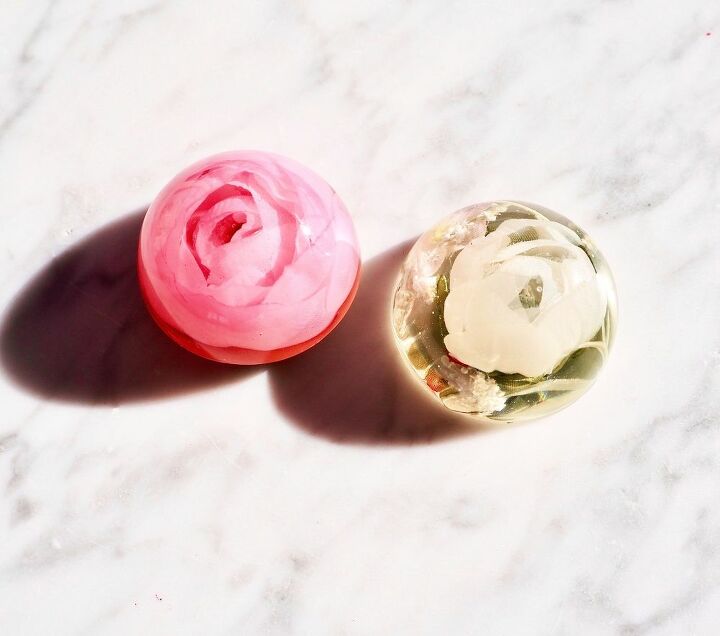
Homemade Paperweights

These little cuties, like everything in my creative world, are truly easy-peasy, lemon-squeasy to make. And in just one sitting, you could kit out your entire friendship circle for a whole year!
For this and many more crafty projects of mine, please check out my YouTube channel. Actual video below 


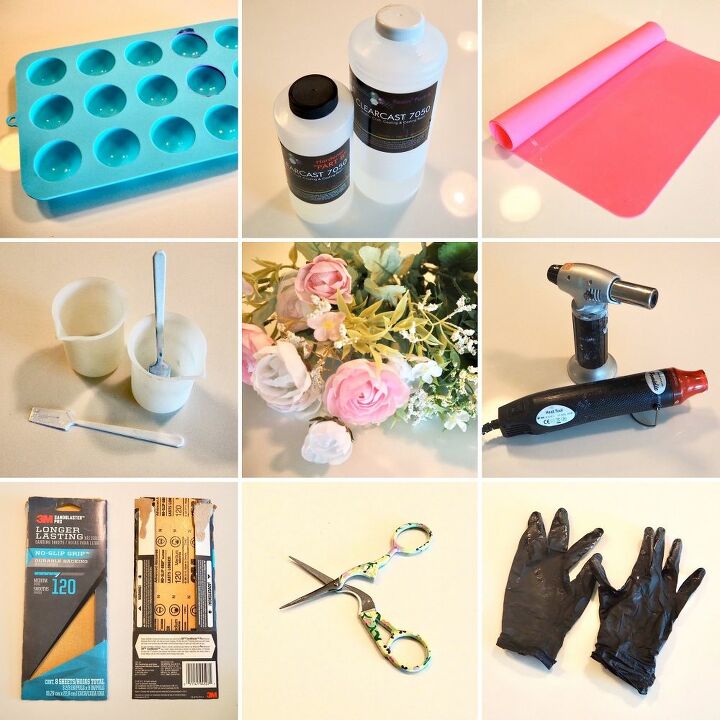
WHAT YOU’LL NEED
- Resin (a thinner viscosity may be better)
- Silicone semi-sphere molds
- Silicone mat
- Mixing cups and mixing sticks
- Faux or real flowers
- Heat gun or blow torch
- Sand paper
- Scissors
- Gloves
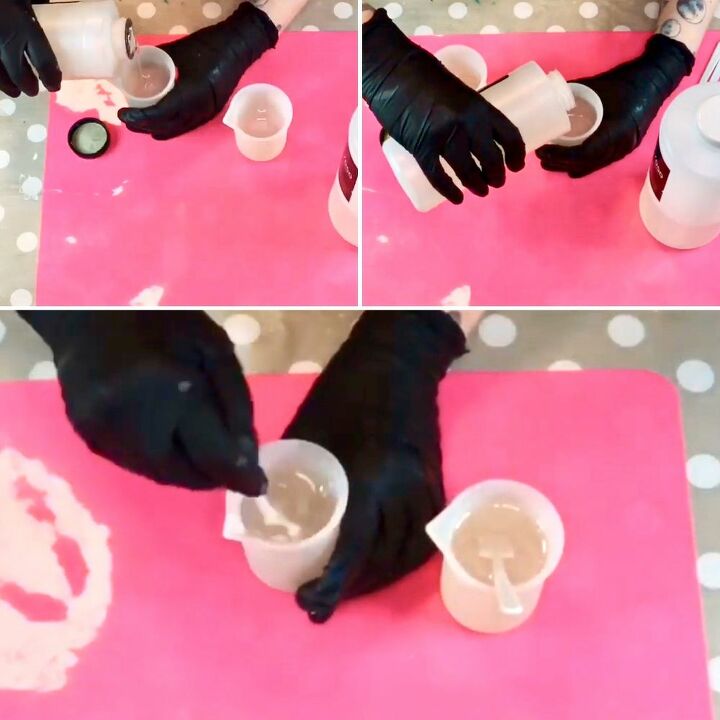
MIX YOUR RESIN
Usually when buying resin the pack comes as a 1:1 ratio of hardener and resin that you mix separately, however, different brands produce varying products with different viscosity. The resin I have used for this project came in a 2:1 ratio which basically means that when fully mixed, this resin will be much thinner and runnier than your standard 1:1 ratio resin.
I chose this resin for this project because it’s a small-scale project and one with potential for lots of bubbles, which I don’t want. Thinner resin should help with this.
In a well ventilated room, I mix 2 parts of resin with 1 part of hardener into my silicone mixing cups, always adding the hardener to the cup first. I mixed up 180mls of fully mixed product for this project, 90mls in each silicone cup. That means 30mls of hardener and 60mls of resin, in each cup.
Mix well for at least 5 minutes.
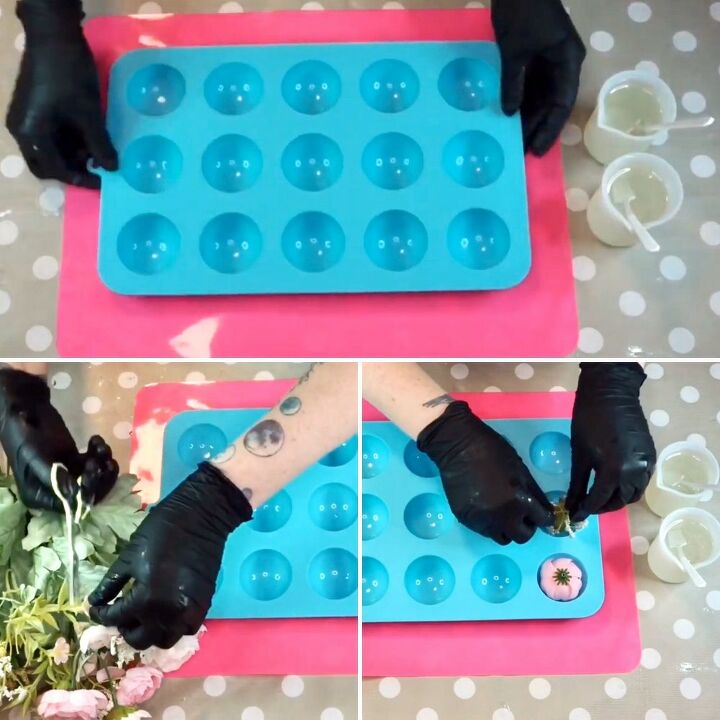
LAY OUT YOUR FLOWERS
Make sure your molds are free from dust and small particles which just love to sneak their way in there. Any little bits that shouldn’t be there will ruin the end results as this is project is all about encapsulating fine detail.
Cut off whichever flower heads and leaves you wish to use and lay them in the molds first to see what they will look like, remember, you want to lay them in reverse order so that the fronts are facing down into the dome mold.
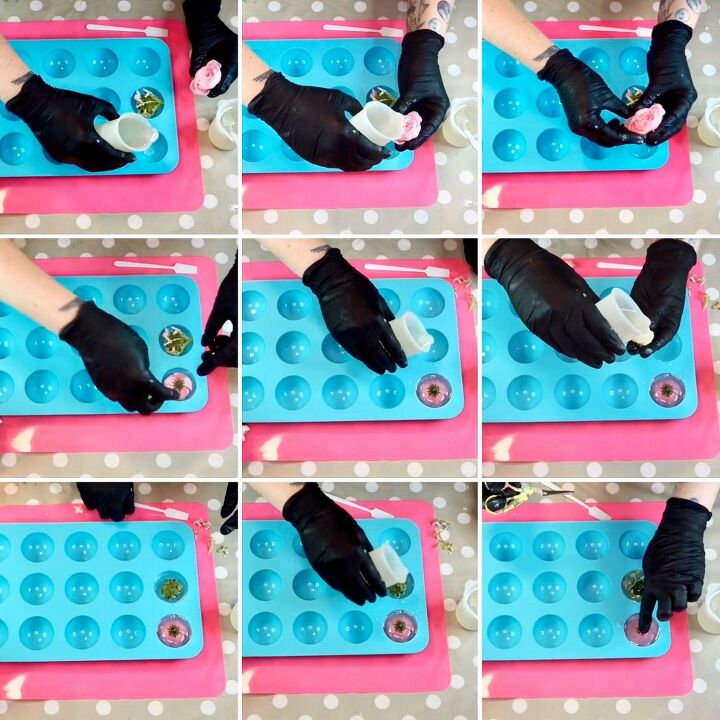
ADD THE RESIN
Once you’re happy with how your flowers etc are laying, it’s time to add the resin.
For the flower heads, lift them out of the mold and add a small amount of resin to the bottom of the mold. Then with the flower head the right side up, fill and coat the head entirely with resin until you sense it start to leak or spill out through the bottom of the bud. Once this starts to happen, turn the head upside down and lay it back in the mold. Then fill the rest of the mold up with resin. This method should make it harder for any bubbles to hide in the petals.
For the smaller floral pieces like leaves etc, these can be prodded into the mold once the flower heads and most of the resin have already been added.
Once you’re happy with how everything is looking, maybe just give your floral pieces a little push back into their molds as they have a tendency to float a little during this whole process. You want as little poking out the top as possible and for your resin to be plush with to top or your molds, but any bits that are sticking out will be taken care of later.
With 180mls, I had enough resin to fill up 6 of my semi-sphere molds. It’s a good idea to work out how far a small amount of resin will take you first rather than making too much and having spare left over because once the resin and hardener parts are mixed together, you cannot save them for later. The mix begins it’s slow journey to curing.
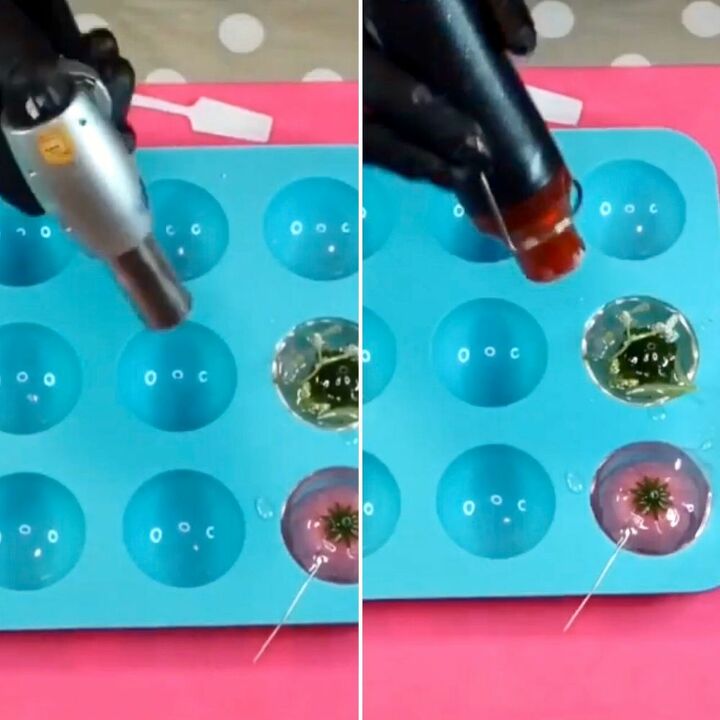
POP BUBBLES
To make extra sure that you’ve gotten rid of any bubbles, use either your blow torch or heat gun to gently dislodge them.
Remember, you’re dealing with delicate petals or synthetic materials so you don’t want to hold the heat source too close to your paperweights or over them for too long as you risk melting whatever may be sticking out past the resin.
Once you’ve tackled your bubbles, allow the resin to fully cure for at least 12 hours.
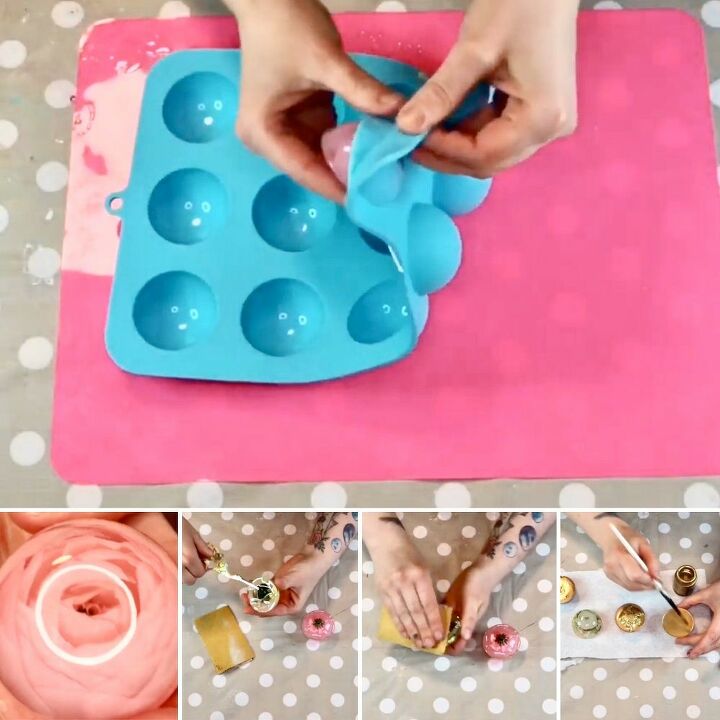
ADD THE FINISHING TOUCHES
Once you’re resin has fully cured and hardened, it’s onto the most satisfying part, demolding!
Peel out each weight and reveal your domed beauty.
Using your scissors, snip off any softer sticky-outy bits from the back of your weights and then sand off the rest using a medium grit sandpaper.
You can leave your weights like this or you can add a painted layer to the back depending on your personal preference. I decided to paint some of mine and leave others clear depending on which would benefit from it.
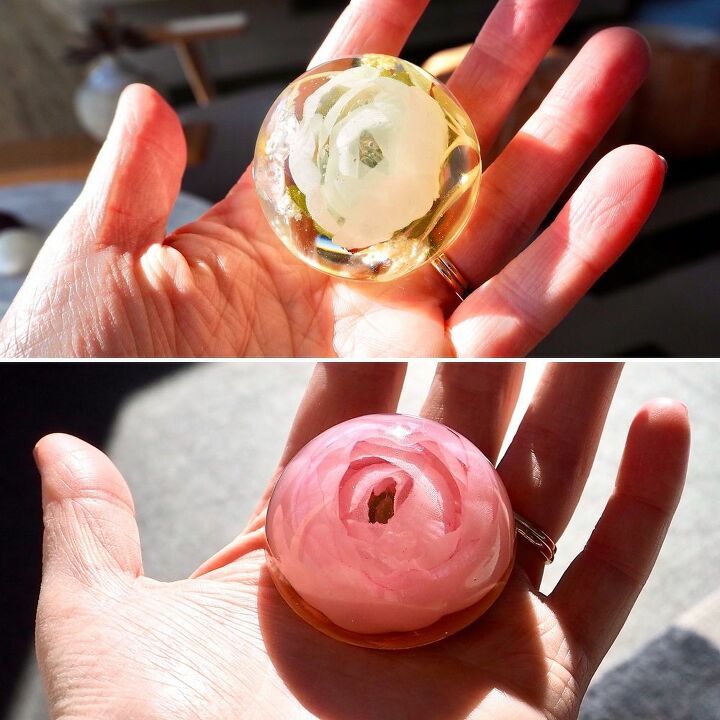
And that’s all there is to it. Beautiful paperweights that are fully customisable.
Why not try glittered ones, some using alcohol inks, some with a little plastic figurine in the middle or someone’s initials. The options really have no limits.

I hope you enjoyed this project and for many more like this, please visit my channel by clicking on the BLOG POST link in this post or my YouTube link above.
Please also check out my Etsy Store for all my handmade pieces.
Take care x
Resources for this project:
See all materials


Comments
Join the conversation
-
Beautiful! I’ll bet you could also use smaller mold/flowers, put a screw in the back, and use as cabinet door pulls.
-
Good idea. I love paperweights and they can be really pricey. This is a good way to have the look without the cost.


Frequently asked questions
Have a question about this project?
With part of the flower exposed on the bottom, how do you prevent it from decaying?
Can you use vibration to remove air bubbles when working with resin?