


Spa Treatment Master Bath Makeover #Spring2020Refresh

It's that time a year to start getting ready for a spring refresh in your home. Let me take you on my journey of my master bath refresh / remodel / transformation! This will give you a realistic expectation of what you can expect from a bathroom remodel. class="step-title fs20">Before
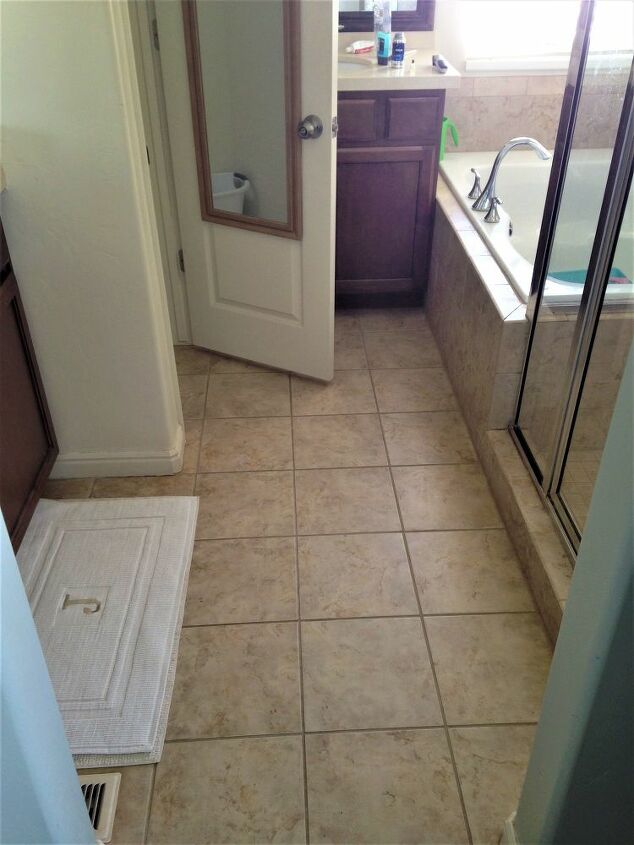
Let's start from the beginning...Have you ever built a home with the future buyer in mind so you really don't pick out things you love but instead pick out what you think is neutral so when the time comes in 5 or 10 years you can resell it without having to put any money into it? Is that just my husband's logic?
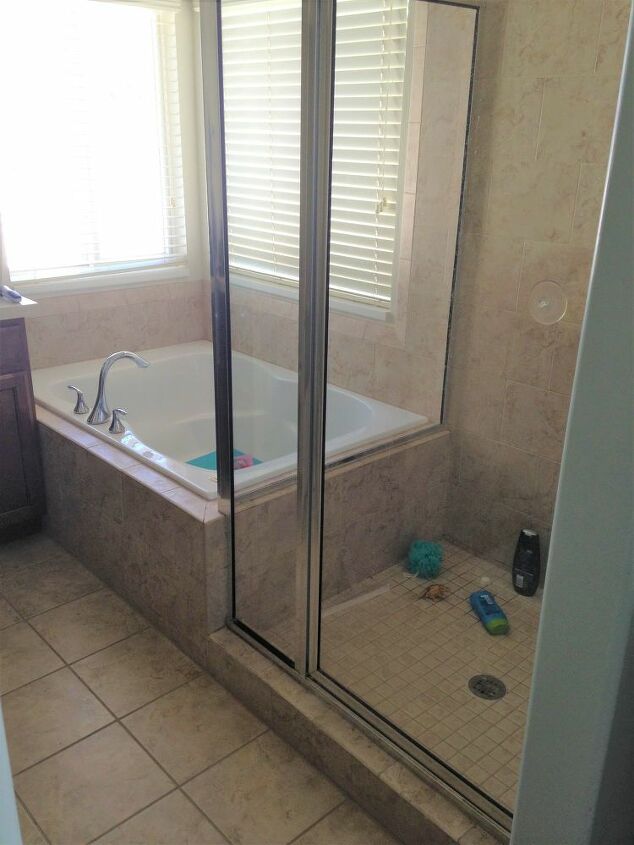
Before
When we built this home, I worked for the home-builder at the time and knowing the mark up on most of the upgrades we decided to go pretty "builder standard" in our material selections. Does it show? In 2008, everything was brown, beige, or dark brown. This was the standard tile selection, standard chrome faucets and shower frame. Nothing "Wow" about this bathroom at all. (The kid's toy dinosaur in the shower doesn't help either!)
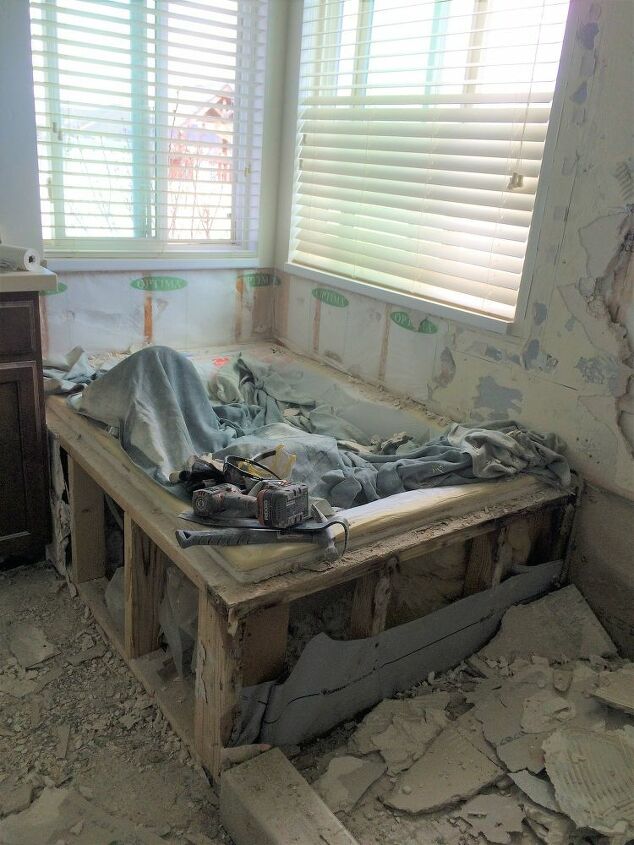
Demo Day
An incident happened to jump start the bathroom remodel. I started to smell a faint damp smell all the time in my bedroom. As I was trying to find the smell, low and behold, I noticed water damage on the baseboard behind my dresser which backed onto the wall of my shower wall.
Long story short, we knocked out the tile to realize a shower pan was never installed on the floor so all that water was leaking behind the tile and onto the framing and wall. Oh Boy!
This was the perfect time to rip out the ugly brown tile and start fresh.
This time I was going to picked out what I liked, not the future homeowner.
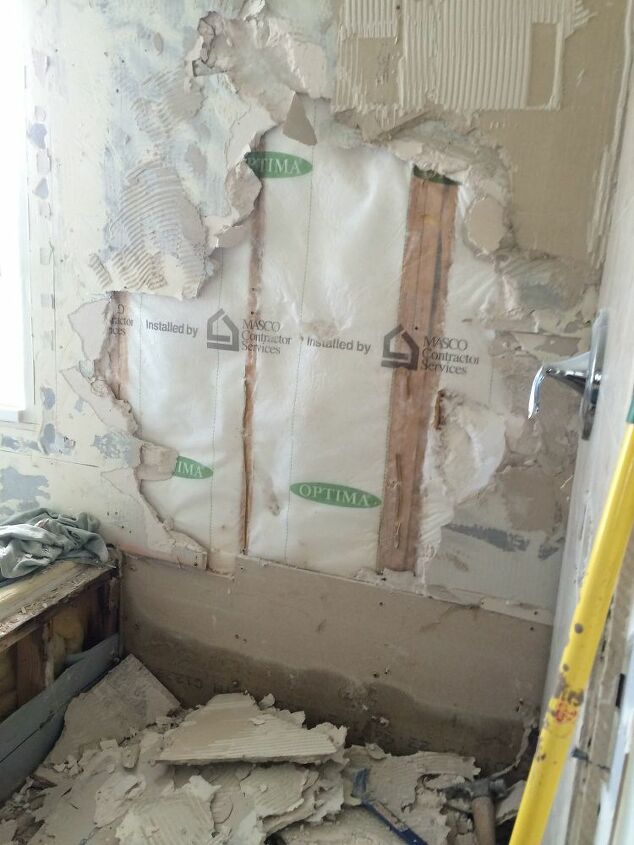
Prep work
To make sure the shower was properly waterproofed, we made sure a tile pan was installed, and Schluter Kerdi fabric was installed. The con about the Schluter fabric ,although it is water proof, it is orange! Really? Of all the colors, why is it orange? For 99.9% of the population it is not a big deal but I'll show in the next picture the problem I had with it.
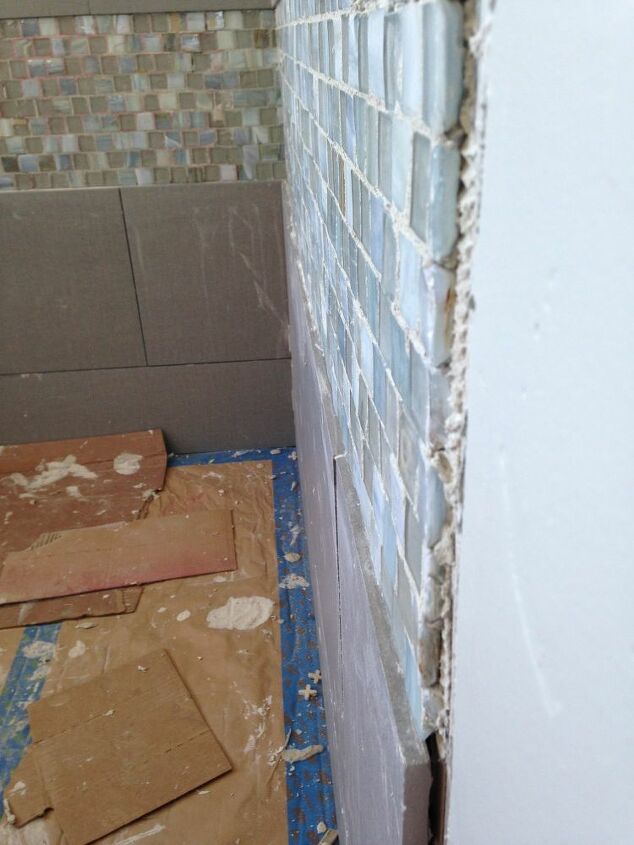
The mess up
There are many things wrong with the install of this picture.
1. The glass accent tile is thinner in depth than the thickness of the main tile so the glass tile is recessed back creating a ledge on the row. Designer Tip: Make sure your tiles are flush if working with different depths.
2. Remember my problem with the orange waterproof fabric?? Well it shows through my clear glass tiles! Designer Tip: the waterproof fabric is usually orange so if you have clear tiles, make sure to cover enough grout over the orange so it doesn't show through.
3.Final complaint is the grout on the glass accent is way too thick in between the accent glass. Designer Tip: If you are not comfortable with tiling, hire a professional.
This tile was a custom order and paper front making it very hard to install. We ended up ripping out the first row of accent tile and unfortunately had to reorder more tile and rush it so our bathroom wouldn't be on hold for another 4 weeks. That was a costly and timely mistake.
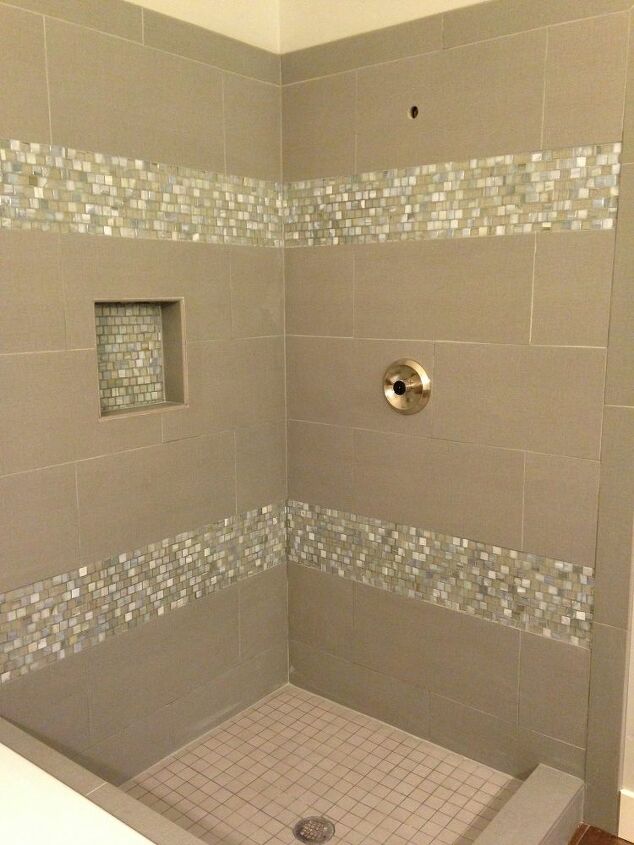
We were able to correct the problem with the glass accent by building up the back so it would be flush against the main tile and you would never have guessed it was a problem to start with.
We did 12x24 tiles horizontal in a bluish-gray linen fabric texture and paired it with that beautiful glass tiles. Because of the way the tiles lined up on the tub and the shower we were only able to do two rows of accent and the back of the shower niche.
Lots of math is involved when trying to figure your measurements and ordering enough of what you need.
Final
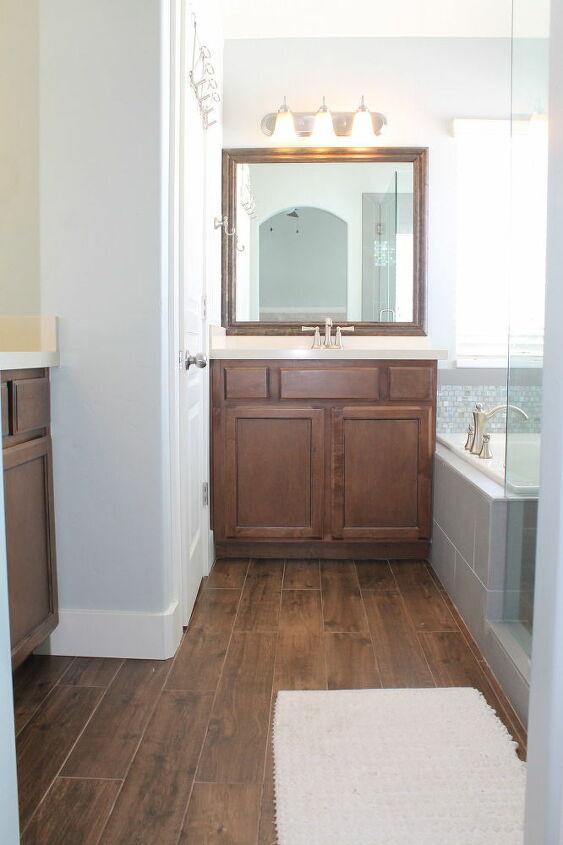
These were standard builder mirrors and we "customized" them by staining some baseboards from a home improvement store and gluing them directly onto the mirror. We cut mitered corners so they would line up with the detail. This was so much cheaper than buying framed mirrors.
We also replaced the floors so they no longer matched the shower and tub tile. The floors are also tile but wood grain to look like real planks. You do not need to "match" your floors with your shower. Do something different but make sure it coordinates and not matches.
The walls needed to be painted anyway because of some sheetrock damage around the tub so instead of sticking with white, we added a tint of color on the walls by going with Sherwin Williams SW 7651 Front Porch. The hint of color makes it feel so tranquil! I highly recommend it!
Although, there is no before and after of the countertops, we did replace those. I recommend going straight to the fabricator and look through their "bone yard." That is where they have smaller slabs that were leftover from bigger jobs that they will sell you at a very deep discount.
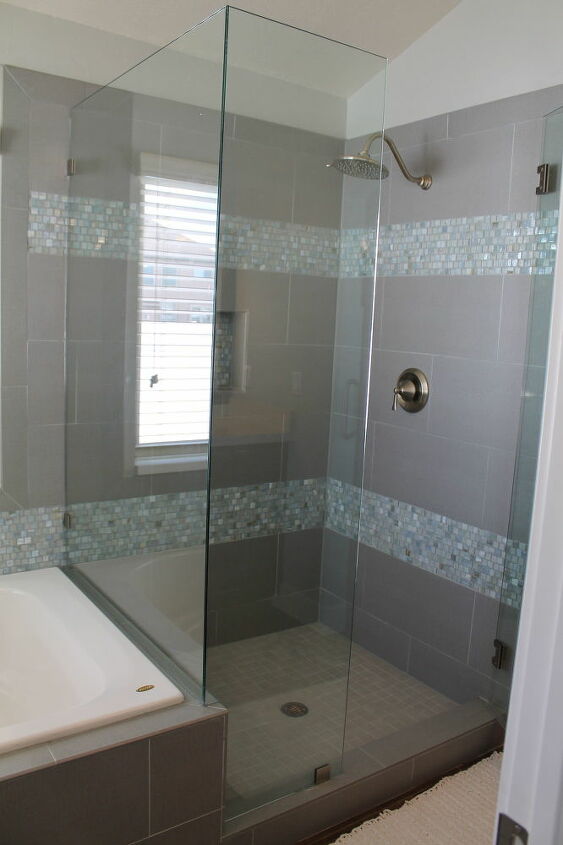
No more standard Chrome frame shower. Adding a Euro glass shower (frameless) visually added so much space to the bathroom. Also, we upgraded all the faucets to brushed nickel and with a shower as stunning as this, I recommend getting a Waterfall Shower head! You will never get out of the shower if you have one like this!
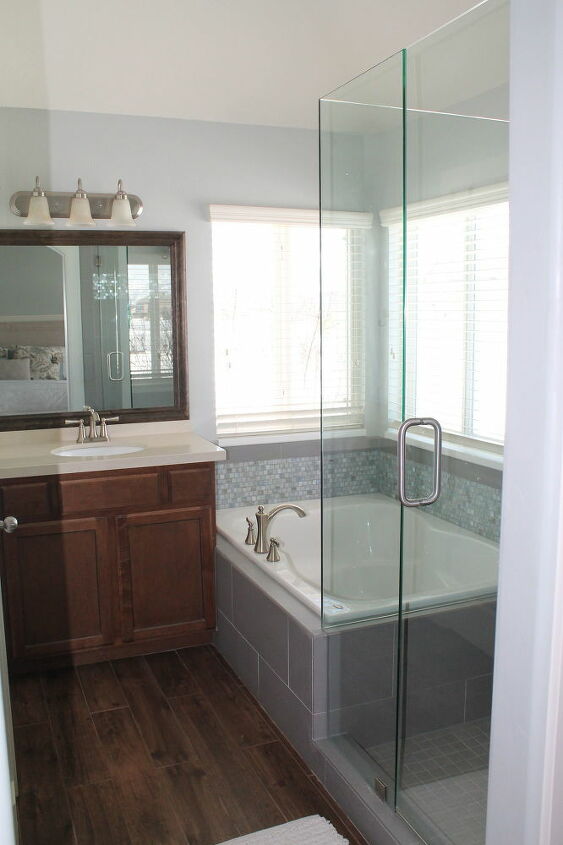
Final
This bathroom is so hard to photograph because it is pretty tight but very efficient and now glamorous and spa like!
If you try your own bathroom remodel I hope I gave you some realistic expectations that you can come across. This was not done in one day or weekend. This was a 4 week process. If you are not comfortable with tackling a project at this level, please get multiple bids and hire a professional. It will save you time, money, and you will have a peace of mind of getting it done right.
Good luck with your spring refresh and let me know what you are going to tackle this spring!
Comments
Join the conversation
-
Beautiful job and great direction.
-
Nice update and I love the accent tiles in the shower. What kind of builder puts the sink vanity where the door can hit you in the butt? That’s poor design!


Frequently asked questions
Have a question about this project?