


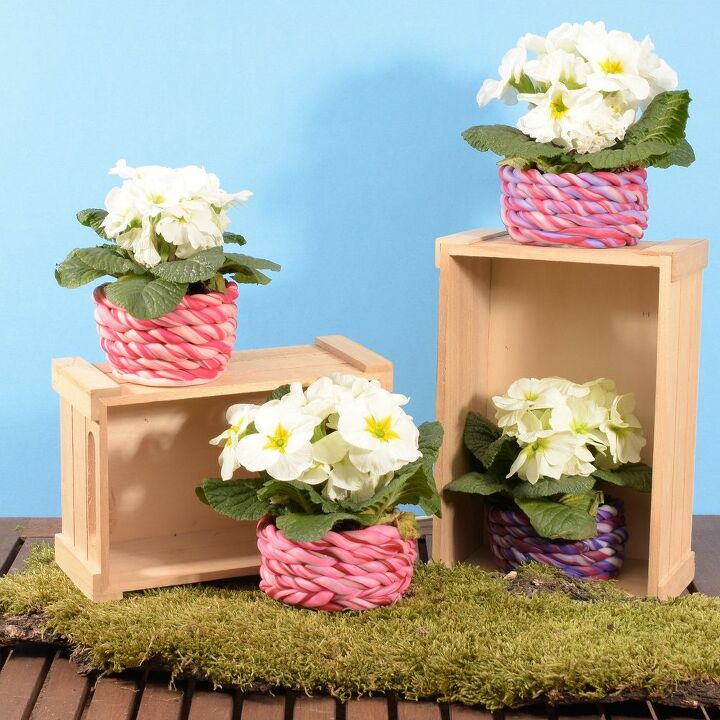
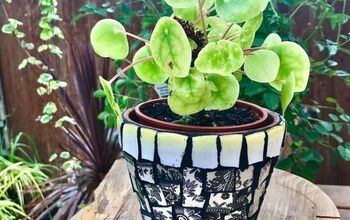
Cernit Clay Plant Pots
Bring spring indoors! Use Cernit clay to make these fun plant pots for spring or for Mother’s Day. Choose a flowery colour combination and create atmosphere in any room in the house with this home decor project. As the clay becomes waterproof after baking, you can use these handmade plant pots outside, too.
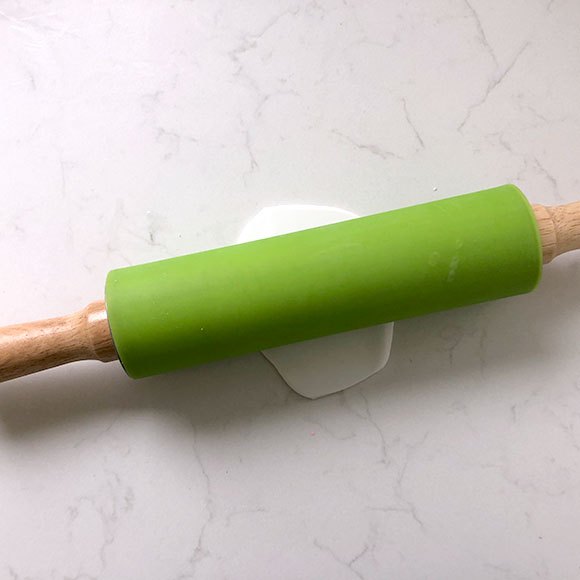
Roll out half a pack of white Cernit clay into a slab thick enough to form the base of the plant pot.
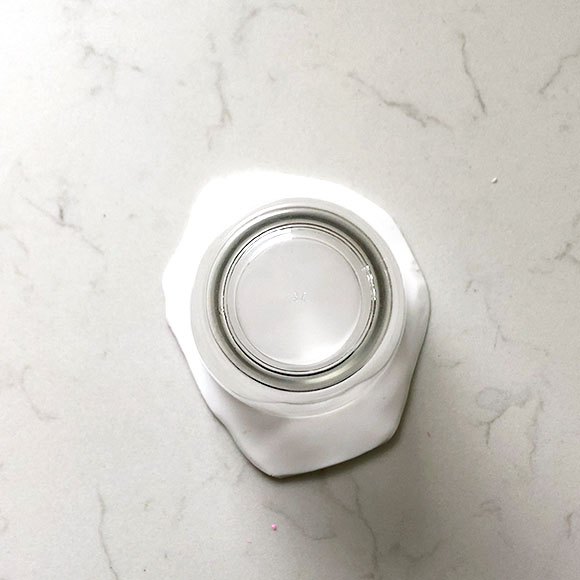
Next, use a glass or other round object to score a circle in the clay. Don’t press all the way through the clay.
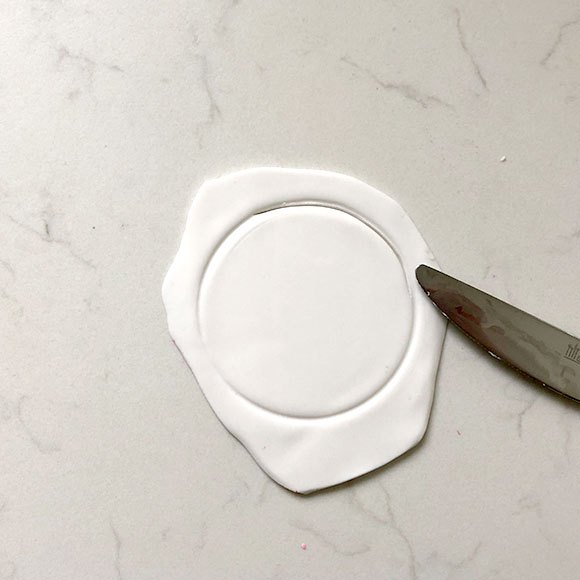
Now cut out the circle and remove the excess clay. This is the base of the plant pot.
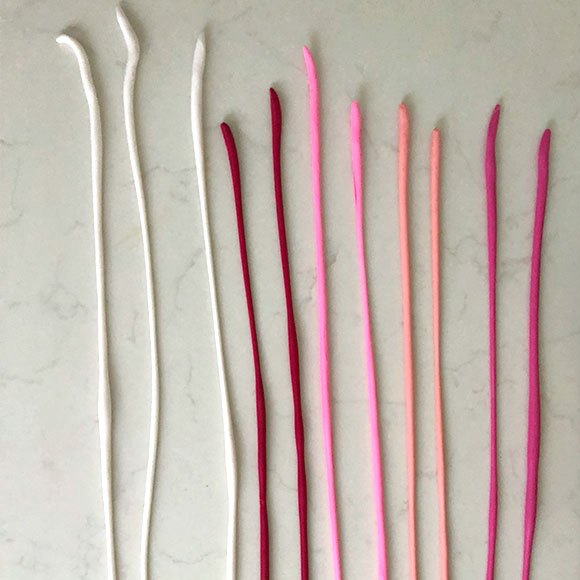
For the plant pot sides, take three packs of clay in different colours. Cut each pack into 6 equal pieces and roll them out into long strands.

Take one strand in each colour and wind them together to distribute the colours.
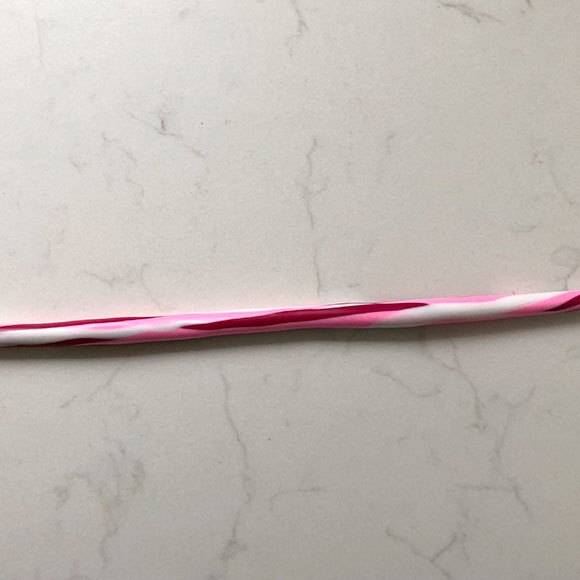
Then roll everything together carefully on your work surface to create one sturdy strand. Don’t roll for too long so that the colours don’t bleed.

Next, fold the long strand in half and twist the pieces together to form a twister shape. Trim the ends straight.
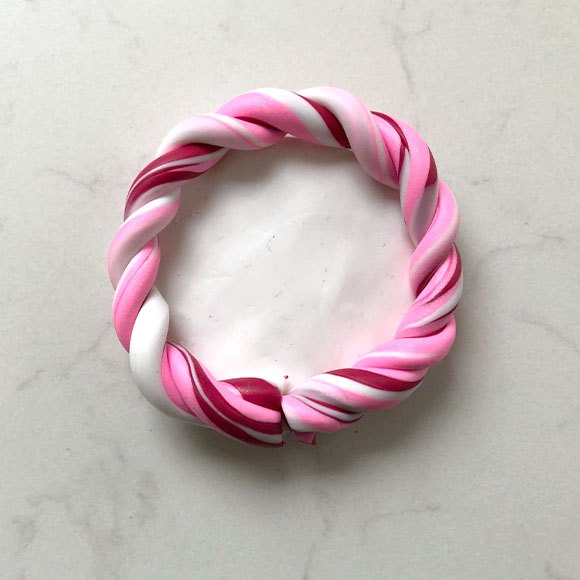
Mould the twisted strand onto the base you made earlier and carefully press down.
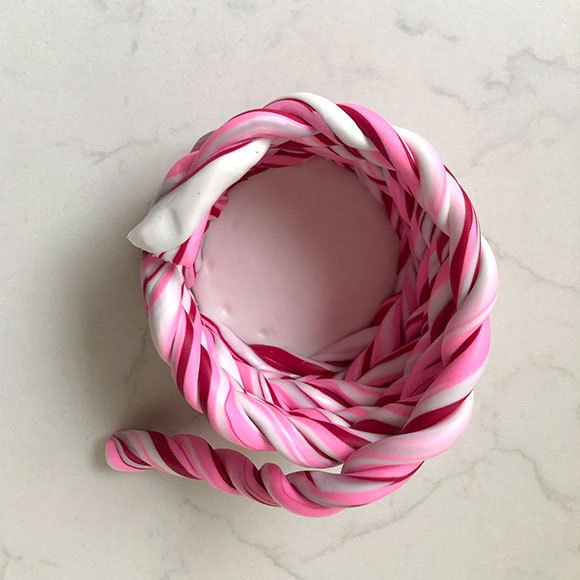
Now repeat steps 5-8 to create a total of 6 layers of twisters. Keep pressing them down gently so that there are no gaps visible in between the various twister layers. If necessary, you can reinforce the inside with some leftover clay.

Bake the plant pots in the oven at 130 degrees Celsius. Your handmade plant pots will be done in 30 minutes. Let them cool down properly before using.
Resources for this project:
See all materials


Comments
Join the conversation
-
Love these pots, very cute!❤
-
Very nice.👍


Frequently asked questions
Have a question about this project?