


Wax Decorated Easter Egg Tree

Hi everyone! If you’re stuck indoors right now and going a little crazy from boredom, then I’ve got you. How about a project where you probably already have most of the tools and materials needed to complete it? Sound good? Then read on!
With Easter fast approaching, this easy project idea is guaranteed to make your festive decor pop. As always, I love a project that is easily customizable to suit any style and colour scheme, and this one is no different!
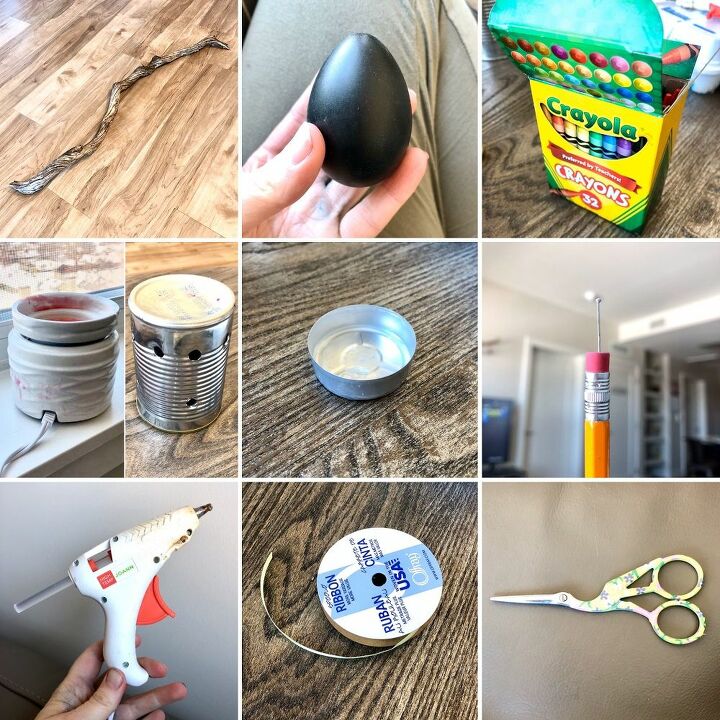
- Branch / twiggy tree
- Real (empty!) eggs / fake eggs (I’m using fake eggs)
- Crayons
- Electric wax melt base / empty tin can with holes and a candle
- Empty tea light casing
- A pencil with a dress pin stuck into the eraser end - one for each wax colour
- Glue gun
- Ribbon
- Scissors
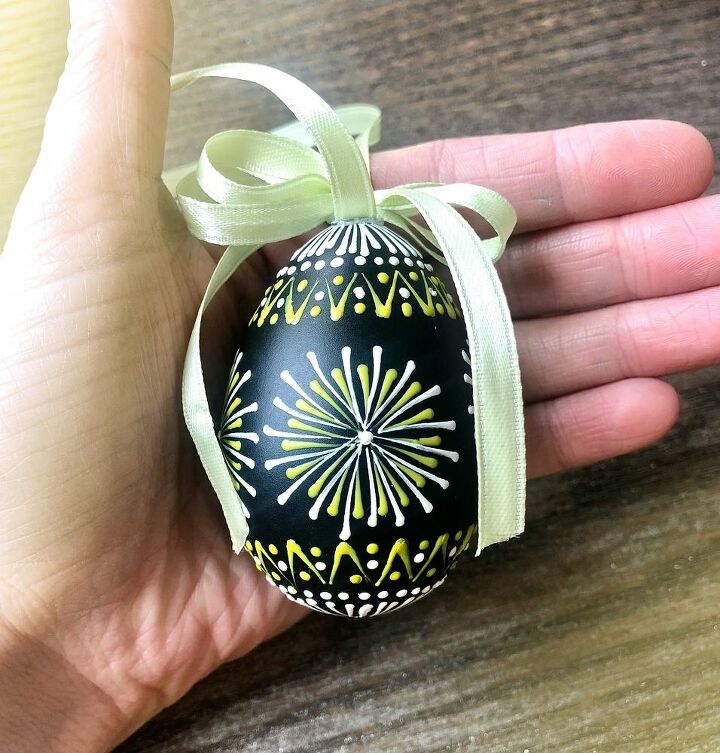
First, pick the colours you want to decorate your eggs with. I had a set of black eggs so I wanted light, bright colours that would stand out against the black. I chose a greeny-yellow and white. If you have light coloured eggs, chose colours that will contrast enough with the shell so that you can see the beautiful intricate patterns you are about to paint.
I chose to keep my eggs all uniformed in colour but feel free to mix this up however you like. Walmart, where I got mine from, had lots of different colour options to pick from.
If you are using real eggs, you might want to dye or paint the shells first. Acrylic paints will work fine for painting, just do a couple of coats.
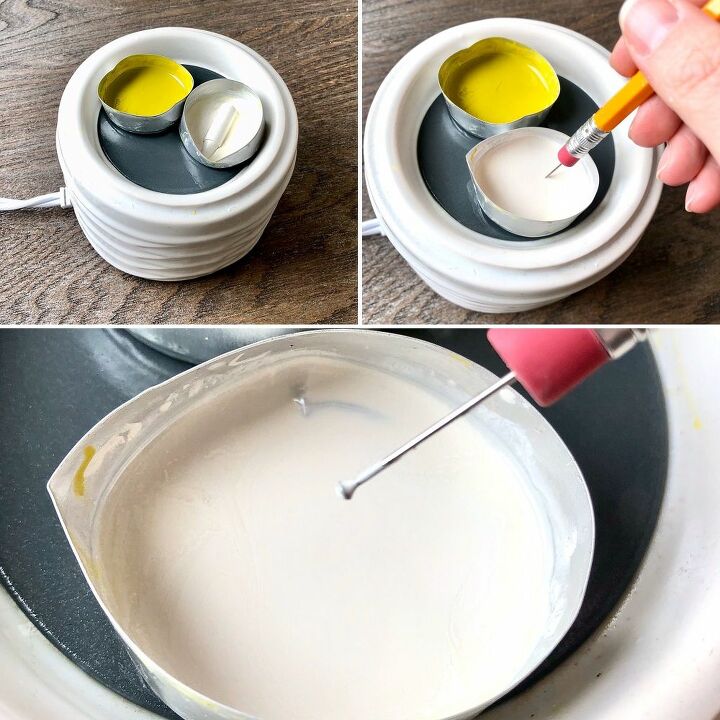
Add the crayons to separate empty tea light cases and place them on top of either your wax melt base or tin and candle and let them melt fully.
Pick which colour you are going to use first and dip your pin into the wax. Give the wax a little mix and then hold the pin at the base of the wax for a few seconds so that it has a chance to warm up along with the wax or it will cool too quickly during the next step.
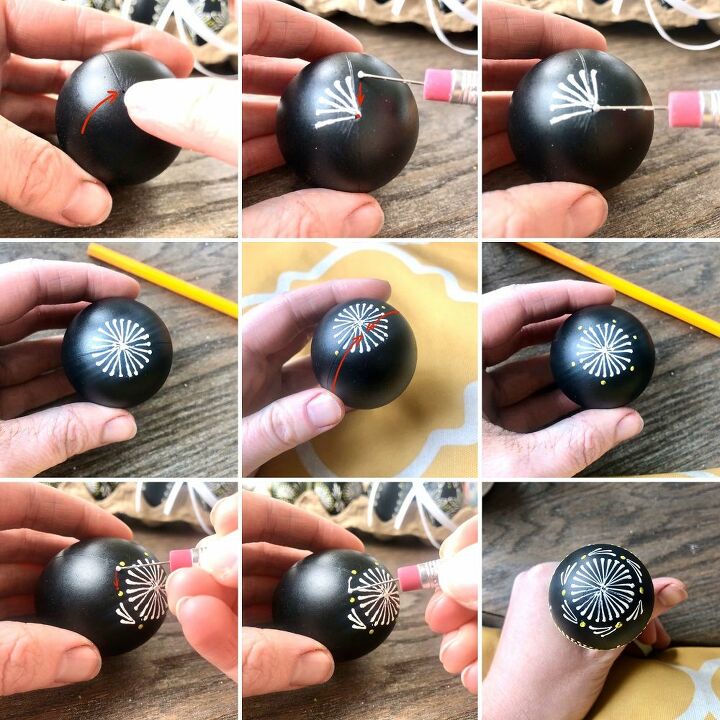
Using the very bottom or very top of your egg as a guide for where to start (fake eggs usually have tiny holes and halfway lines like on mine shown above), take your wax loaded pin and quickly place and drag the pin head in a straight line along the egg. The longer the pin is in contact with the egg, the thinner the line will be because the wax cools and hardens super quick!
The entire action from the pin leaving the wax to completing one stroke on the egg shouldn’t take longer than 1 second!
I recommend having a practice egg to start on as there is a knack to this technique that comes with a little bit of practice and speed. It’s also very important to note that the wax needs to be very hot. If you’re having no luck at all making a line and your speed is good, it’s probably the temperature of your wax.
Once you’ve made your first line on your egg, go back into the wax, hold the pin in there for a second and then repeat the above steps to make your next line. After every line, you will need to go back into your wax with your pin so get comfy and have your colours nice and close by!
To make a dot, simply do not drag the pin. Place the pin head down on your egg and lift it off, again with speed.
Go in with a different pin each time you change colours to keep them nice and clean.
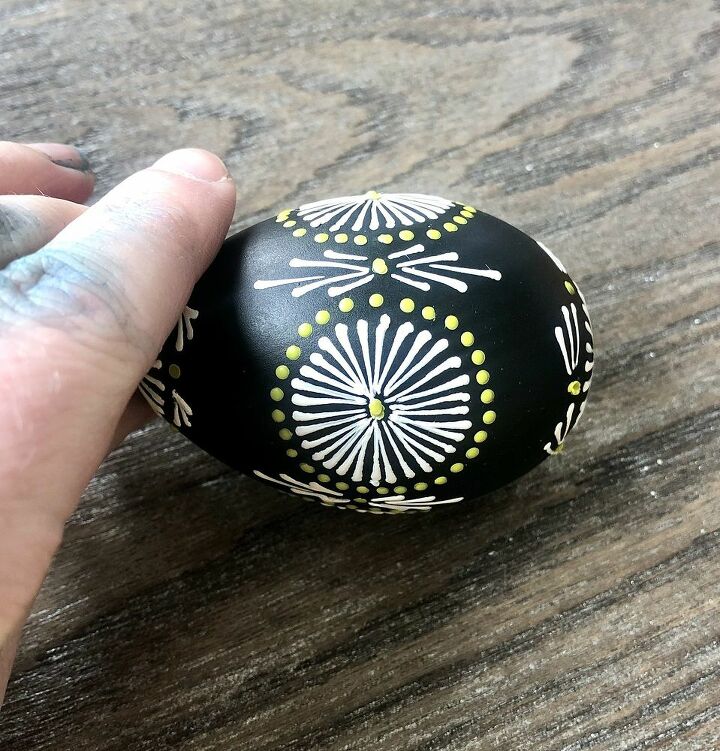
Feel free to use this or any of the designs I have painted on my eggs. The bottom and top are the same and the middle is a repeated pattern of quarters.
There are tons of other options available on the internet too if you prefer.
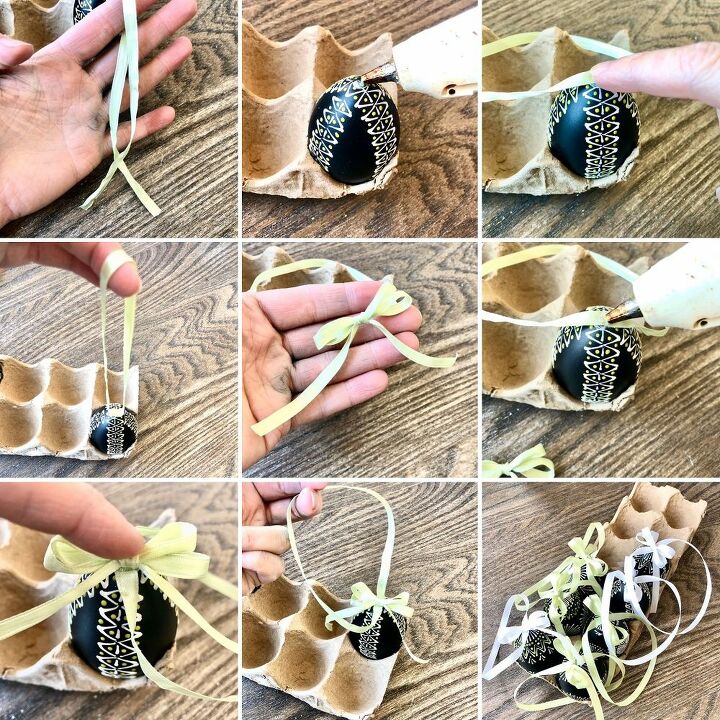
Next, cut a piece of ribbon long enough to loop around your branch or onto your tree and glue this in place at the very top of your egg with your glue gun. Then cut another piece of ribbon for a bow and glue this in place at the base of your first loop.
I made 7 eggs in total for my branch so I alternated the ribbon colours using the same colours I used for my wax patterns.
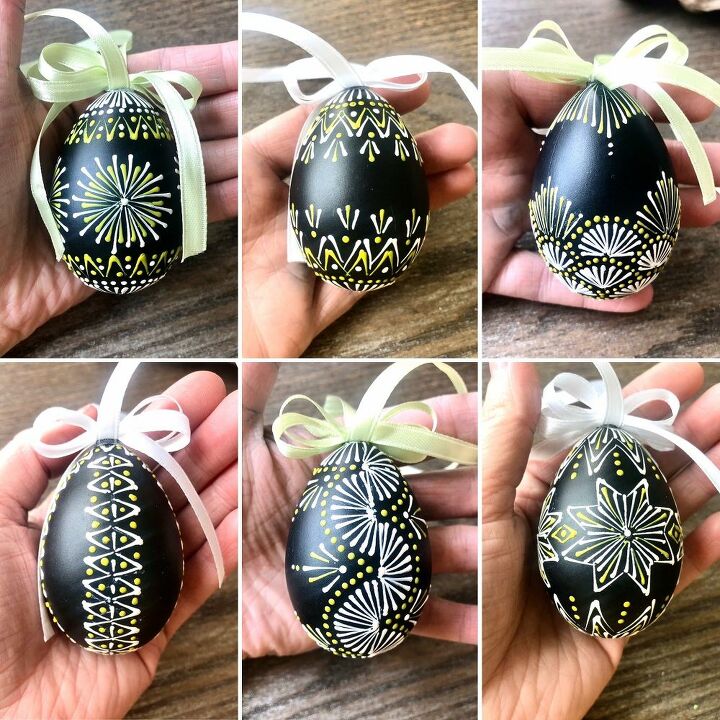
Here are the other 6 designs I painted onto my eggs. 1, 3, 4 and 6 are all repeated patterns in quarters, 2 is as many zig zags as will fit, and 5 is split by halves. 3 is also the only pattern where the top and bottom are not the same.
If you would like me to share more images to help you copy these designs, let me know in the comments below.
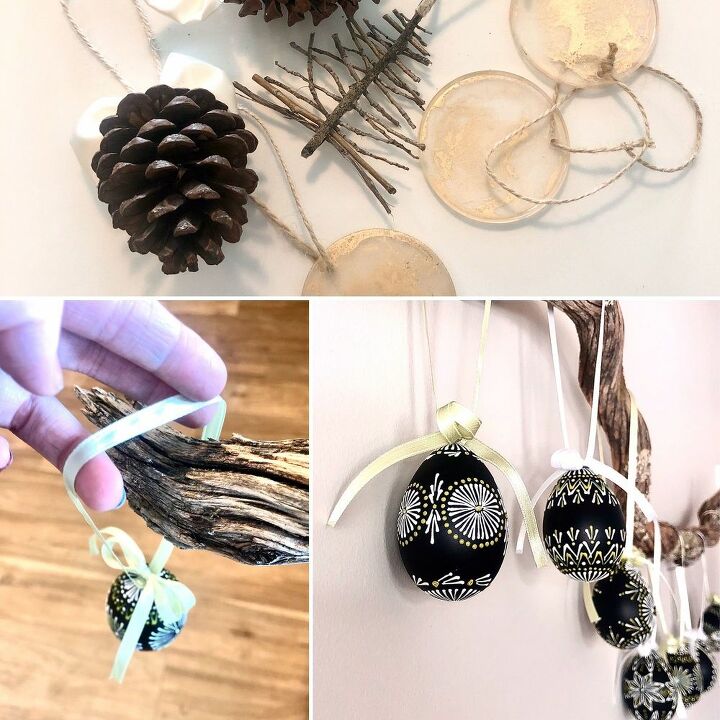
Lastly, I removed my winter decorations from my branch and replaced them with my lovely eggs.
I’m already trying to think of what I can replace my eggs with when summer comes....

And that’s all there is to it!
I hope you feel inspired to get CRACKing on this EGGcellent project and if you have any questions at all, drop them below and I’ll be happy to get back to you!
Please, please check out my YouTube channel for lots of crafty tutorials like this and subscribe for all future vids 
I also have an instagram account so I’d love it if you guys checked that out too and gave me a follow 
Many thanks, stay safe and happy crafting!
x


Comments
Join the conversation
-
Stunning!
-
You are definitely very artistically talented. The eggs look amazing. I love it!!


Frequently asked questions
Have a question about this project?
I did a search on Amazon and WalMart and couldn't find the black eggs. did you find them this year -2020- in black, or did you paint them black which is an alternative?
Very pretty, but too much work for me! I love how they turned out and you did beautiful job. Were these eggs actually black? Or,did you paint them.
It's all so confusing.
for years, I was told that the Easter bunny brings Easter eggs; Now, I'm supposed to believe that they grow on trees? Which ever way, It's absolutely beautiful! I think that if I tried to hand paint such an intricate design on something as light and flimsy as an empty egg shell, I would have a nervous breakdown. Is your branch actually a grape vine?--Whatever, it is, it's great! R.C.Leach