


How to Sew a Face Mask - Quarantine Activity

I made this post very early on in the pandemic so after making lots of masks, I realize this is an elementary version. I am going to post my current favorite mask at the end. It has nose wire and a curved fit and comes in 4 sizes. I think we will be wearing masks for a while so make many different kinds. Make some with pockets for filters, some lightweight and some heavyweight. My mom and I were wearing heavyweight fabrics today and we fogged up our glasses and had trouble seeing the groceries! 😂 I think we can all agree that not everyone has the same size head, so my advice is make one mask and then alter the size to fit you. And I think something is better than nothing there are so many types of diy masks, let’s just be happy that people can make these and keep their minds and fingers busy and maybe, just maybe, keep the worrying at bay for even just a little while. I am not going into surgery or a hospital with my masks so for me, I believe they are fine. We all have different situations and you should research and find the best pattern for you. I’m on my third pattern and tomorrow I am making my fourth pattern which has ties instead of elastic. You do you!
Update Mary Washington Hospital and Lucy Fazely have provided a pattern to use if sewing masks for their hospital. Here is the link...
https://www.marywashingtonhealthcare.com/documents/PDFs/Cloth-Face-Mask-with-wire-nose-piece.pdf
I’ve made a mask per the hospital and Lucy Fazely’s directions and I will post steps and pictures of that one. You can find that link located three pictures down.
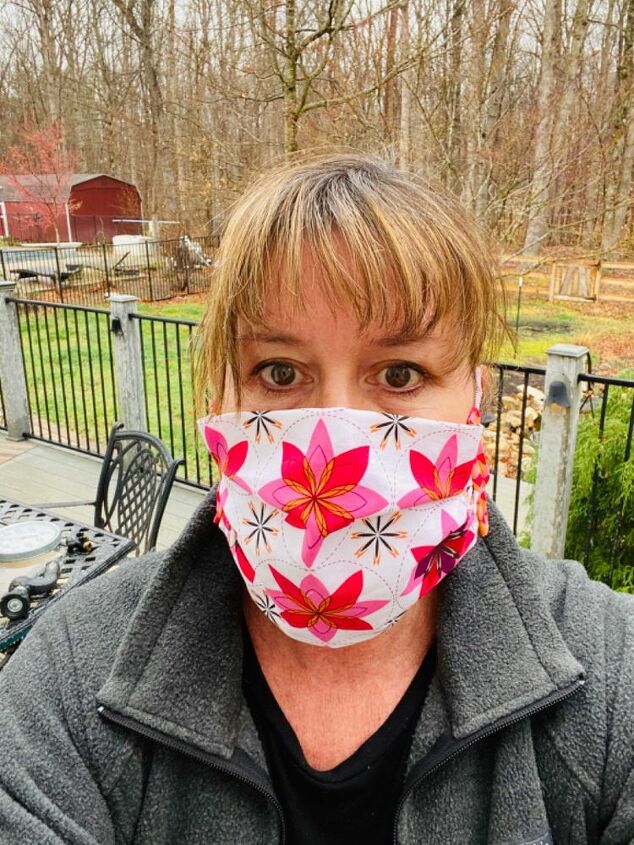
**These will not protect you from the virus but they might help to protect you, to some degree, in keeping you healthy in the future. Think smoke, allergens and whatnot. Also, these are not recommended for young children. It is almost like breathing with a hand over your mouth and nose and that could be detrimental to a small child.** I seem to be at loose ends these days looking for things to do and stay productive while stuck at home base during this Stay At Home time. I am trying to do activities that make me feel like I am doing something productive but don’t cost a lot of money. Please share what you are doing during this tough time. I think we all would appreciate ideas on what to do with our time. This size is large. It was way too big for my daughter who is 5 foot 3 inches, slightly too large for me who is 5 foot 8 inches. It was perfect for my 5 foot 11 inch husband. I am going to make a variety of other sizes to give you an idea of what size would work for you.
I recommend making one and evaluating the size. I was going to cut a bunch of these at one time and I’m glad that I didn’t because my daughter and myself will want smaller sizes.
I think for a while we will be using even a small amount of protection on our faces, just because we have experienced this pandemic. It has really changed my way of thinking and of all the things I took for granted that were swept away in a matter of two weeks time. How has this pandemic changed you? Besides toilet paper, what will you keep a reserve of in the future?
I used quilting cotton fabric. I have tons and this seems like a great time to use this fabric that has just been sitting around not being used. I feel like doing this is helpful and I really believe that having an activity to do like these easy masks is helping my mental health while I Stay At Home during this crisis.
You will wash the fabric before you begin and after you are done. And I chose not to use dryer sheets when I put it in the dryer. I felt it might be healthier not to have that residue on fabric that you breathe through on your face.
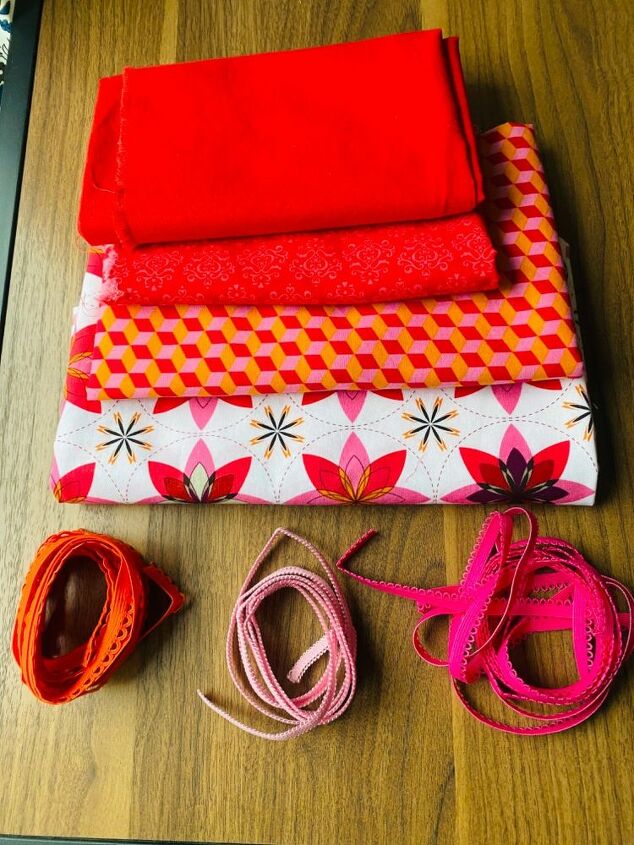
In addition to cotton fabric, you will need elastic of some type. I am using fancy elastic because I found them earlier than my plain old elastic. I also ordered more from Amazon.
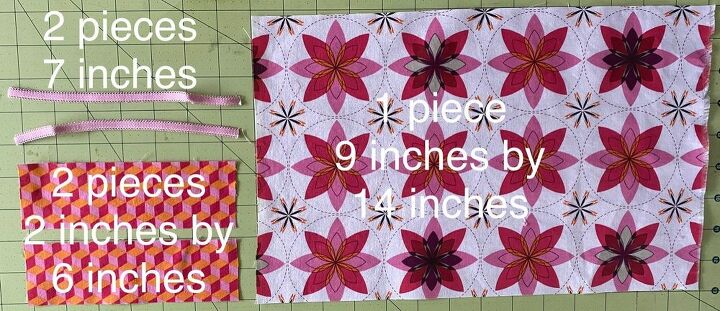
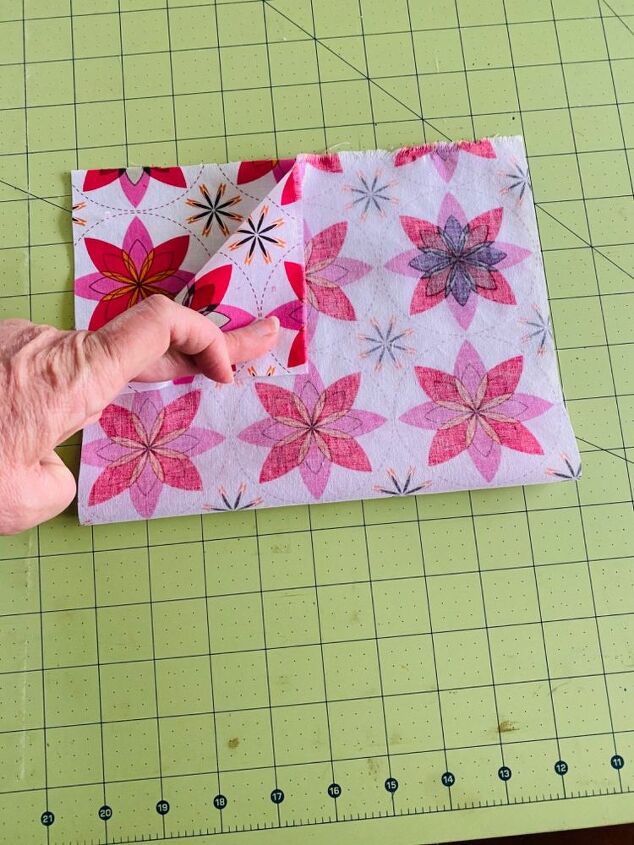
I cut my main face fabric to the dimensions of 9 inches by 14 inches. This size is perfect if you typically purchase size large or extra large shirts.
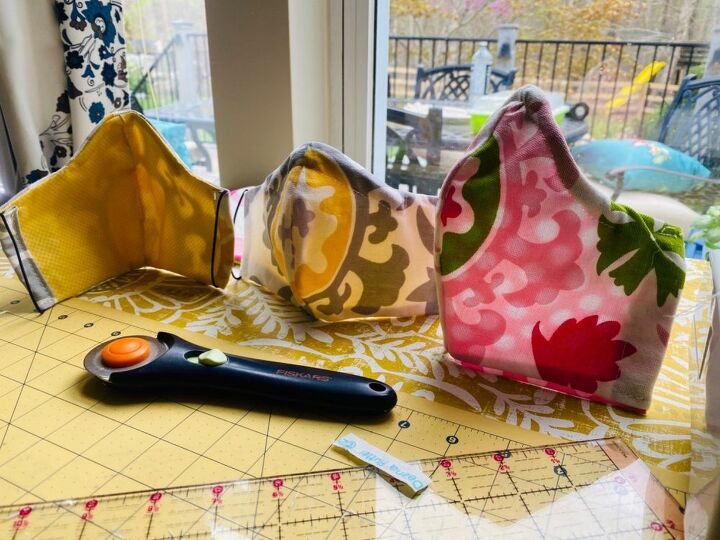
I have another tutorial that uses interfacing to give the mask more protection and you can find it at this link...
https://www.hometalk.com/diy/how-to-sew-a-face-mask-part-two-44277695
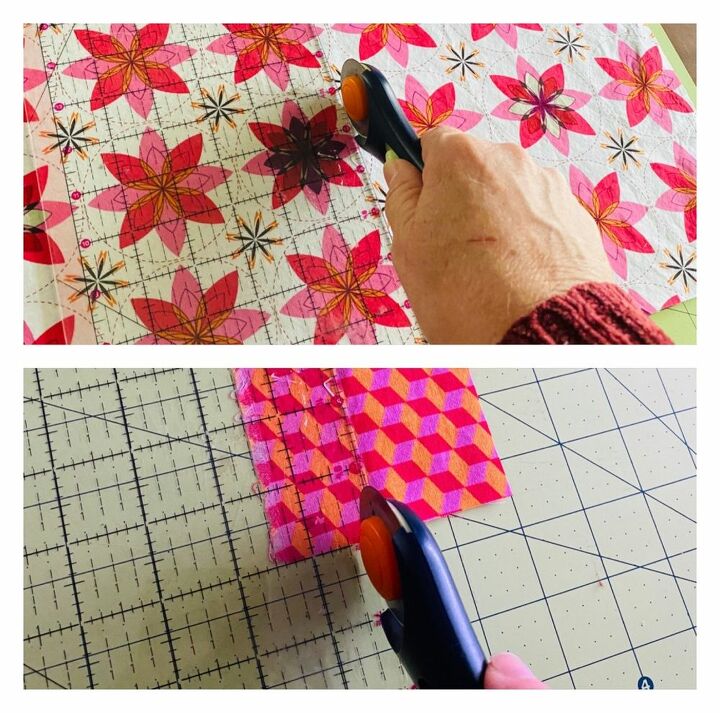
If you have a rotary cutter, cutting mat and guide, this is the perfect project for these items but you don’t have to have these items. You can use scissors and a ruler if that is all you have.
I cut the two pieces that will cover the raw edges to 2 inches by 6 inches.
Putting right sides together fold in half which would make it 7 inches instead of 14 inches. Sew the top edge closed.
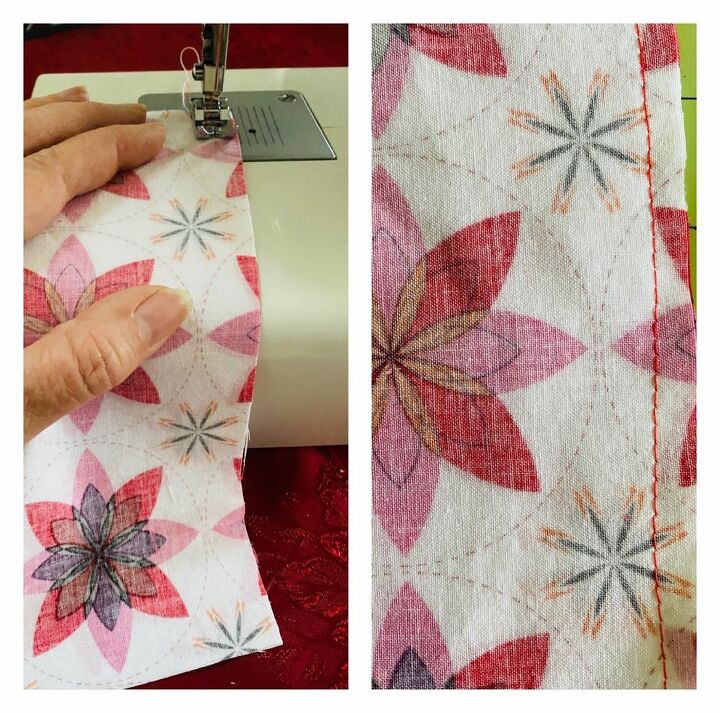
I use a sewing machine to sew the top edge closed. Then turn your fabric right side out. You will have a tube That is open on each side.
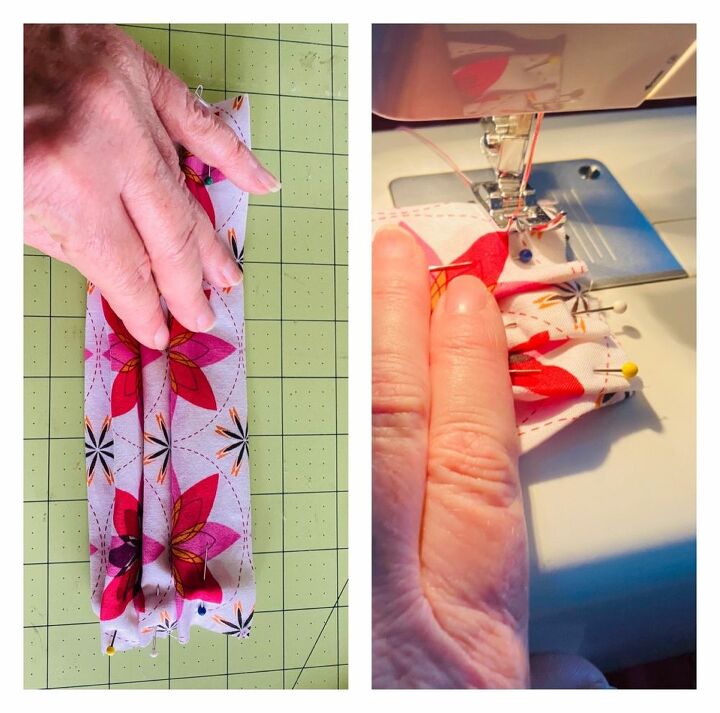
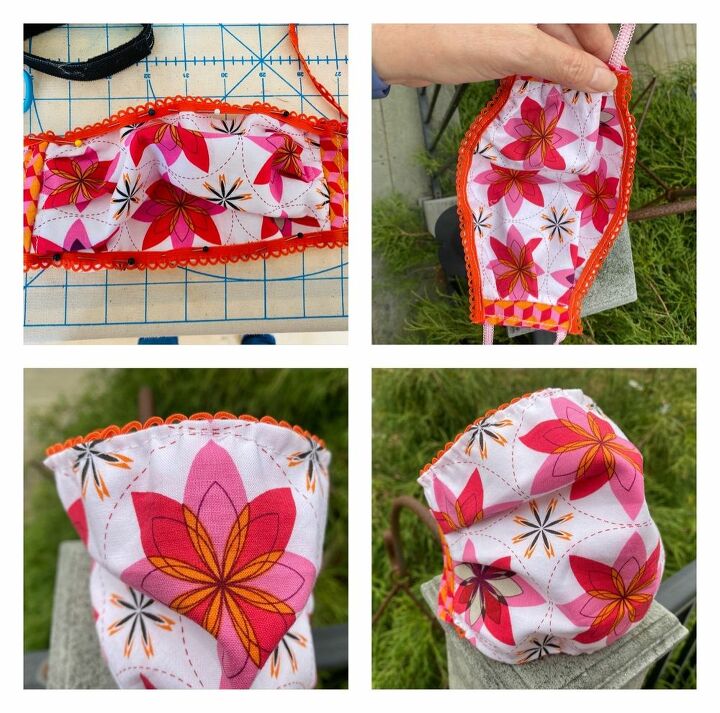
Create three pleats across your fabric and pin into place. After both sides have been pinned, sew down each side, roughly a quarter inch in.
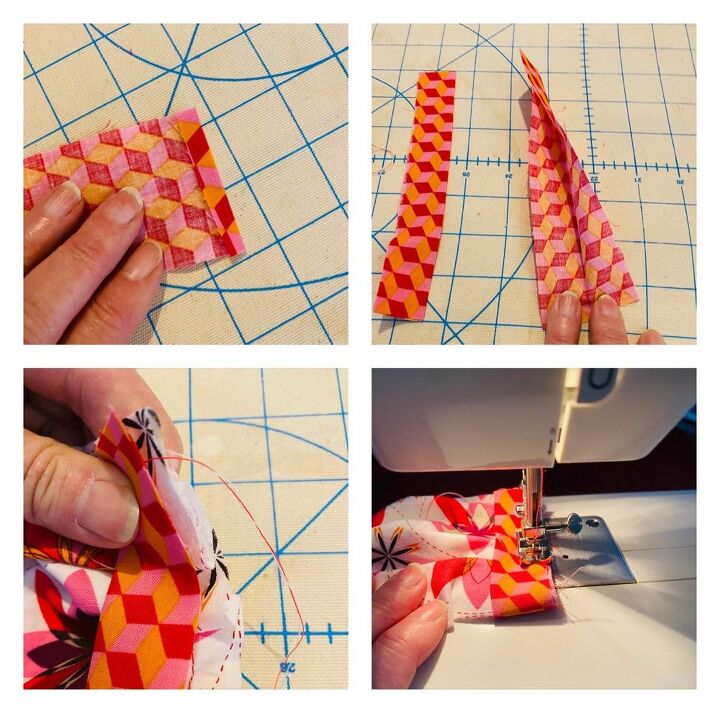
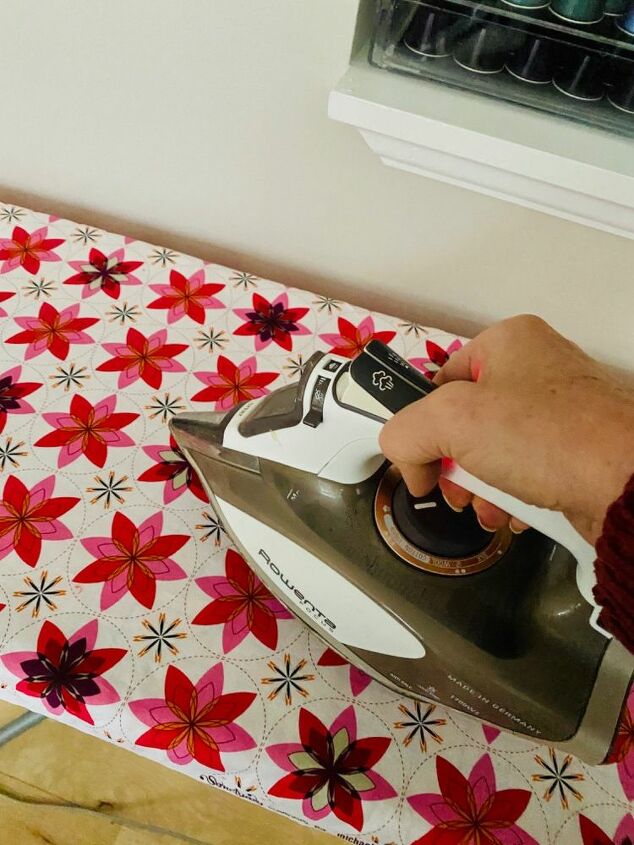
The two 2 inches by 6 inches Pieces are to cover the raw ends at the end of your mask. First, I ironed about a quarter inch on the short ends of these pieces and then I ironed them on half. You will line up the raw edges, this piece will form a u shape, down one side and up the back of your mask. You will straight down to secure this. Once this is done, you will flip the fabric over the line you just sewed. This creates a long pocket on each end of the mask.
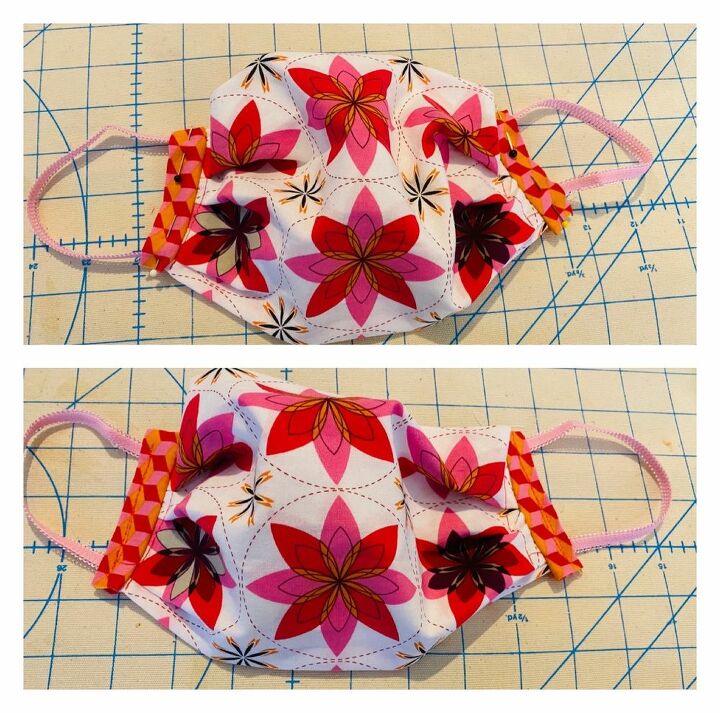
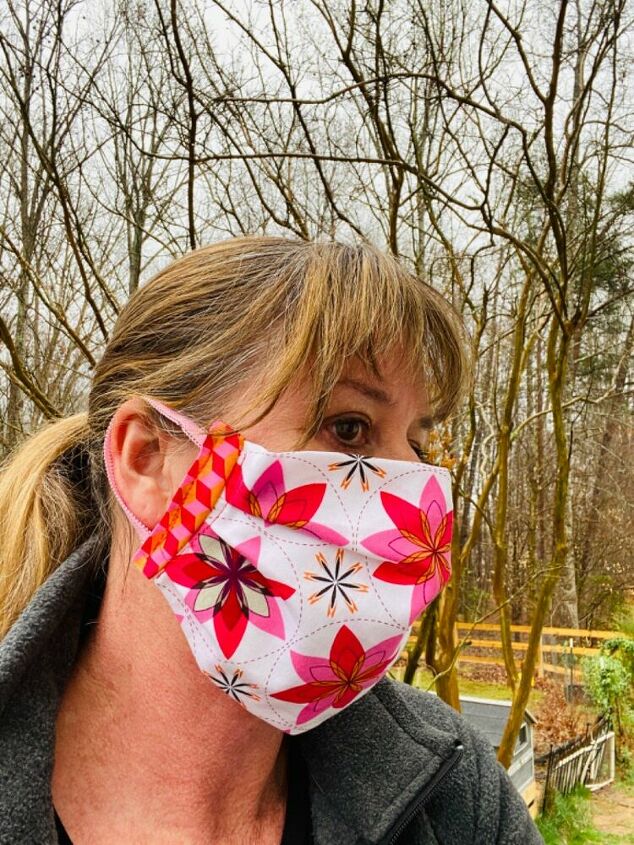
I pinned my elastic in place on each side and sewed each end closed.
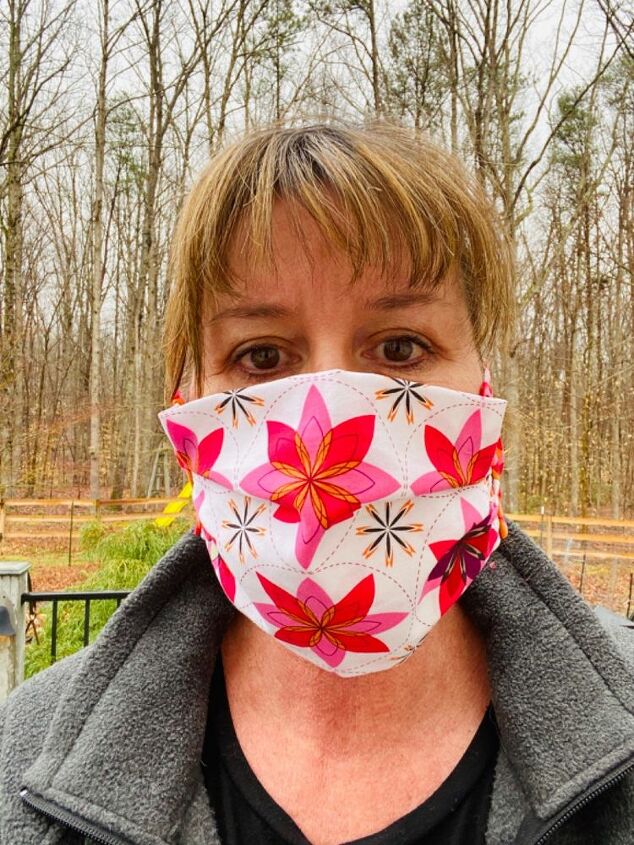
Depending on how tight you want it, you could add a Channel with a string across the top and bottom to gather it right or more elastic across the top and bottom. Since everyone’s face is shaped differently, you might need to make some adjustments. I would probably make another one for me and make it 12 or 13 inches instead of 14. In this picture, I learned that there is a top and bottom to the mask. If you feel there is too much space along the top try flipping it around.
I am not expecting to stop a deadly virus with this but it might help a little. I can tell you, it isn’t all that easy to breathe and gets hot quickly so I feel some protection is better than none.
I have some ideas on adding a filter to these masks and I will post that in the near future.
I really found this activity therapeutic. There is so much we aren’t able to do in a time like this that something small like this keeps our mind busy and our fingers busy. I am having so much trouble not eating all the quarantine snacks. Also, using up my fabric stash makes me feel great!!!
I added some elastic lightly stretched to the top and bottom of the mask. It would have been better to sandwich the elastic between the layers but I was adding it after the two pieces had already been sewn together. You can see with the elastic added, it is more shaped to fit your head. It literally stands up on its own!
These are my favorite!
Resources for this project:
See all materials


Comments
Join the conversation
-
Thank you for the ideas. Tomorrow I will start this project!
-
I love the cute trim. Good idea.


Frequently asked questions
Have a question about this project?
Is interfacing pressed rather than woven?
Yes definitely BUT where can you get the ‘proper’ fabric for the masks so that they are up to standard? Thank you
I have a mask with thin elastic for the ears and it is flat. Want stay on my ears. It pushes my ear over and slides off. How can I get them to stay on my ear?