


The Easiest Way to Refinish a Table - Perfect for Beginners
This post is sponsored by Retique It®, all opinions are my own.A 90's thrift store find flipped and turned into a beautiful wood table. Learn the easiest way to refinish a table, and how to turn a plastic like surface into a rich wood. I was strolling through the thrift store a few weeks ago and came across this 90’s gem. Complete with a purple plastic like finish and big bold peace sign. The teenager in me loved it! But the adult, not so much.
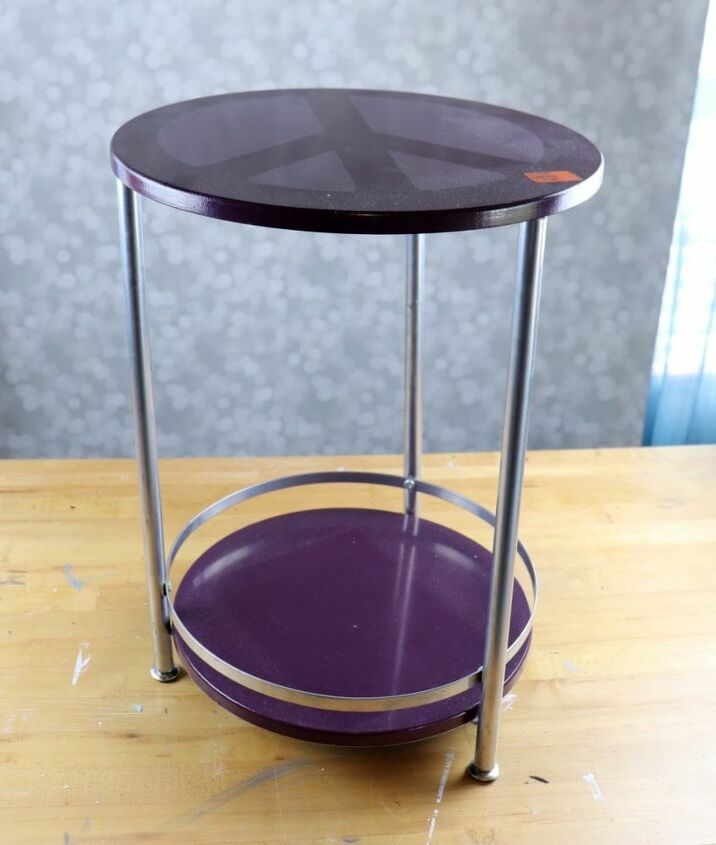
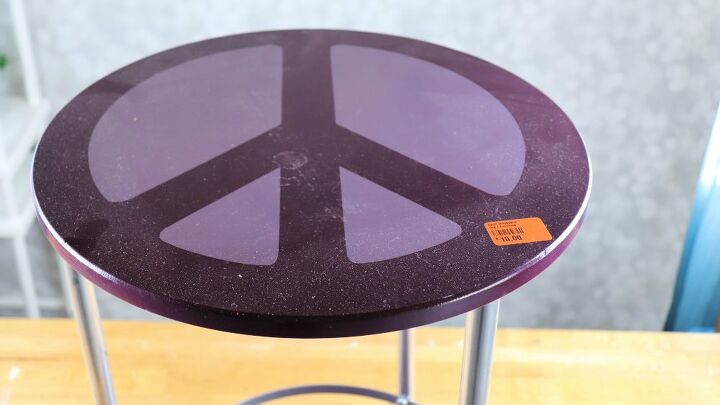
When I’m thrifting I try to look beyond the outside of a piece and look for it’s potential. This table had a beautiful shape and 2 tiers that would make it an ideal plant stand. But the peace sign had to go. It was a plastic looking top so traditional refinishing or painting methods wouldn't work for this table. I scooped it up for $10 and vowed to find a way to refinish this table.
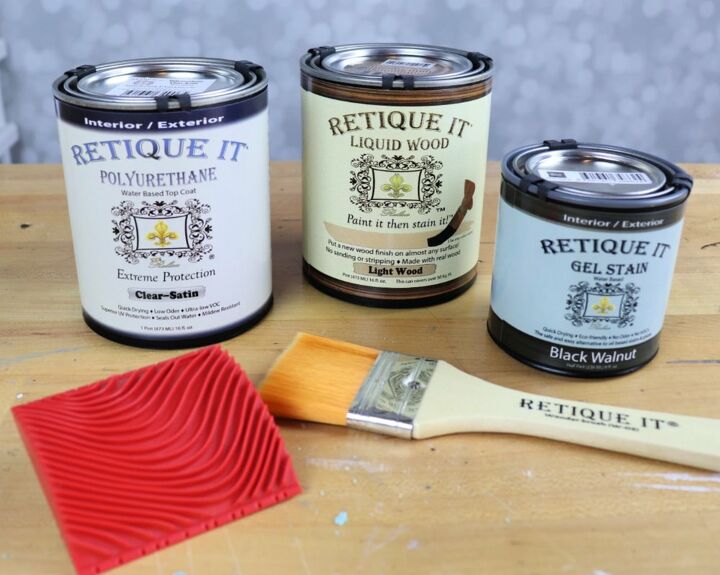
Retique It® Liquid Wood
Retique It® came to me at the perfect time! This is just the product and system I needed to finish this table. Let me walk you through how I turned this outdated table into a beautiful, modern wood plant stand. This is a process you can follow, even if you know nothing about refinishing furniture! What is Retique It Liquid Wood? This is a new product that makes just about any hard surface into something that can be stained without having to strip off the old finish. No stripping old paint, this really is the easiest way to refinish a table. The surface becomes like bare wood because Retique It contains real wood. When you brush it onto a surface you are actually applying a thin layer of wood which can be finished with stain!I started with these products and I’ll show you each step and just how easy this process is.
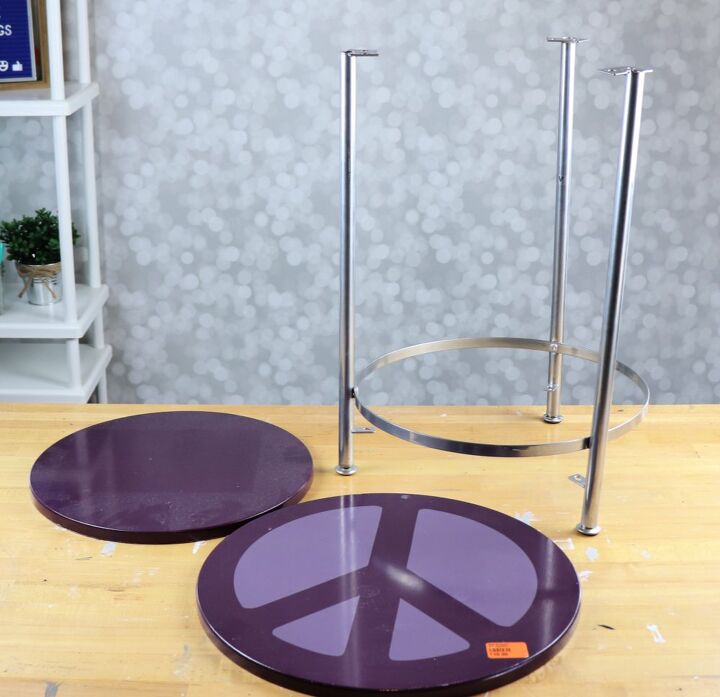
Step 1: Prep the table.
I took apart the table, both circles came off the metal stand. I washed and dried them well then wiped them down with a mixture of water and rubbing alcohol. I worked in a well ventilated area and propped up the circles on scrap wood so I could easily access the sides as well as the top.
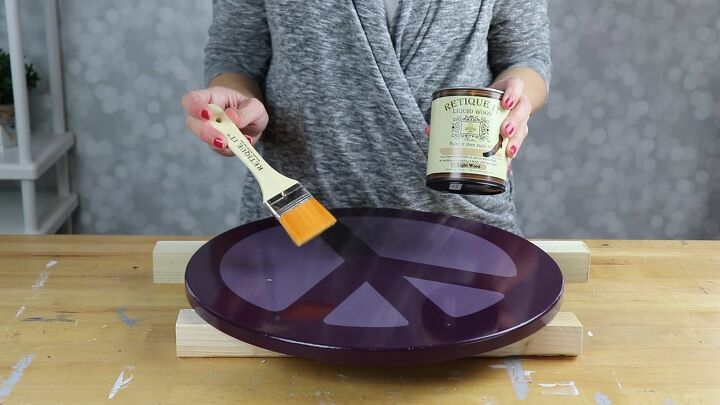
Step 2: Apply Liquid Wood.
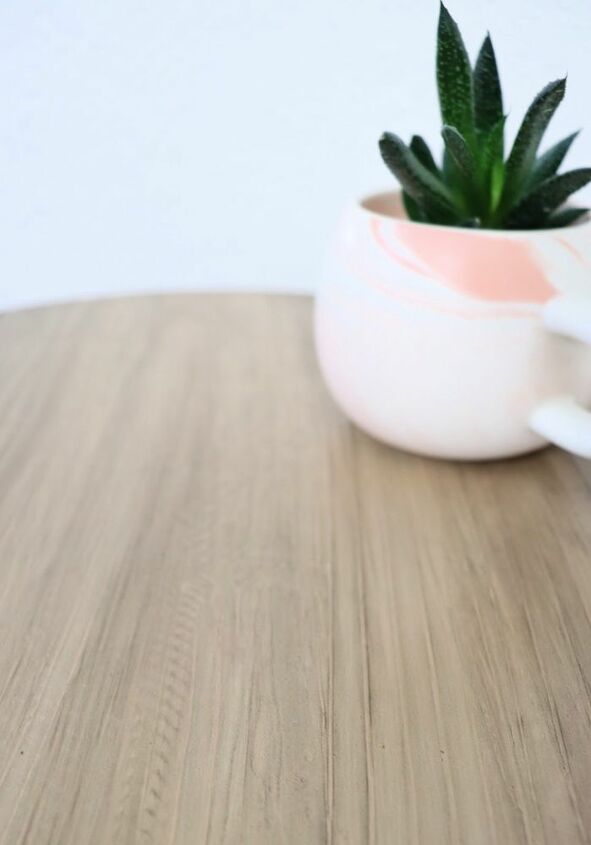
Normally you would strip the old finish, but not with this product! I started with the can of Liquid Wood in Light Wood, and stirred it well before starting. I used a paint brush to add a thin layer of the product to both circles. Brush strokes don’t matter at this point, I just made sure my final strokes were long and in the same direction. I let this dry for 2 hours and washed my brush thoroughly with soap and water.
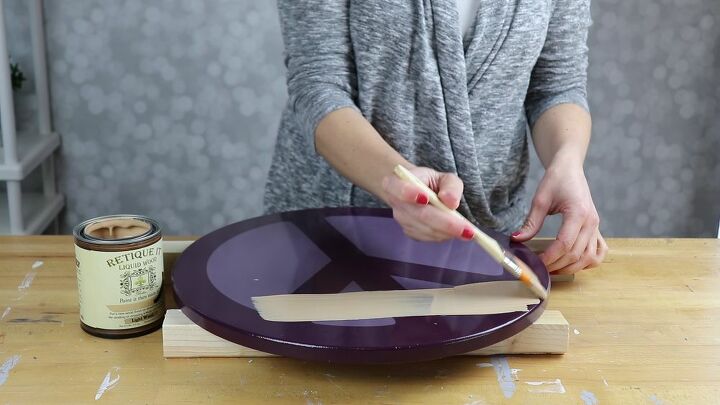

Step 3: Second coat of Liquid Wood.
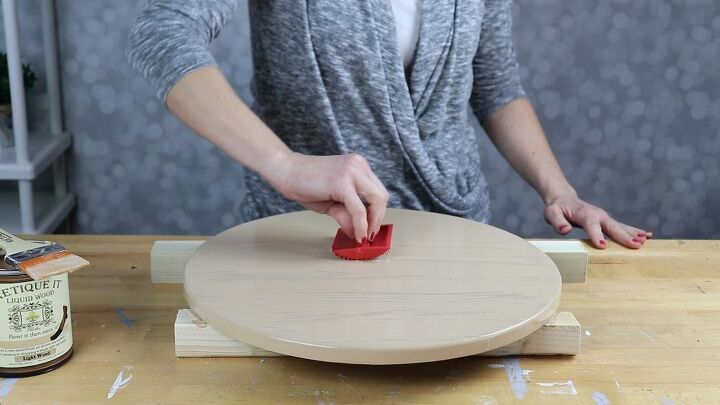
After 2 hours I checked the finish to make sure it was dry. Then I applied a second thin coat using the same method. During this step you can use a different color of liquid wood to give more depth to the piece, I opted for the same color. This time I used a graining tool to add wood grain to the finish. I used long strokes running the tool from one side to the next rolling periodically to create variation in the finish. This added beautiful knots and texture to the finish. When I was happy with the look, I washed my tools and let this dry for another 2 hours.
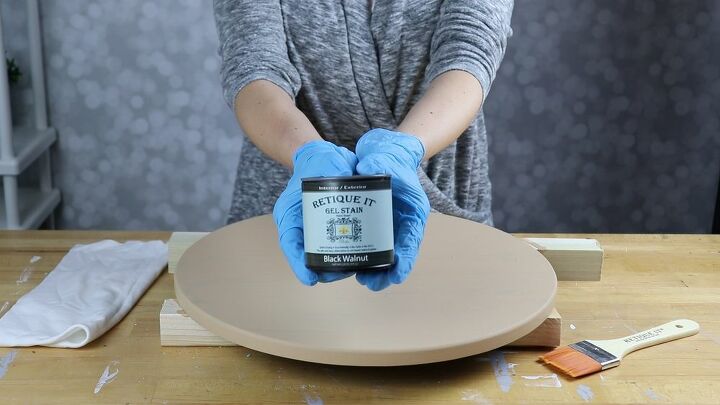
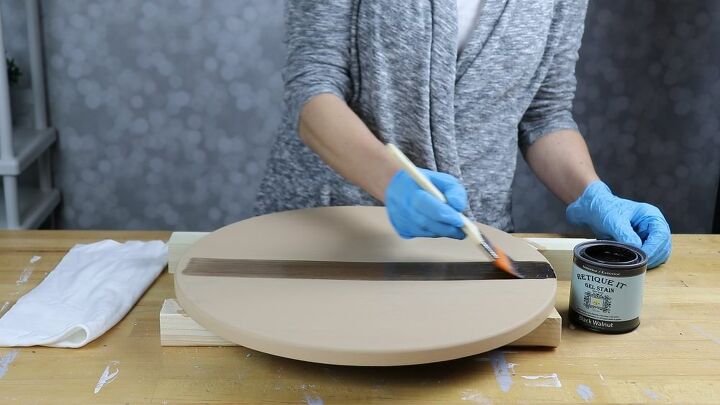
Step 4: Stain the Wood.
I used Black Walnut Gel Stain for this step. I shook and stirred the stain and put on gloves before starting this step. I made sure the surface was dry and lint free then brushed on a thin coat of gel stain. I was going for a light look so after about 10 minutes I pulled some of the excess stain off the wood with a soft cloth. You can let this gel stain dry, without wiping, and add more layers for a different look. I let this dry completely before moving on.
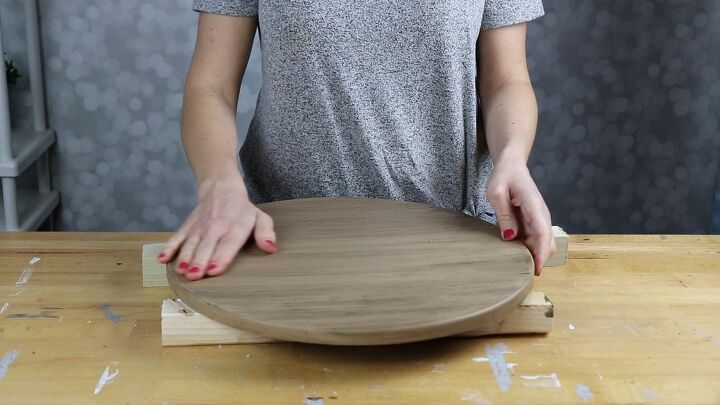
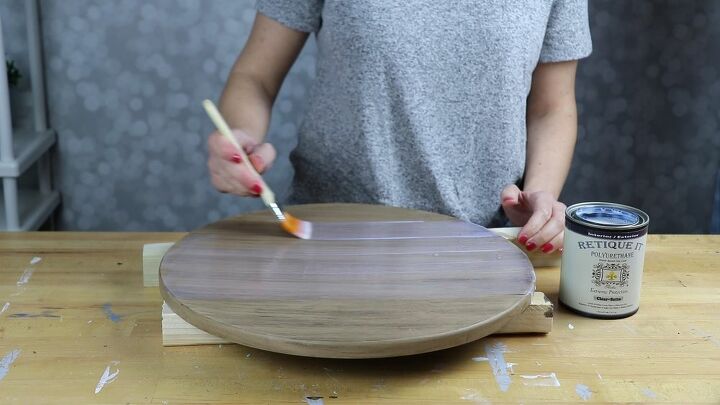
Step 5: Seal the wood.
Using Retique It Polyurethane in clear satin I added a thin layer to the wood circles and let it dry. I applied 2 coats using this clear coat and it will hold up well indoors or out.
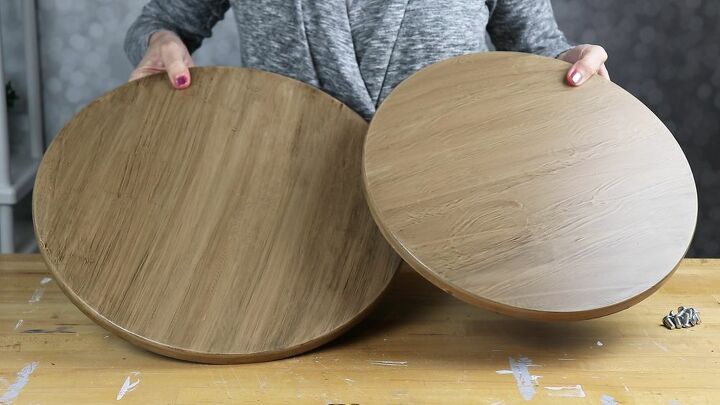
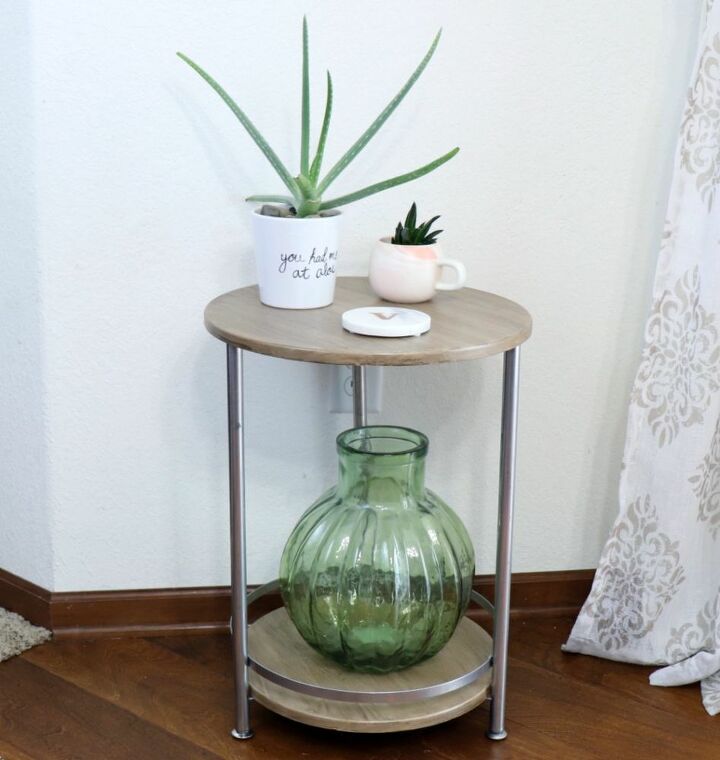
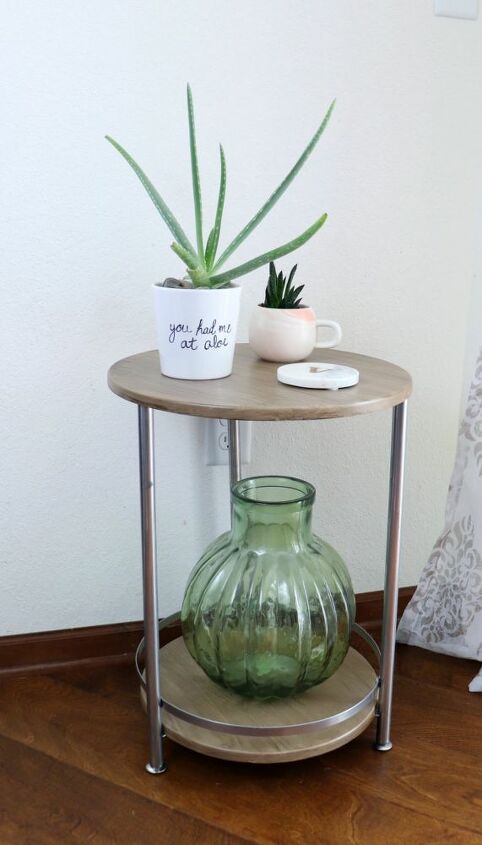
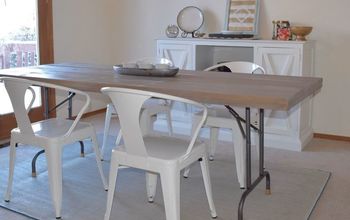
The result is a gorgeous wood finish with depth and texture. I put this table back together and it has a completely new and modern look! This was truly the easiest way to refinish a table. I didn’t need a lot of experience and these steps were so easy to follow.
I am using this piece as a plant stand just inside my patio doors. Soon, when the weather improves, I will move this outdoors to use for pants and as a functional end table.
I am so glad I looked past the 90’s exterior and found Retique It to help bring out the beauty of this table.
Do you have an outdated piece that needs refinishing?I encourage you to check out Retique It and try this. It works on a plastic finish like this table or any old wood. You will be so pleased with the results.


Comments
Join the conversation
-
Did this 15 years ago to twelve wardrobe doors (6 big and 6 small top doors.)
I built this huge built-in wardrobe 40 years ago but a friend made me new doors in MDF when louvred doors went way out of fashion. Still looks like real wood. Great product.
-
Such a cool product! I love how your table turned out.


Frequently asked questions
Have a question about this project?
Your description of the table top said “plastic like surface”, but it looks thick and heavy so what is it made of? Does the product work only on non-porous surfaces?
I have a large wood table that needs to have the top layer of laminate removed as it’s chipped.
not sure what kind of wood is underneath under the laminate. Would this piece be a good candidate for Retique it? TIA
Would this process work on glass tables?