


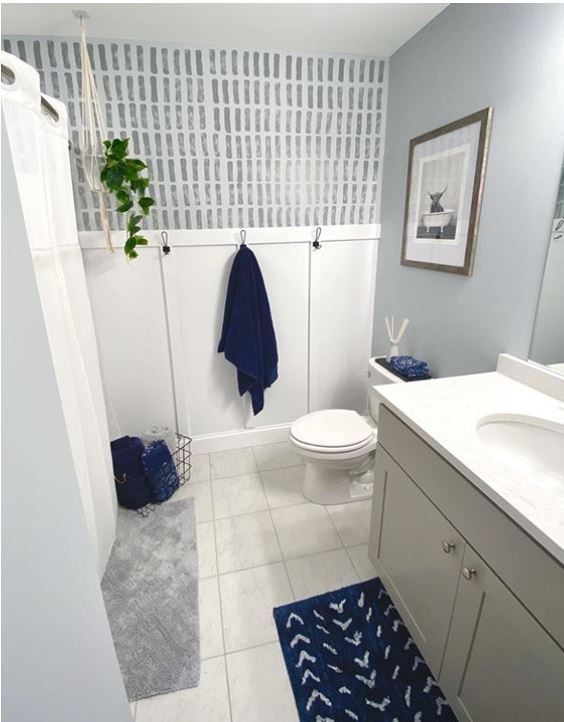
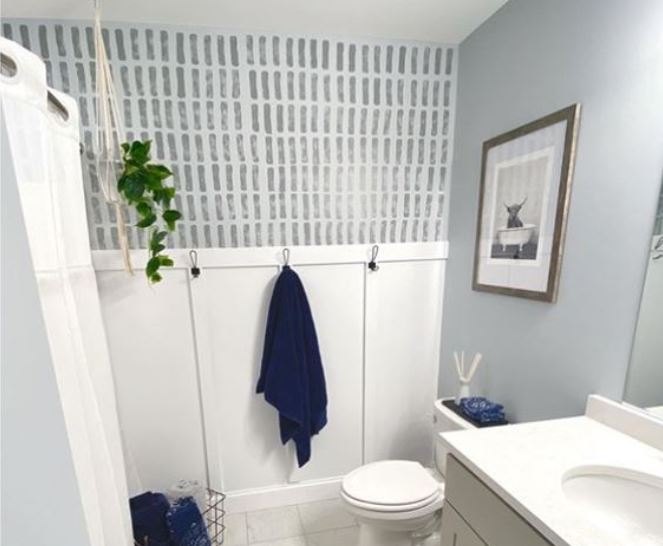
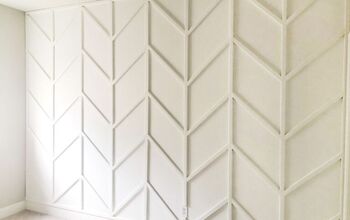
Super Simple (and Cheap) DIY Accent Sponge Wall

This sponge wall was the easiest, cheapest DIY I’ve ever done! We decided to do this fun pattern above board and batten in our guest bathroom. We originally discussed wallpapering it, but this was a MUCH cheaper (FREE) alternative, and we’re so happy with how it came out!
Edit: Many people are asking about the total transformation of the room. Like I mentioned, this post is regarding the SPONGE WALL portion, but if you're interested, I've also shared a board and batten tutorial here.
Another bonus to this simple how to paint an accent wall DIY is that you can use things you probably already have in your home (quarantine win!). I'm sure most of us have an old can of paint laying around, and an extra kitchen sponge.
What you'll need:
Sponge
Paint
Scissors
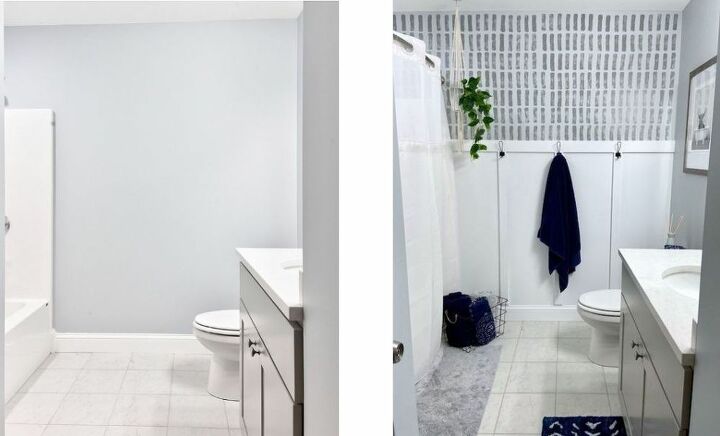
This is such an easy project, but it can truly transform a room.

Step 1: Cut your sponge
I wanted to keep it simple, so I went with a basic rectangle shape. The only thing special I did was round the edges a bit because I didn’t want such a harsh corner. I’ve also seen this done with circles, hexagons, arrows, full rectangles in a subway tile pattern – you can really get creative here! Make sure you dampen your sponge before cutting, to make it a little easier.
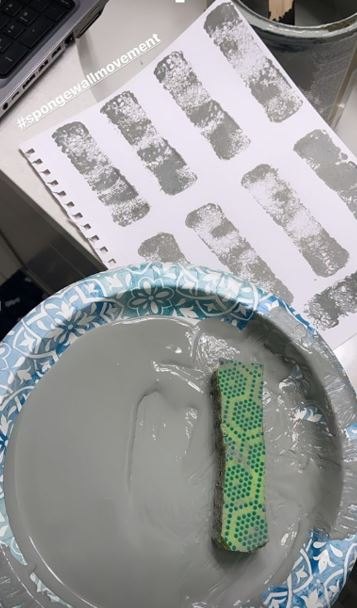
(Optional) Step 2: Test your pattern
I’m a little crazy and I wanted to test my pattern and practice my spacing first, so I just did this on a blank sheet of paper. I held it up to the wall to make sure I would like it – then decided to go for it!

Step 3: Sponge!
I started in the top corner and only pressed the sponge lightly. The beauty of the sponge wall is that it doesn’t have to be perfect! You can see the spacing isn’t exact and the texture of each line is different. I only dipped the sponge in paint every third or fourth line to give it that “imperfect” look.
Step 4: Fill in the gaps
You may run into spaces where a whole sponge won’t fit. See around the shower head and by the curtain rod? I skipped over these and went back for them once I was done with my full sponge. I took a new sponge and cut the appropriate sizes to fill the gaps.
Let me know if you give this a try, and if you have any questions leave them below!


Comments
Join the conversation
-
I did this back in the 80’s with a rag…
-
Beautiful! Now if I was younger and healthier I’d be doing that today.


Frequently asked questions
Have a question about this project?
How did you finish the bottom half of the wall?
What did you use for under the paint? Looks like a board across top and a line under to divide it 🤷🏻♀️
Did you do the hole bathroom or just one wall ?