


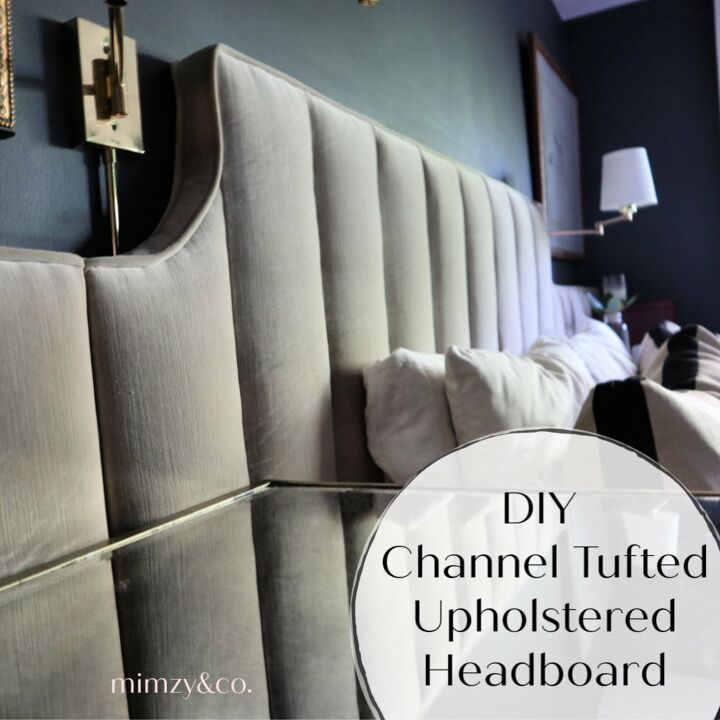
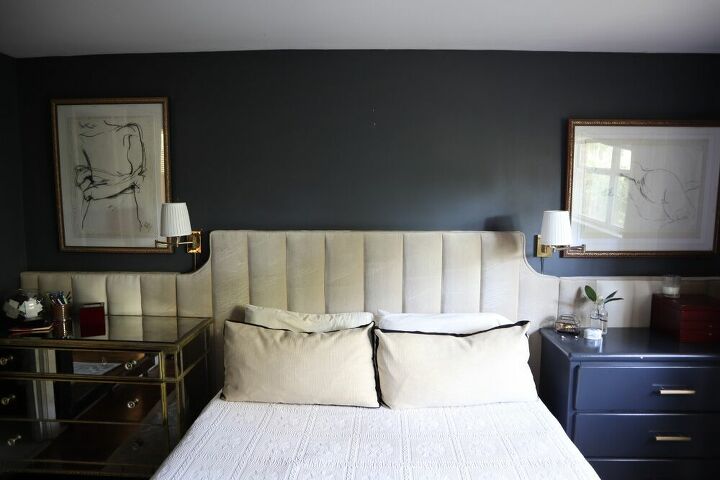
DIY Upholstered Channel Tufted Headboard
This Channel tufted headboard has been on my to-do list for a long time. I've been planning and pinning for so long that when I found the right fabric at the right price I was ecstatic.
The video is fast so if you have any questions about any part of the process please leave me a comment and I'll answer asap.
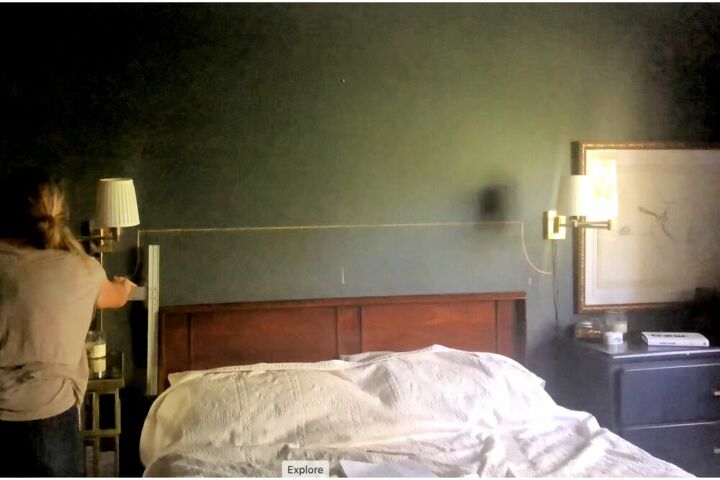
First, I drew the pattern on the wall with chalk to see if the pattern I had in mind was suitable and to determine the dimensions.
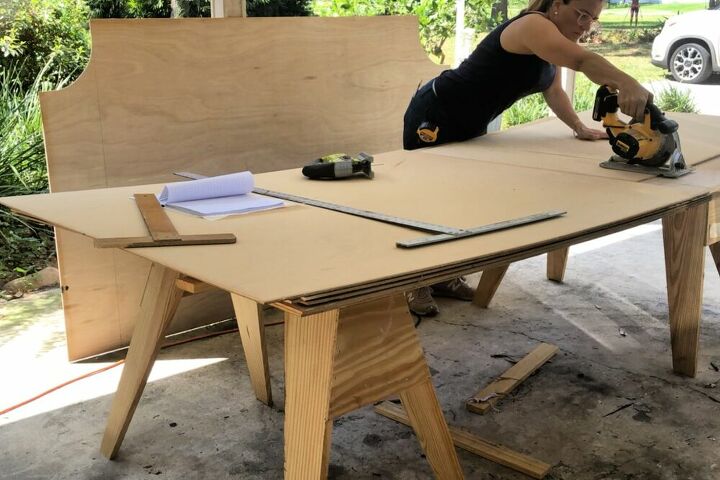
Then I transferred the pattern to plywood and cut it out.
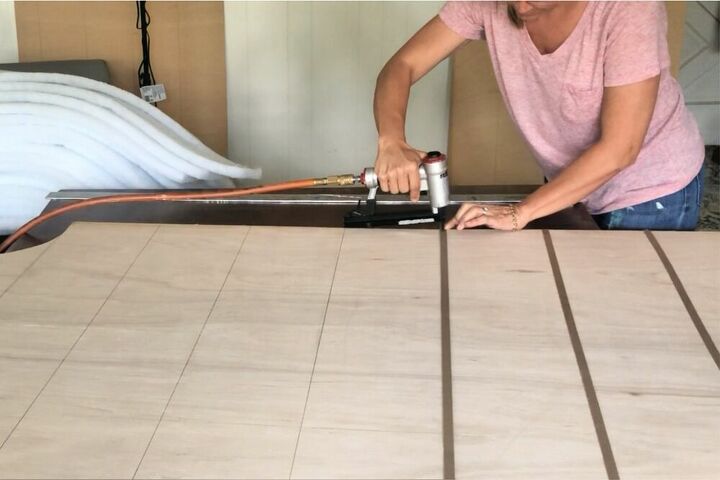
I measured the middle section of the headboard and evenly divided it into 8″ sections and drew pencil lines. I stapled cardboard tack strip on top of the pencil drawn line from bottom to top. The tack strip has two purposes. It provides a straight line to follow and it provides a tactile guide that can be felt through the layers of fabric.

I used 1×2 pine to frame out the back of the plywood and create some depth to the frame, and also create 4″ feet to bring my headboard to the proper height.
My headboard spans the whole 14′ width of my bedroom. So I had to make the headboard in three sections in order to be able to move it and handle it.
I created the curved corners with plastic flexible trim moulding from Home Depot.
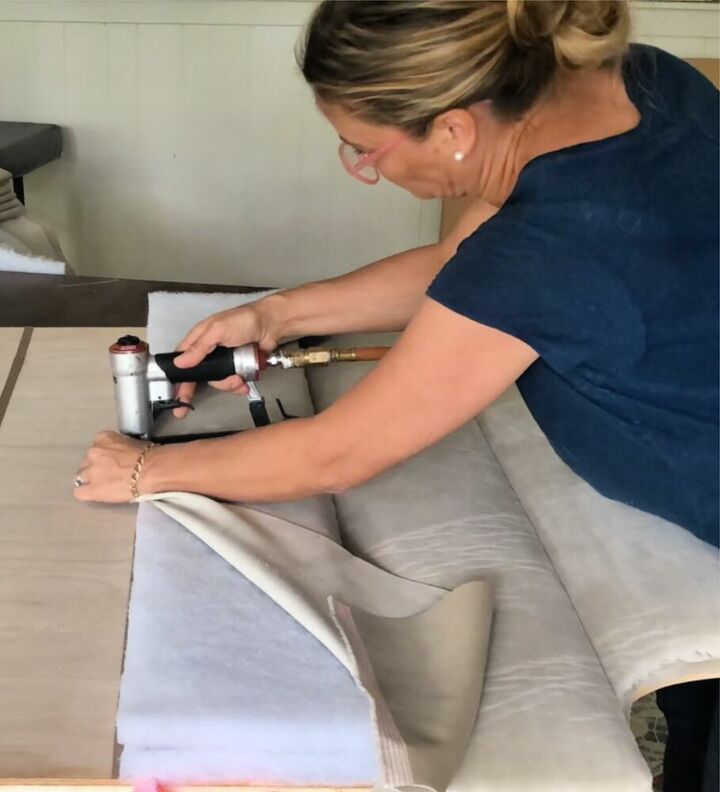
Start the very first strip of fabric on outside edge of the frame. Take care to make the first piece straight and staple the fabric all the way down the frame.(not pictured)
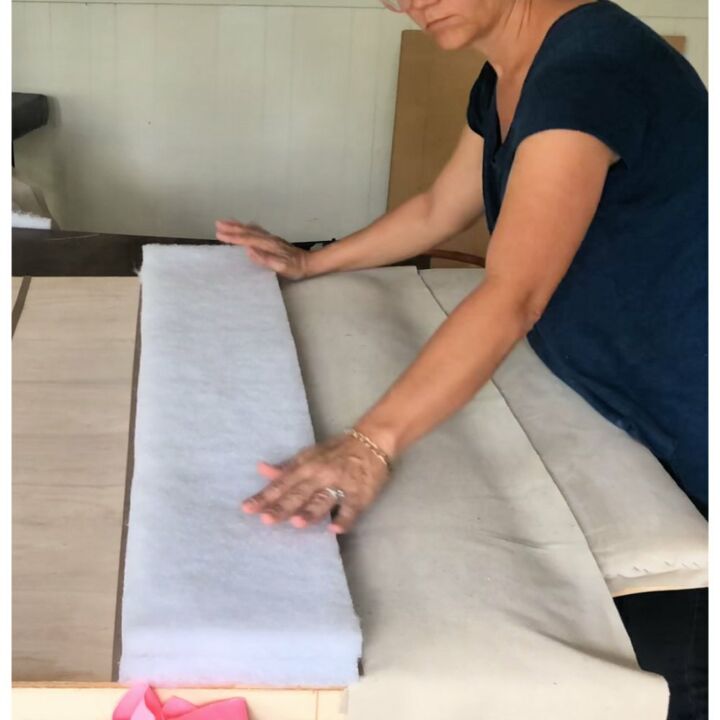
Place the Dacron between the tack strip and fold the velvet fabric over the Dacron and staple the fabric tight over the Dacron, stapling the fabric to the tack strip.
Feel for the tack strip as you move your staple gun to make sure you’re stapling into the tack strip. This will keep your seams straight.
After the first strip of fabric is stapled down, cut off the excess fabric so it lines up and reveals the tack strip underneath.
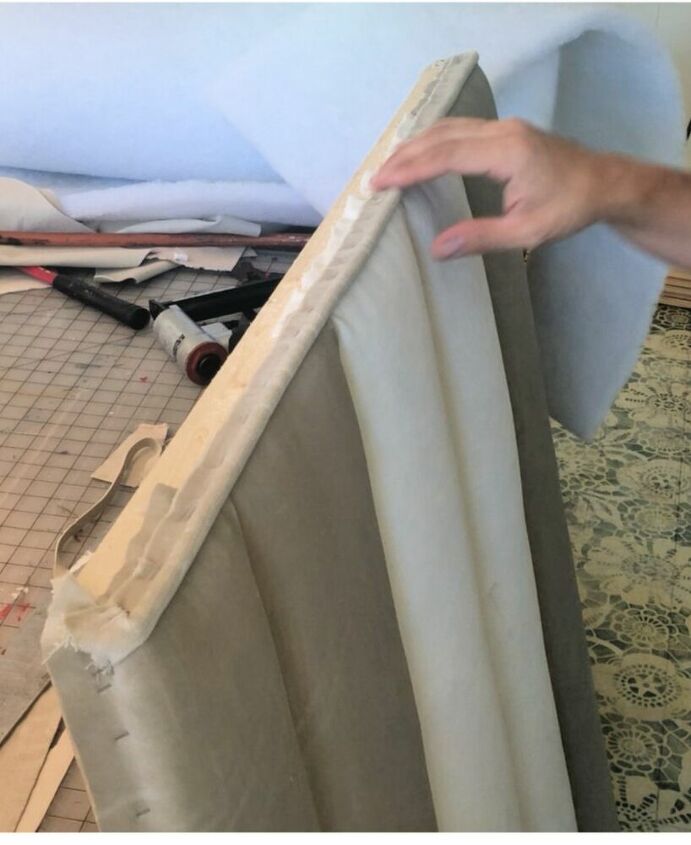
The last step is to finish off the top of the headboard. I boxed mine out with welt in front and back. I couldn’t get the fabric lay down smoothly over the curve on each side, so I opted to use welt in front and back. If you plan to make a rectangular shape headboard with no curves you can simple wrap your fabric over the top of the headboard and staple it to the back of the frame and be done. No messing with welt. But I had to complicate things and make curved corners.
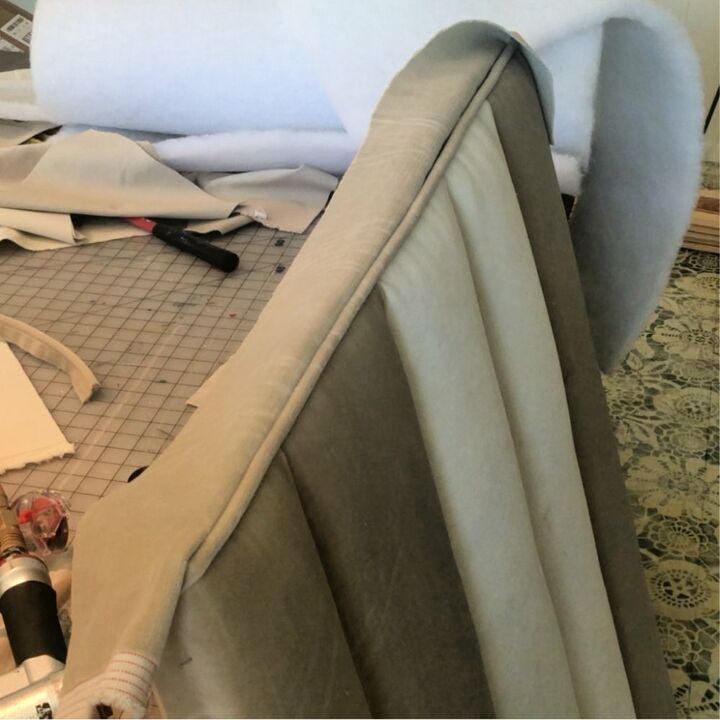
The last step is to attach one more piece of welt along the back of the headboard frame and install.
This tutorial is pretty detailed and has quite a few steps. If you plan to tackle a project like this you definitely want to watch the video and visit my site to see each step.
Resources for this project:
See all materials


Comments
Join the conversation
-
Thanks for showing the final product up front. Makes following directions so much easier. Looks great
-
Looks fantastic! Your upholstery work is spot on. Upholstery is difficult, but yours looks professional. Nice job.❤️


Frequently asked questions
Have a question about this project?
I’ve never done anything like this, but it looks great and my daughter who is 13 and very good at doing things like this wants a headboard so I think this is a great project.
Your staple gun looks like it was running by an air compressor but I couldn’t here one. What type of air compressor and staple gun are you using and do you need different staple guns for different size staples?
How did you measure and cut all your pieces but before you started? Do I need one those boards with all the little squares on them that you were doing your project on?
Thank you for sharing your headboard looks awesome.
Great idea but why is the headboard the length of your wall? How did you attach the headboard to the wall? How do you clean it, just vacuum? This is quite detailed but I assume one can make it any shape or style they want.
What type of fabric did you use?