


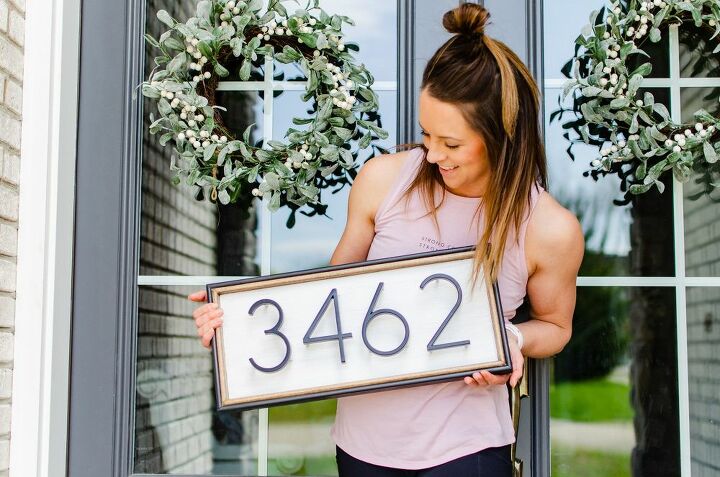
DIY House Number Sign
When delivery trucks are still struggling to find your house almost two years after moving in… you one hour DIY a house number sign to fix that problem!
I love the look of wood house number signs. Often i’ll see them with one solid board, one border or with a planter underneath. I wanted to take the concept but add my own twist. I decided that building two borders and making it multicolored was a great way to make it my own.
If you prefer to watch a video tutorial you can click over to my Instagram account and watch the process in my highlights under “House Number Sign.”

Materials:
One - 1 x 6 select pine board. Cut down to 18” (for a 4 number sign)
Two - 1.5 x 1/4in x 8ft.trim pieces (I had these leftover in my garage from our homebuilt but anything similar will work.
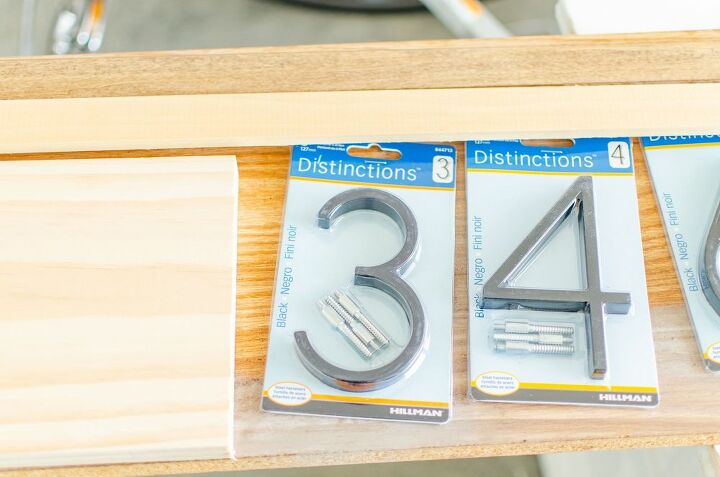
5 inch floating house numbers
220 grit sanding block
Paint or Stain of choice in three shades.
Wood Glue
Super Glue
Polycrylic
Hardware for hanging (I used these)
Tools Needed:
Miter Saw
Brad Nailer
Drill
Hole Punch Kit (optional)
Drill Press (optional)
This project is one hour hands on not including drying time for the paint, stain and sealer.
With my pine board cut down to size I started with 45 degree miter cuts on my trim pieces to make an inside boarder. When all 4 pieces were cut for the inside boarder I cut an outside border with the same trim.
Next it was time to sand. I used a 220 grit sanding block to smooth out any ridged cut lines and to smooth the face of the sign in preparation for paint.
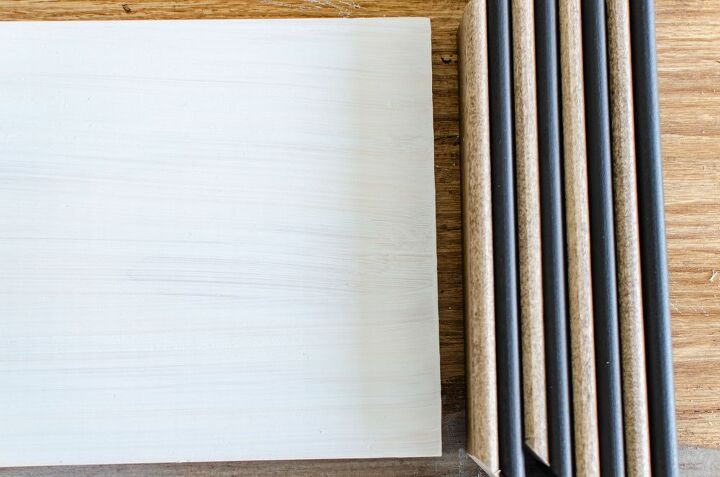
I wanted my sign to coordinate with the outside of my home so I chose white chalk paint, charcoal chalk paint and my favorite stain color.

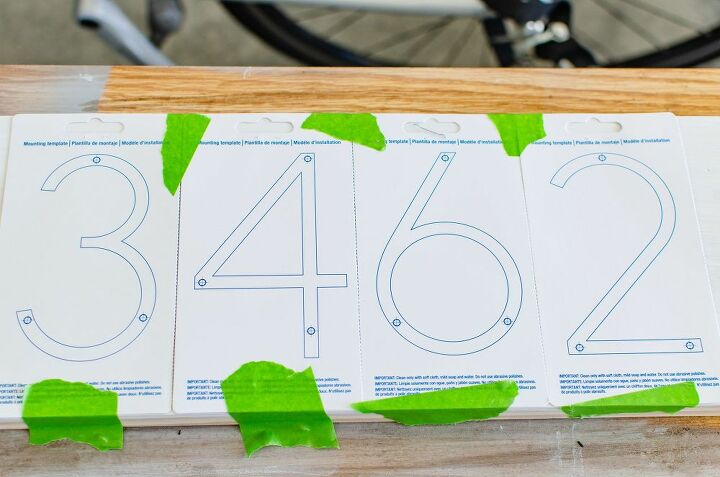
After the pieces were dry and before assembly it was time to punch out the holes for the house numbers.
I chose modern 5 inch numbers for this project. This particular brand came with a guide to help line up the numbers on the board for easy placement. I taped the guides to the board and used a punch kit to mark out the holes. The punch kit definitely isn’t required but I already had one on hand from a previous project.
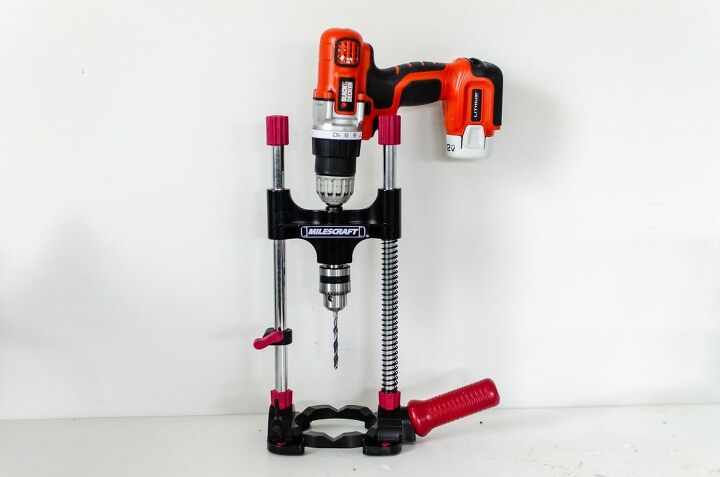
Once the hole marks were made it was time to drill. I set my drill up on a drill guide and used it to make my holes. This tool also isn’t required but it will give you complete control over the depth of the holes and will make them perfectly straight. Drill guides run about $30 and are a wonderful companion tool to have in your workshop. I highly recommend it!
Once the holes are made in the board for the house numbers its time to assemble the sign. I applied a small amount wood glue then attached the borders to the board one at a time with a brad nailer.
After the sign was assembled I applied the finish coat. My choice for sealing a project is Minwax polycrylic in clear matte.
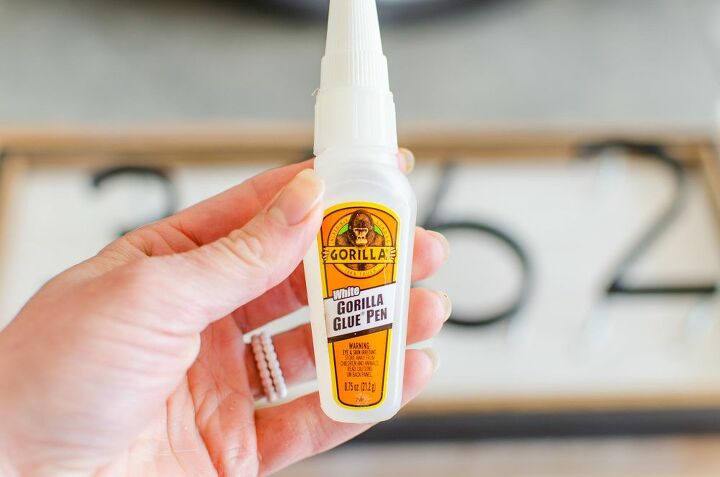
When the sealer is dry the last step is attaching the house numbers. I put 1-2 drops of gorilla glue into each hole and pressed the house numbers into place.
Since ill be installing my number sign into brick I purchased masonry hardware to attach the sign to my home.
This project took about one hour of hands on time, plus drying time for paint and sealer. It is the perfect project for a newbie woodworker and also makes a wonderful gift!
If you enjoy my content please join me on Instagram! I would love to connect with you!
Resources for this project:
See all materials


Comments
Join the conversation
-
You did a great job.. just thought for those who love the look .. but, don't have the tools to make the wood frame etc.
(like Me) Perhaps a picture frame would work without the glass. I have several oblong frames and you always find dome in Goodwell etc stores. Remove the print maybe paint frame and you are good go.. Use a floor tile or something weather proof for the backing - and glue the numbers on... you can place numbers vertically or horizontally like she did...and display near front door or yard in a prominent location... Just a thought but ....
I'm going to give it a try and let you know end result... :)
Thanks again.. great idea.
Marsha
-
I love this, but when I do it I will probably try to add a solar panel and back lighting... It's just hard to hide a solar panel, but I will try to think of how to do it!


Frequently asked questions
Have a question about this project?
Omg! This is great but do you have an instructional video for arms like yours?