


Hanging Vases

Summer is on its way and that means spending even more time outdoors. For me that also means creating an outdoor space that feels inviting and a relaxing space to hang out with the family. Decorating the outdoors can be so expensive! Since weather and seasons can be harsh on outdoor spaces it's important that whatever I put outside is either durable or removeable.
Living in a state with hurricanes and heavy rains I like to opt for removeable outdoor decor. This Hanging Vase DIY is literally the perfect solution for both beauty, budget and weather.
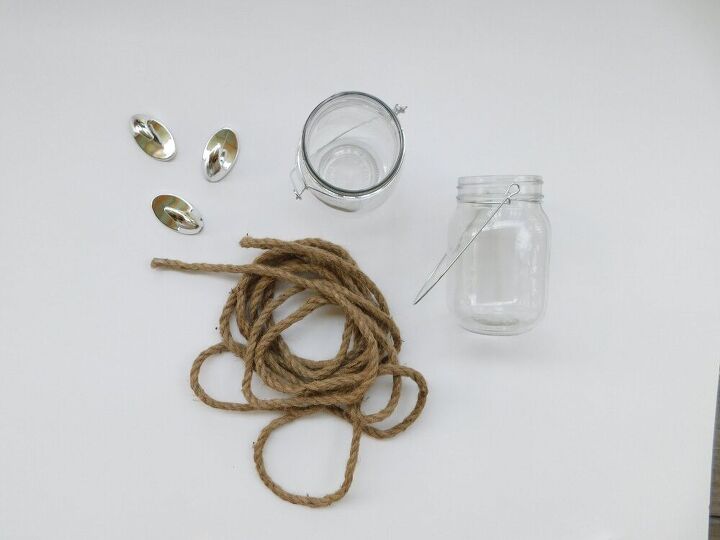
The materials for this project are easy to find and also really inexpensive.
- Glass jar with metal handle
- Nautical rope
- Nails or outdoor command hooks
- Hot glue gun & glue sticks
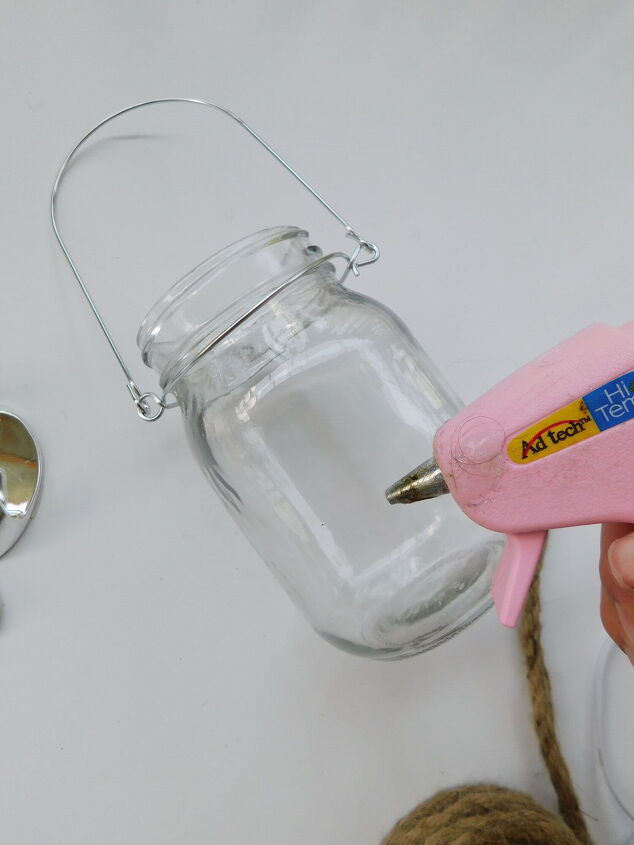
For the first step, plug in the hot glue gun and let it heat up. Once it's heated, place a large dot of hot glue onto the lower third of the glass jar. Quickly place the end of the rope onto the hot glue and hold in place until the glue is cool and the rope won't slip.
Keep the glue gun plugged in.
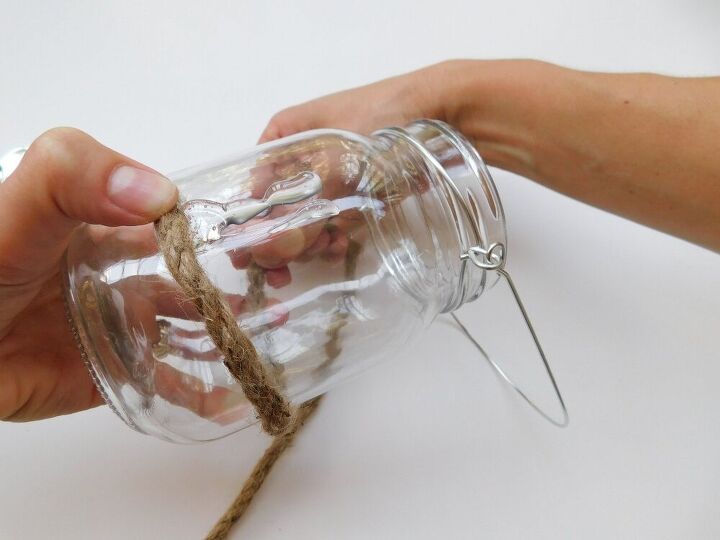
Wrap the glass jar with the rope. I wrapped by jar about 6 times with the rope so that the middle of the jar was covered.
Take the glue gun again and attach the top end of the rope to the jar. Again, hold the rope against the glue (carefully so as not to burn yourself) until the glue is cooled.
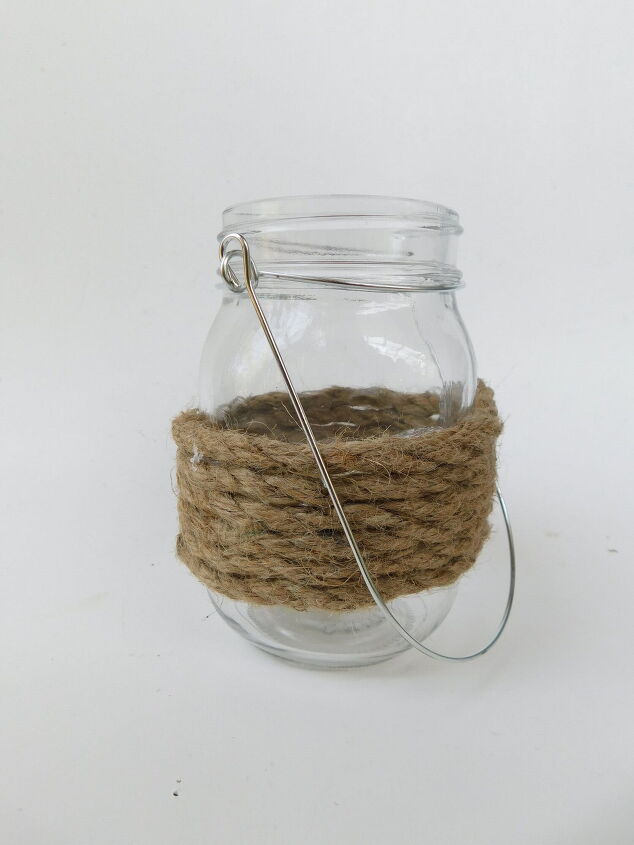
Unplug the glue gun.
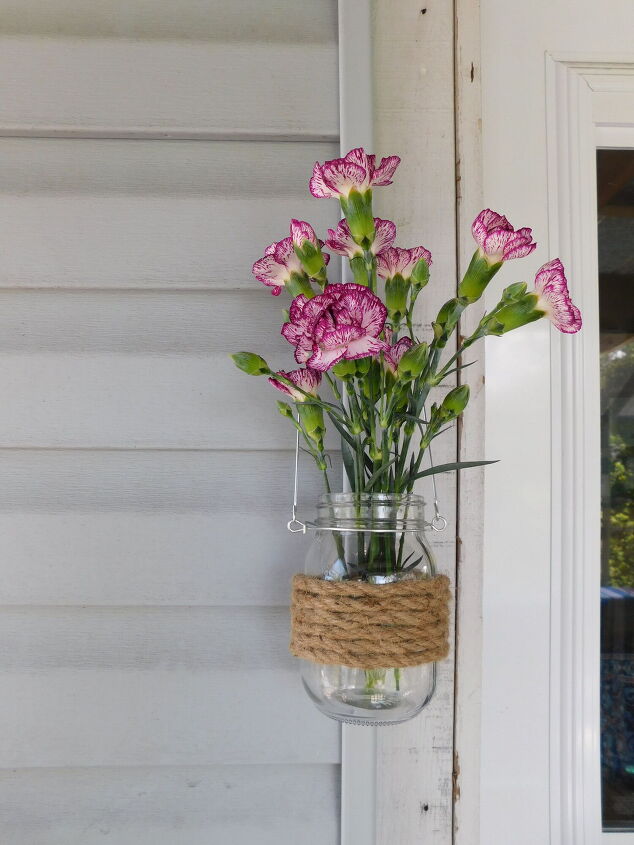
All that's left to do is hang! Use a nail or command hook to display one or multiple jars. Fill them with twinkle lights, fresh cut flowers or create a hanging terrarium.


Frequently asked questions
Have a question about this project?
Where did you get wire hanger.