


DIY Dupe Door Mat
I have been seeing some cute door mats around Pinterest and Instagram, so I thought I would give it a try making one for much less cost! Why not make one of your own, using supplies you probably already have on hand (and may have forgotten about).?
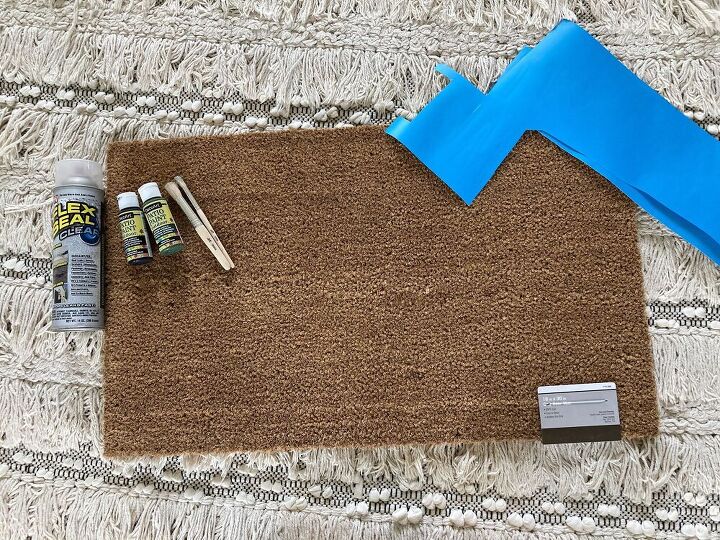
Coir door mat (home depot, target, amazon etc have these), paint (I use patio paint outdoor by DecoArt, but you could use other outdoor paint or even acrylic paint), stencil brush (this set is from home depot), a stencil (I made mine on my cricut, but you can use any stencil(s) you have on hand), a sealer (any outdoor sealer can be used-I have Flex Seal in clear, but you can also use Krylon outdoor sealer spray or Varathane paint on outdoor sealer), and (not pictured)-some cardboard for transporting.
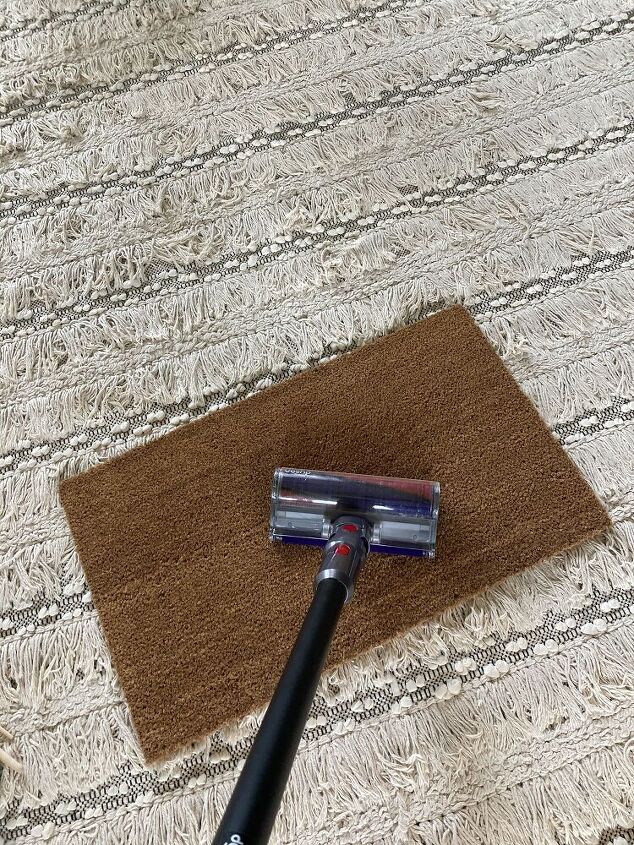
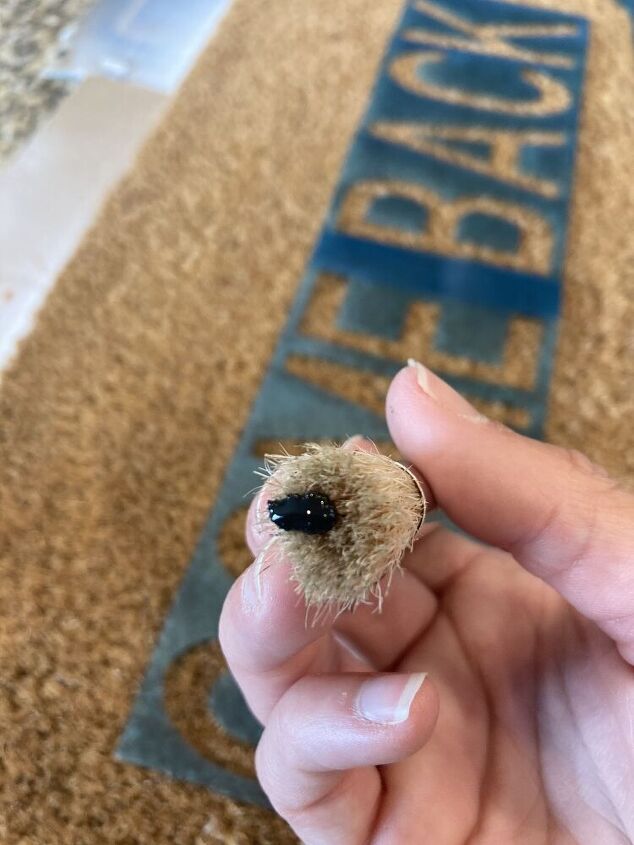
I like to vacuum off my door mat first to try to get as many of the loose coir pieces off, as possible.
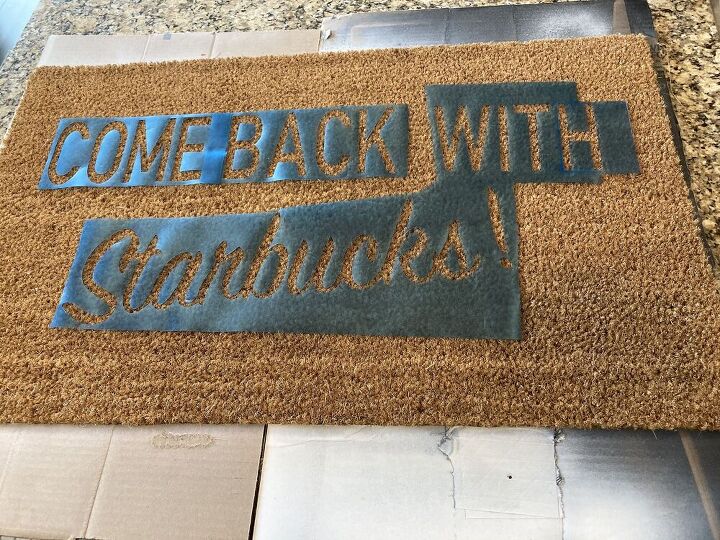
Place your stencil(s) on your door mat and move around until in desired spot(s). Push down stencil vinyl firmly to get it to stay in place the best you can (it will still look like it isn't lying flat, it's normal). If using store bought stencils, once in place, use masking tape or painters tape to hold in place.
There are a few ways you can apply the paint to your brush. I like to squeeze a pea-sized amount onto the brush itself, but you could also squeeze a little bit directly onto the mat itself.
In order to get the best results, simply dot your brush straight up and down. Do not try to brush side to side or at an angle.
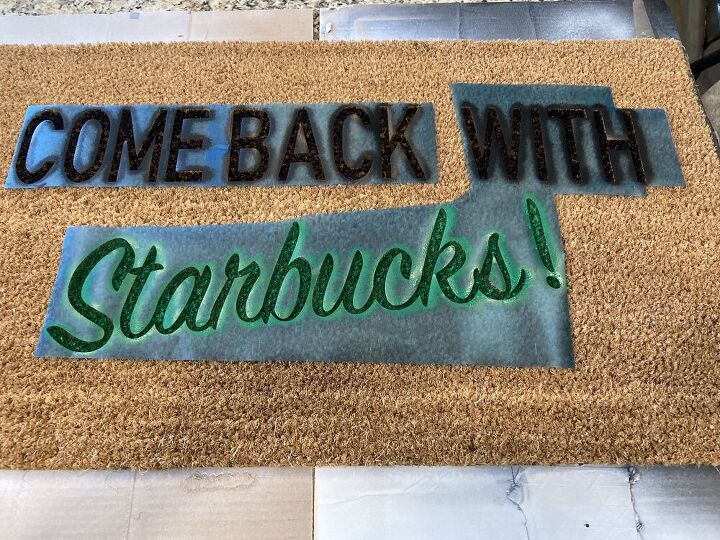
You'll want to paint on 1 coat, let it dry & then paint on a second coat. Once it is all painted, leave the stencils in place and let it dry.
There are a few different types of outdoor sealers you can use for this project: Flex Seal Clear (it leaves a rubbery top coat), Krylon Outdoor sealer spray (it is uv resistant) or you could use a paint on type that Varathane makes!
Once your paint is completely dry, using some stiff pieces of cardboard, transport your mat into a well ventilated area. Grab some smaller pieces of cardboard or paper bags you have lying around to help cover up the areas of your mat you do not want the sealer applied to. Once you are ready, apply 1 coat of your sealer. Once it is dry, apply another coat.
*keep your stencils still intact*
Once your second coat of sealer has dried for a short time, you can remove your stencil(s).
Once you've removed your stencil(s), you need to let your door mat completely dry over night. Once it's dry, you can place it in its designated spot!
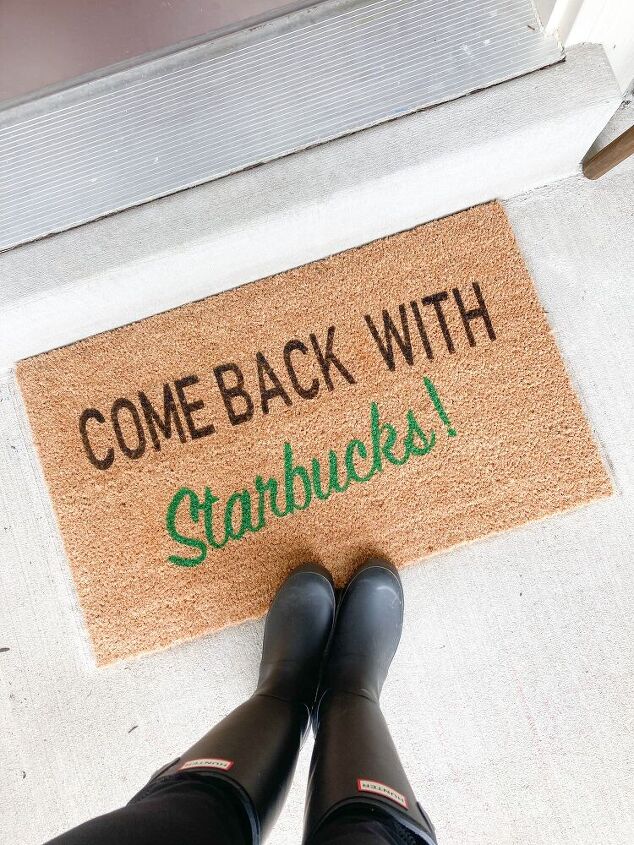
Now you get to enjoy (and show off) your DIY Dupe Door Mat!
Resources for this project:
See all materials


Comments
Join the conversation
-
So cute! Love it.
-
I love this project!!! What is the font you used for “Starbucks”? 😊


Frequently asked questions
Have a question about this project?
Which font did you use for the stencil?