


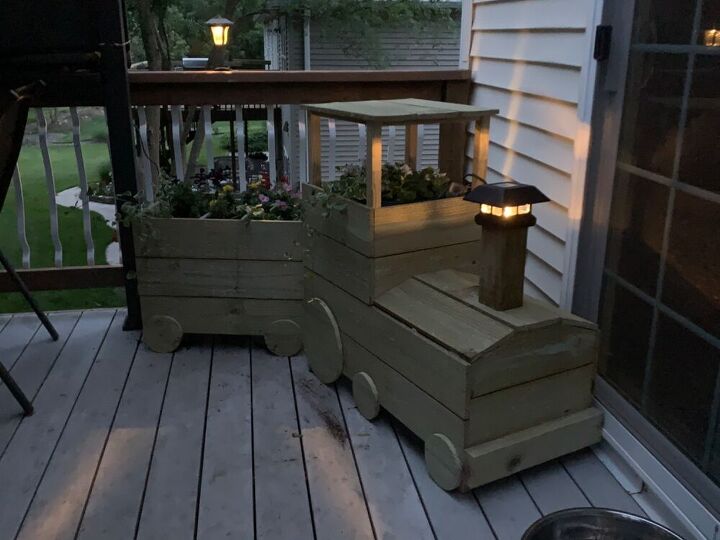
DIY Train Planter From Fence Pickets

Rather than the typical wagon or wheel barrow planter, why not make a fun train planter?
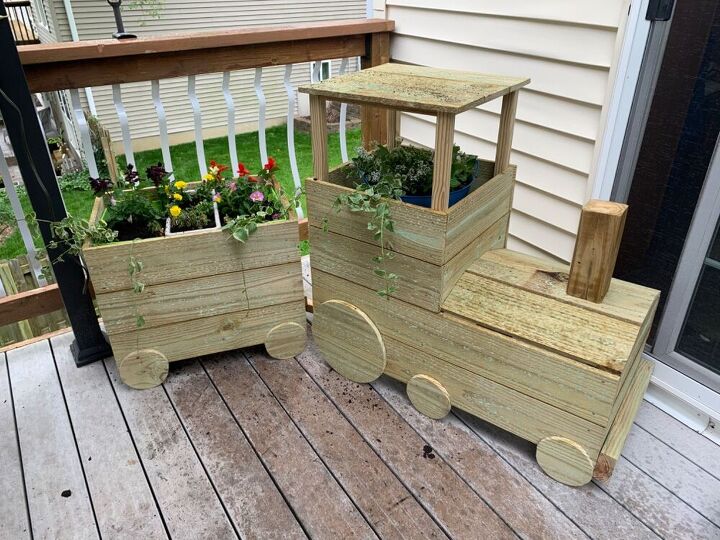
My mom recently asked if I could make a cute wooden planter to help fill in one of the couple open spaces in her yard or on her deck. My dad being an avid train lover, this is what I came up with.
For this project, you will need:
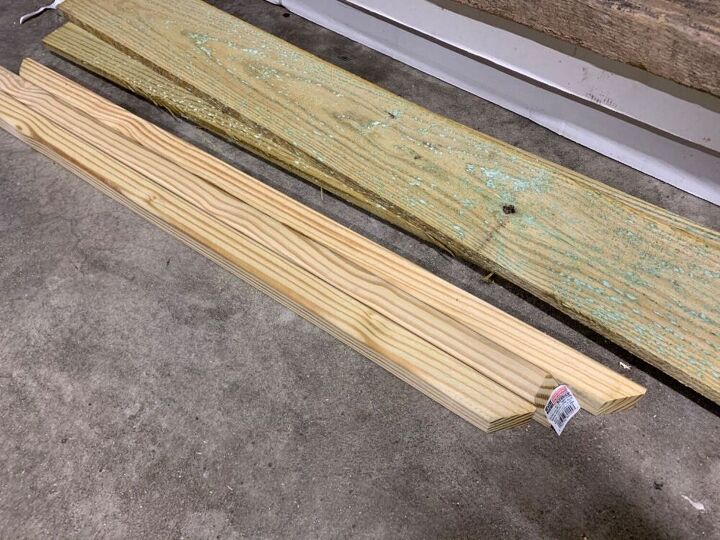
-(12) 5.5”x6’ fence pickets ($1.50/ea for pressure treated, or cedar for $3.25/ea)
-(7) 3’ 2x2 balusters ($0.80/ea)
-scrap wood pieces (I used some 2x4, 1x2, and a scrap 4x4 piece)
-galvanized 1 1/2” nails (plus a few 1”)
-outdoor wood glue
Optional:
-a few outdoor screws (and screwdriver)
-a solar 4x4 post cap with light ($6)
-1/4” staples (and staple gun)
Tools used:
-compound miter saw
-jig saw (to cut the wheels)
-hammer
-bar clamps and small clamps
-speed square
-compass or round objects to trace for wheels
Cut all pieces, starting from the flat end of each picket. (Some of the scraps from the dog-eared end can be used for wheels)
Cuts below are listed by each picket:
-(2) 35.5”
-(2) 35.5”
-(3) 23.5”
-(3) 23.5”
-(3) 17.75”, (1) 16”
-(3) 17.75”, (1) 16”
-(3) 16”, (1) 17.75”
-(4) 16”
-(4) 16”
-(3) 18.25”, (1) 16”
2 remaining pickets are for the wheels and support slats
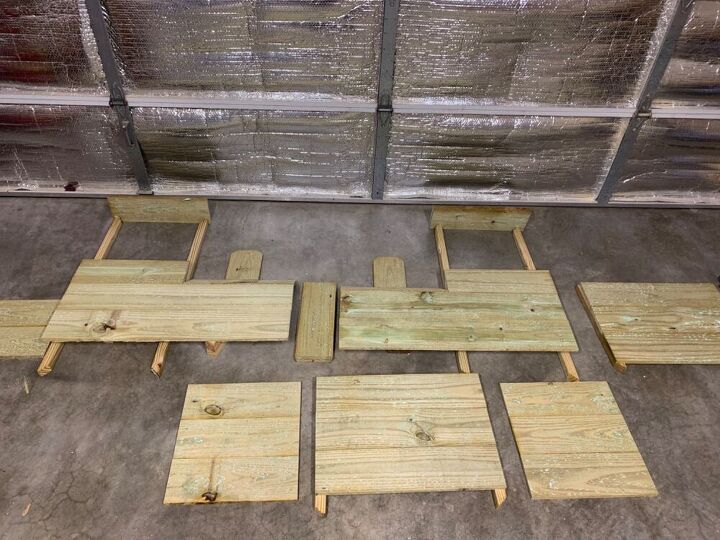
You should have the following pieces:
-(4) 35.5” (engine long sides)
-(6) 23.5” (train car sides)
-(7) 17.75” (engine cab sides, front top)
-(14) 16” (engine/car front and backs)
-(3) 18.25” (engine cab top)
Cut two of the 2x2 balusters in half (18”). (It is much cheaper to buy PT balusters than it is to buy 8’ 2x2s, but they do have beveled ends. I used the bevels to my advantage and angled them so the wheels would mostly cover the posts.
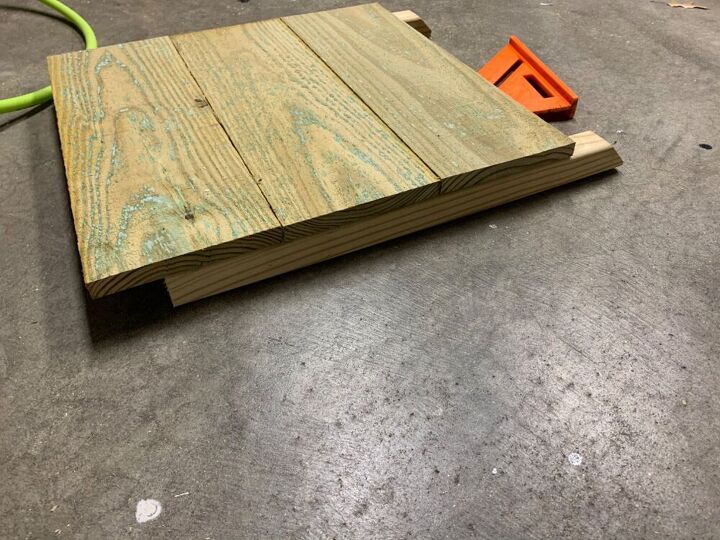
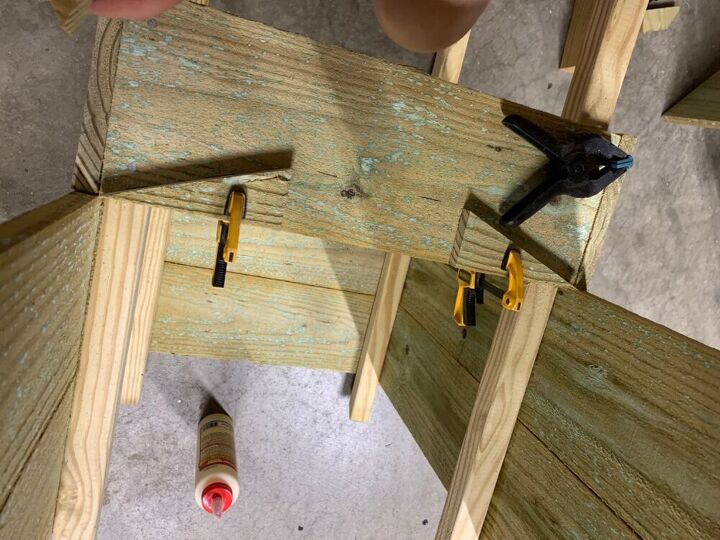
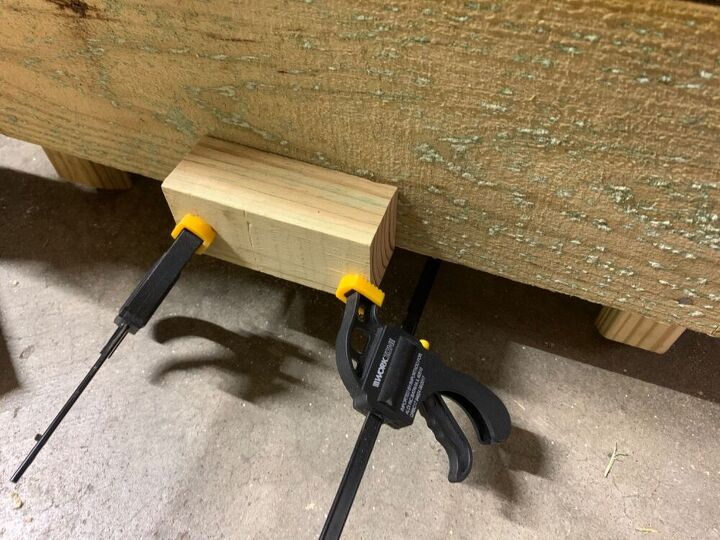
Attach (3) 16” pieces to (2) 2x2s as shown in the picture using wood glue and 1 1/2” galvanized nails (2 nails in each end of each board). Repeat with another set of 16” planks and 2x2s. This is the train car front and back.
I wanted the pickets up off the ground, while still having good frame support, so I placed the 2x2s down about 3” from the bottom plank. If you want the train frame sitting on the ground instead, make the 2x2s flush with the pickets.
Next, attach (3) 23.5” pickets to each side of the car front and backs, lining up the ends to be flush with the outside of your 16” boards. You should now have an open bottom box.
The engine is slightly trickier to assemble, because of the split and you can’t attach the front pieces (which would keep it square) until the rest is together. To hold the sides in place, I used a bar clamp to hold a 16” front piece in place while assembling the rest of the engine.
Start buy cutting one beveled end off 4 balusters, making sure they all are the same length.
To make the engine sides, attach (2) 35.5” planks, and (1) 17.75” plank a trimmed 2x2. Again, start the bottom plank 3 inches up from the beveled end, and this time, set the 2x2s in the thickness of a 16” board so you have room to attach these later. Attach another trimmed 2x2 to the front end of the 17.75” board, set in the thickness of a plank, making sure the board is square and parallel to the other 2x2, and the ends are even. Repeat for the other engine side, making sure to miss or this one to the first.
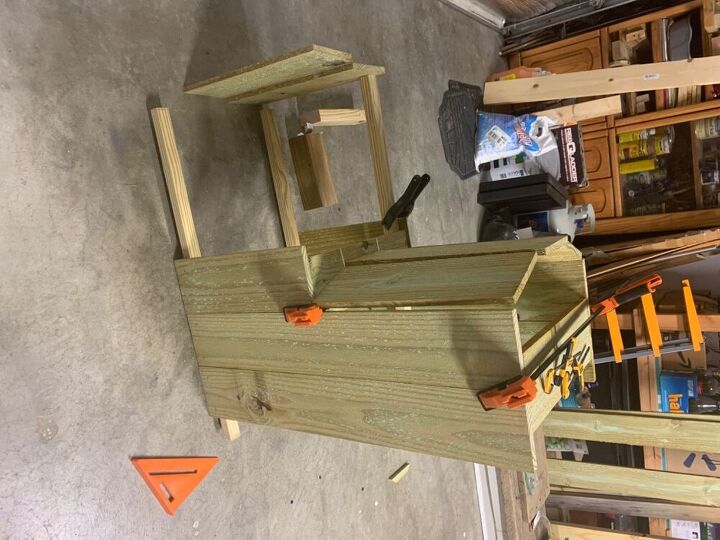
Line up (3) 16” planks on the back of the engine sides (staying level with the side planks) and attach to the 2x2s. To help keep things square while you are attaching the back, clamp one of the 16” pieces to the front of the engine (see picture).
Attach another 16” piece to the front of the cab 2x2s, level with the top of the 17.75” pieces on each side.
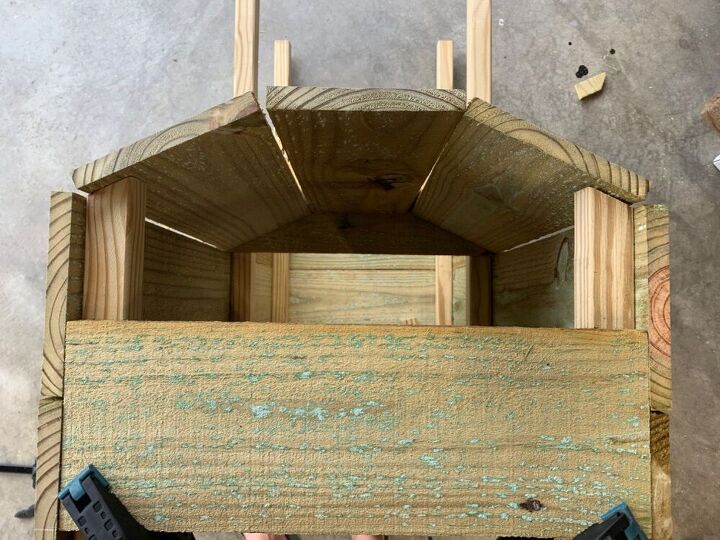
Fence pickets are not all the exact same size, so to find the angle of the engine front pieces, you will need to put three 17.75” planks in place and measure (ours was about 23°). Cut the beveled ends on the remaining 2x2 to fit the angle, then cut each end long enough to hang below the bottom side board 3”. Attach the 2x2s to the side planks, remembering to leave a plank thickness at the front.
Place another 16” plank flush with the underside of the center plank and mark the angles of the diagonal side pieces. Cut the corners to fit. Attach it to the 2x2s, along with another 16” piece below. (These are not level with the planks on the sides. You can make them level if you wish and do not want a number piece on the front, but you will need an extra 16” plank to do so.)
You can use the trimmed corner pieces from the previous step on the cab side as support for the top planks. Attach the piece with your short nails, along with a scrap piece for the center plank.
Attach the engine center and diagonal pieces to the front corner 2x2s and the surrounding planks.
Attach another row to the cab of the engine. ***I chose to do this after the rest of the engine was assembled so it was easier to mark and attach the diagonal pieces, and it also served as a sort of final adjustment to keep things square. Also, if you plan to take plants in and out of the engine, I recommend only going 3 planks high at the back of the engine, instead of 4, or make the top removable.***
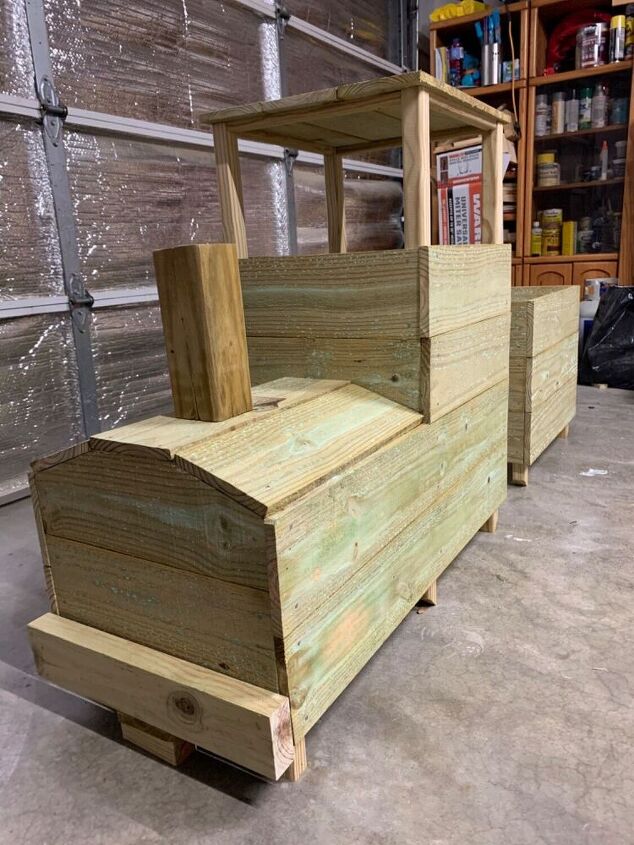
For a “bumper”, I attached a 2x4 (cut to the outside width of the train, ~17”) to the front. Again, you could use another 16” picket piece instead if you want to keep it flush.
I went back and forth on making an open top smoke stack from plank pieces, but in the end decided to use a scrap piece of 4x4 and attached with nails through the bottom.
For the top of the cab, cut scrap pieces to fit between the 2x2s (I used 1x2s). Attach the 18.25” pieces centered across the 2x2s, with your scrap supports underneath.
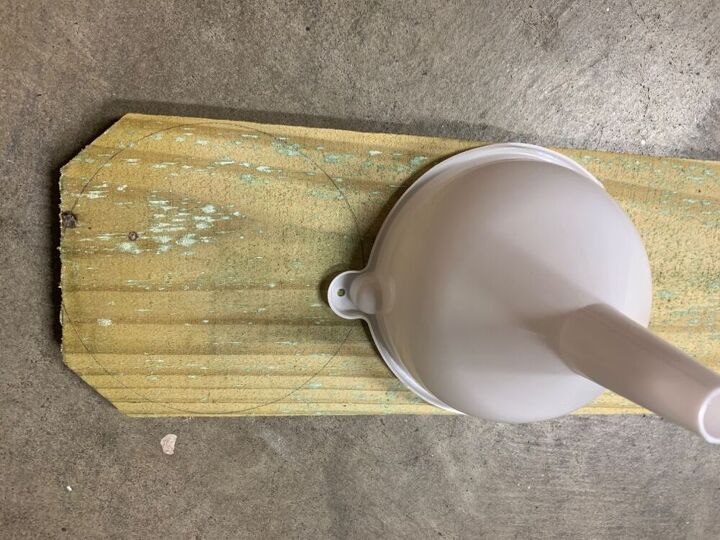
On the scrap picket ends and remaining 2 pickets, draw out 8 circles the diameter of one picket width (~5.5”). I had a funnel that was the perfect width for this. Keep them close together, but leave enough space for the jig saw blade between them.

You will also need two large wheels, cut from a double width of pickets (~11”).
cut all pieces with a jig saw and sand edges lightly.
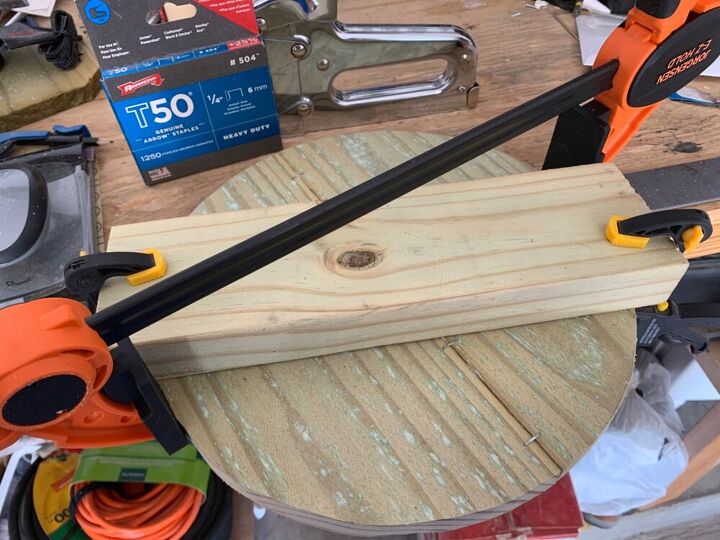
To hold the two parts of the big wheels together, glue and clamp them. You can also use staples, or just make sure to place nails in both halves when you attach them to the train.
Nail the wheels in place using short nails. I placed the wheels where they would cover the bottoms of the 2x2s.
OPTIONAL:
If you want to attach the cars together, cut small scrap pieces to mount to the bottom back of the engine and the front of the car. Drill holes through each end of a longer (mine was ~8”), skinny scrap piece, and loosely screw the piece to the bottom side of the “hitch mounts”. By keeping the screws loose, you’d engine and car can move around some while remaining attached to each other.
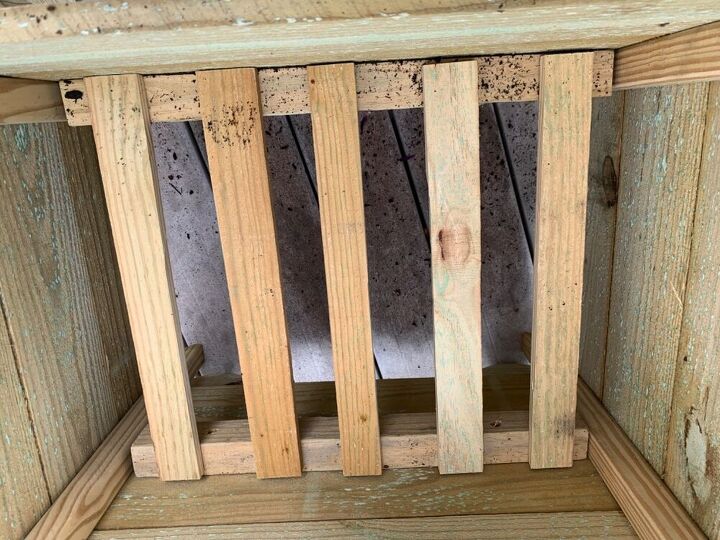
For the final step, attach scrap boards to the inside of the engine cab at your desired height (mine are at about 9” below the top). Use some of the remaining picket pieces as support slats to run between the attached rails. I cut the planks in thirds lengthwise to give me more slats and spread them out. You could also build a more solid bottom if you want to put your soil and plans directly in the train. My mom wanted to be able to move plants around, so we set plastic planters and bins on top of the slats.
Plant and enjoy!
For added fun, we bought a solar post cap light to put on top of the smoke stack. Completely optional, but does look pretty cool!
Resources for this project:


Comments
Join the conversation
-
I love this and plan on making one this spring. I'm also going to try to make a fire truck.
-
I agree - Can we print these instructions. I would love to send them to my grandson. He lives in an area with lots of trains.


Frequently asked questions
Have a question about this project?
Great job! You are a terrific daughter. 👍
How do I put up the porch railing in the back ground cheaply ,what supplies and how to do it ? Thankyou
How can I print out these instructions?