


Newspaper Tubes Geometric Design Wreath
Have you ever been inspired to make something by what you saw on tv? I know I have! Have you seen "Making the Cut" on Amazon Prime? I love shows like this! So much creativity and talent! Well, on one of the episodes, there was a fashion show with the models stepping through a prop or hologram of lines in a geometric open pattern.
It was so cool! Immediately I thought the design would make a snazzy looking wreath! Wow! Just hear me out! Are you tired of seeing the same old, same old, round wreaths when it comes to decorating your door or wall? As an alternative, why not create a fun geometric design wreath using newspaper tubes. That's right, recycle your newspapers into lots of tubes - and then, transform them into an adorable geometric design wreath!

Take several pages of a complete newspaper section like the style or metro section and fold in half. Fold again, vertically into three sections. Cut out on the vertical folds, giving three strips per page.
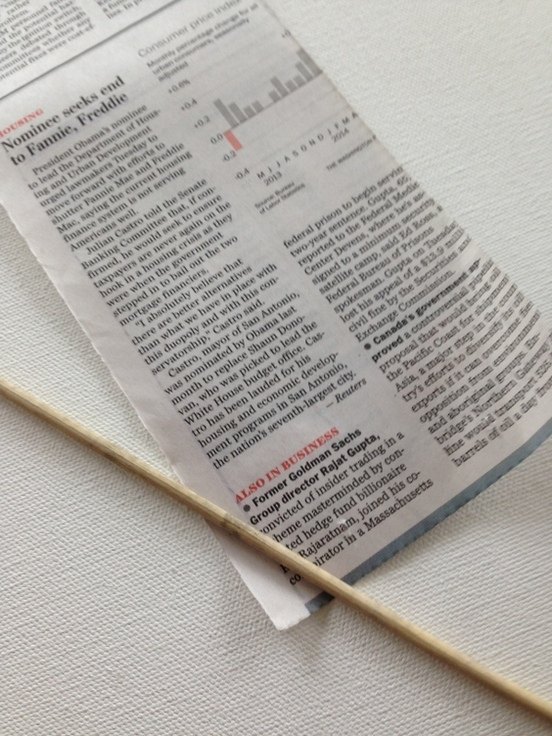
Then, take a thin skewer stick and place it on the corner edge of paper at an angle, as pictured. Place the end tip of the paper over the skewer and start rolling the paper with fingers pressed down on the table first.
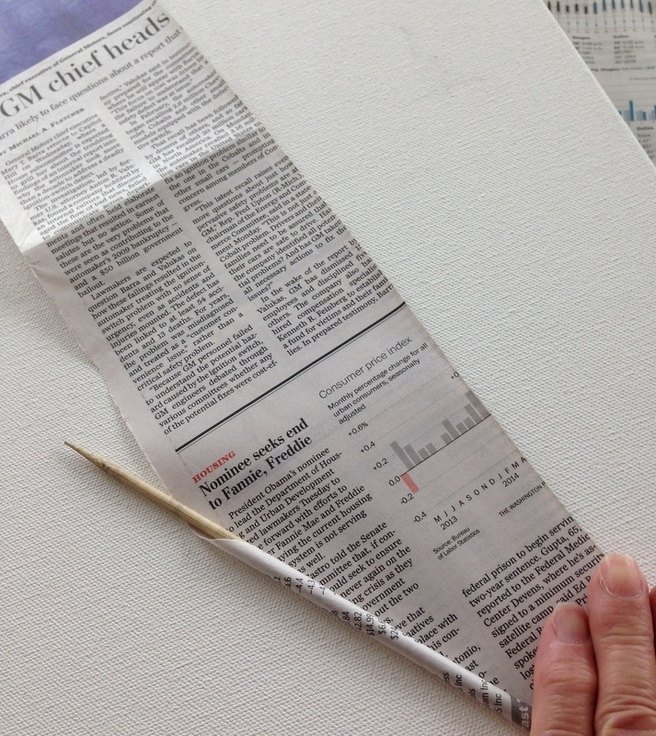
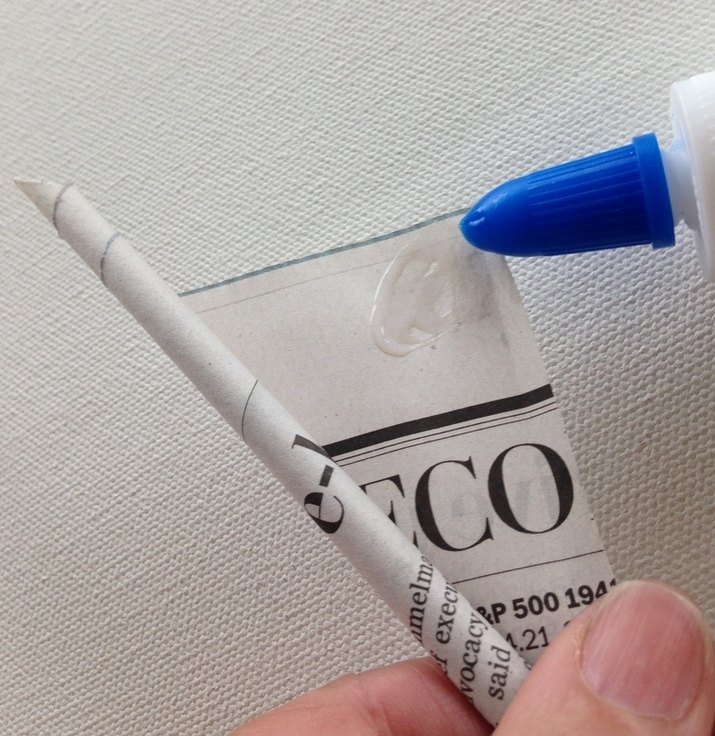
Once you've started rolling the paper, lift up the tube so your left fingers are controlling the roll while your right hand is rolling the stick and tightening the tube. Just before finishing the roll, add glue to the corner end tip and continue rolling until reaching the end to seal. Be sure to remove the stick.
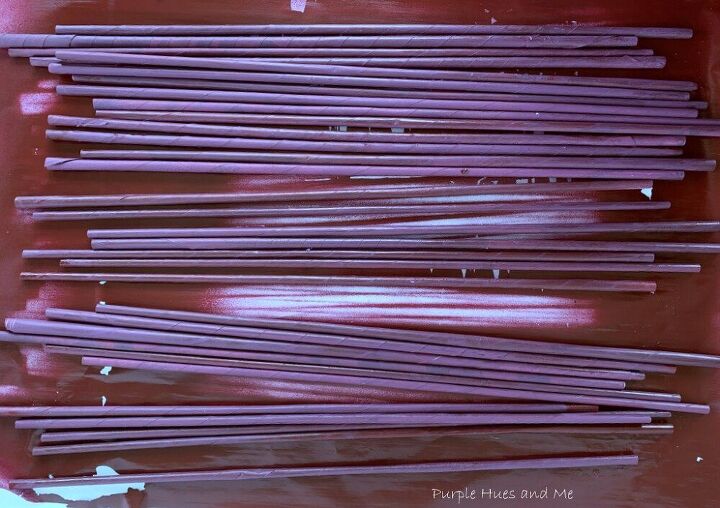
You will need thirty-six tubes to make nine squares (four tubes per square shape.) Spray paint the tubes outside on parchment paper and let dry. Then cut down each tube to measure 16" long. You may need to add additional glue to seal the paper if it loosens while cutting.
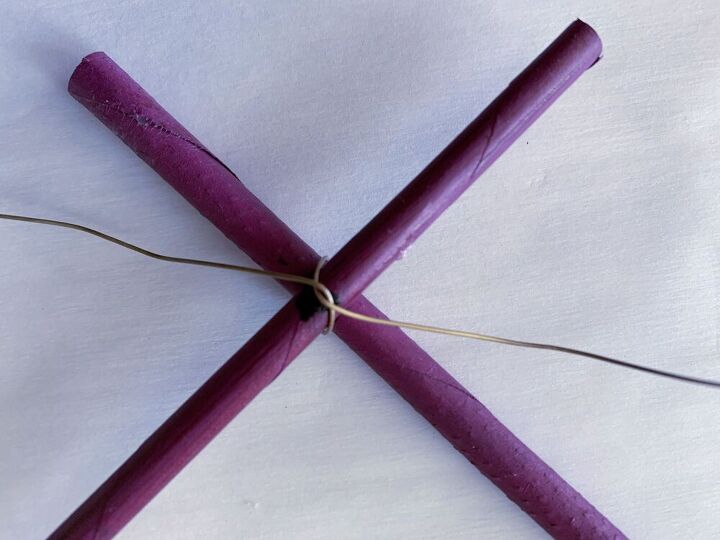
Next, mark each tube 1 1/2" from both ends with a magic marker. Hot glue the tubes at the marks, creating a square. There should be about one and a half inches extending from where the rods intersect.
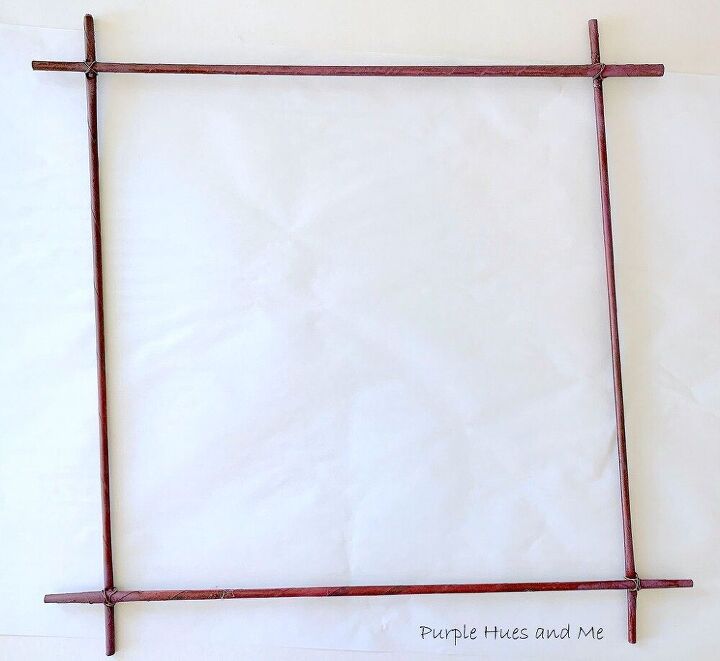
Then cut off four, 6" pieces of thin floral wire for each square set. Wrap wire around tubes where they intersect, twisting ends together and cutting off excess wire. This helps to make the squares stronger and secure - and less flexible. Paint the wires the same as the rods to blend in and less noticeable.
Lay a tube square down straight. Then lay another one on top directly in the middle at an angle. And the next, slightly to the left or right - trying to keep the end "X's" (rods) evenly spaced on the angle in a decorative pattern. Apply dabs of hot glue where the rods meet on each layer.
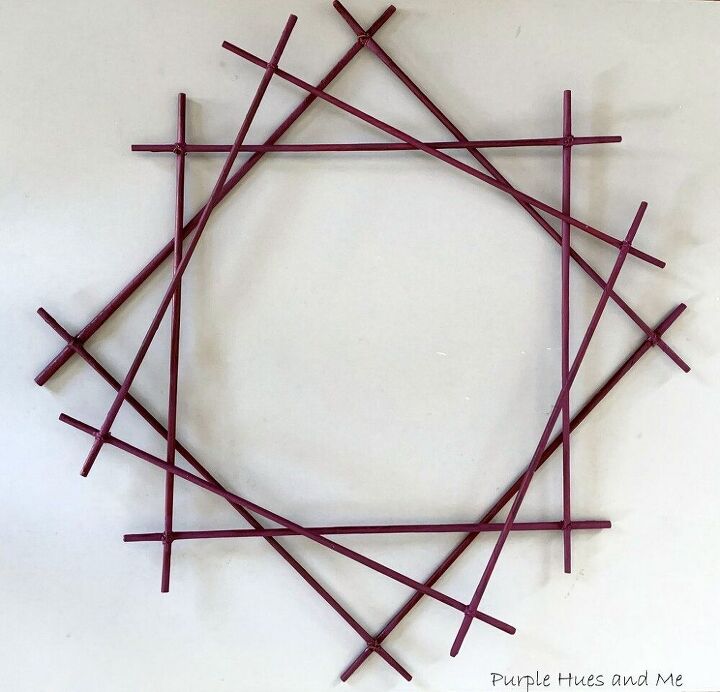
Continue adding the tube squares, trying to keep the rod ends where they intersect ("X's) evenly spaced in a decorative pattern . . .
gluing in place where the rods touch with each new layer . . .
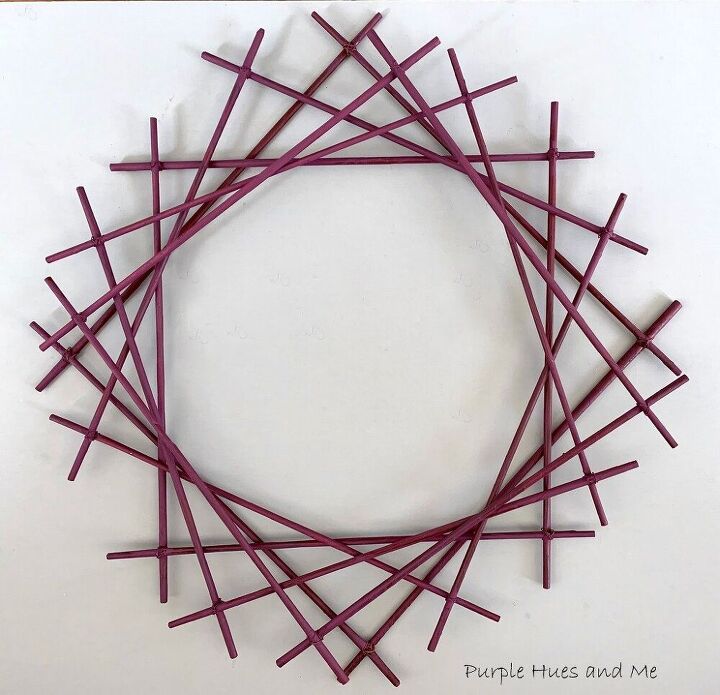
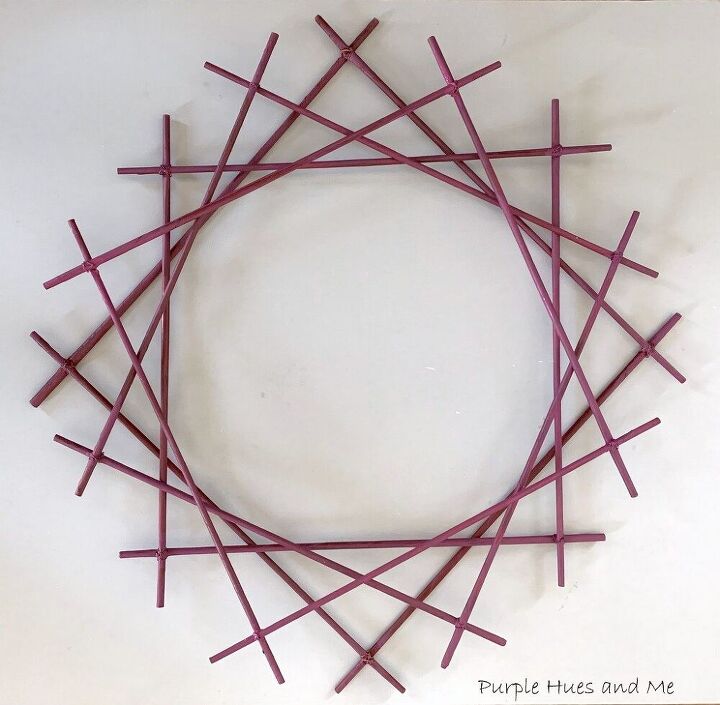
until all the square tubes are placed on top of each other and glued down.
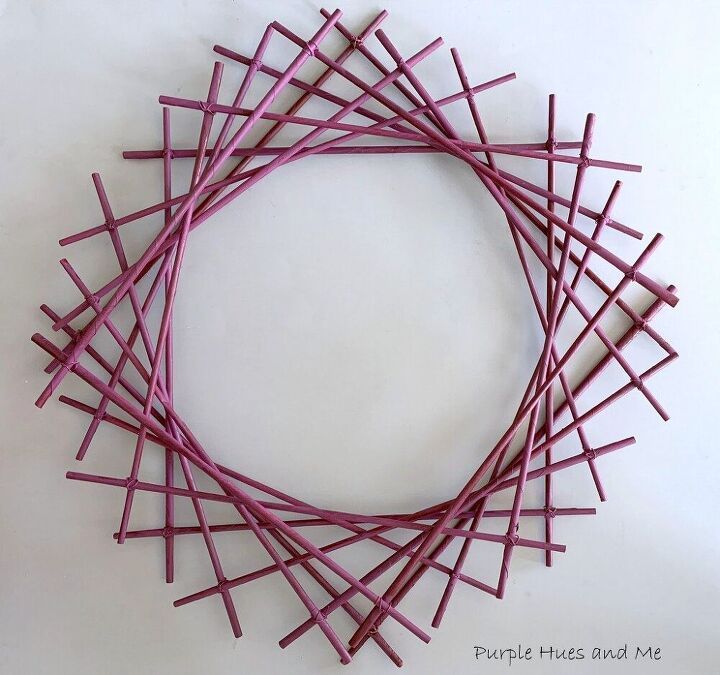
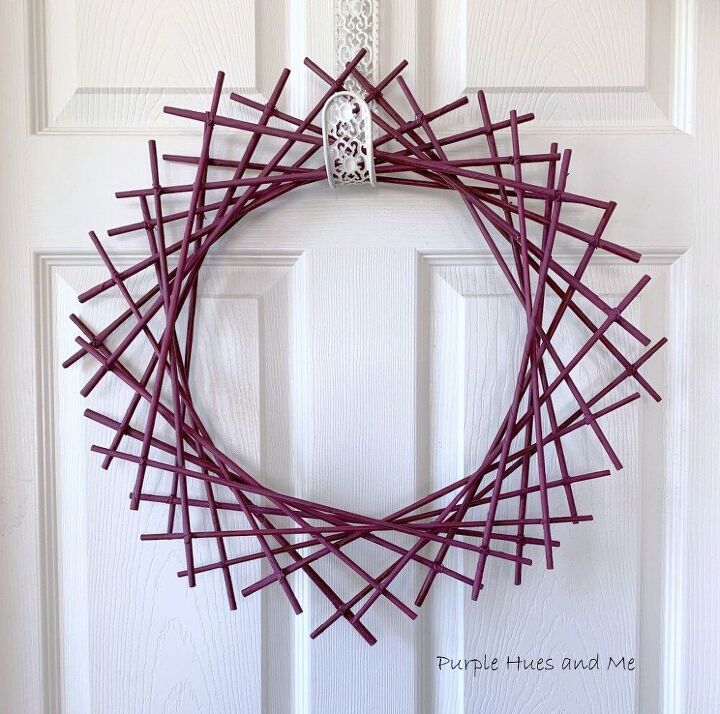
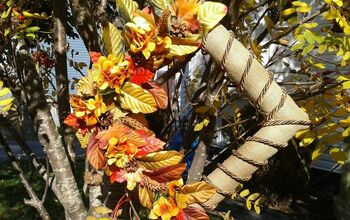
This geometric design wreath looks cool plain . . .
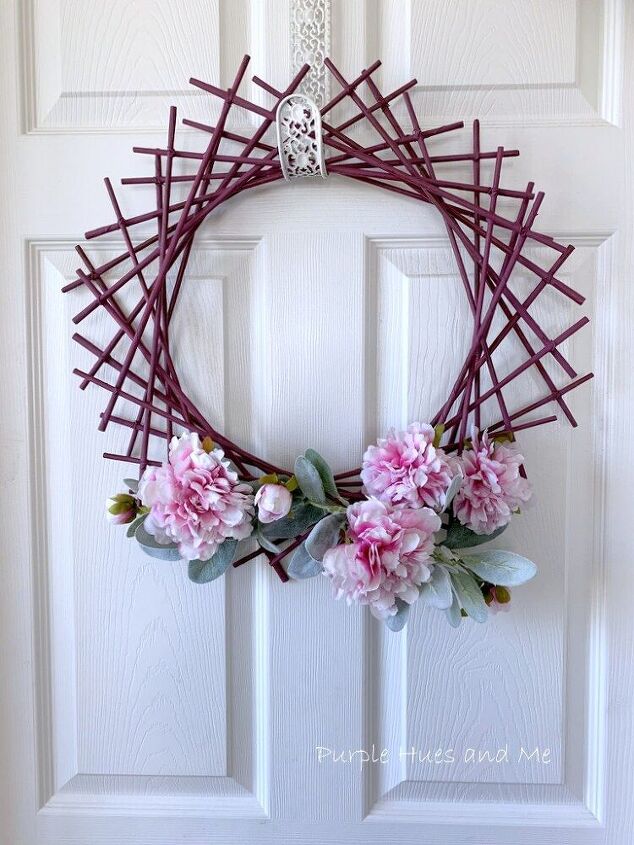
but prettier with faux flowers and stems added! How cool is this!
Resources for this project:
See all materials


Comments
Join the conversation
-
Thanks so much - I might just try a wooden knitting needle, too! I love the geometric look of your wreath, the color, and the ability to come up with different looks!
-
I always enjoy seeing your projects.


Frequently asked questions
Have a question about this project?
How may I print this project?
I was thinking, how about using colorful pages from magazines?