


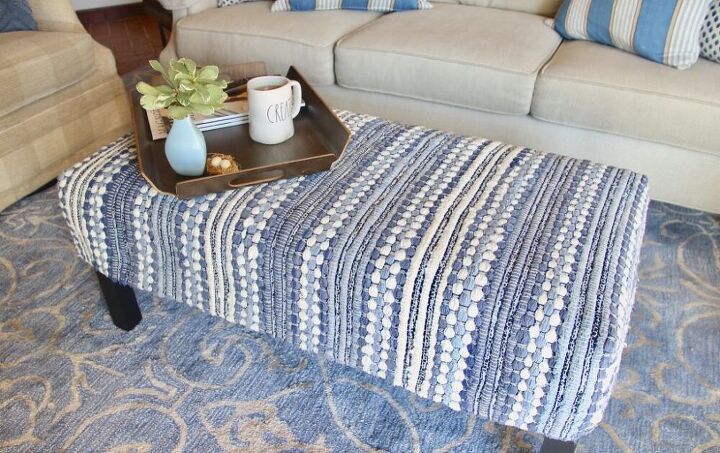
DIY An Ottoman Slipcover -- From an Throw Rug!
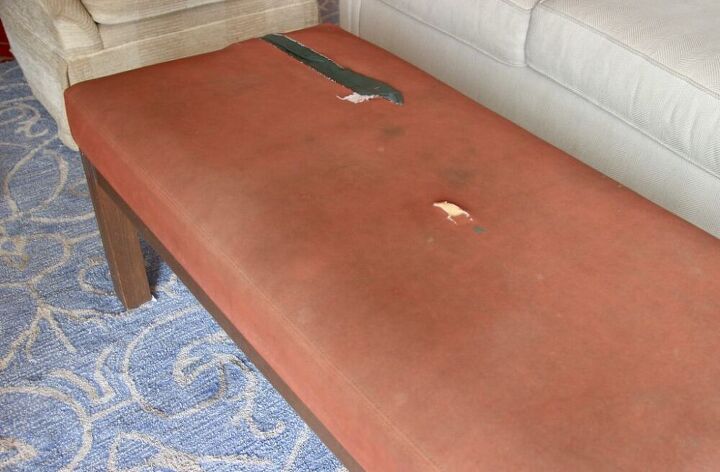
Do you have a tired, worn ottoman, foot stool, bench, stool that needs some love? Make it a slipcover out of a throw rug. I made mine from a new rag rug. Easy peasy - pinky swear! With a rag rug you already have all the straight lines waiting for you.
Materials you will need:
- Your bench or ottoman or footstool
- A throw rug to cover
Supplies:
- Upholstery thread to match
- Upholstery or heavy needle
- Scissors
- Straight pins or binder clips
- Ruler
For more detail about figuring the size rug you would need jump over to my blog post.
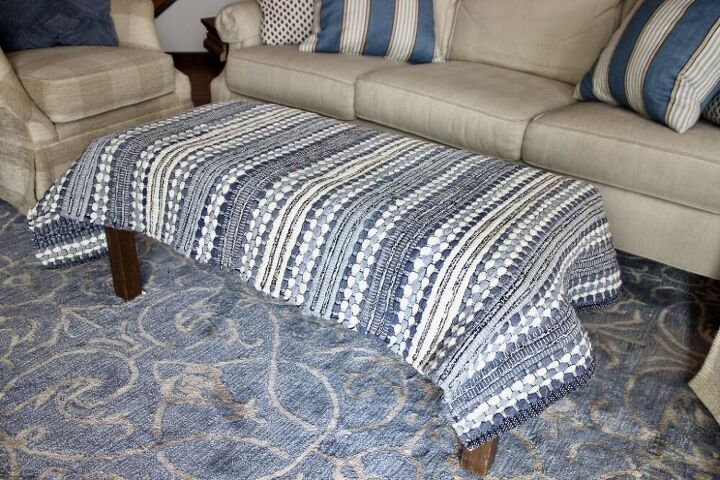
- With the right side of your rug FACING DOWN, center you rug on your ottoman.
- All four sides need to be hanging the same length down. Grab your ruler, measure those shortest hanging sides and then fold the longest hanging sides up to match. For me, I had to hem up the short ends of my ottoman.
- Remember, you are looking at the WRONG side of the rug, so you want to fold them up and hem them on this side.
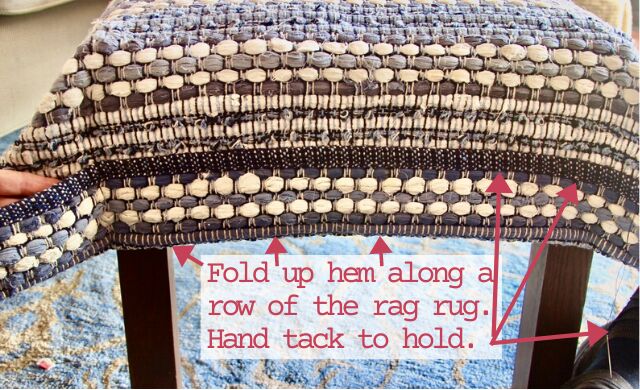
- With your upholstery needle and thread, Tack up your hem with a simple whip stitch — it’s not going to show. Once you get started tacking the hem it will naturally fold along the row you have chosen. Just help this along by being consistent in stitching into the same horizontal row across the top of this hem.
- If you're a non-sewers, this project is a great boost of confidence, Working with a very textured fabric — or rag rug — will hide your stitches, so really don’t overthink this.
- Surprisingly easy, right?
- You're halfway there already!
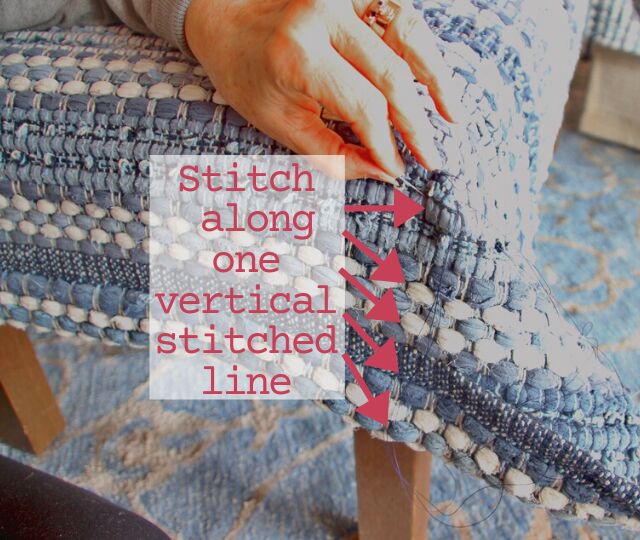
Start by folding your corner “wings”. Hold them out and determine which line of the rug weaving you want to follow to create a nice tight corner.
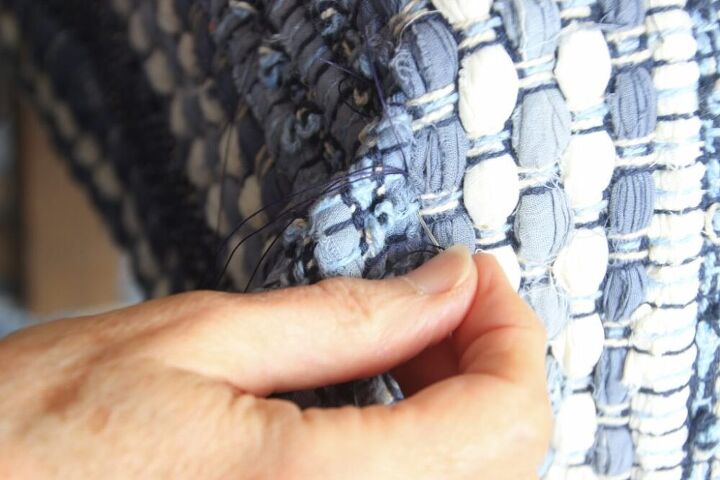
- Starting at the top of your corner wing, push your needle with knotted thread through the top and then loop around pulling your needle through that loop. This will create a slip knot so your thread can’t pull through the fabric. (Or you can tie a square knot around a clump fo fabric to get started — whatever works for you and is strong).
- Now with this vertical row of stitching, you are pushing your needle from one side of the wing through to the other side, with the point of the needle coming out along the string you want to follow vertically. Then on that new side, pull the thread taught, move your needle down about 1/4″ and push back through along that vertical marker string with the point this time coming out between the two rag rows you are using as your vertical guide. Repeat and repeat all the way down using the same string and rag row as your guides. Be sure to keep your thread pulled taught the whole way down.
- At the bottom of the row, stitch around the bottom rag row several times and then back up an inch or so. Now tie a couple of good strong knots before clipping your threads. The very end of these corners will take the greatest pressure so we want to be sure those don’t come undone.
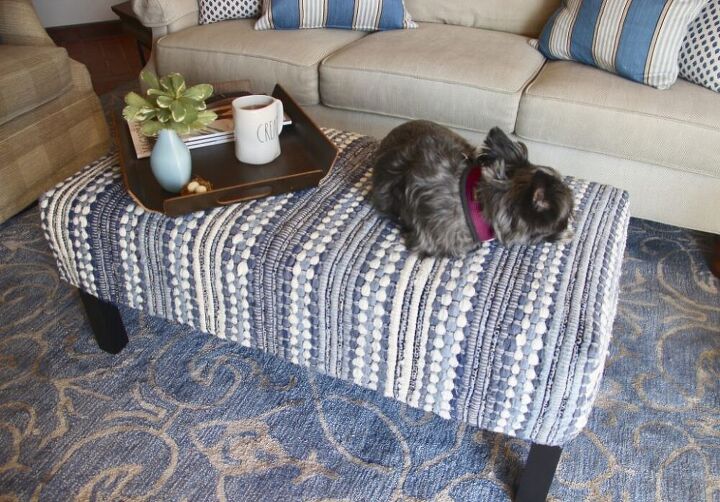
- That’s it! Your DIY Ottoman Slipcover is done!!!
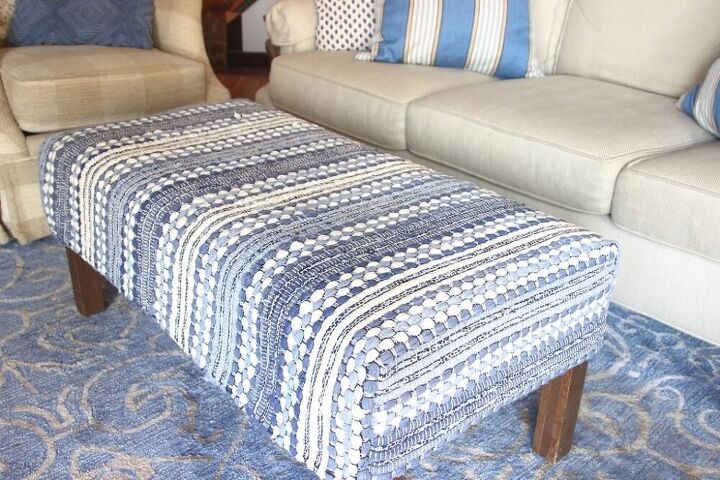
- Lift your slipcover off and turn right side out.
- Decide which way you want you wings to fold in (mine are laying in against the long side of the bench) and slide your slipcover in place. NOTE: if any of your wing points hang down too low, you can do a quick tack underneath to keep them out of view.
- And Ugh! Those marred, brown legs. That fabulous slipcover deserves some freshly painted legs.
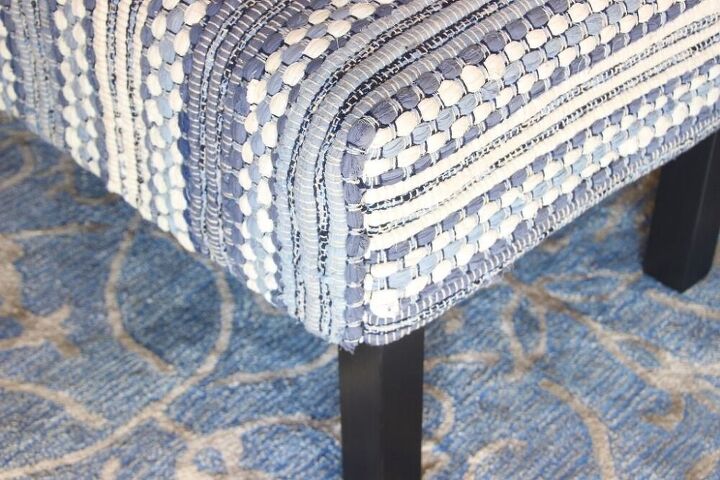
Now you can see why you want to follow along one line with a rag rug! Doesn't that corner look sharp?Like how this looks? Check out more of my home decor tutorials.
Hope you will come check out more projects.


Comments
Join the conversation
-
Tha rug brings back childhood memories. My mother used those same type of rugs to cover our hassocks. It looks great, thank you for sharing.
-
Love this idea. I am going to use this idea to reupholster a chair. Thank you for the inspiration.
= )


Frequently asked questions
Have a question about this project?
I have to ask, what is a shorkie?
Can I do this on a ottoman that opens. It’s thicker so I would need a larger rug?
With the weave of the fabric very loose such as with this throw rug, how do you prevent it from coming unravelled when you shampoo it? I would think that if it were being used by pets, you would want to clean it regularly.