


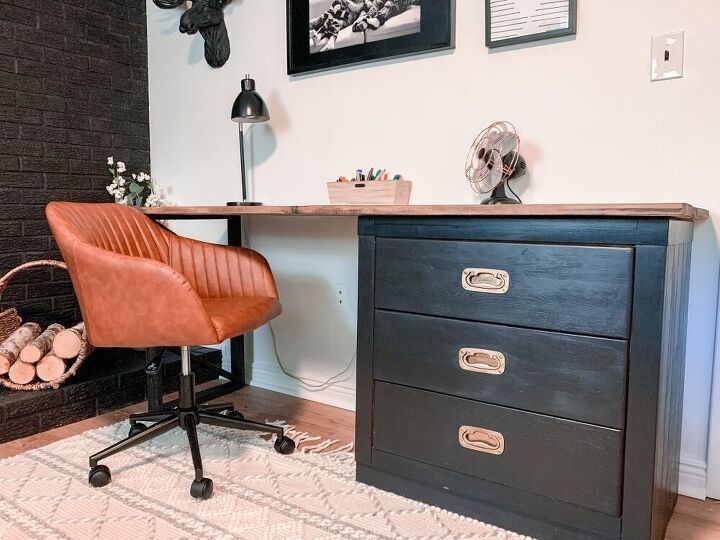
Desk Dresser Combination- Otherwise Known as the Desker

Last big project in my One Room Challenge guest room update so it better be good, right?! Well, I must say, this one turned out pretty good! In a guest room you need a dresser and you need a desk. So why not make dresser desk combination?! The “desker”, as this piece is fondly called, is the perfect solution for a guest room or any room where you are short on space and storage!Disclaimer: In the name of full transparency, please be aware that this blog post may contain affiliate links and any purchases made through such links will result in a small commission for me (at no extra cost for you). As an Amazon and Home Depot Associate I earn from qualifying purchases.
- Length of time for project: 6 hoursCost: Depends on the dresser you find and wood you use for the desktop. My desker cost approximately $40 total with finding a dresser on FB marketplace, using reclaimed wood for the desktop, and having lots of stain supplies on hand.What you’ll need:A dresser 28-30″ tall
- 1.5″ thick wood for the top of the desk (could use plywood or planks, I used various reclaimed planks of different widths)
- 1×4 boards for the leg
- Wood conditioner, stain for desk, stain for leg
- dark wax
- Antique gold rub n buff
- nail gun
- wood glue
- pocket hole screws and kreg jig
- For other links to products in the room check out my Liketoknowit page.
What I learned: Reclaimed wood is tough to work with as it has lots of imperfections (although it is quite beautiful). 2×6 boards or 1″ plywood would be a good option as well.
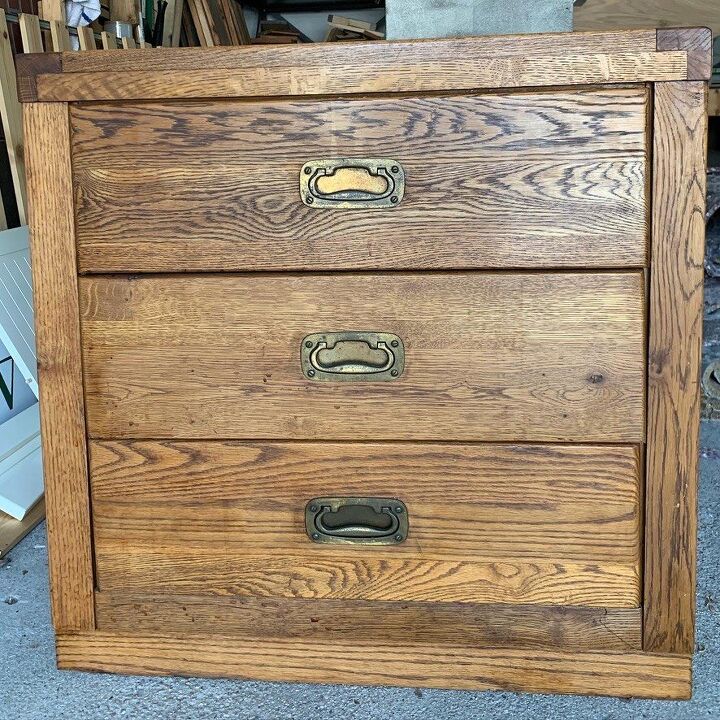
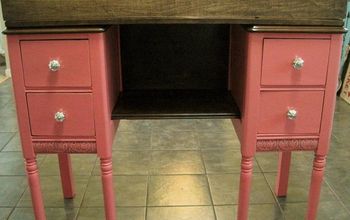
There are lots of ways you could go about this step. Buy a new dresser, find a used one, build one. The main thing to keep in mind here is size. You’ll want the dresser height to be 28-30″ tall in order for the desk portion of this desk dresser combination to be a good working height once you add the desktop. The width you desire will be very specific to your own space. Personally I found this cool 3 drawer dresser of the perfect height on Facebook Marketplace. It just needed a little love and was easily updated with a couple coats of paint and some rub and buff on the hardware to make it look newer and more gold, less brass. If you are looking for more detail on how to properly paint the dresser, check out my post on painting my bathroom vanity.
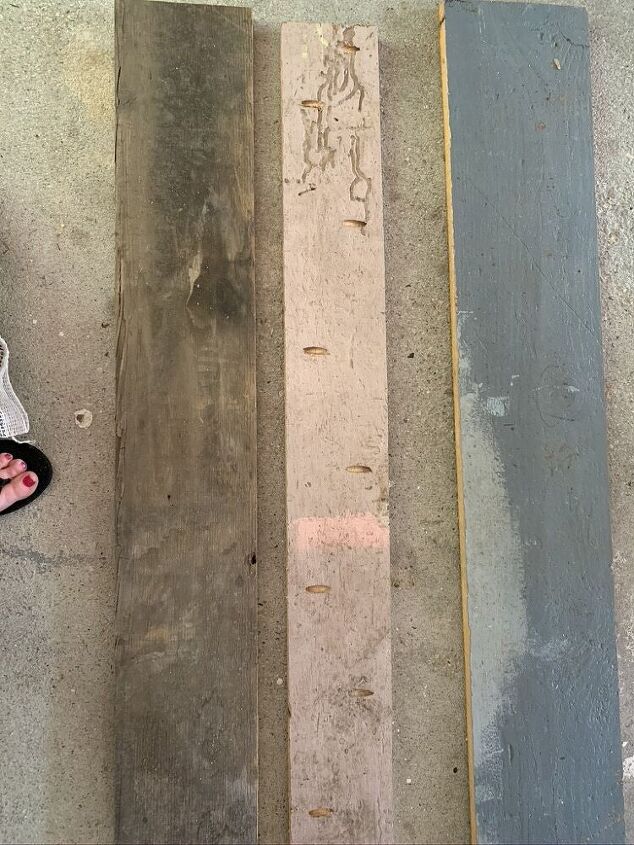
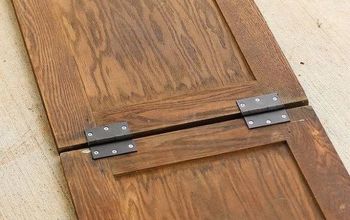
The desktop width should be based on the width of your dresser. Mine was about 24″ so when making my desktop I made it a bit wider to create an overlap. Still trying to work with some reclaimed wood I have on hand, I found 3 boards of approximately the same thickness (not necessarily the same width) that I first cut them down to 6′ in length. Then attach the boards together using pocket holes and wood glue. Next, clamp the boards together until the glue dries for a nice tight fit.
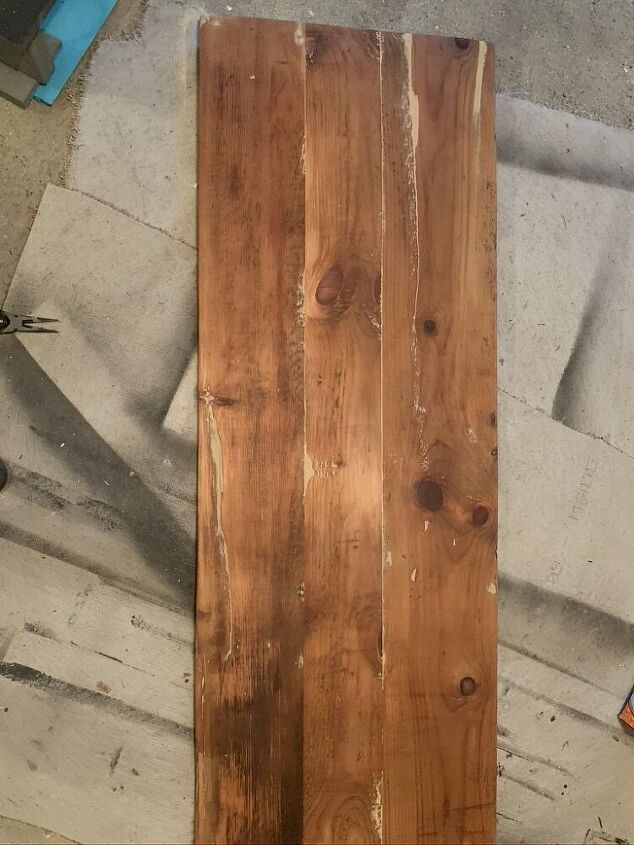
These boards are reclaimed wood so there are a lot of cracks, knots, etc in the wood. The deeper cuts and cracks I repaired with some wood glue and wood filler. Once everything is filled and dried, it’s time to sand. These boards were rough requiring the use of my belt sander in both 60 and 80 grit followed by the orbital sander using 120 and 220 grit. Once it is smooth to your liking, you can then stain it.
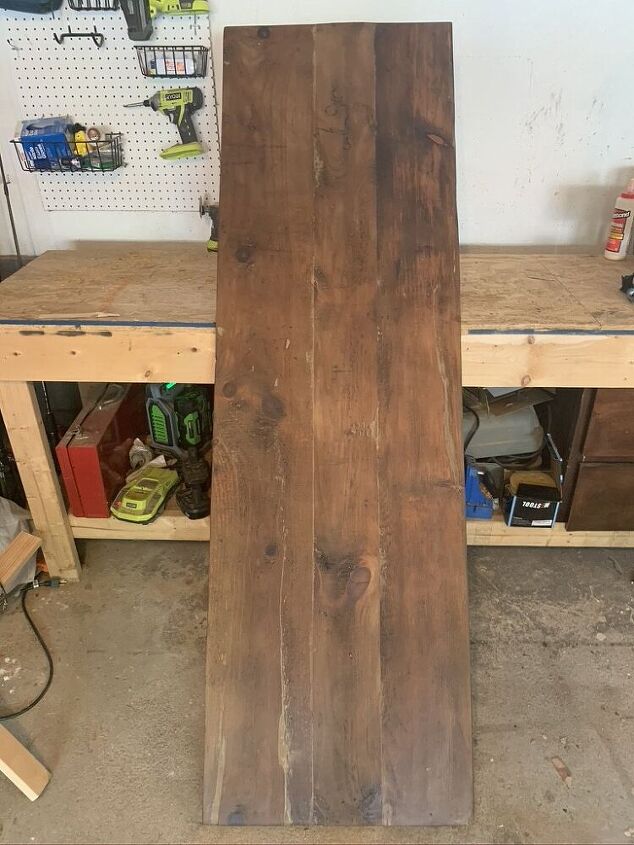
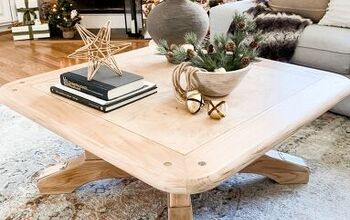
My current favorite finish process is as follows: apply wood conditioner all over to ensure a consistent uptake of stain, followed by 1-2 applications of your stain of choice. I’m currently loving weathered oak by Varathane. It is a very light stain with very little pigment but does add a bit of a gray tone to the wood giving it a nice rustic vibe. On this project two coats of stain were applied before finishing with a coat of dark wax to add depth and also a bit of protection.
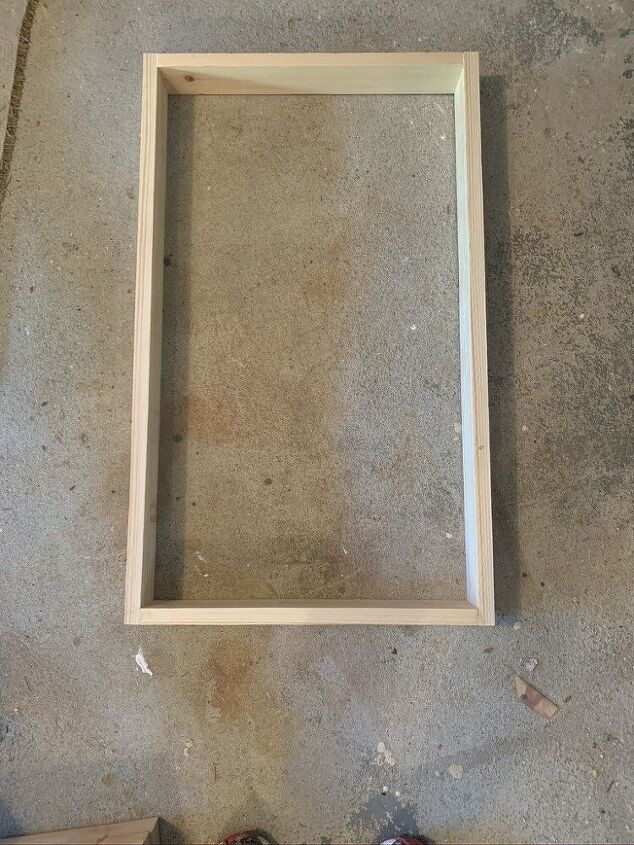
To create a leg the same size as the dresser (for symmetry), build a rectangle using 1×4 boards. Cut the vertical 1x4s to 30″ in height and the middle strips to 22.5″. Attach the middle strips to the vertical sides using wood glue and pocket holes. Place the pocket holes on the outside of the rectangle so they are hidden (covered by the desktop on the top and on the floor side on the bottom). Technically, once this rectangle is built, you could be done and stick with a nice simple leg, but I decided to jazz it up a bit.
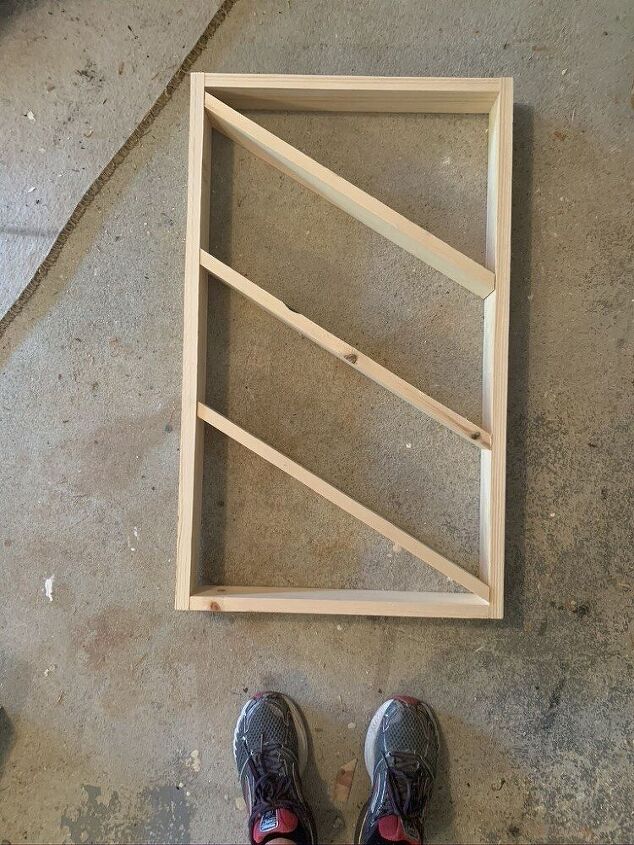
To add some interest, I added three additional strips of wood inside of the rectangle to mimic the herringbone pattern used on my herringbone board and batten accent wall. They add some strength and structure, plus they just look cool. Cut these three strips at 30 degree angles on each side. Place one end in the top corner. Place the other end in the bottom corner. Then center the final strip in between. Attach the strips using wood glue and 1.5″ finishing nails and finish with a black stain.
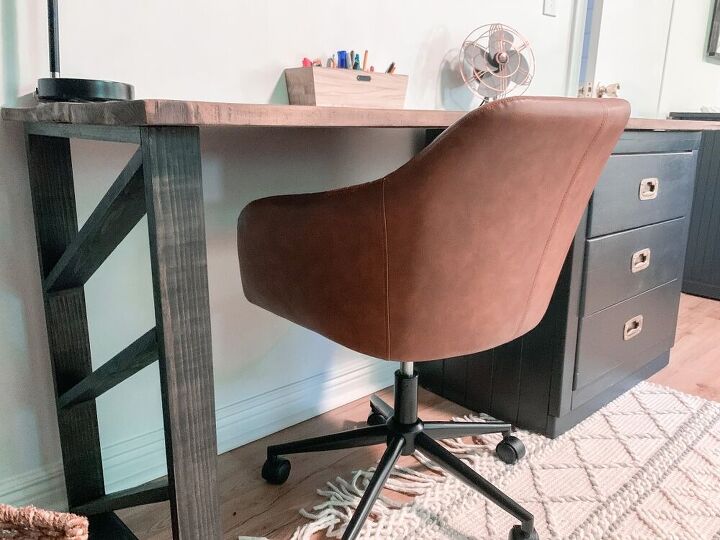
Now, to attach it altogether! First, using 1.5″ wood screws, attach the desktop to both the dresser and the leg you just built….but do it from the bottom. I removed the top dresser drawer and placed several screws through the top of the dresser and into the bottom of the desktop. Then place two to three screws through the top portion of the leg into the bottom of the desktop.
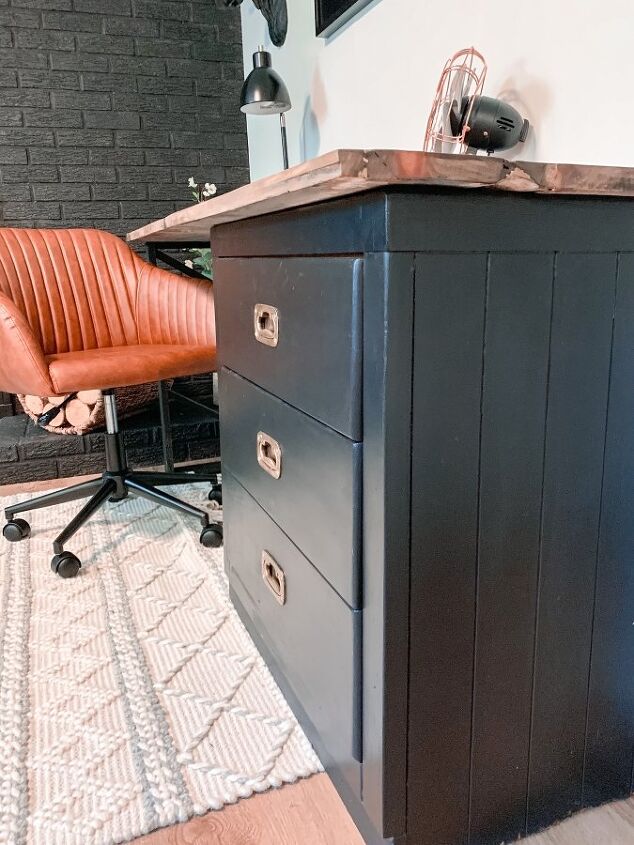
- Now step back and admire your work! This desk dresser combination, otherwise known as the Desker, is perfect for a guest space or bedroom! It allows you to incorporate both clothing storage and a workspace which is pretty cool!Just one more week left in the One Room Challenge! Make sure you check out all the amazing designers and guest contributors to see all the super creative incredible updates currently happening! Also take a look back through each week of this space to see how far we’ve come. Next week….the final reveal!Week One- Guest Room Refresh Plan
- Week Two- Wood Paneling Update
- Week Three- Wood Wall Art
- Week Four- Modern Baseboard Heater Cover
- Week Five/Six- Herringbone Board and Batten Accent Wall
Resources for this project:
See all materials


Comments
Join the conversation
-
This is very cool. I love the idea and how it turned out. Brilliant.
-
A beautiful addition to a bedroom, den or study. Love the creativeness.


Frequently asked questions
Have a question about this project?
Nice, but instead of just the visual interest on the support- to provide more room for storage, etc- maybe a different option???? Just a thought 🤔. Very nice piece!!