


Rustic Flower Bucket

This is one of my favorite diys of late!! It turned out better than I was hoping!! The cowhide hubby deserves some credit for that as he came in during the finishing stage with his grinder and cut some metal to wrap the buckets in!! It was an easy, no cost project made from recycled materials-does it get any better than that?!
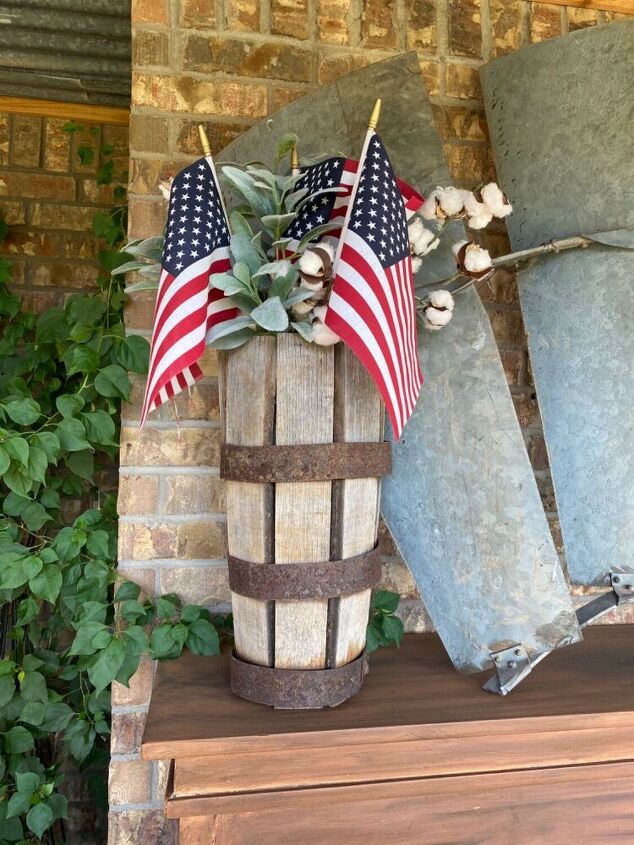
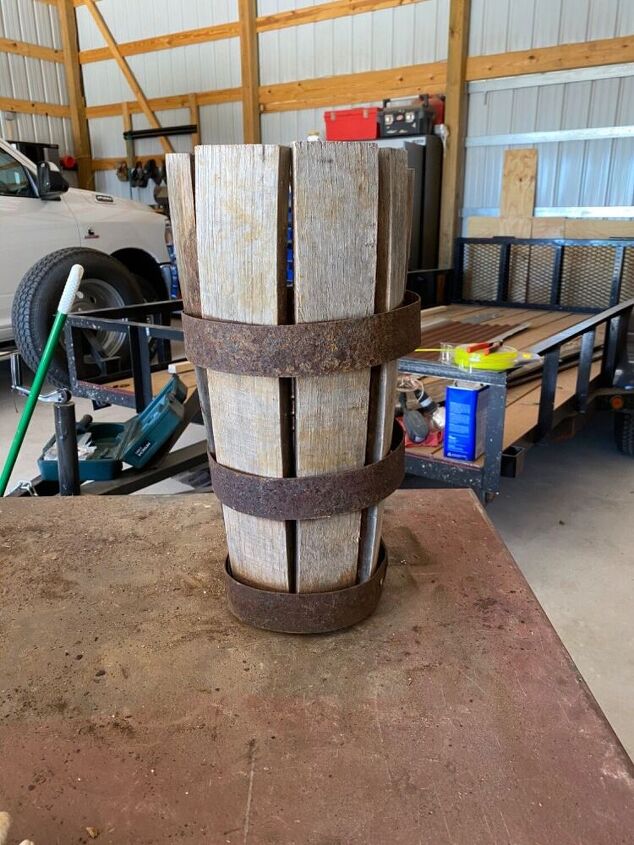
It turned out so cute and looks just like an old whisky barrel!!
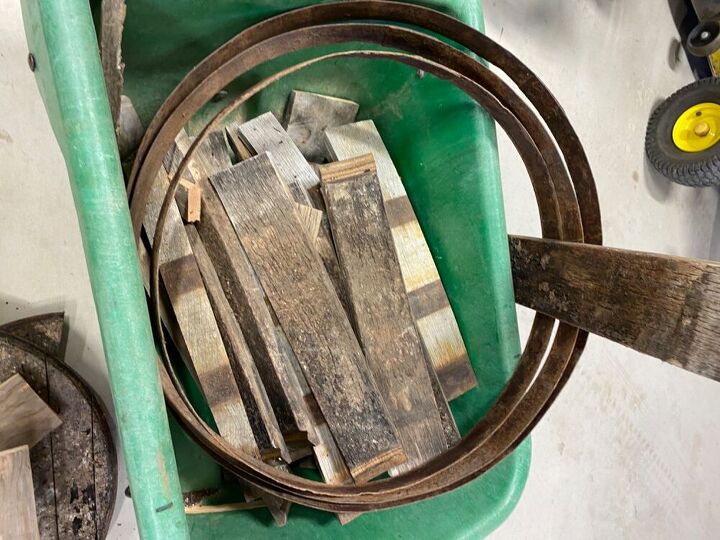
I started with a pile of recycled slats and metal rings from an old whiskey barrel planter that had seen better days!
This was a bit like putting together a puzzle. Some were thin and had more of a curve, others thicker with more stability. It took a few tries to get the right mix. I used 7, leaving space in between at the top, because my buckets were more narrow at the base.

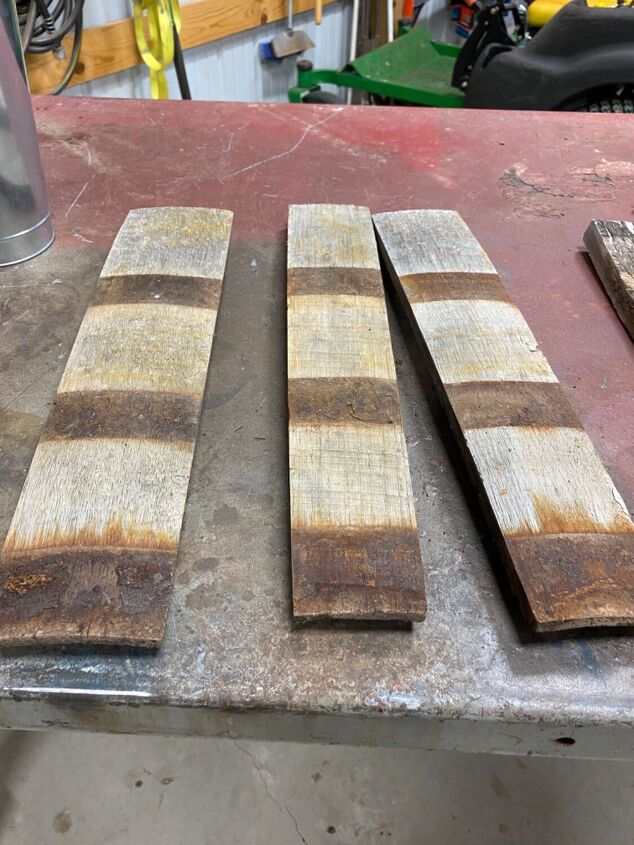
After picking the slats I wanted to use, i knocked some of the grunge off of them using a hand held sander. You could use a stiff bristled brush to do this as well but I love to sand so I always reach for this favorite tool!! If you don’t have a hand held sander, go get one today! I got mine as a birthday present, and it has been well used!!
Using a hot glue gun, I ran beads of hot glue to temporarily hold the slats in place until I could finish with some fun twine!
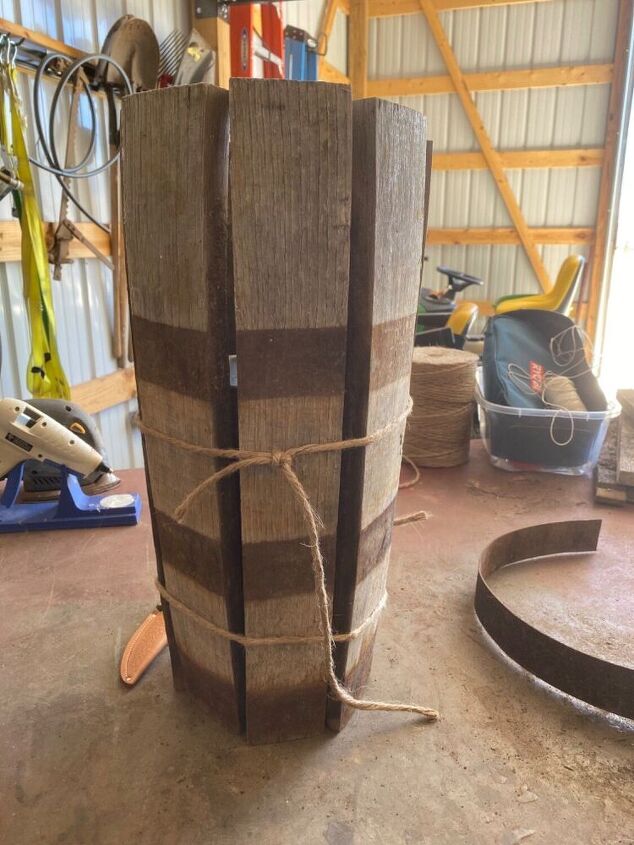
I tied a few pieces of twine around to hold the slats in place (in case the hot glue wasn’t strong enough-that was a total experiment... and it worked!!!) while I put on the finishing touches. At this point I was going to finish with twine wrapped around the dark areas and tied into cute fringed knots but then......
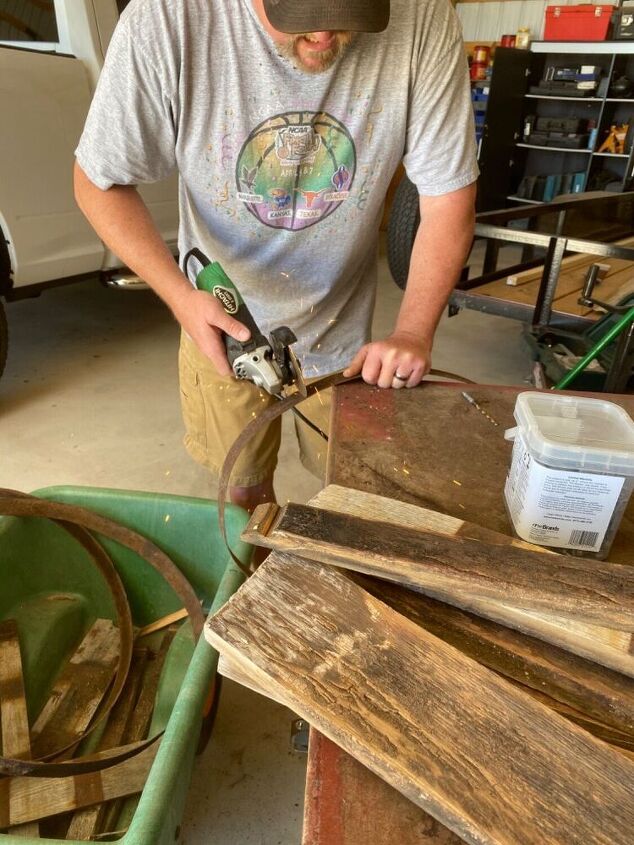
My husband wandered into the barn and said he could cut the metal straps so I could wrap them around just like a whiskey barrel!! Heck yeah Honey!!!!🤠 Using a metal grinder, he shortened the straps to the circumference of the new barrels and smoothed out the sharp edges.
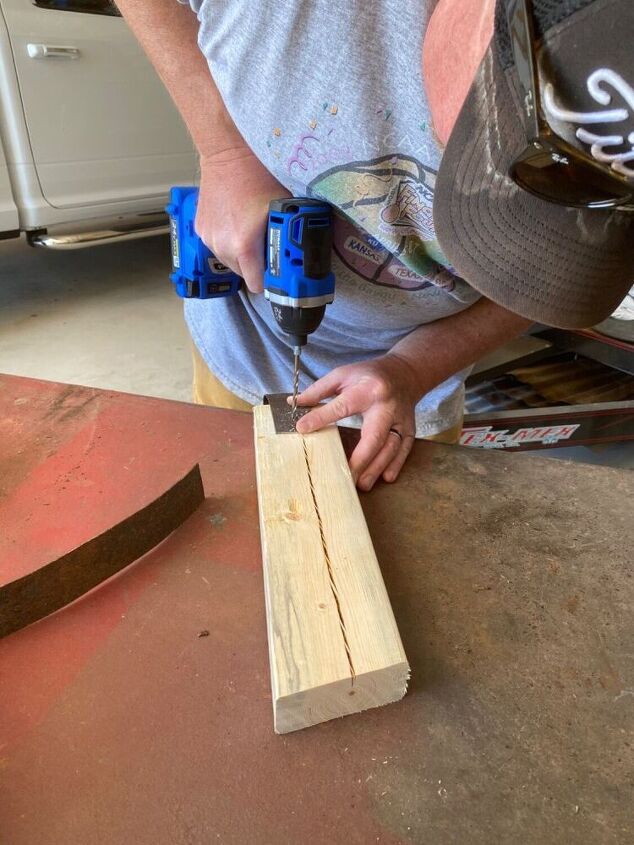
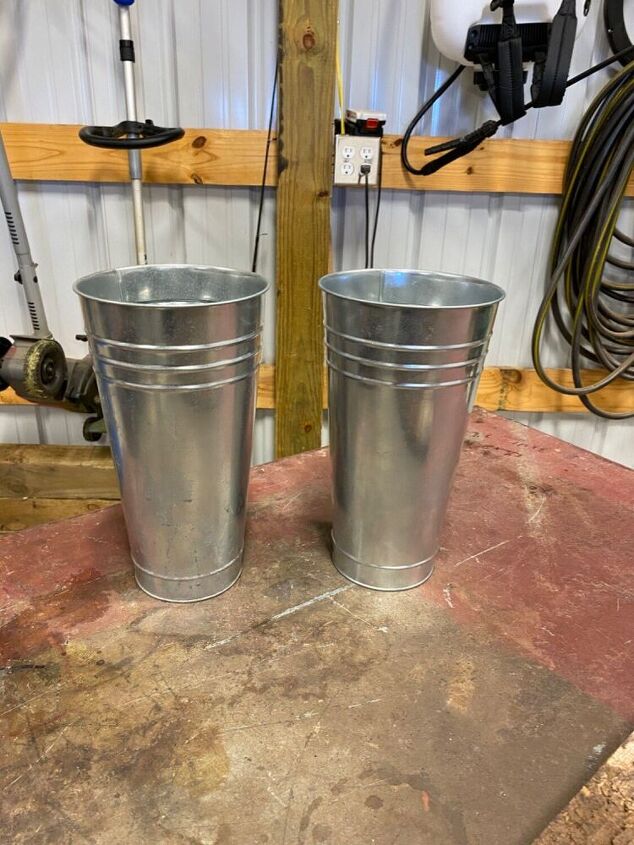
Because the metal buckets I used were rather flimsy, we predrilled holes so that we didn’t have to put so much pressure to get the screws in!! We used 2 1/2 inch screws because we were going through two thicknesses of metal, wood and the bucket itself. (And by we, I mean my hubby did all the work here!🤣)
This took both of us so there are no pictures!! I lined up the holes and held them in place, (not that easy because those metal straps are stout y’all!) while my hubby screwed them in. Because we used screws, the buckets are no longer water tight, but they turned out so cute, I don’t care!!
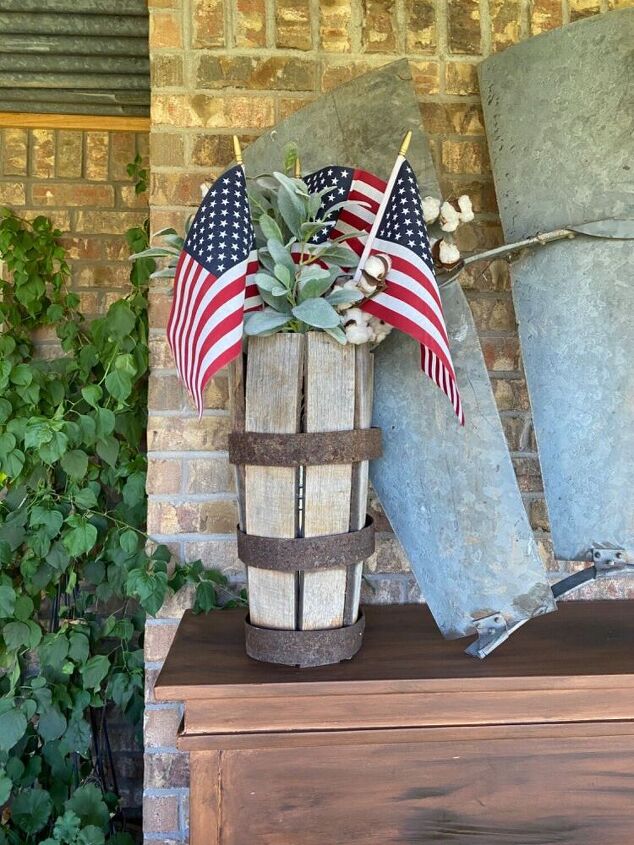
Insert greenery, cotton stems and perky flags!! I’m off to make a twin so I’ll have a matching set to flank my windmill!
Resources for this project:
See all materials


Comments
Join the conversation
-
Love it you did a great job!!
-
Kim- Your buckets came out so cute! Dry or wet arrangements, they are totally awesome. I bet if you put some silicon caulk around those screws it would make your bucket water-tight again... just sayin'.


Frequently asked questions
Have a question about this project?
What is a cowhide husband?? Im from the north...is that a southern thing!?