


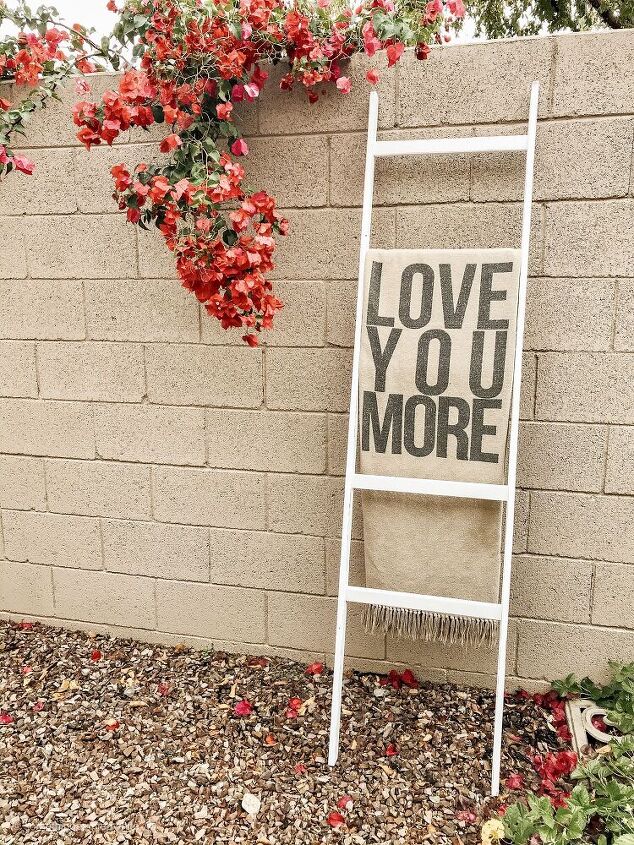
Super Easy DIY Ladder Pot Rack for Under $40

My husband thought I was a little bit crazy when I suggested suspending a ladder in the kitchen and hanging pots and pans off of it... ladder pot racks just weren't something he had ever even heard of, let alone seen.
But he admitted that I have a pretty good track record when it comes to home décor, so he was willing to hear me out and see what he could do to help.
We happened to have a ladder already on hand from when he made blanket ladders last fall, so we held it up in the kitchen a bunch of different ways until he could see what I was going for. It was obvious that it would work and look amazing, but first we would need to cut it down a little to make it a) look more like a pot rack and less like a ladder and b) fit above the island in the middle of the kitchen.
For our pot rack, I simply cut 2 feet off the blanket ladder to make it 4 feet; but I'll cover a do-it-from-scratch routine here in case you missed the how to make a blanket ladder post. If you already have a blanket ladder (and why wouldn't you??), skip on down to the Preparing to Hang Your Ladder Pot Rack section below.
Materials
The amount of wood you need will really depend on the size of your ladder pot rack. The ladder pot rack I built, and therefore the one we'll be talking about here, can be done with the following:
- 1 8' 1x2 (ladder sides)
- 1 6' 1x2 (ladder steps)
- 8 2-inch screws
- paint or stain
- 4 eye hooks
- 4 swag hooks
- chain - I used about 8 feet (4 2-foot lengths). Your needs may be different depending on how high your ceilings are and how far down you want your ladder to hang.
- hooks from which to hang your pots
Be sure to go for good, straight, quality wood. It's worth the extra pennies it'll cost you over getting the cheap stuff.
Tools
- screwdriver (or drill with screwdriver attachment)
- drill
- saw
- ladder
Making the Ladder for Your Ladder Pot Rack
As with any woodworking project, or any project in which you use power tools, always put safety first! Wear goggles or other eye-wear, gloves and masks (they're useful even when there isn't a pandemic) and other protective equipment as appropriate. And keep your hands and other appendages away from sharp things.
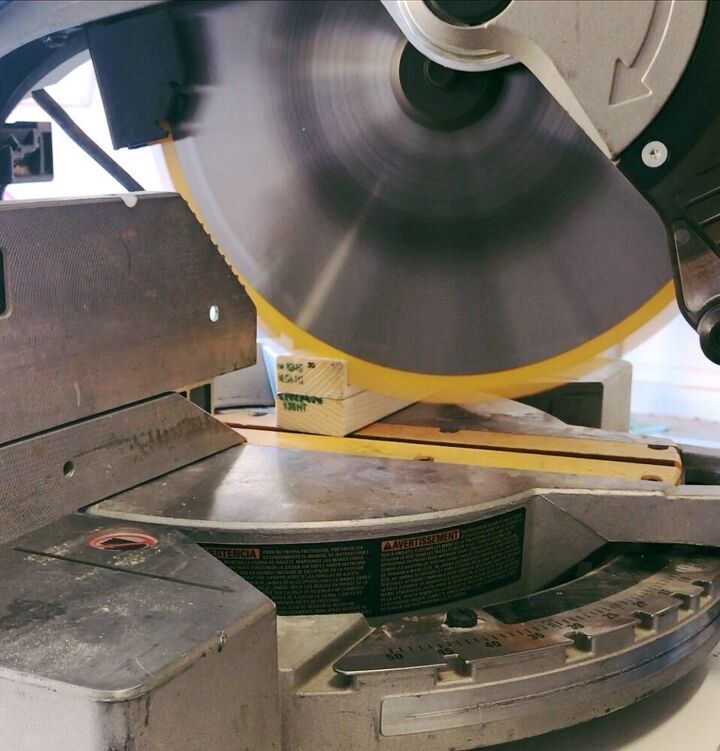
- Cut the 8 foot 1x2 in half. Just whack it in half. These will be the sides.
- Cut the 6-foot board into 4-16 inch lengths. (or if you want to make it easier and use 18-inch steps, just whack it in half and then half again) These will be the crossbeams or steps and connect to the sides.
- Drill holes in the wide edge of each of the 4-foot 1x2 sides at 6", 18", 30" and 42". It doesn't matter which end you start on as with a 4-foot board you should have 6" left over! (And I didn't even need a calculator for that one!)
- Attach the steps on each side where you drilled the holes. For my example you'll notice that the steps are angled... you can do that or just attach them straight on. Mine are angle because that's the best way to build a ladder, and is not necessary if you're building your ladder pot rack from scratch.
- Paint or stain in whatever color your little heart desires.
- Admire the ladder part of your project.
Preparing to Hang Your Ladder Pot Rack
Speaking of ladders, you're going to need one now. Unless you have a really low ceiling, and then you might need to do some renovating before you start hanging stuff from it.
I wanted the ladder pot rack to be centered over my kitchen island, so I did the following:
- Place the ladder on top of the island right where you want it to be.
- Attach the eye-hooks to the top of the ladder. I put them at each of the end steps.
- Measure from the wall to the eye hook, then measure from an adjacent wall so you have the distance from 2 walls.
- Using those measurements, make a mark on the ceiling for the first swag hook. The goal is to have that mark be directly above your eye hook.
- Measure the distance from the first eye hook to the second eye hook on the same side. If you're using my measurements, you should have a distance of 36".
- Make a mark on the ceiling 36 inches over from your first mark, and the same distance from the wall that the side of your ladder pot rack will be.
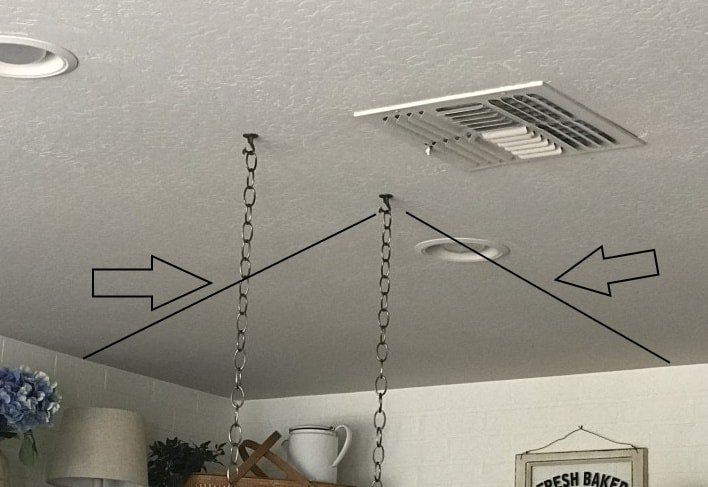
Following the "measure 17 times, cut once" rule, I hung twine from the marks on the ceiling down to the eye hooks to make sure the marks were indeed directly above the eye hooks on the ladder.
Don't worry about measuring for the other 2 hooks; we'll cover how to handle that next.

Hanging Your Ladder Pot Rack
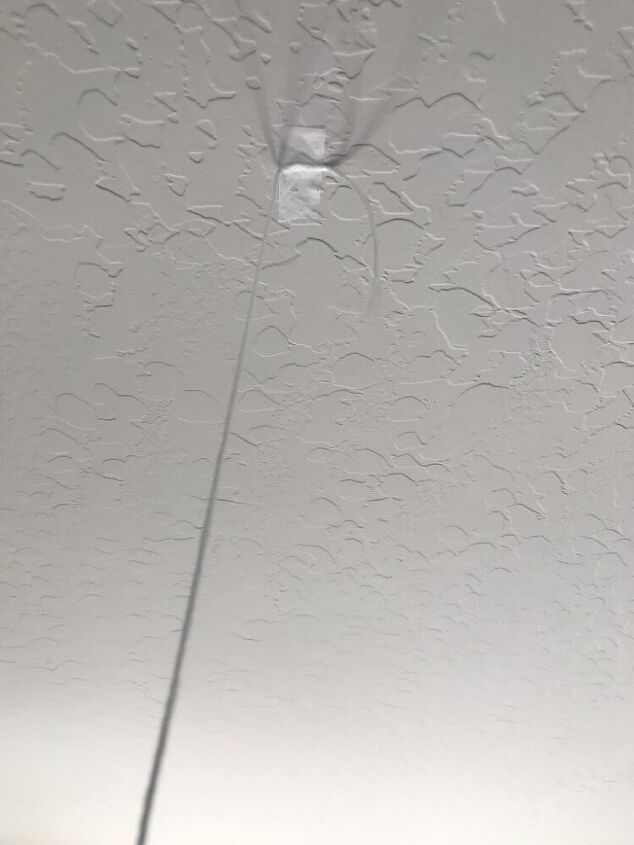
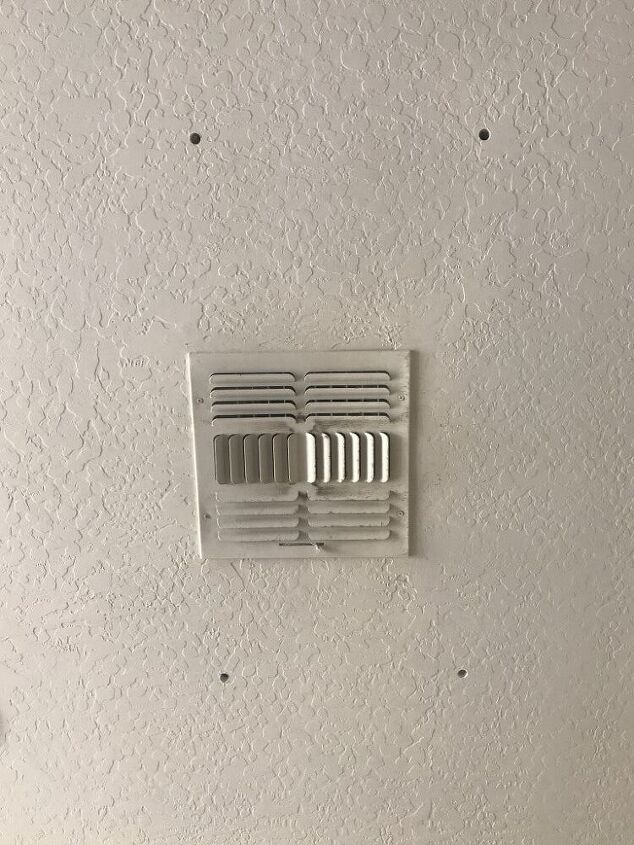
Now that you know where your ladder will be hanging, find out if there are any studs running where your holes will be drilled. You can use a stud finder (easiest), drill a small pilot hole (easy) or use the "tap" method (hardest).
Following the directions on the swag hook packaging, drill a 1/8 inch hole into the ceiling. If you strike wood, you will use the included screw to attach the hook, so don't drill a bigger hole. If your drill bit goes straight through, you will drill a 5/8" hole. Don't attach any hooks or screws just yet!
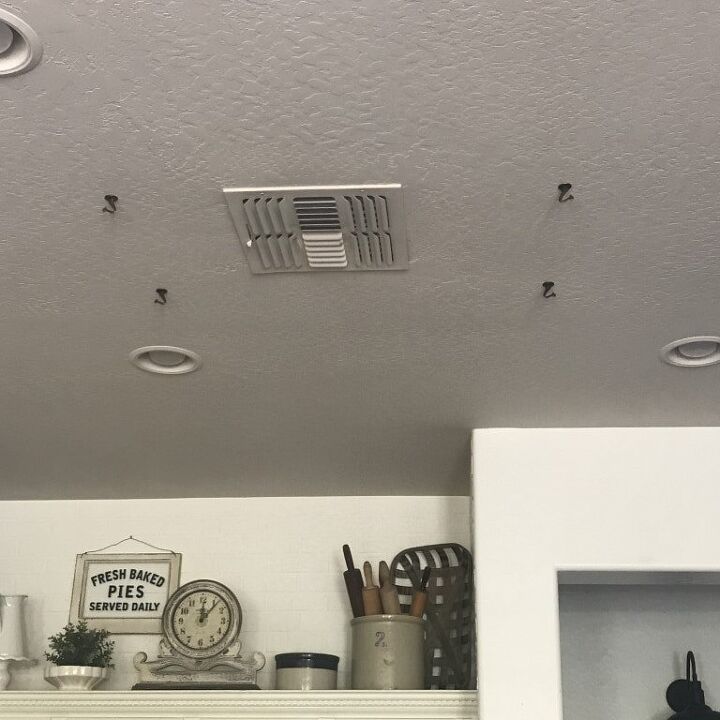
Lift the ladder pot rack up to the ceiling and align the two side eye hooks with the holes you just drilled. Apply a good bit of pressure to the other eye hooks so that they make indentations in the ceiling. That's where you'll drill the other two holes. Perfect (or close enough) fit!
Follow the same "is there a beam/stud there?" routine that you did for the first two swag hooks and install all 4 swag hooks.
Now just attach the chain to the eye hooks and hang from the swag hooks. You might need to remove/add links to get the ladder to the appropriate height. It's easy to just twist the chain a little to open a link for adjustment.
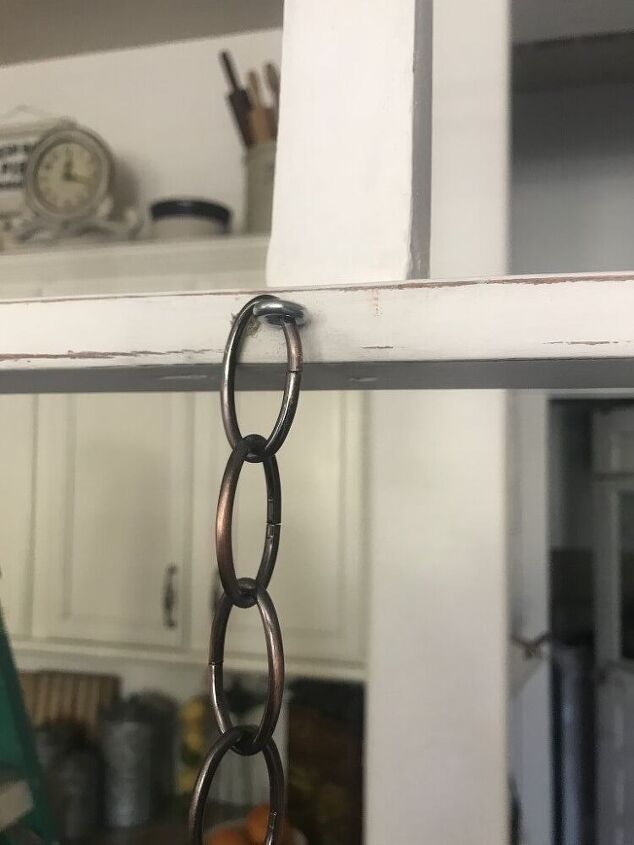
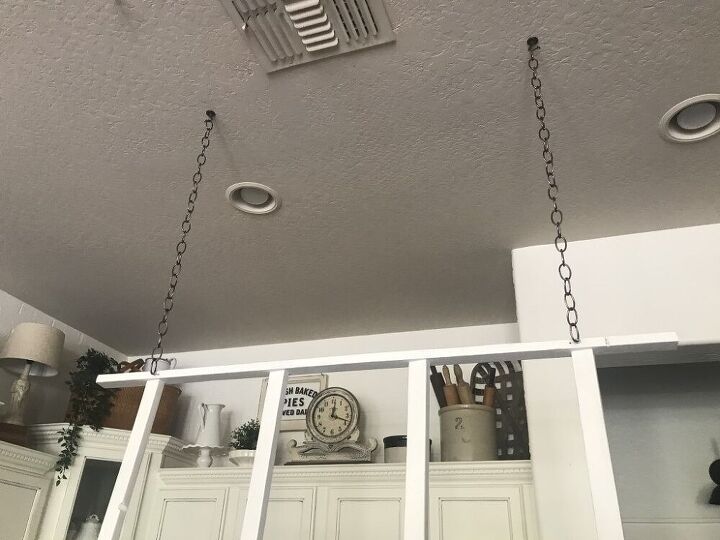
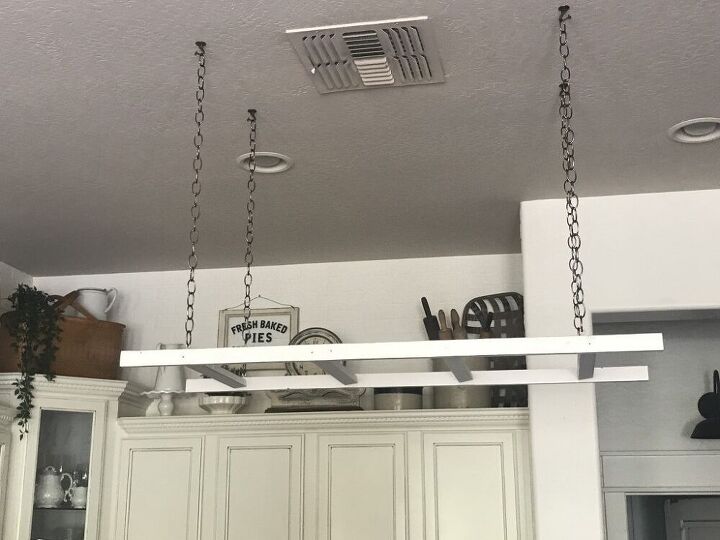
Pro tip: make sure your chains are all the same length or your ladder will hang wonky. Nobody likes a wonky ladder!

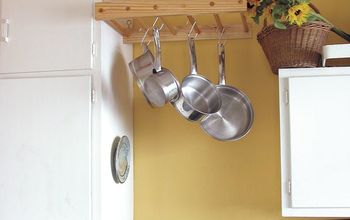
Hanging Pots on Your Ladder Pot Rack
You'll need some decent sized s-hooks to hang from a pot rack like this. (not as big as if you'd built it out of 2x4s, but still big enough to go over the 1x2). I used s-hooks that I found on Amazon.
Arrange them however your little heart wants, and enjoy!
I love these blue pans hanging in my kitchen.
Happy DIY'ing!
~Cindy~
Resources for this project:
See all materials


Comments
Join the conversation
-
I love it. I saw the ladder idea in the laundry room and basement but this is my favorite!!!!!
-
I love this! Am wondering how it would work with a drop ceiling? Probably not well


Frequently asked questions
Have a question about this project?
I love the look but it seems like it would get real dusty having so many up there. What the e secret?
Not a question. I just wanted to tell you I hung a ladder above my dining room table. After wrapping it with lights, i hung tea cups that came from grandmas and moms. I hung them at different lengths using twine. I changes them out for Christmas cups in December. Those I found at thrift stores. I love the use of ladders!
Is it easy enough to reach the pans without having to adjust the level of the chain each time you need one?
And if so, does it get in the way of prep etc? The banging of the heads lol