


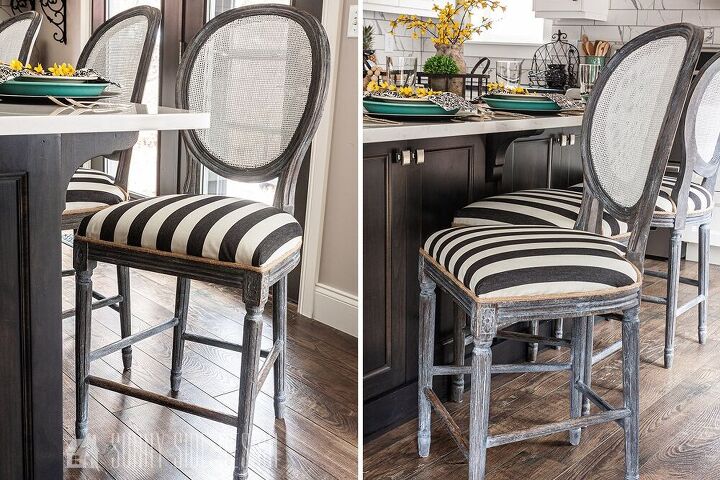
Farmhouse Bar Stool Makeover
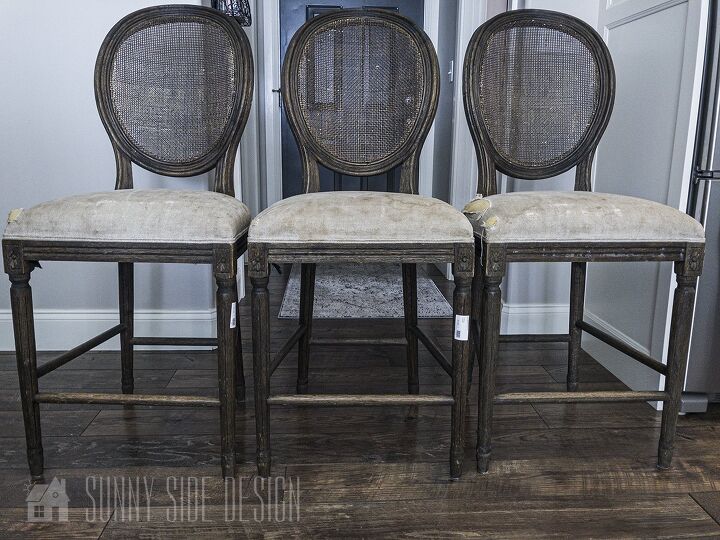
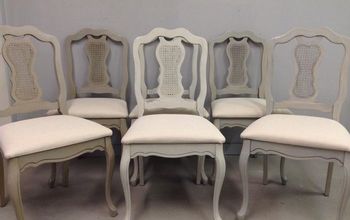
We found three worn wooden and cane farmhouse style bar stool s begging for a makeover! The bar stools looked really rough at first, but we could see their hidden potential. Using chalk paint, white wax and new upholstery transformed these thrift store finds.
We have found that you spot the best finds when you are not looking for them. Does that ring a bell with you?
While in Park City, we decided to stop at the Restore Store. Of course, as I looked around I spotted the 3 farmhouse bar stools.
Immediately, I had a vision of what I would do with them. How could I pass them up when they were only $12 a piece. The wood was in good condition, however the upholstery was filthy and ripped.
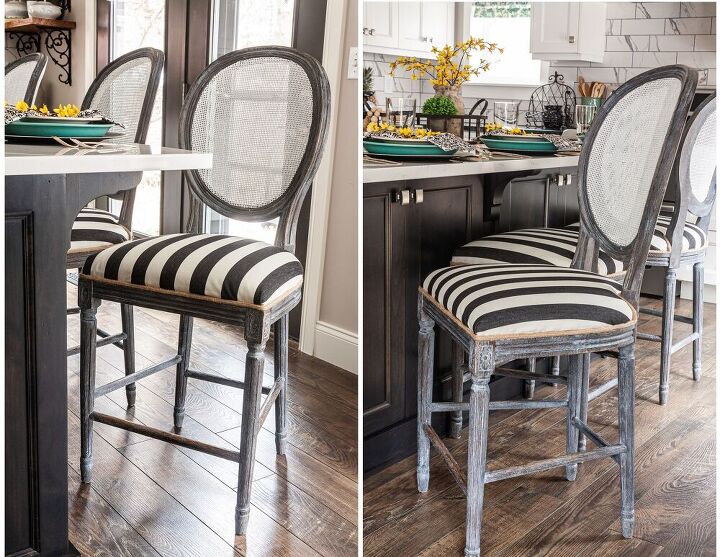
Clearly the transformation is amazing! See how you can get professional results with our ideas and tips using paint, wax and recovering the upholstery.
Supplies we used:
- Tack remover
- Needle Nose Pliers
- Staple Gun
- Chalk Paint
- White Wax
- Batting
- Fabric
- Braided Jute Trim
- Hot glue gun
If you are more of a visual learner, we have created a video tutorial. This tutorial was first featured on HometalkTV.
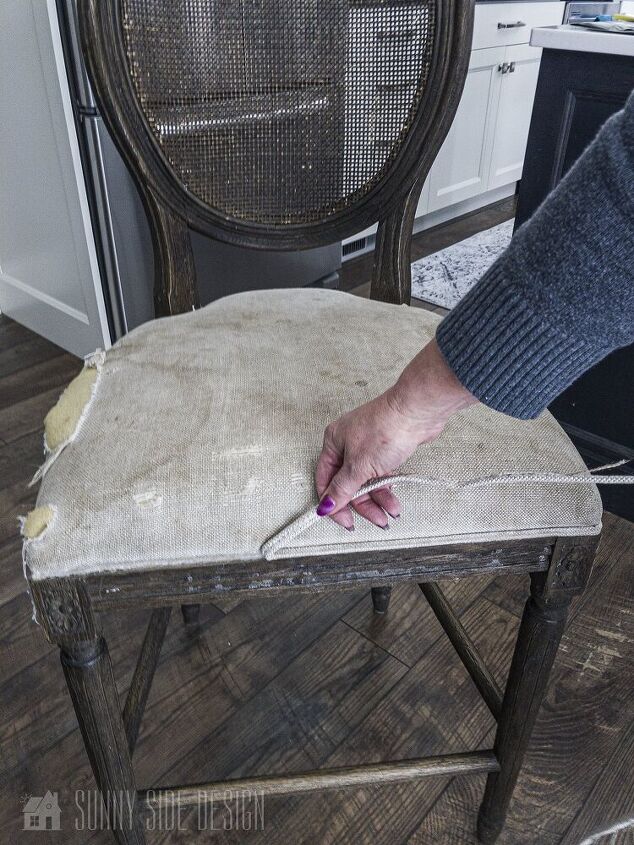
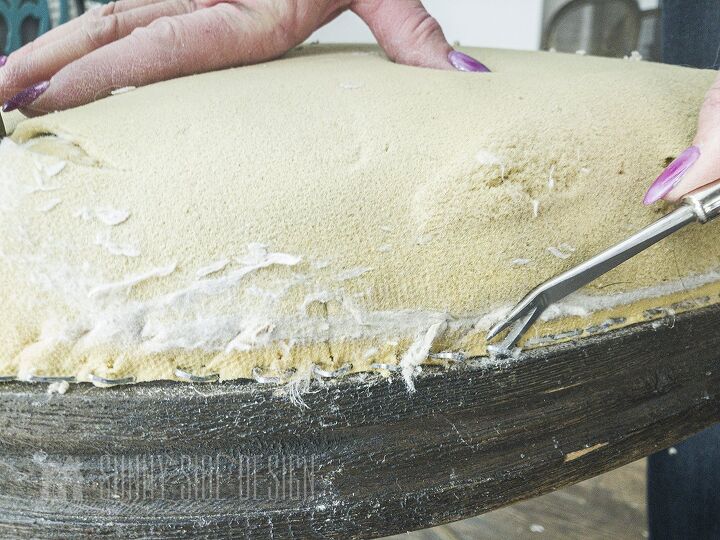
Using a tack remover tool, loosen the edge of the welting and pull it off of the fabric. This piece is usually just glued on and can be removed without too much trouble.
Pro Tip: The tack remover tool is not only helpful in removing staples but also in removing the welting and fabric. This little tool cost less that $4 and is extremely helpful.
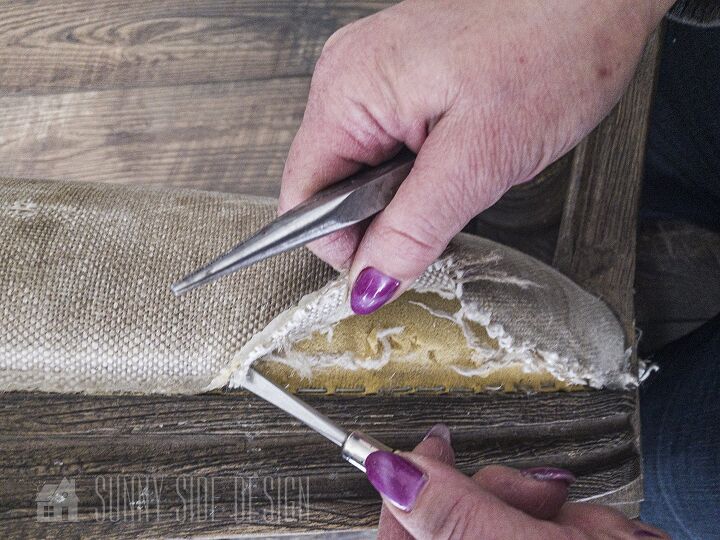
Again using the tack remover tool, or a small screw driver loosen the fabric from the staples. Hang on to the old fabric, we will use that as a guide to cut out the new fabric.
Pro Tip: You may want to wear a mask when removing the old fabric. Often it is very dirty and the dust will fly as you rip off the old fabric.
We have found that tack removal took does a great job to loosen the staples. Then pull out the staple with the needle nose pliers. They have a small enough tip to grab the staple easily.
Depending on the type of wood you are working with this may be an easy task or a difficult one. If the bar stool is a hardwood, such as oak, it will be more difficult to remove the staples.
Of course, our bar stools are oak and it was a challenge to get the staples out. Many times while removing the staples, ours would break. If this is the case, see our tip below.
Pro tip: Instead of just pulling straight on the staple, pull and twist and the same time and they are much easier to remove.
This was the most challenging part of the entire project. It took about 20-30 minutes per chair to remove the staples. It’s all smooth sailing from here.
Clean the bar stool
Our bar stools were pretty grimy! It appeared to have dried milk on all the grooves in the wood. We used a Norwex cloth and gave the entire piece a good wipe down before applying any finishes.
Pro Tip: If your piece feels like it may have a greasy film, wash the piece with a de-greaser like TSP.
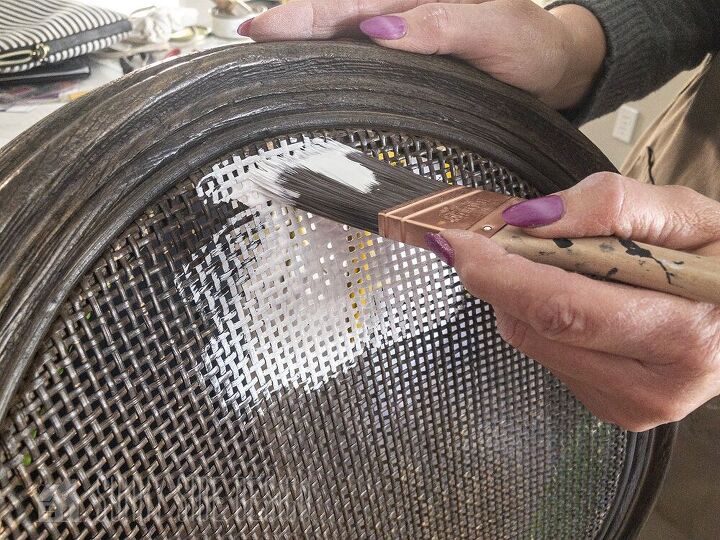
To make the chairs appear more up to date and fresh, we painted the cane section with Behr white Chalk paint. We taped off the backside of the stools with Frog tape and cut in freehand the front of the stools.
With the open weave of the caning, grab a partner to help the painting. That way when the paint pushes through the weave your partner can smooth it out and catch any runs.
Pro tip: With an open weave finish like caning, brush in a cross hatch motion,
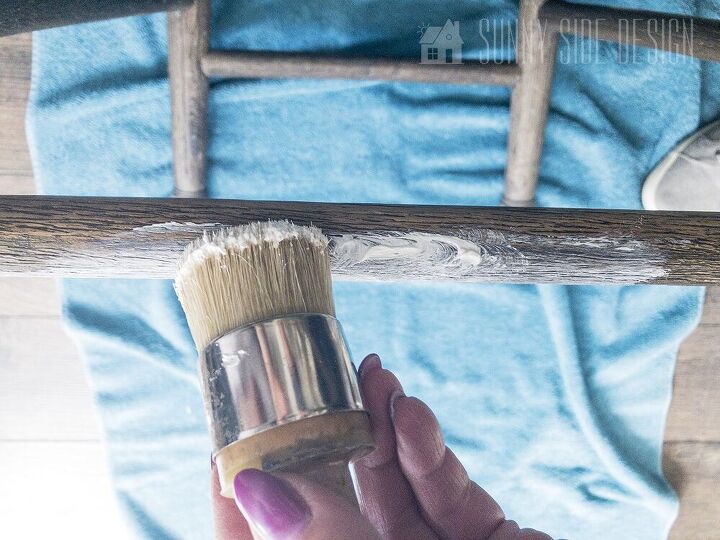
A white wax will freshen up the wood without painting the entire chair. We like Behr white wax. The quality is very good and easy to work with, yet is less expensive than other white waxes.
Apply the wax in a circular motion with a waxing brush or a large stencil brush. Using a circular motion helps to push the wax into the grain and grooves in the wood. Allow to dry and buff with a clean cotton cloth.
We also applied wax to the white painted caning area. This will provide a barrier of protection, helping to keep the white paint clean.

This step is optional, however I like to cover the foam cushion with batting. Originally this chair had the fabric directly over the foam. I feel like I get better results if I add batting.
Using the old fabric as a pattern cut out a piece of batting about 2″-3″ larger than the original fabric.
Place over the foam cushion. Cut a slit in the batting to fit around back wood piece.
Note: These farmhouse bar stools are one solid piece. The seat does not remove.
Tuck the batting in between the cushion and the wood. Pull batting towards the lower edge of the back. Make sure it is even all around.
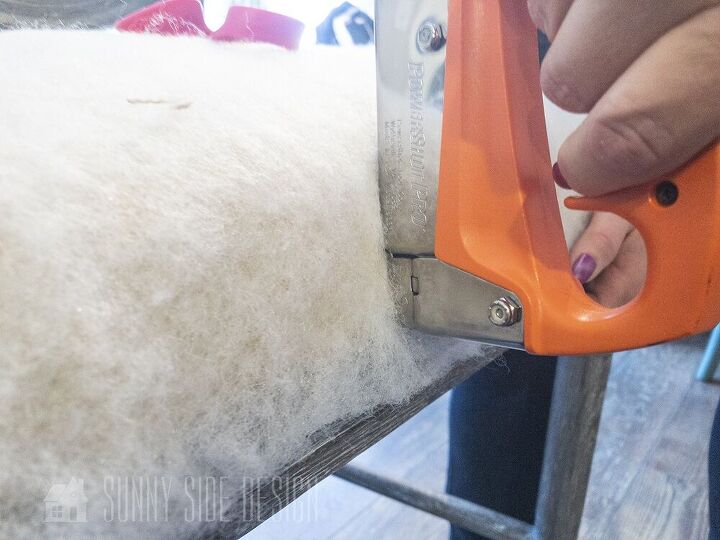
Place a few staples, just to secure it. We added 2 staples per side. There is such a narrow lip for placing staples, we wanted to make sure we had plenty of space for securing the fabric well. The batting will also get secured when the fabric is stapled into place.
Using the old bar stool fabric as a guide, cut out the fabric. Cutting it about 2″-3″ larger on all sides.
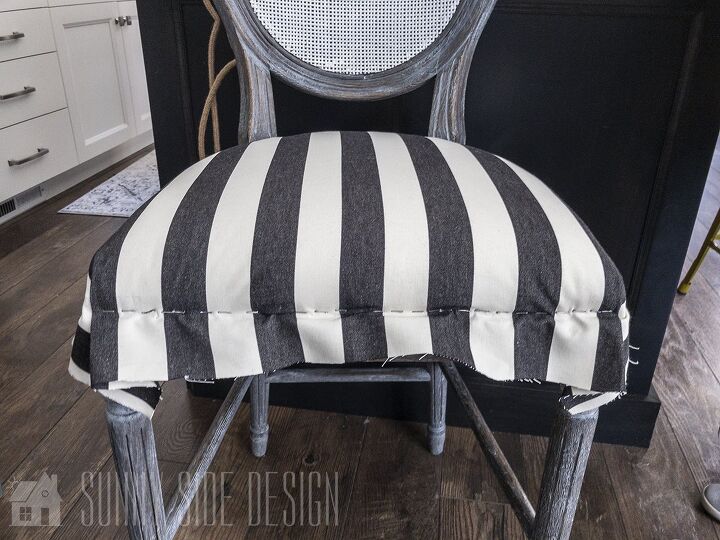
Place the fabric, right side up onto the farmhouse bar stool.
Place a staple in the center. Make sure the staple gun is resting on the ledge. The staples will need to be as close to the ledge area as possible. Otherwise they will show after the cording is applied.
Pull the fabric and make sure it is smooth before adding any more staples.Then add 2 more staples, one about 3″-4″ to the right and one 3″-4″ to the left of the center staple.
Fill in the area with staples between the side staples and center staple.
Align the center stripe on the mark on the back of the bar stool. Place one staple to secure it.
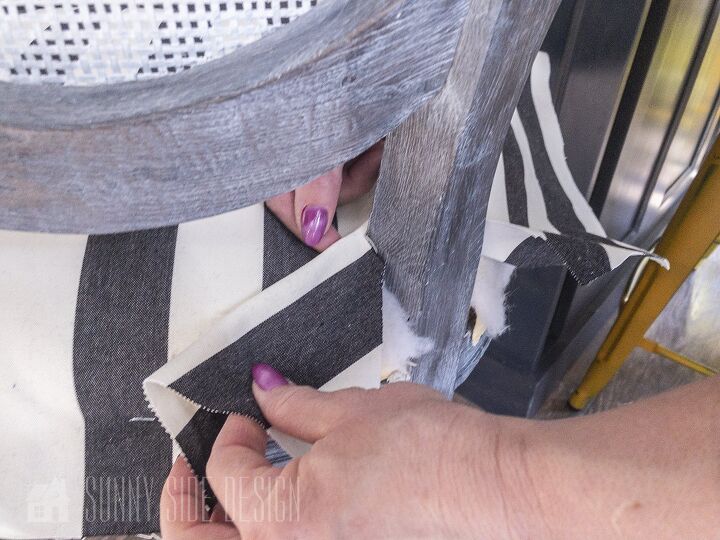
Now we need to make a few cuts in the fabric to have it fit around the back wood pieces. Begin by making a cut, aligning it with the center of the wood. Cut to within 1 1/2″ of where the fabric meets the wood.
See the video tutorial if you have any questions with this part.
Now from that initial slit, cut two angle cuts. See the photo, the center now has a little peak where the 2 cuts angle out to each side.
Tuck that peak piece in between the cushion and the wood.
Fold under the edge of the fabric so that it aligns with the edge of the wood, pull tight and secure with a staple. Repeat for the other back section. Fill in the area with staples.
Pro tip: At this point it is always helpful to have a second set of hands to help keep the fabric taut while stapling.
Pull the side taut and place 3 staples spaced about 3″-4″ apart. Repeat for the other side.
Once both sides are secured with 3 staples each. Then fill in both sides of the bar stool with staples.
Now that the fabric on the bar stool is completely secure.
With a pair of sharp fabric scissors, trim off the excess fabric.

We are now down to the final finishing step! We attached the cording beginning at the same back corner of the bar stool where it originally was started.
Use a hot glut gun to attach the cording. To prevent fraying place a little hot glue on the end of the cord. Then secure to the lower back edge of the bar stool.
Continue to run a bead of hot glue and apply the cording until the raw edge of the fabric and staples are covered. Trim the cording to fit the remaining area, then once again place a bit of hot glue on the tip of the cut edge. Secure in place.
Pro tip: To prevent the cut edges of the braided jute trim from fraying, place a little hot glue on the cut edge.
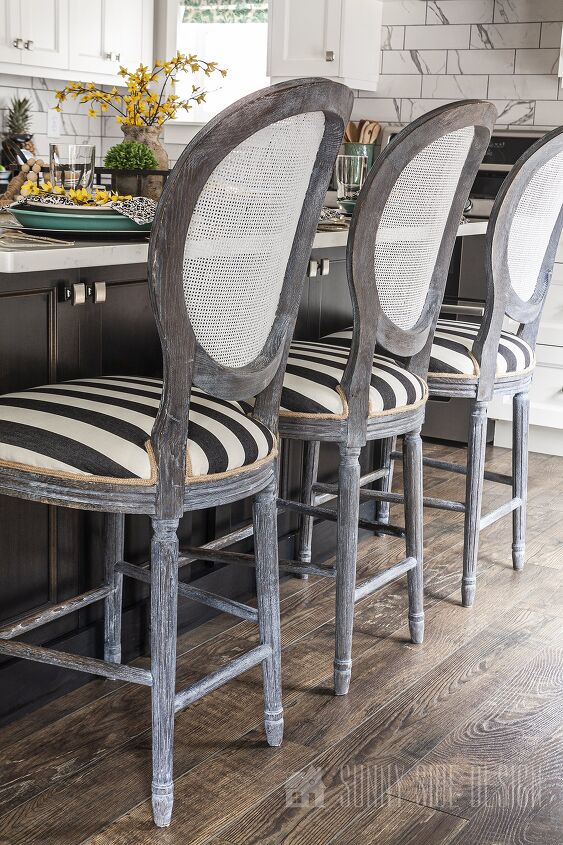
The combination of the fabric and the natural braided jute trim really give these bar stools that farmhouse feel.
At first, upholstery may seem a little intimidating. However with a little practice (start on a small piece first) you will soon find that you too can get professional results.
What do you think about this project? Do you love the results? The refinishing of the wood was super easy and the technique could be used on any piece of furniture.
To see more of our DIY upholstery projects click here.
Resources for this project:
See all materials


Comments
Join the conversation
-
These chairs look like high end furnishings. I would expect to have to pay top dollar for them, so I could never afford them.
You do such beautiful work, I am blown away ladies! Thanks so much for sharing!!
-
Wow you did a beautiful job, I'd buy those in a second! Nice find!


Frequently asked questions
Have a question about this project?
Love this, well done! Do you do something extra to keep the fabric from coming out where you folded it around the top of the chair ?
People seem to love a hot glue gun. Are there different types of hot glue for different projects? Or is hot glue, hot glue? I love your chairs
I would have taken the seat apart to staple the fabric underneath. How is it that yours is nice and neat without tucking the fabric under?
What do you use to set the cording?