


Add Some Beauty to Your Fence With DIY Decorative Plates

As you may have noticed, I’ve been on a quest to update the outdoor spaces of my home for the past few months. Beyond adding a new coat of paint, I wanted to add some decor to my fence to spruce it up a bit and add some visual interest. These DIY decorative plates are easy to make and super cheap. They will only last a season or two, but with a project this cheap and easy you’ll be happy to make a new set when needed. Follow my step-by-step tutorial below to get started today!
Tools and Materials:
- Paint
- Paint brush
- Plastic plates
- Isopropyl alcohol
- Alcohol ink
- Heat gun
- Kamar varnish
- UV protective gloss
- Stick and Style stencil
- Slick Stick
- Blue shop cloth
- Scissors
- Twine
- E6000
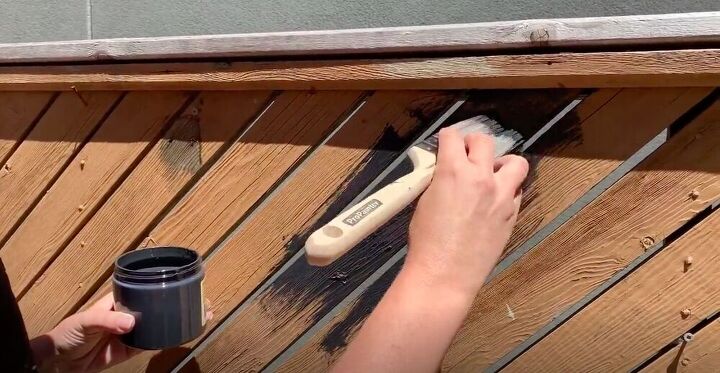
Paint the Fence
I got lucky with this project as I didn’t have to prep my fence at all! The existing paint was well adhered, so I was able to just paint right over it. If the paint is not well adhered, you’ll need to sand and remove as much of it as possible. When you paint over peeling paint, it will just peel off together with the previous coat of paint. Using an older paint brush I painted an even coat of midnight blue paint onto my fence. This paint has great coverage and I didn’t even need a second coat!
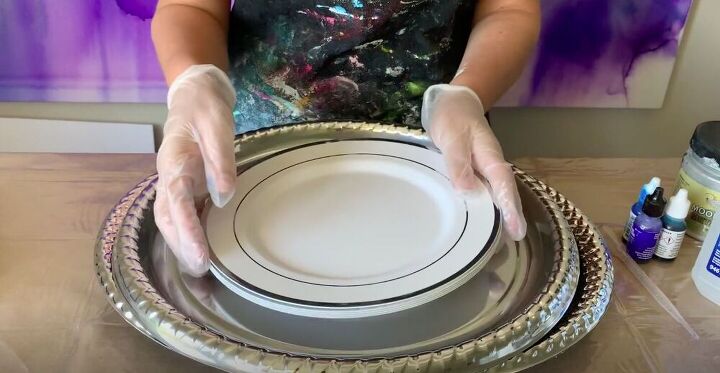
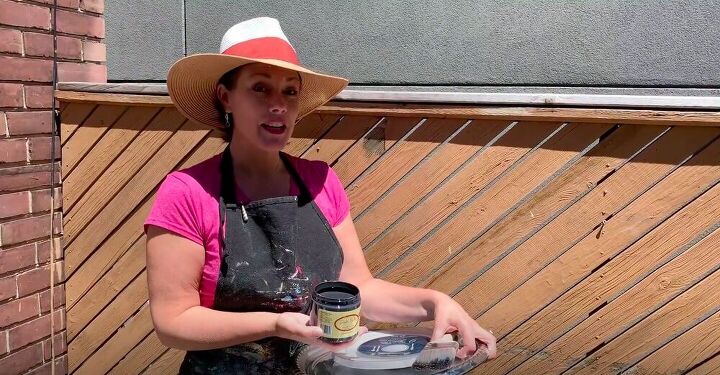
Color the Plate
I bought some cheap disposable melamine plates at my local dollar store for this project. These plates will probably only last a season or so, but that’s fine because it’s easy to do again or just to change up my decor seasonally.
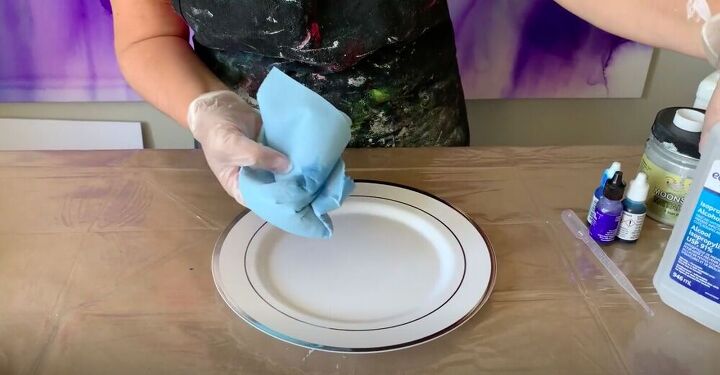
To get started, I thoroughly cleaned the plate with a bit of isopropyl alcohol on a blue shop cloth.
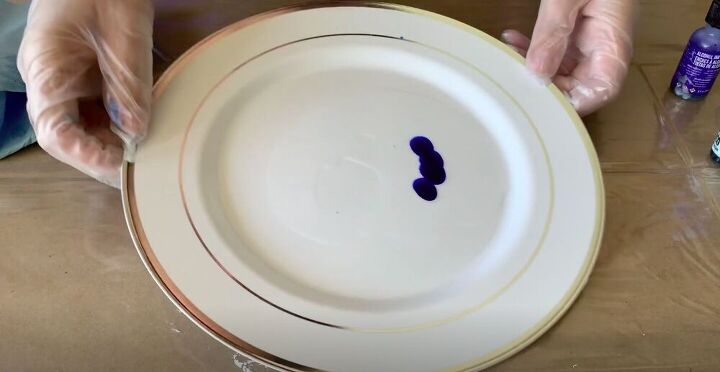
I added a small puddle of isopropyl alcohol to the center of my plate. Then I added a few drops of alcohol ink in different shades of blue and swirled it around a bit.
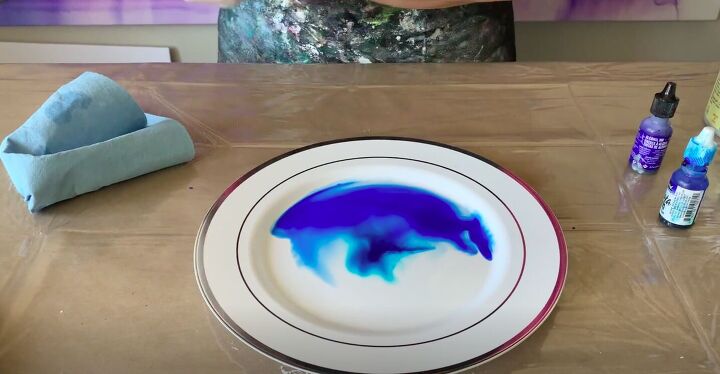
If any of the ink gets on the edge of the plate or in a place you don’t want it to be, just take a paper towel and some isopropyl alcohol and wipe it off.
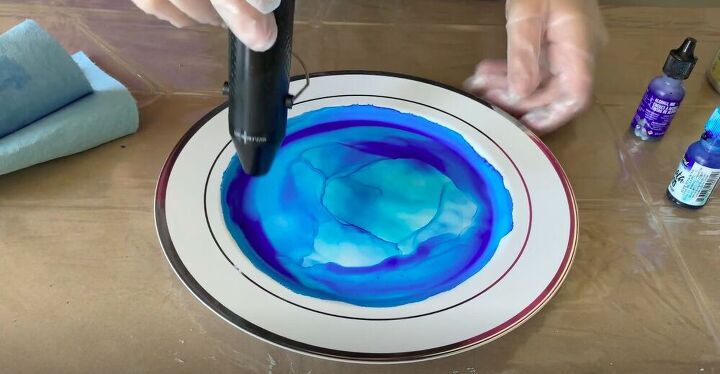
Then, using a heat gun, I moved the ink around a bit until it started to dry and I had achieved the look I was going for.
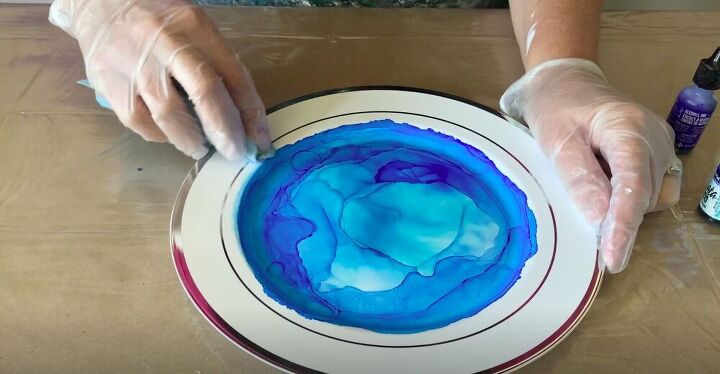
I cleaned up the edges again with a blue shop cloth dipped in a bit of isopropyl alcohol.
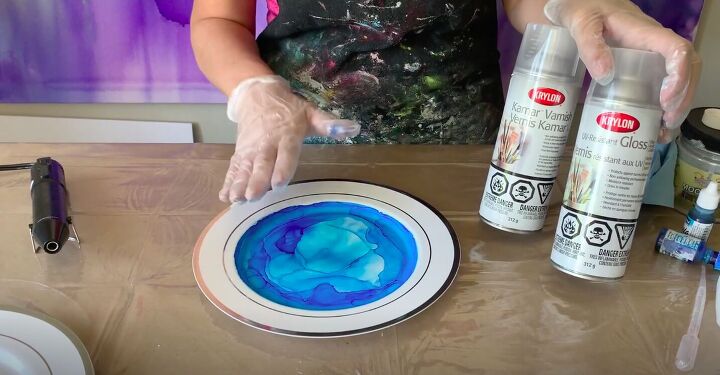
Alcohol ink is not UV stable, so it will fade in the light. I sealed it with two sprays. First I sprayed Kamar Varnish to stop it from smudging, and then I added a gloss that would make it UV resistant.
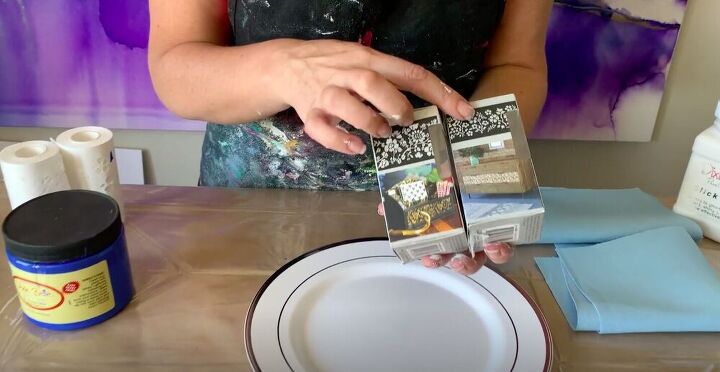
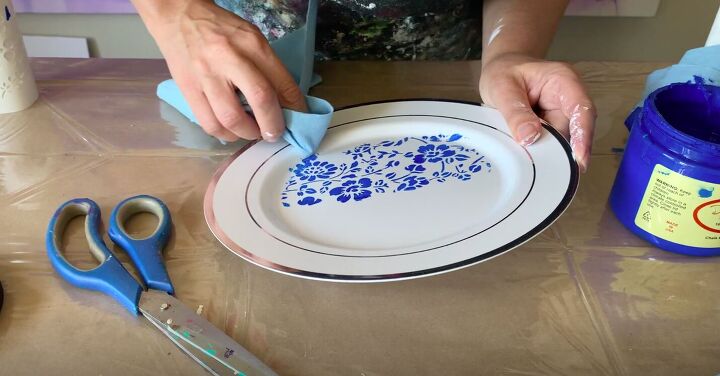
Add a Stencil
Now I’ll show you another way you can decorate a plate. I used a stencil called a Stick and Style stencil. I’m working with a floral stencil for this project.
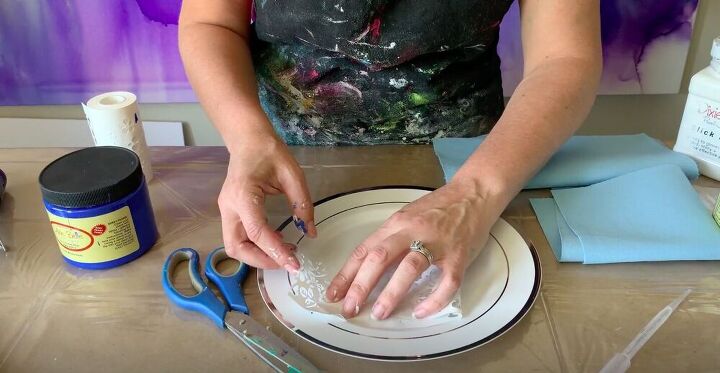
I cut it to size and stuck it down.
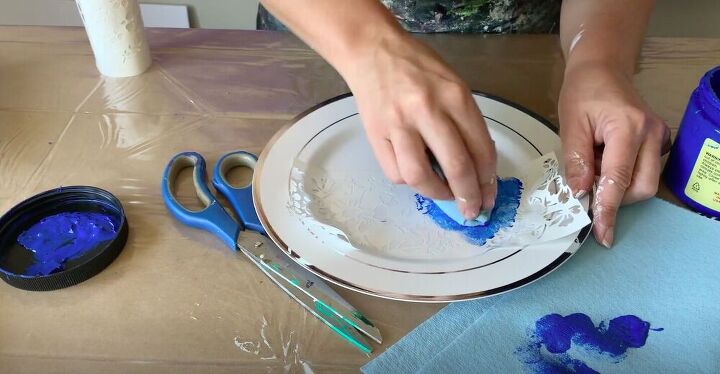
Then, using a blue shop cloth, I dipped into some paint. I offloaded a bit onto another shop cloth, and then pounced it onto the stencil. You may be asking yourself, why didn’t she just use a stencil brush? Well, I couldn’t find my stencil brushes or sponges! You can of course use one if you have one, but this is a simple way to work with what you have at hand.
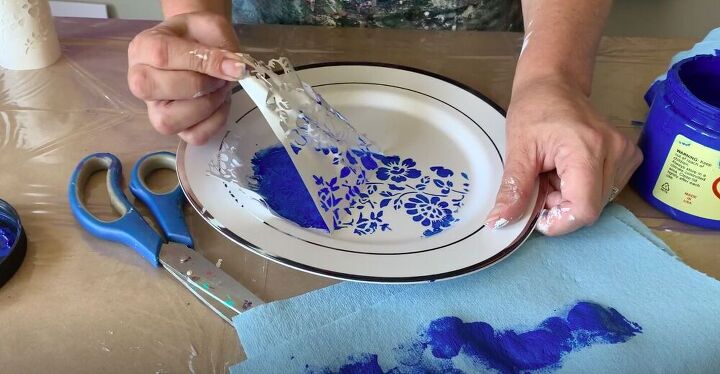
Once I had covered the entire stencil, I removed it and touched up the edges with a blue shop cloth.

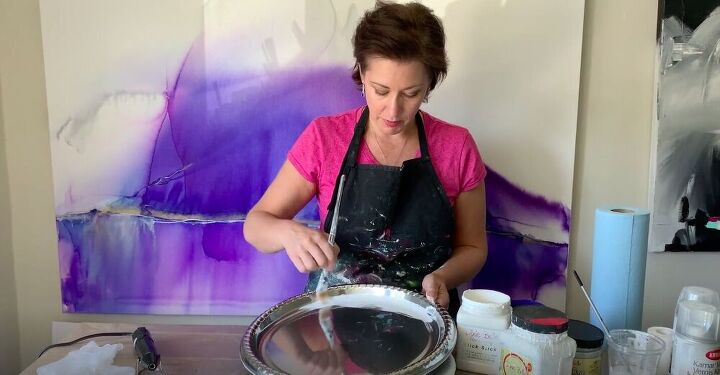
Splatter the Plate
This third technique is one of my favorites. The plate I’m using for this technique is very shiny, so I decided to use a product from Dixie Belle called Slick Stick. This allows you to paint over any shiny surface. Sometimes, when working with a very shiny surface, the paint won’t stick properly. Slick Stick solves this problem by priming your surface. Add two coats of Slick Stick to make sure your plate is completely covered.
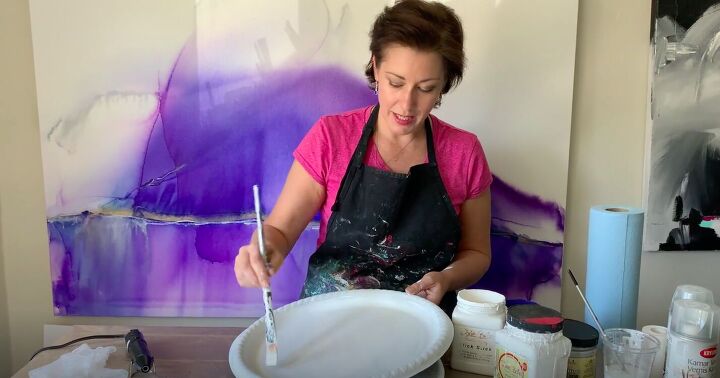
Once the Slick Stick had dried, I added a coat of white paint and let it dry.
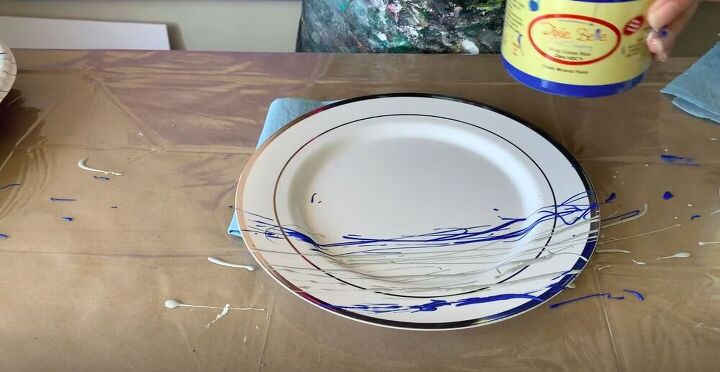
Now for the fun part, I dipped the handle of a paint brush into my paint and splattered paint all over my plate, a la Jackson Pollock. I alternated with two colors, a nice deep blue and a silver color.
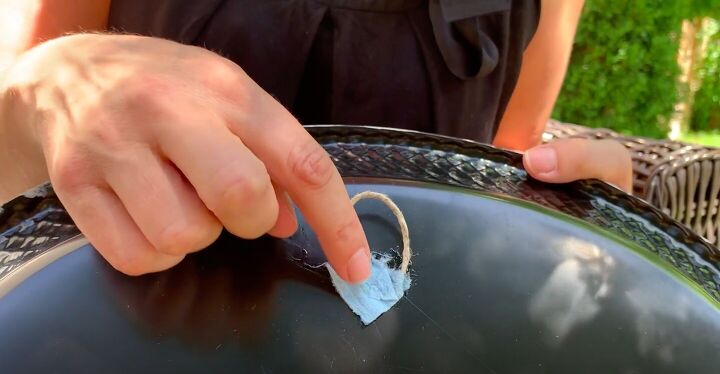
Hang
In order to hang these plates I attached a small piece of twine with E6000 glue and added a bit of blue shop cloth to hold it on securely. I attached hooks to my fence which made it easy to simply hang the plates on the hooks.
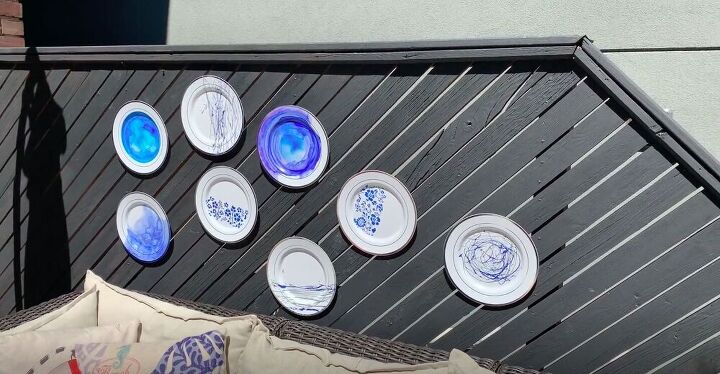
This is a fun and easy project that brings the indoors outdoors for some stunning summer decor! What kinds of designs would you use for your own fence? Let me know in the comments below!
Resources for this project:
See all materials


Comments
Join the conversation
-
I LOOOVE hanging plates anywhere I can. I might just try hanging them on my fence. Thank you for the inspiration!😀
-
you should do spray painted ferns and other natural materials for out side


Frequently asked questions
Have a question about this project?
I love the paint on the plates. Could the plates be used for food instead of just decoration?
It looks lovely. When you have to redo this in a few years, could you get plates from a second-hand store to avoid the manufacture of cheap stuff that creates pollution and ultimately ends up in the landfill?
Hi Fiona, have you tried using Spar Urethane on the plates? It is waterproof and UV protection, but I am not sure how it will react with the alcohol ink. Maybe an experimental piece could be made to find out. I also think that regular acrylic craft paints could be used instead of Dixie Bell to save money. Thank you for sharing your project :)