


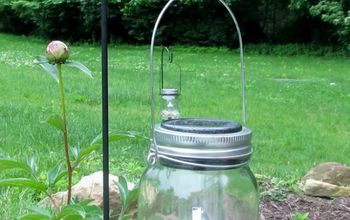
DIY Solar Lantern - Luminary Jar
Up-cycle an old jelly jar into something useful and decorative for your backyard patio area!
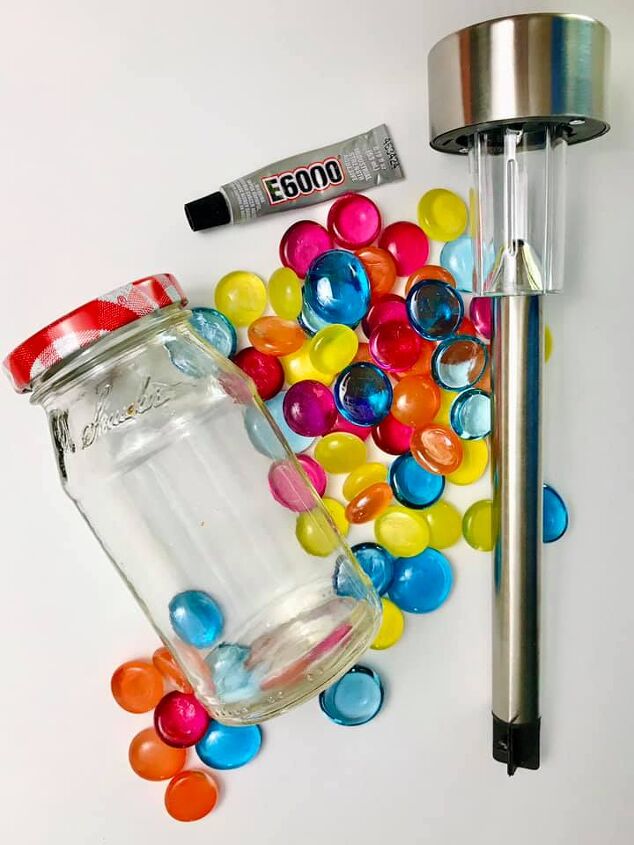
Gather Materials Needed for DIY Solar Lantern
- Empty jar (I used a small jelly jar.)
- Flat Glass Marbles (mine are from Dollar General Store)
- Solar Lamp (mine is from Dollar General Store)
- Hot Glue Gun
- E6000 Adhesive
More Glass Gem Ideas
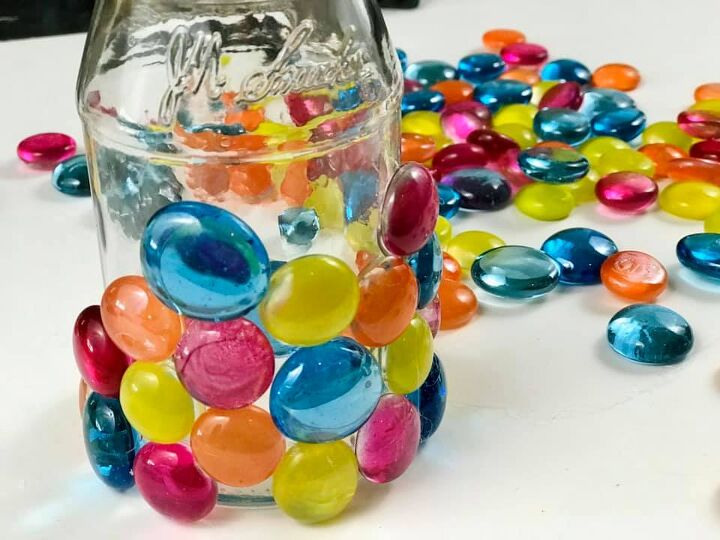
Attach Glass Marbles to Jar
There are several different methods that you can try to attach the glass marbles to the glass jar... from my experience, I recommend using a combination of E6000 with hot glue. The E6000 glue does require a little bit of drying time, therefore the need to use hot glue with it... the hot glue holds the glass marbles in place UNTIL the E6000 has a chance to totally adhere the marbles to the jar.
(Since I originally created this solar lantern project, I have since been informed that and outdoor-grade clear silicone may also work for this type of project.)
I discovered that beginning the marbles at the bottom of the jar and using somewhat of a random pattern for the marbles seemed to work best. All of my marbles varied in size, and made it impossible to get a perfect design/pattern anyway. Therefore, go for more of a random pattern - just be sure to attempt to fill in any large gaps/empty spaces between the marbles as you progress.
NOTE: Using only hot glue will not work IF you plan to use the solar lantern outdoors... the change in temperature will cause the glass beads to pop off the jar. IF using this lantern indoors, hot glue will work perfectly!
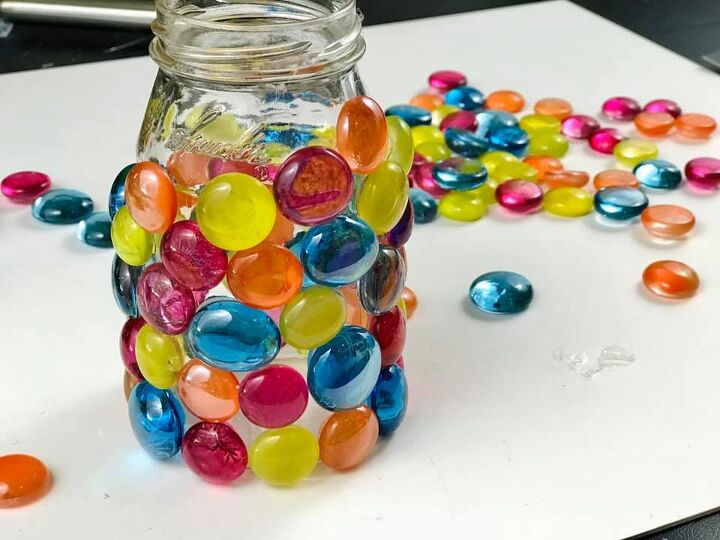
As you near the top of the jar - around the rim - be sure to keep any marbles below the rim of the jar... to be sure that you will have plenty of space to attach your solar lamp (in the following step).

Attach solar lamp to jar
Disassemble the solar lamp by removing the stake. Mine was a quick and easy procedure to just unscrew from the lamp unit.
Using the E6000 adhesive, attach the solar lamp to the top rim of the jelly jar. It is important that the solar panel still be visible at the top of the lantern - to ensure that it can acquire solar light and fully function / light-up properly.
Allow the E6000 to fully dry before handling.
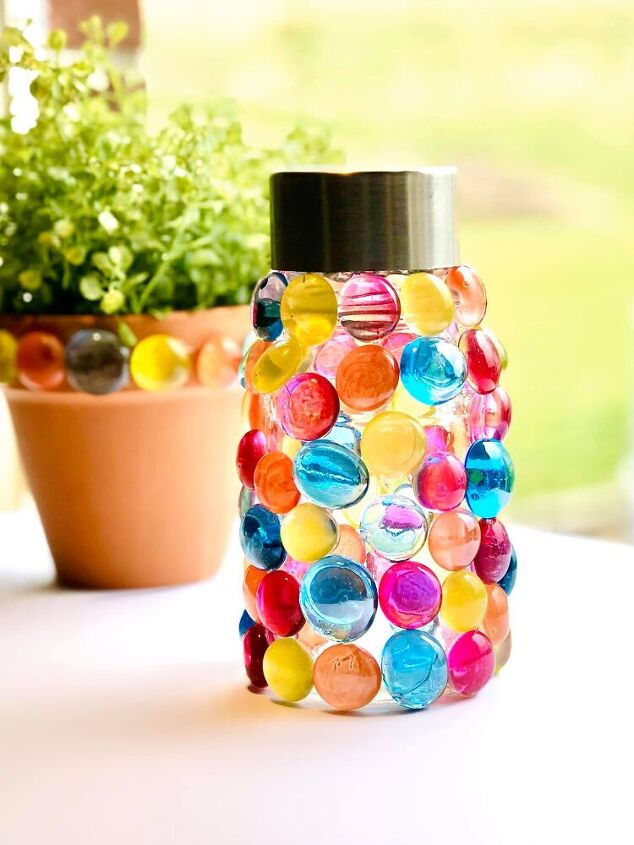
Use Your New Solar Lantern to Light-Up Your Favorite Outdoor Space
These DIY solar lanterns are perfect for adding ambient lighting along walkways, on picnic tables, tucked in a container of flowers, nestled among plants in a garden, etc. Get creative! You can even add a wire hanger and display from lower level tree branches in your backyard!

Like this project? Want to get more home decor & crafting ideas sent straight to your inbox?
Then, CLICK HERE to sign-up for my Extra Sweet Decor Email!
My promise to you... no spam, ever!!! Only great ideas to make your home even sweeter than before!
~Tracey
Resources for this project:
See all materials


Comments
Join the conversation
-
That’s awesome wonderful idea, Marcia! Thanks for sharing!
-
I’d just use the seaglass colored spray paints


Frequently asked questions
Have a question about this project?
Where's a picture of the completed project? Is the light down in the jar?
So, when the solar light dies, as they all do, can you remove it and put on another? Or is the adhesive pretty perman my?
When gluing the glass gems to the jar, do you put the adhesive on the gem and the hot glue on the jar? Or the adhesive on the jar and the hot glue on the gem?
thanks for this cute project!