


Chippy Paint Method
Hello! I’ve been meaning to post this chippy paint technique for awhile because it’s just so easy to do! I have a couple different ways I achieve varying degrees of the chippy paint look, but this one is definitely my favorite and the most dramatic. Head over to my blog to see more fun DIYs, too (that will go straight to your inbox)!
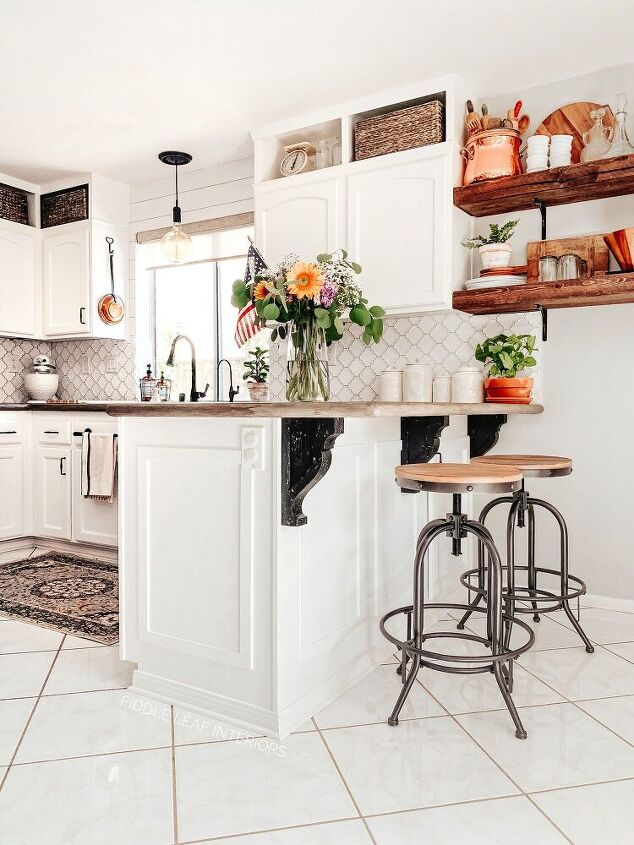
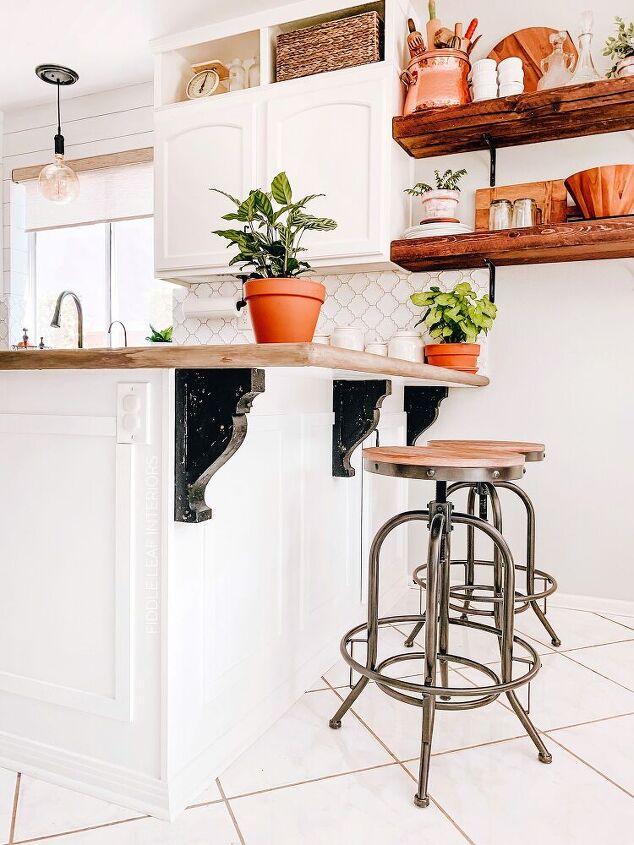
You also literally can’t mess this chippy paint method up. If you chip too much, just paint over it. If you haven’t shipped enough, just chip some more! It’s really as easy as that! I used this technique on these corbels, as well as on the faux fireplace mantel I built a few months back.

Paint or stain your item with the base coat. Here I used wood stain because I wanted a brown color to show through once I chipped away my top coat. Allow to dry.
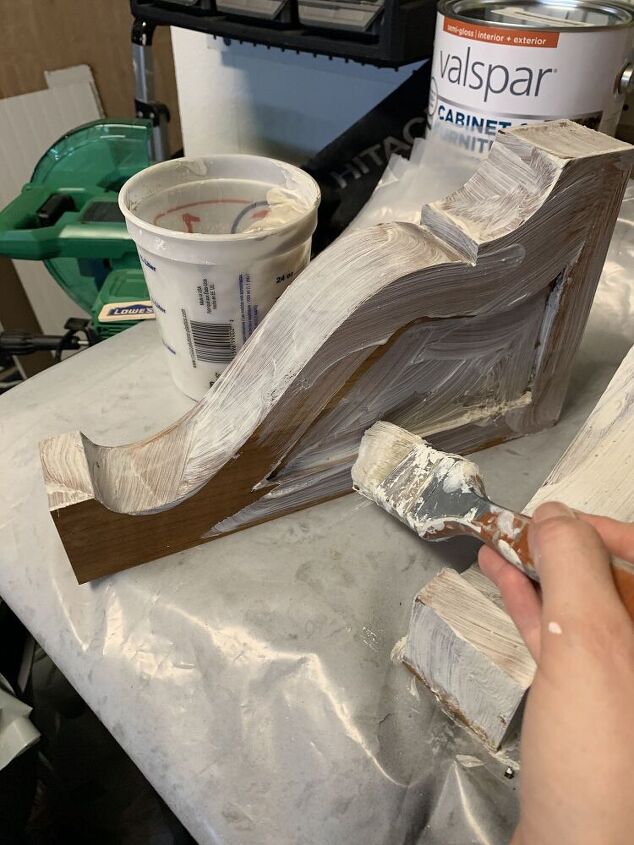
Mix up your plaster of paris with water until it reaches the consistency of mayonnaise. Using your old paint brush, lather it onto your item of choice. The thicker it is, the more you’ll be able to chip up. I made sure to brush it in all different directions and to leave some bigger clumps in places, too. Allow to dry.
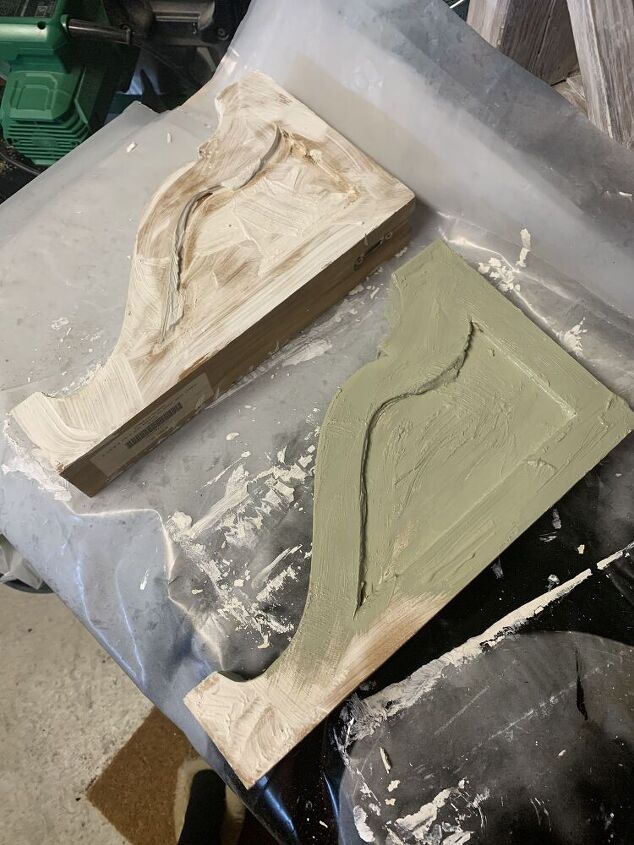
Using your scrap paint, paint a couple of coats on top of your dried plaster of paris. Again, this is just building up some layers of paint to make it easier to chip away. Allow to dry.
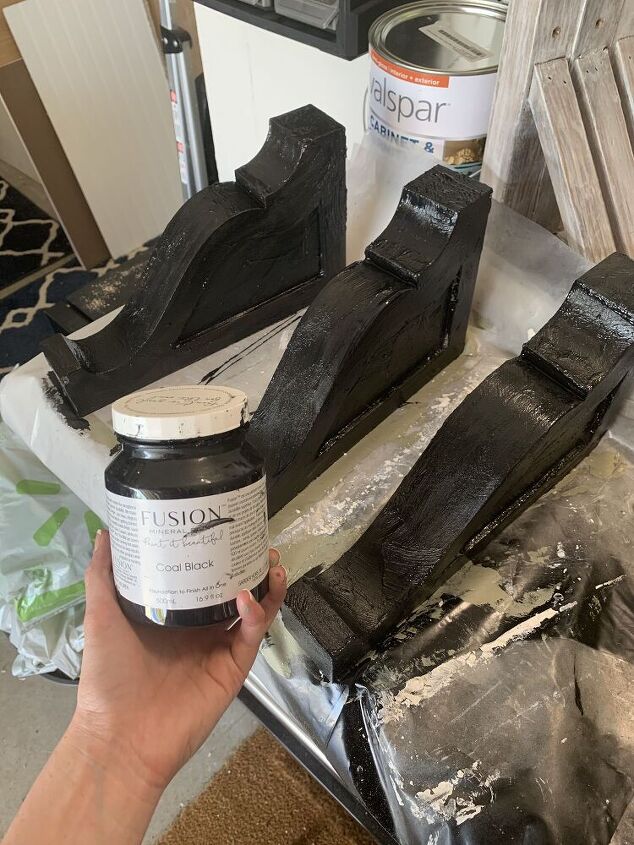
Paint on 2 coats of your top coat of paint; here I used black. Allow to dry.
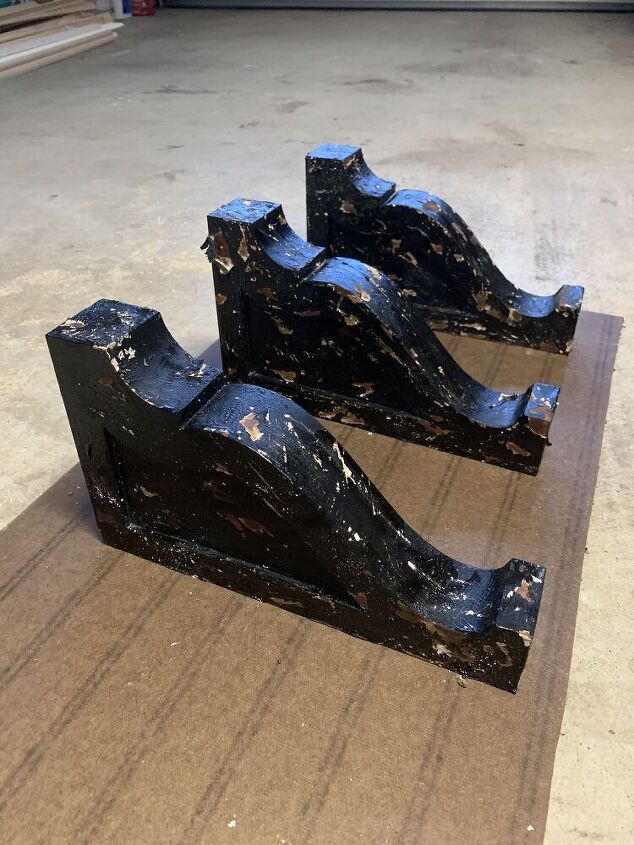
sing your putty knife or 6-in-1 painter’s tool, start chipping away your paint. It’s easiest to start in areas where you can tell the plaster of paris is thicker. You might notice some white powder residue from the plaster of paris, but you can easily/gently wipe it away with a damp towel.
I made sure to leave some pieces of the chipped pieces of paint attached to the corbels themselves here. It makes them look older and more aged, gives them more texture, and while you can still see the brown stain underneath, it’s more subtle because the black chipped piece of paint is still hanging there!
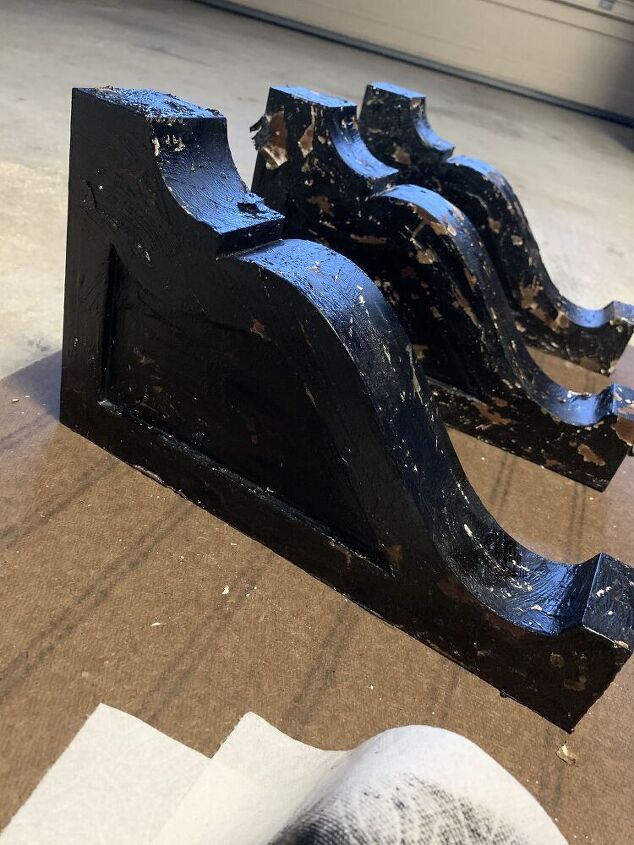
Now you may look at your chippy paint project and think “YIKES! That looks a mess!” That happened to me here because it’s really easy to get carried away with the chipping! If that’s the case for you too, not to worry, just add more of your top coat to cover up some of the chipped areas to make the chipping more subtle. Repeat steps 5 and 6 until you are happy with your final product! Just dab some of your top coat over the chipped areas to make the chipping more subtle!
If you choose, you can seal your project with a matte polycrylic, but I didn’t find any reason to do so!
And that’s it! It’s so easy (and fun!) to create this chippy paint look, and I know those of you who love good ole’ vintage pieces will love using this method!
Have fun, and I’d love to see your chippy paint projects, too! Tag me on Instagram @ fiddleleafinteriors or head over to my blog! I'd love to see you there!
Resources for this project:
See all materials


Comments
Join the conversation
-
Have you done this before? Just wondering how long the plaster will hold up.
Or if it will start calling off the wood? I would like to try an do On something else. Thanks for sharing
-
Love your corbels and your chippy paint method. Gives me ideas to replace mine. Thanks!


Frequently asked questions
Have a question about this project?
Where did you get your corbels?