Sunburst Mirror on a Budget
Sunburst DIY mirrors usually cost a several hundred dollars. I'm sharing how you can achieve this look on a budget
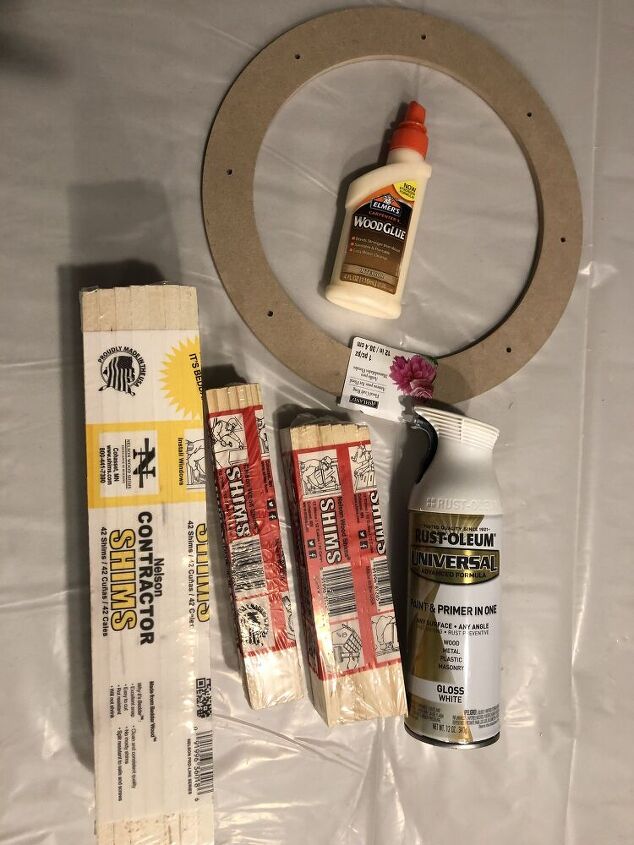
- Wood Shims in 8-inch and 12-inch
- Wood Glue
- 12 inch mirror
- Spray Paint
- Wood Beads
- 12 inch Floral Craft Ring
- Bonding Glue
- Picture Anchor and accessories
Start by glueing the wood shims together. Worked on each section in a pattern and worked my way out and using the longer shims in the middle and the shorter ones on the end as shown below.
Mirror needed 30 sections of the pattern. Once it was done, it was time to glue it to the craft ring.
Always recommend getting a visual prior to attaching. I laid out each section so that it was even in the middle before glueing them to the ring. See progress shots below.
Here is the progress shot once it was all glued together.
It was time for paint. I set up my spray tent in the yard. This thing is a life saver.
Using a can of paint, I sprayed the front and sides and had enough paint in the can left over for the wood bead necklace.
Once dry, it was time to attache mirror using bonding glue.
Added weights and left overnight to ensure it attached evenly.
The next day I added picture hanging hardware to the back on the craft ring.
Used the beads to make a necklace with some white twine I had on hand. Giving it 2 coats of spray paint.
After it was dried, I used bonding glue to attach on the rim of the mirror to give it a finished look.
Here is the finished project. We hung it up in my Tweens room and love the way in compliments the space.
The total project cost was approx $50 and about 5 hours and achieved the desired effect.
You can visit the link for more details:
Enjoyed the project?
Resources for this project:
See all materialsComments
Join the conversation
-
-
 Georgia Karamargin
on Aug 03, 2021
Cool idea! I’d like to make one in gold or bronze!! Please answer people’s questions, it helps us figure out what to do!
-








Frequently asked questions
Have a question about this project?
This is beautiful!! Did you need more shims than what is pictured? I know you said 30 sections...Thank you for inspiration! So awesome!
TORIE, you say you used 2 packs of 8" shims, there's only 24 shims in this project? On amazon you get 2 packs in the order with a total of 24 shims. Do you mean ordering 2 to get the 48 shims?
I didn't see 12" shims on Amazon saw only 15".
When you started putting the sections together how did you get them flat on the 8in shims? Some of mine don't get very close unless I trim the shimes in the middle of the circle