


DIY Dollar Tree Button Pumpkin
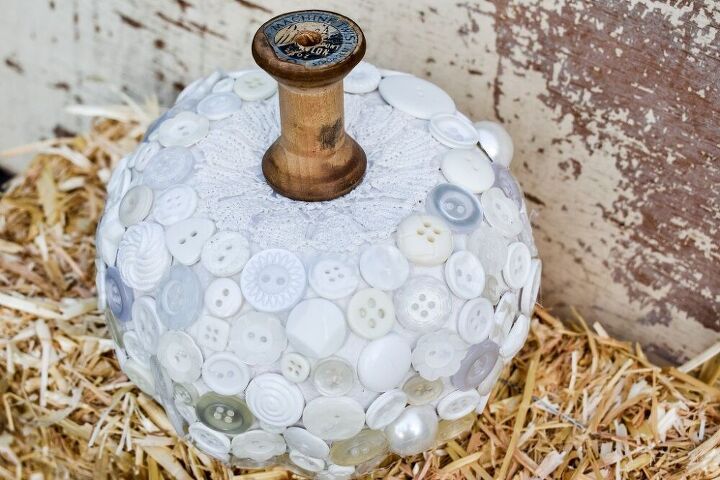
Do you remember those bright orange foam pumpkins they had at Dollar Tree last year? I planned ahead and put some aside last Fall. This year, the pumpkin theme on my blog, Zucchini Sisters, is vintage sewing notions. My pumpkin features buttons, crochet work and a vintage thread spool that I had in my craft stash.
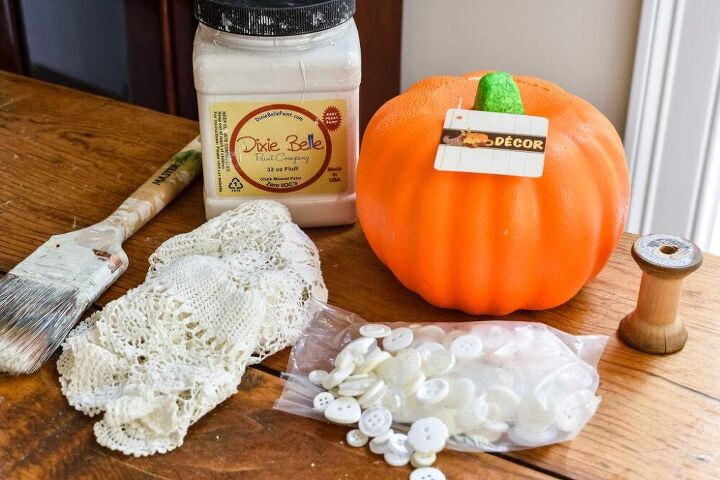
Here's what you'll need:
- 4 1/2 inch foam pumpkin from Dollar Tree (or another foam pumpkin)
- White paint – I used Dixie Belle paint in Fluff
- paintbrush
- crocheted doily
- assorted white and clear buttons
- hot glue gun and glue sticks
- empty wooden thread spool
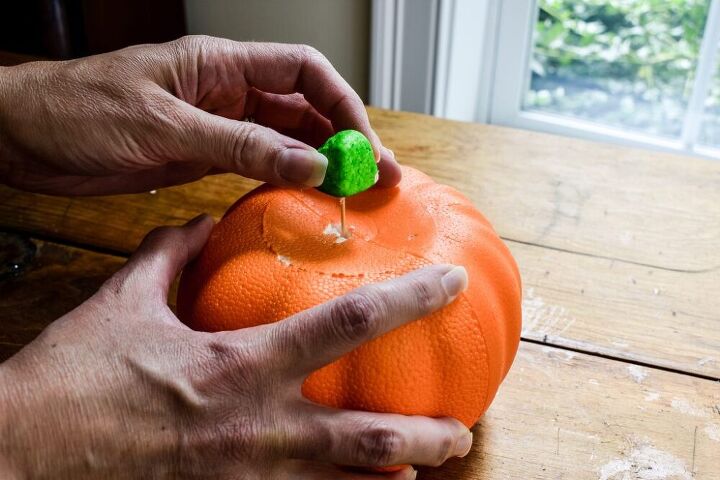
Step 1.
Remove the green foam stem. It’s held in place by a toothpick and will lift right out.

Step 2.
Paint the pumpkin white. You’ll need two coats to ensure that no orange shows through.

Step 3.
Cut out a circular piece of the doily to go on top of the pumpkin. This is optional…you may choose to cover the top with more buttons, instead. Hot glue the doily to the top of the pumpkin. Center it where the “stem” will be.
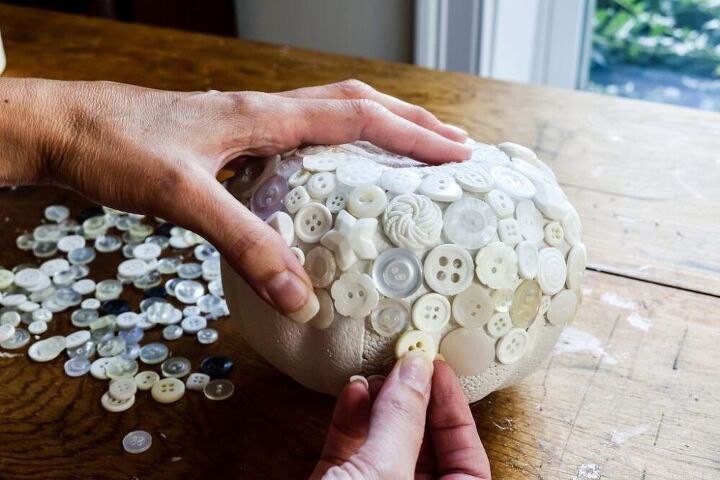
Step 4.
Starting at the top, hot glue the buttons in a circular pattern around the pumpkin. Vary size, color and style for added interest. Continue gluing buttons until you almost reach the bottom. Do not glue buttons to the bottom of the pumpkin as it needs a flat surface to rest on.
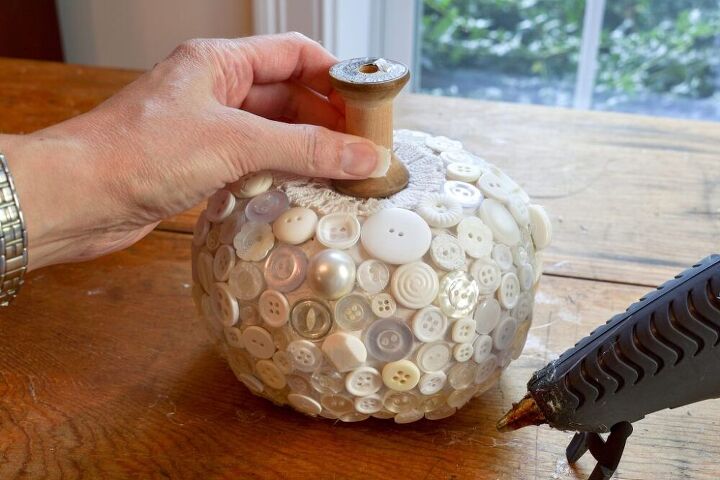
Step 5.
Attach the spool to the top of the pumpkin with hot glue.
And you’re done! I hope you liked my DIY Dollar Tree Pumpkin makeover and that you feel inspired to start crafting for your own Fall decorating. Please visit my blog, Zucchini Sisters, for more craft and home decor ideas!
Resources for this project:
See all materials


Comments
Join the conversation
-
This is a wonderful idea to use some of those old doilies and buttons, inspired idea! Thanks for sharing.
-
Very cute, you could even use a wine cork if you didn't have a thread spool for the stem.


Frequently asked questions
Have a question about this project?
Cute!!