


Stenciling a Tile Bathroom Floor
In our pool house bathroom, the floor tiles were bland and dated with dirty grout. Since I have never done this before, I wanted to experiment on a bathroom floor that wasn't a primary one - master bedroom, for example. Though a bit time consuming I am extremely happy with the results. To see more about our historic property, click here.
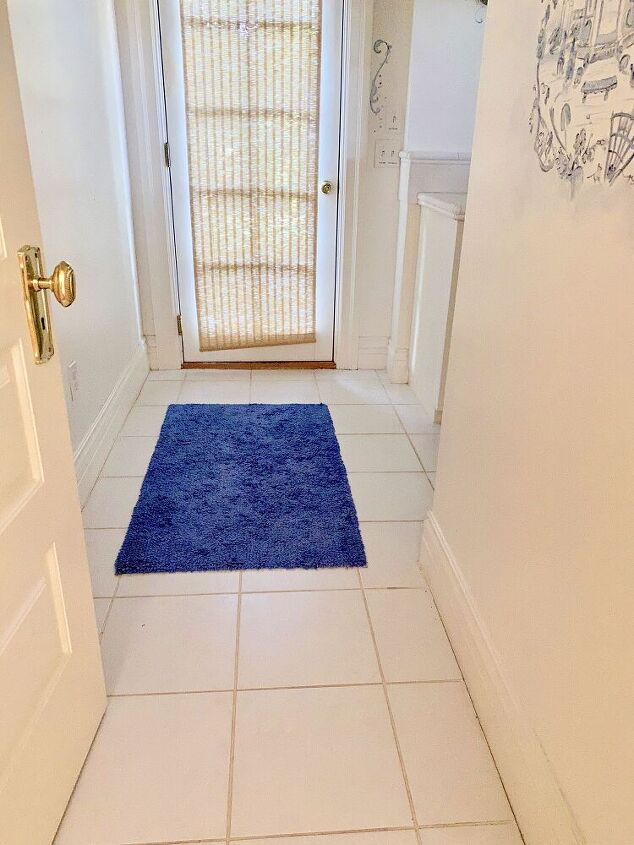
The floor BEFORE
In searching for a stencil, I discovered that most over the counter ones were too small for my individual tiles.
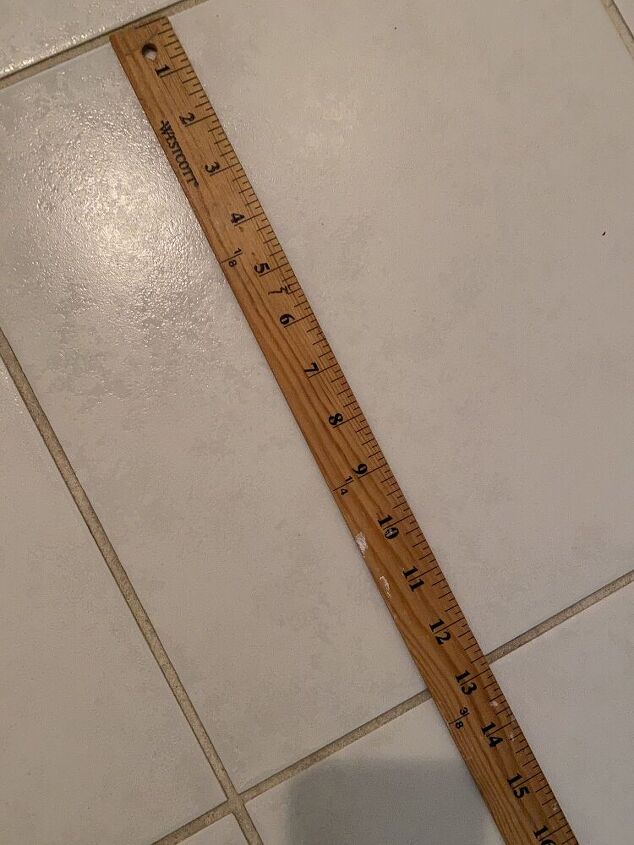
Measure accurately
In selecting a stencil, you will need to determine whether you want the stencil to fit inside your tile, or do you want the grout to be part of the design. Since I really didn't want to see distinctive grout lines, I had a custom made stencil to fit both the tile and surrounding grout.
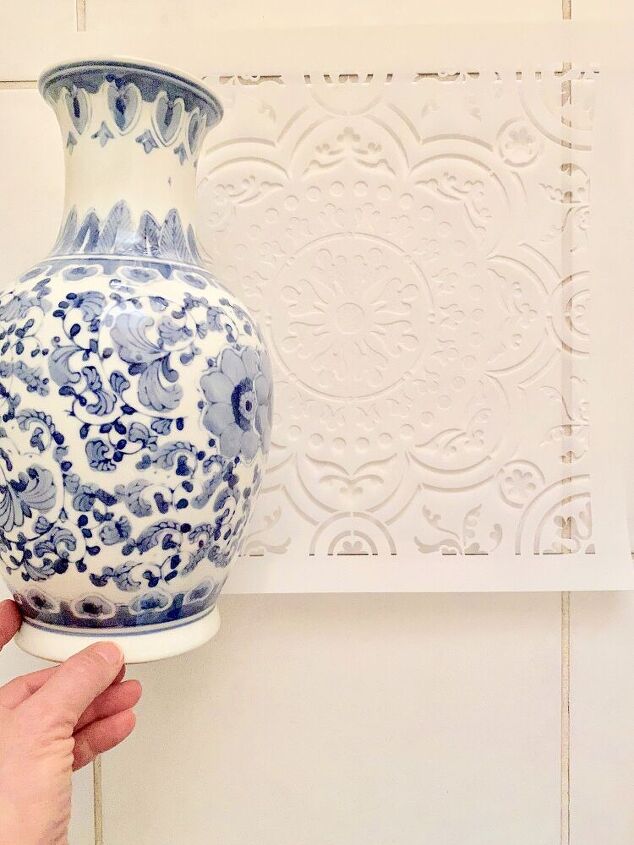
My inspiration
In retrospect, I selected a rather complicated stencil design, custom made by Royal Design Studio s. Up to this point I wasn't sure if I would paint it one color, two or more. But inspired by this blue and white vase, I began my color selection.
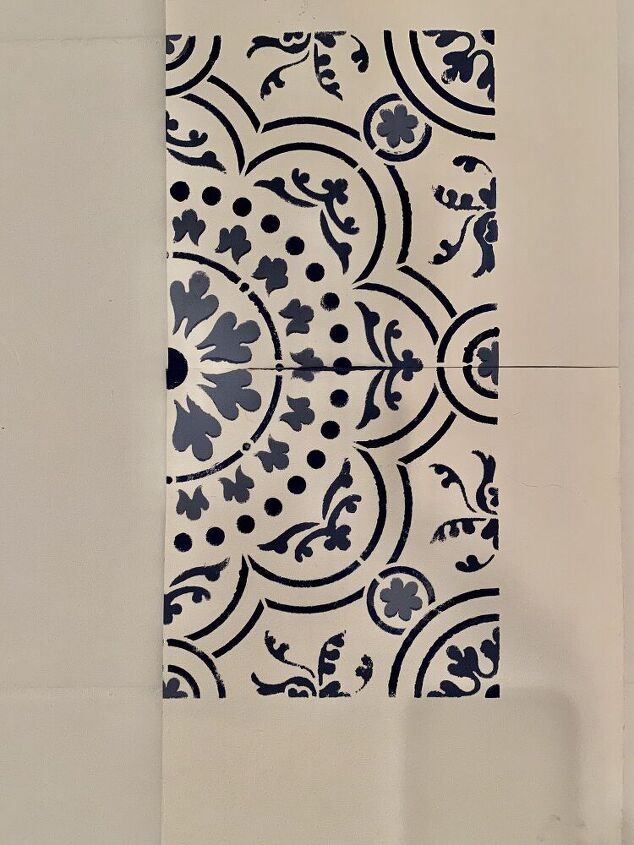
Sample
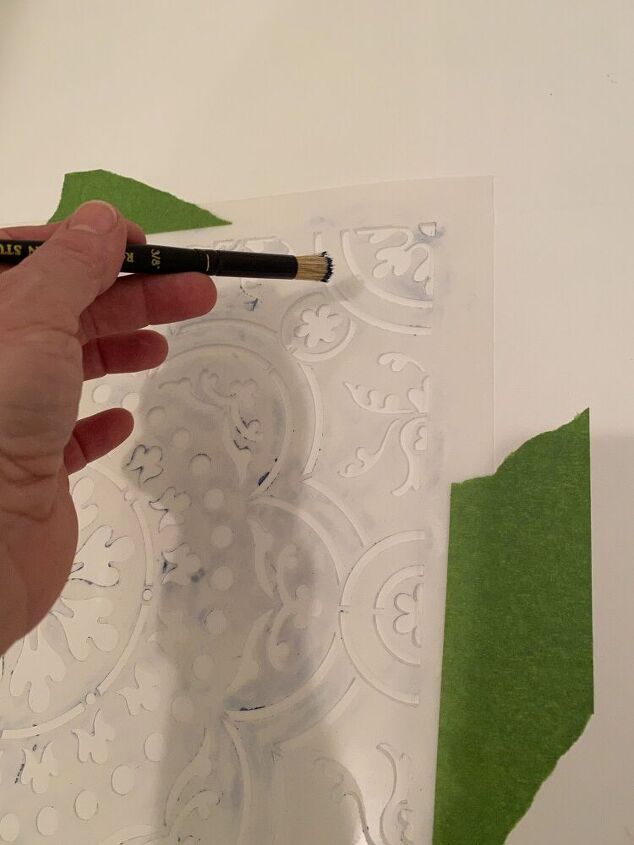
Before I began painting the floor, I practiced with some different colors on a sheet of artist paper. Here I determined what color would go where.
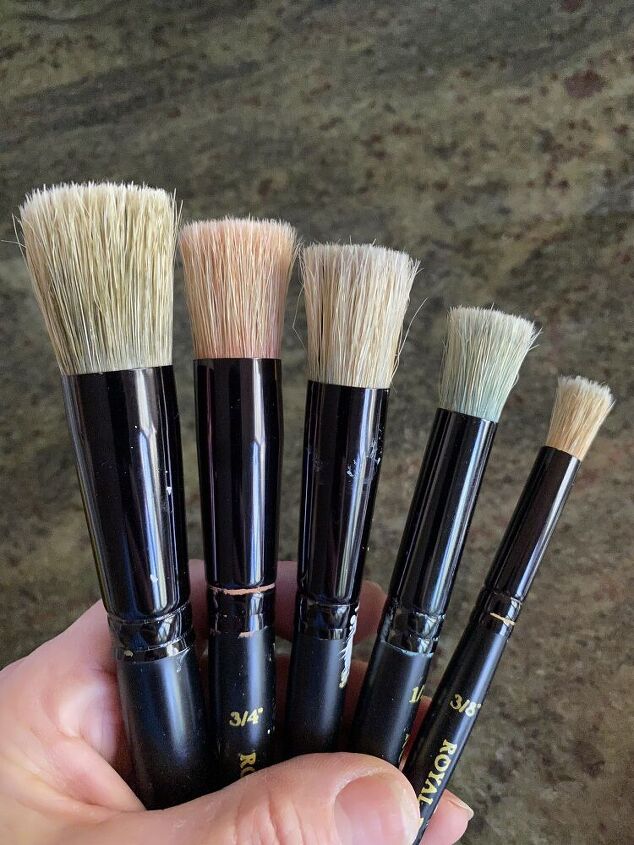
Use the right tools
Make sure you have good stencil brushes. Previously I had purchased some from Walmart and the bristles fell out during the painting process. This set is from Royal Design Studios.
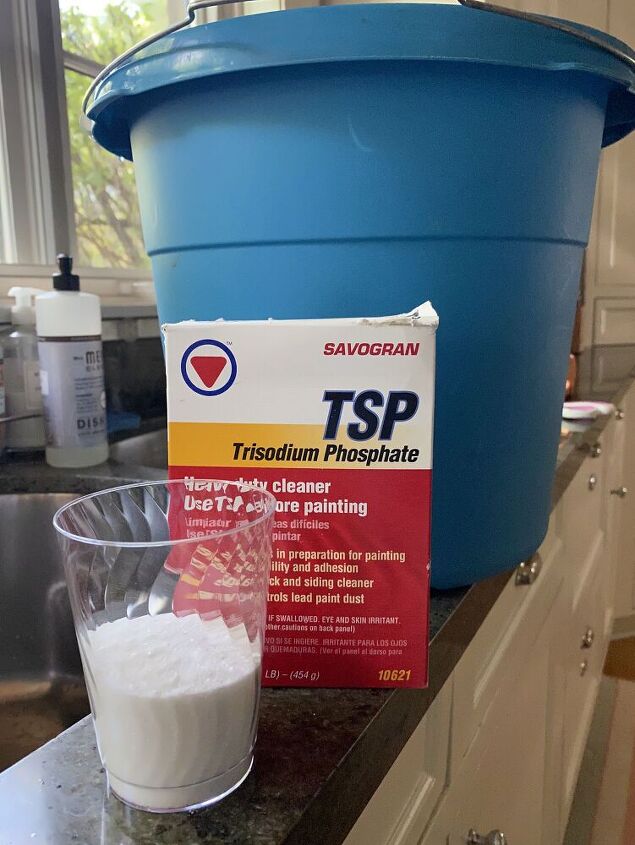
Preparation is important
Even before painting the stencil, it is so important to prep the tiles. Using TSP (trisodium phosphate), the floors are thoroughly cleaned. Be careful using this product and follow the manufacturer's instructions. A clear rinse followed.
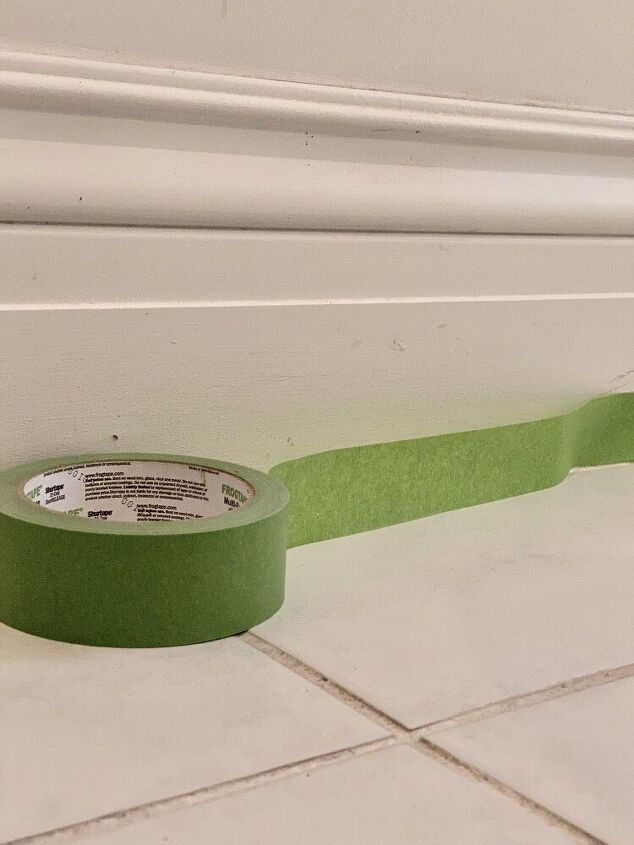
Protect the baseboards/walls
Using painter's tape, I taped off all the baseboards and around the toilet.
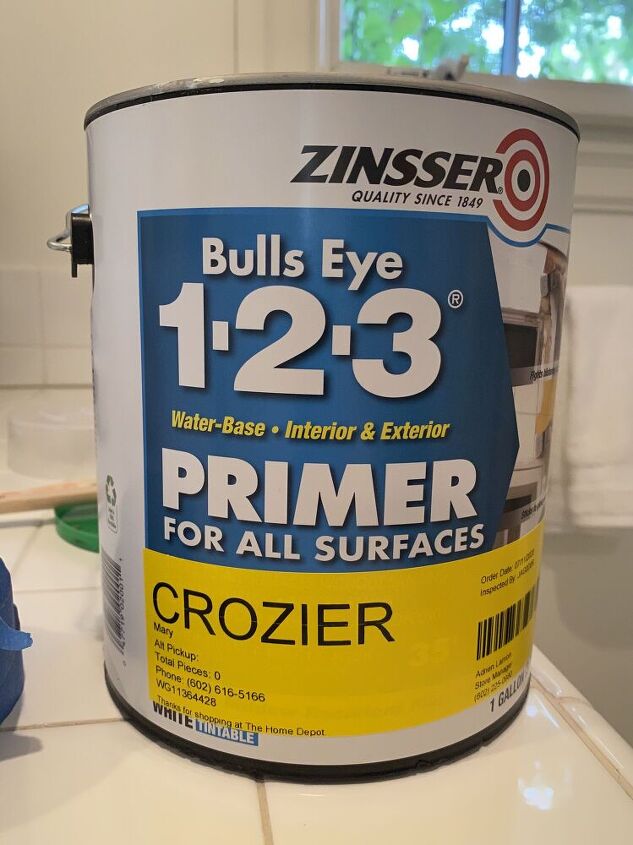
The Primer
Next, I primed the tile floor (tile and grout) with 2 coats of Zinsser's Bulls Eye 1-2-3 primer. Let dry according to manufacturer's instructions. After the primer dried, I painted 2 coats of the white base coat chalk paint.
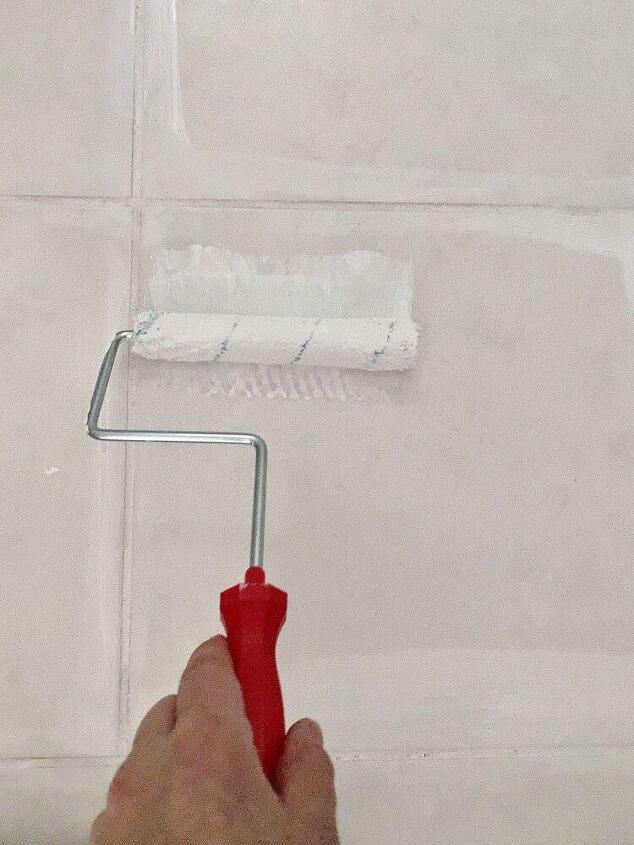
In priming and painting the floor, I used a roller for the tile and a paint brush for the grout.
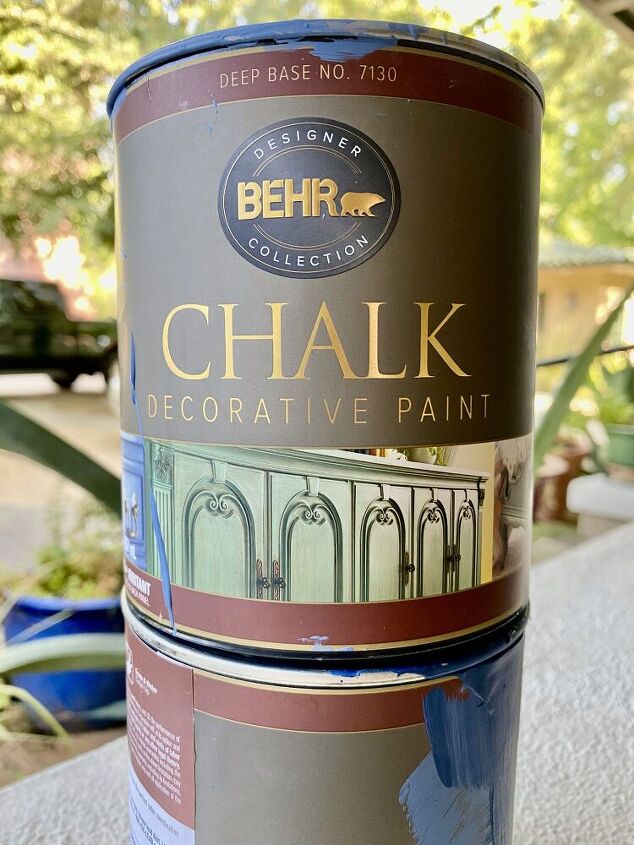
Choosing your paint
I used Behr Chalk Decorative Paint for both the white base coat and 2 shades of blue. For the 3rd blue, I blended white into the darker blue paint, until I achieved the lightest blue shade.
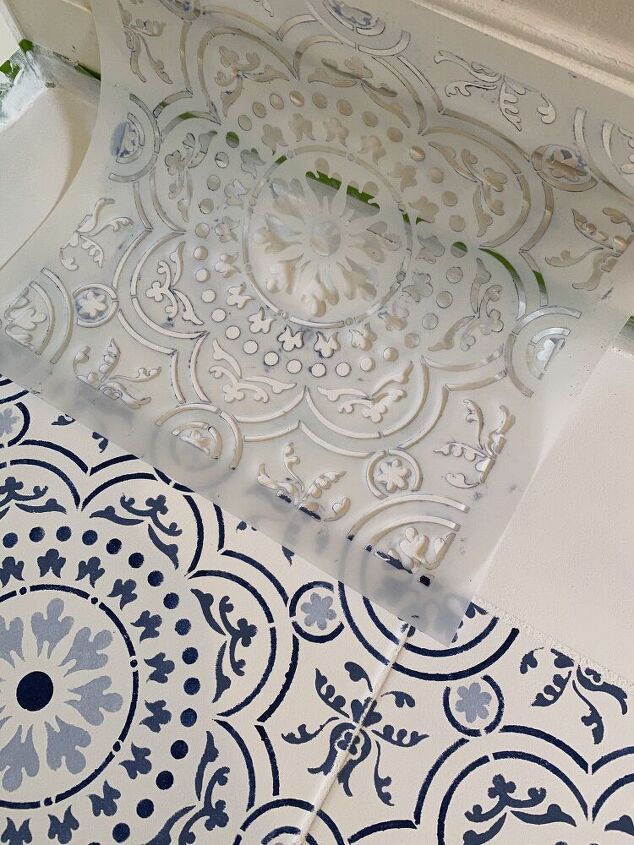
Secure the stencil to the floor with painters tape. Check and double check that your stencil is square to the tile.
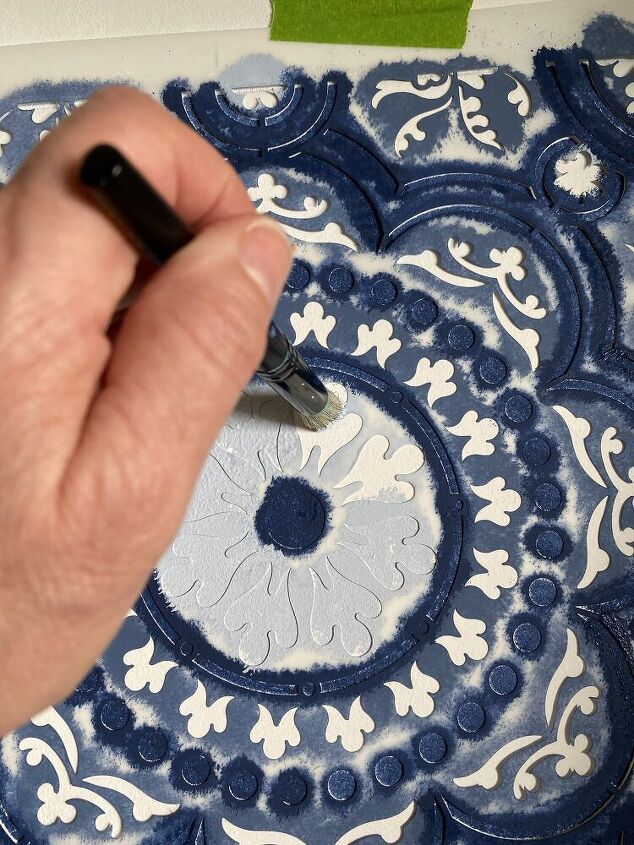
By dabbing the stencil brushes into the paint (and then dabbing the excess on paper toweling), I carefully added the 3 shades of blue.
Stenciling partial tiles
Since all the perimeter tiles are not full tiles, you need to bend the stencil to fit. Securing with painter's tape helps a bit. Again, make sure your stencil is aligned correctly.

Work in progress
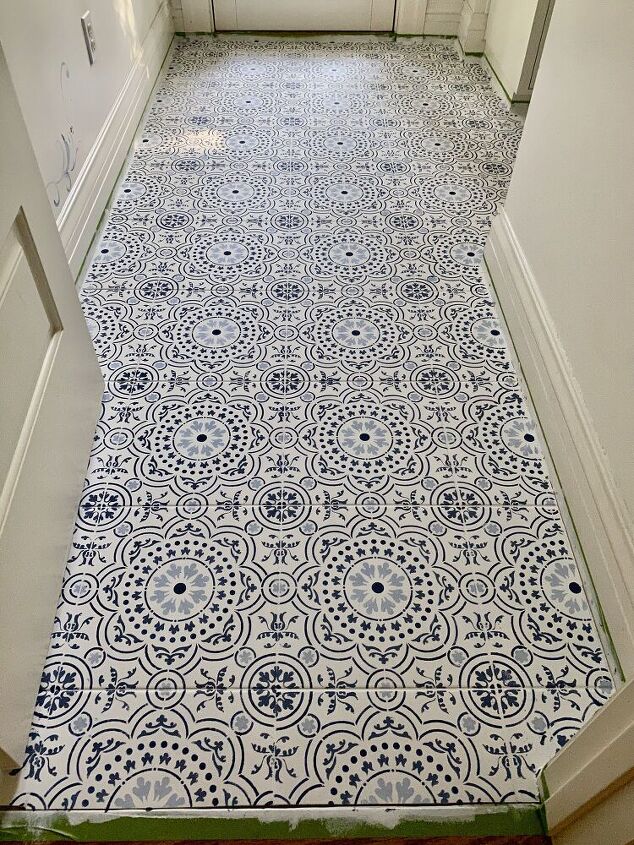
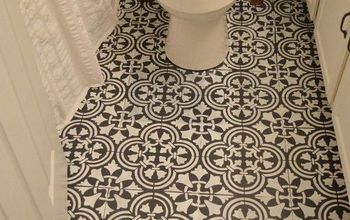
The floor AFTER
Once the tiles are stenciled and dry, then it is time to apply 2 coats of a protective sealer.
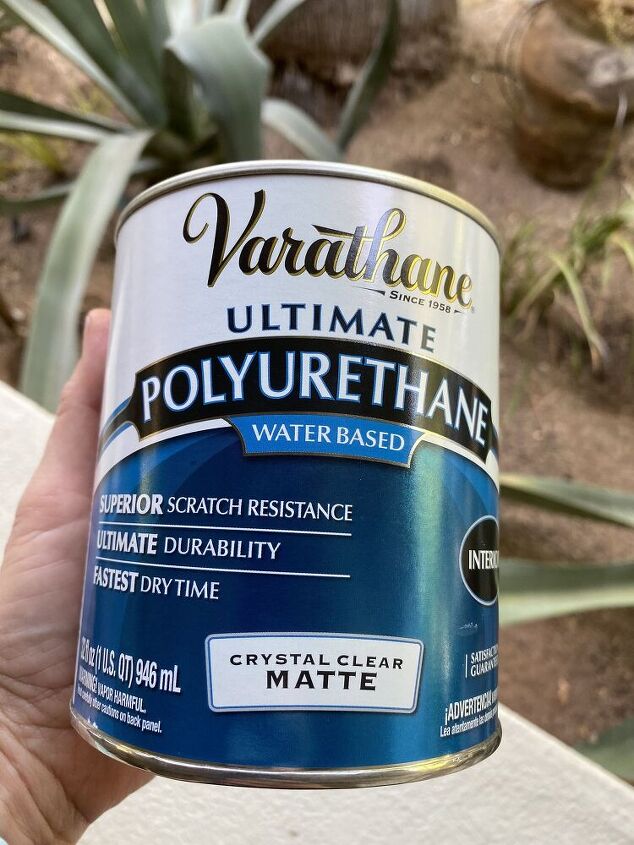
Apply the polyurethane (water based) and dry according to manufacturer's directions.
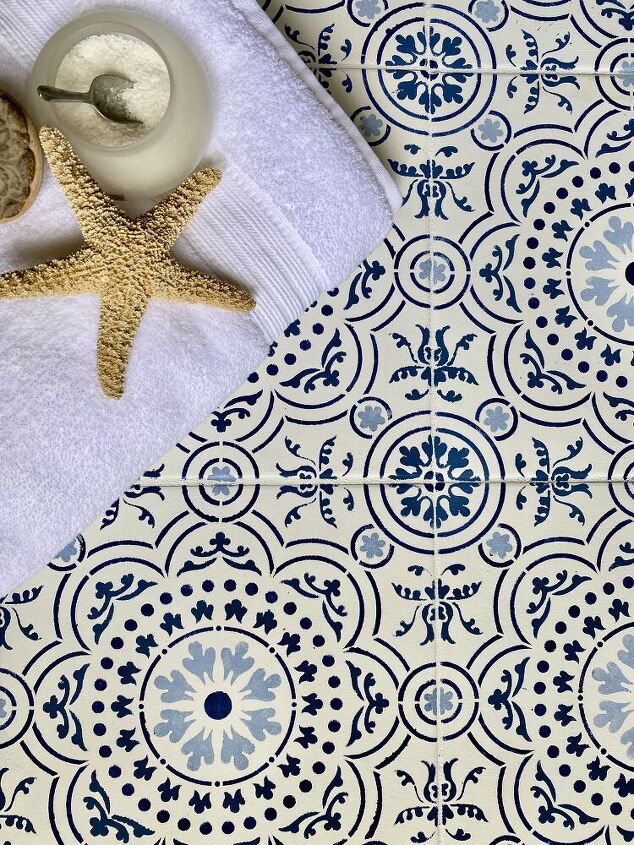
I cannot tell you how pleased I am with this floor. It was labor intensive as you are working on your knees or sitting on the hard tile floor. The bathroom had a total of 77 tiles (mostly partial ones around the perimeter). But I now think of it as a work of art!
To see a more in-depth tutorial, please visit my blog post here.
Resources for this project:
See all materials


Comments
Join the conversation
-
Ingrid, thank you. It was certainly a labor of love!
-
My kitchen floor needs this! It has chips and no matter how much I clean it, it looks dirty because of the chips. This is a great idea and you have inspired me! Thank you so much!


Frequently asked questions
Have a question about this project?
Does this floor scratch with wear?
Can I do this project on vinyl flooring?
Why is it they never show what they do to get in the corners or around the toilet? I want to try this, but I can not find a place that has reasonably priced 8x8 in stencils, which I can only assume I need a few.