


Knockoff Rustic Industrial Mirror Frame

Walk through my house and you’d probably think I know nothing about home decor. I have old brass/gold hardware throughout. Lots of builder grade boring stuff. Old, out of style tile and almond colored toilets. It’s bad sometimes my friends. But that is the beauty of DIY! I can take my time and slowly upgrade the space to be what I want. And that is just what I did when I updated this closet door to have more modern hardware (painted) and added a rustic industrial mirror frame that is a knockoff of a super expensive version for a fraction of the cost!
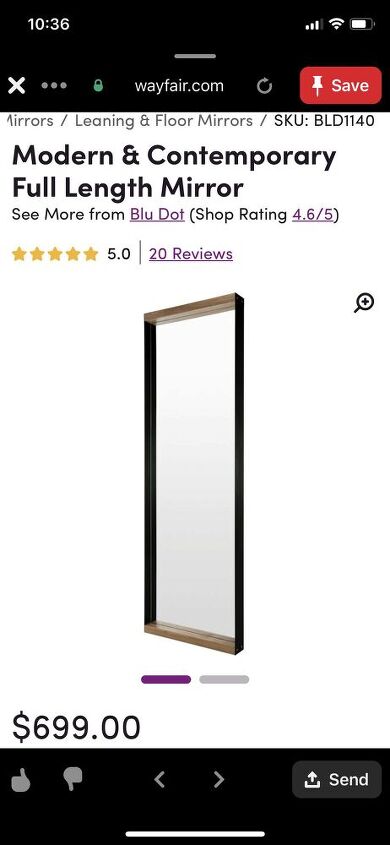
First off, here is the $699 inspo. Beautiful, right?! But definitely out of my budget. I think you’ll find that this tutorial will give you the exact look of the mirror in this inspiration picture with some super significant savings!
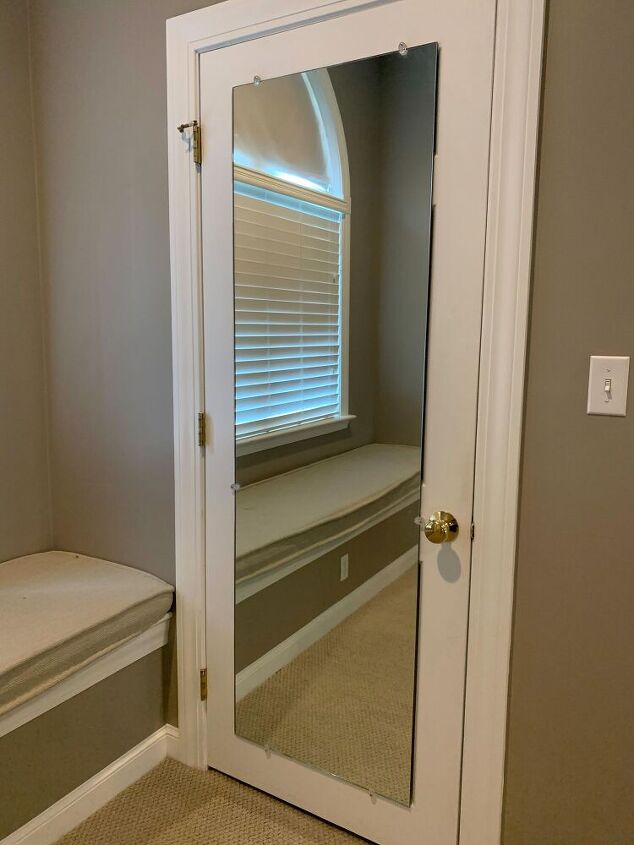
And here is the before shot of my closet door! Agh. Don’t judge me.
Given that both the mirror frame and the door hardware need their own tutorials, the focus of this tutorial is the rustic industrial mirror frame. I’ll address the hardware in another post in the very near future, I promise!
First you need to remove the old clips which is just a few turns of a screwdriver. If your mirror is as big as mine, I’d recommend recruiting a little help so that when you remove the last couple of clips the mirror doesn’t come crashing down. Oh, and quick tip: make a couple of pen lines along the top and side edges of your mirror so you know where to place the new clips without re-measuring.
These new clips are meant to screw into the door and then slide in and out. You will want to place the screws in the slot closest to the edge. Make the screw tight but not so tight you can’t move the clip. Then slide the clip out away from the center of the door. This will allow you to put the mirror in place and then slide the clips back in to secure the mirror. Caveat: do the opposite of what I just said for the bottom clips. You want the screws at the far end away from the clip end so that when you put your mirror weight on them they don’t shift.
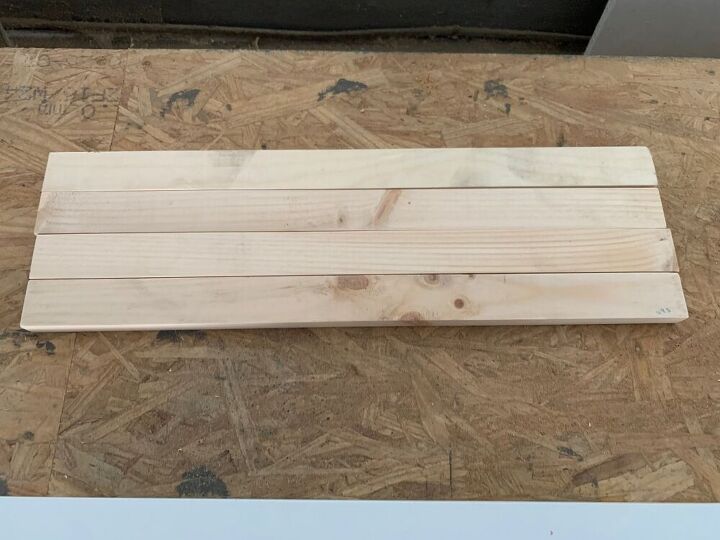
Using 1×2 boards, cut the top and bottom pieces to the exact width of the mirror.
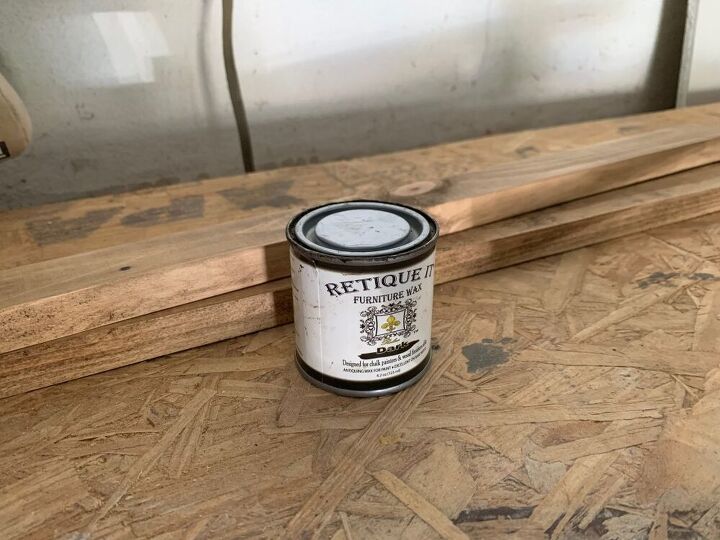
You can then finish these any way you like. I started with a rough sand using a sanding block and then applied dark wax directly to the bare wood. If you have a preferred stain, feel free to use that here.
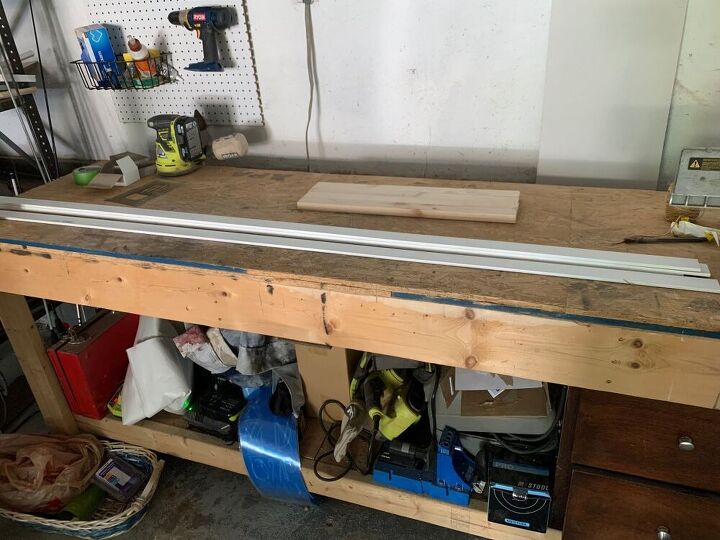
Using 1.5″ width lattice strips (I purchased the vinyl but wood would work as well), cut the side strips to the height of the mirror + 1.5″. The additional 1.5″ accounts for the top and bottom wood strips that you will be covering with the lattice.
Once cut, give a rough sand with a sanding block and spray paint each side with flat black spray paint. I used Rustoleum brand.
Once attached, I noticed that the lattice strips bend a bit where they are not physically attached to the mirror. This was easily remedied by adding some super glue to the sides of the lattice strip and then pulling the sides in with some painters tape for tension until they dried. Hot glue would probably also work quite well.
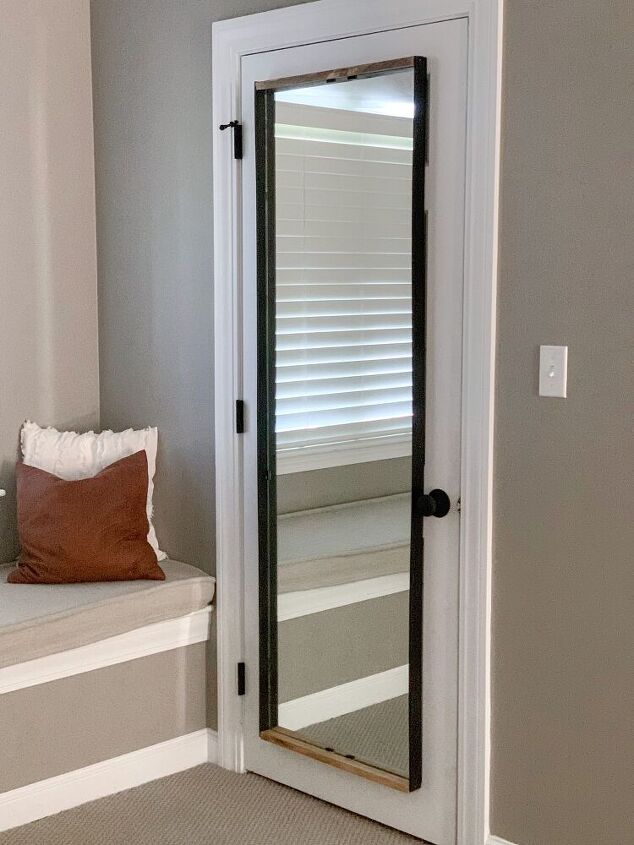
And that is it my friends! A $699 mirror for about $20 in supplies to create your own rustic industrial mirror frame. Seriously can’t beat that! Don’t forget to check back soon for a tutorial on the door hardware update as well. As you can see, updating the hardware makes all the difference!
Resources for this project:
See all materials


Frequently asked questions
Have a question about this project?