


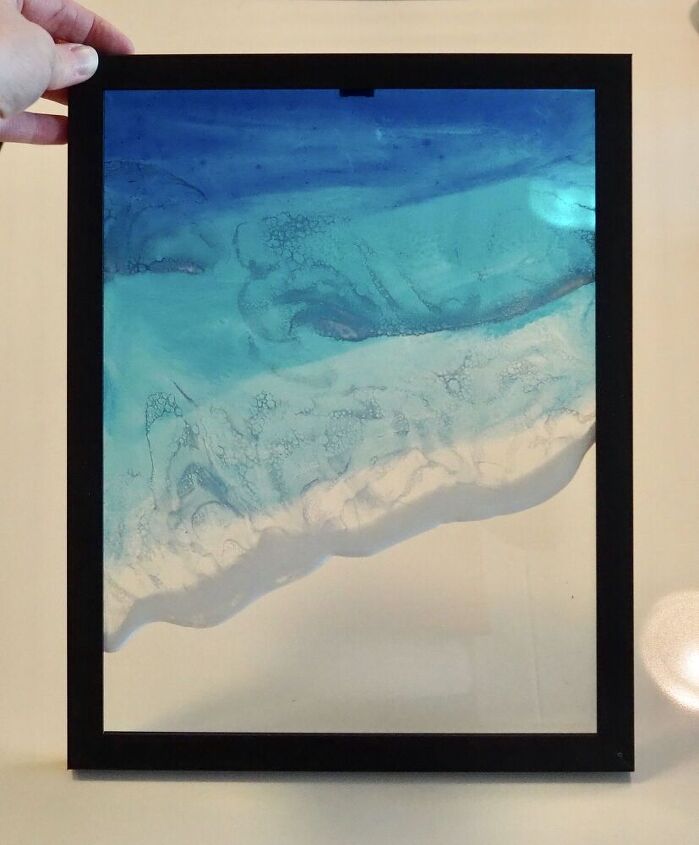
Resin Ocean Picture Frames

Hello! I’m back with another resiny tutorial today! If you’re looking for a really cheap and easy starter into resin then this should be perfect for you and a perfect introduction into the wonderful world of resin waves.
I’m an affiliate with a fantastic resin company too so you can benefit from 10% OFF ANY PURCHASE with them as well as FREE SHIPPING on all orders. Details and link below 
I also have an ETSY STORE where I sell my hometalk creations along with many other handmade resin pieces. Click the link above to visit.
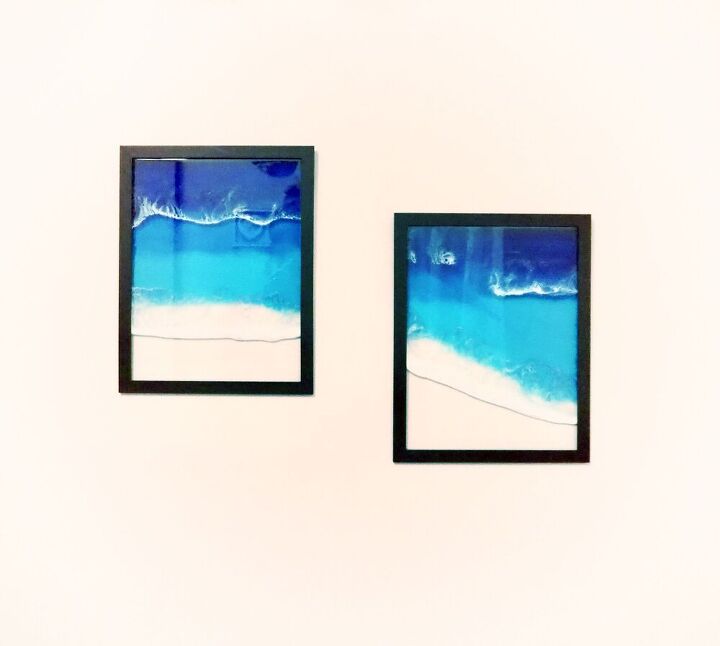
These pictures are perfect on any walls because you pour the resin directly onto the glass which means a little of the wall behind pokes through, tying them into any colour scheme and making them perfect for gifts.
MY YOUTUBE!
 See video above to watch this tutorial
If you prefer to watch your tutorials rather than sit and read them then click play on the video above and you’ll be able to watch my video tutorial on this exact project.
Please also visit my YouTube channel and subscribe for future crafty tutorials. 
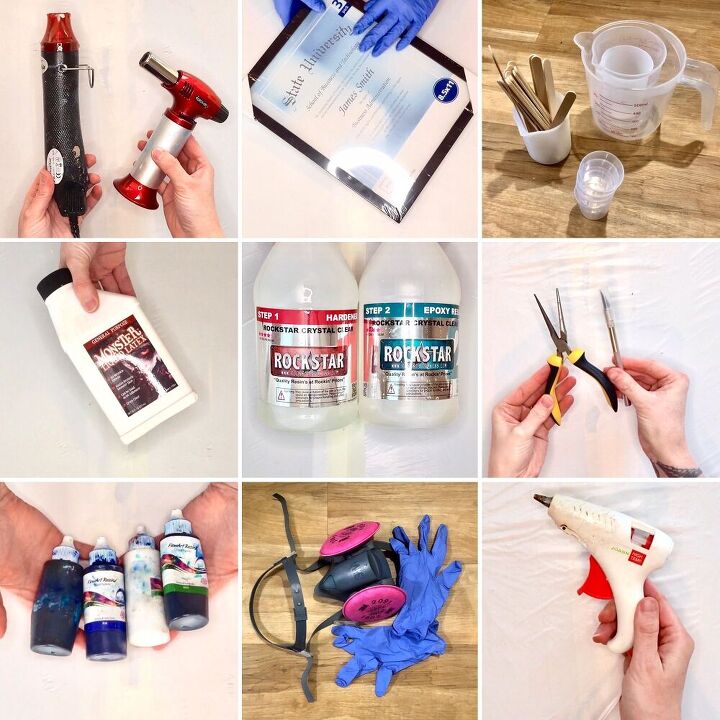
WHAT YOU’LL NEED
- Resin - I’ve used Rockstar Resin’s 4 Star 1:1 Thin Coat Resin. Use this link and my code HANNAH at check for 10% off. They also do FREE SHIPPING on every order!
- Liquid pigments
- Picture frames. I bought a pack of 3 for about $4 from Walmart!
- Heat gun
- Blow torch
- Measuring jug and cups
- Mixing sticks
- Liquid latex
- Pliers and knife
- Glue gun
- Respirator/well ventilated room
- Gloves
Always invest in reusable supplies to save money as well as the environment where possible 
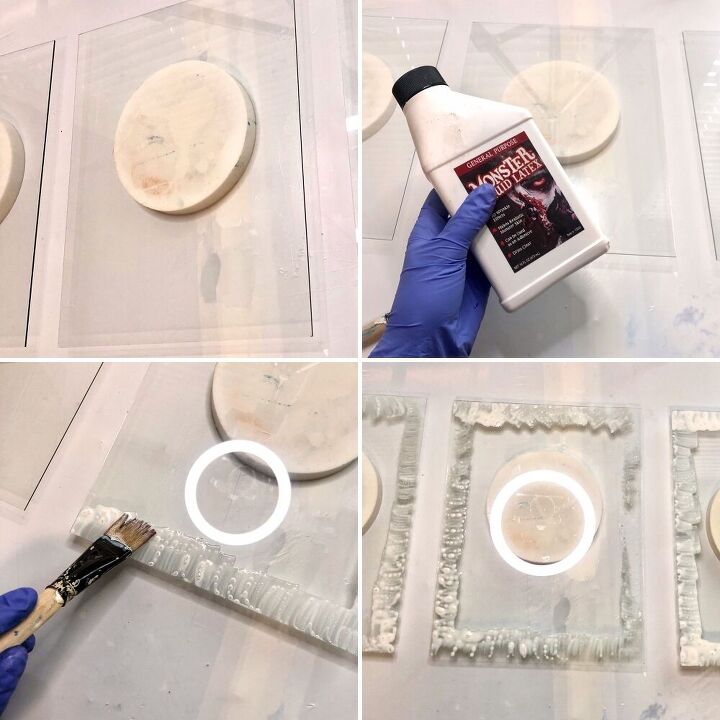
PROTECTION
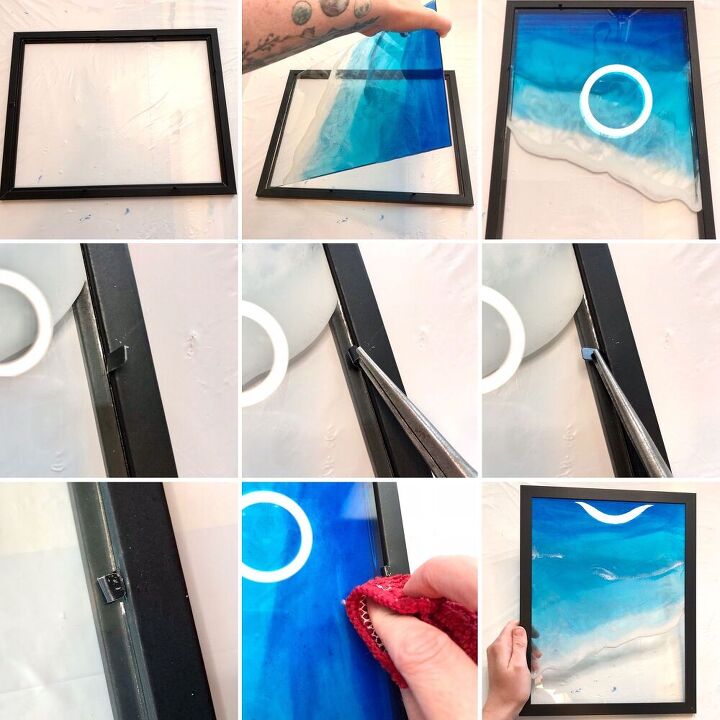
First, remove the glass panels from the picture frames and stand them up off your work surface to keep them clean and breathable. I rest mine on some silicone molds I have which are soft and won’t scratch the glass.
Apply a layer of liquid latex around the edges of each panel and then flip them around ready for the next step and allow the latex to dry.
RESIN
So I chose to use Rockstar’s 4 Star 1:1 Thin Coat resin for this project out of all their awesome products because of it’s affordability and versatility. It cures clear and strong in approx 12 hours.
The 4 Star Coating Resin will give you a work-time of about 30-45 mins once fully mixed. A very generous work-time.
Mixing:
For this project I mix 500mls of resin:
To do this, 250mls of hardener is added to my measuring jug first, followed by 250mls of resin. Mix the 2 together thoroughly for at least 5 mins. I usually mix a lot longer just to make sure I get a rock hard cure. Make sure you regularly scrape the sides of your jug when mixing to combine both parts completely.
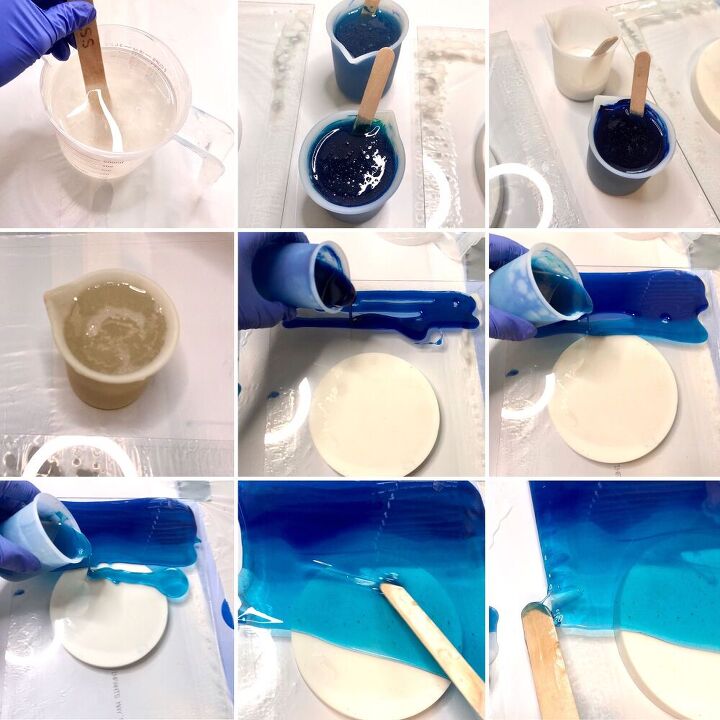
With my now fully-mixed 500mls of resin, I pour this into 5 different small silicone containers ready for colouring.
I colour 4 of the 5 containers with 3 different shades of blue and one with white. Keep the last one clear.
My blues are coloured using liquid pigments as follows:
Deep blue - 2 drops of green, 6 drops of blue and 2 drops of purple
Mid blue - 2 drops of green, 3 drops of blue
Light blue - 1 drop of green, 1 drop of blue
Pour approx a 3rd of each blue onto the glass panels covering about 2/3rds of each panel in assending shade order to create a nice gradient. Blend the 3 shades together using your gloved fingers or a mixing stick for a nice natural merge. Ensure the panels are coated right up to the edges and top corners.
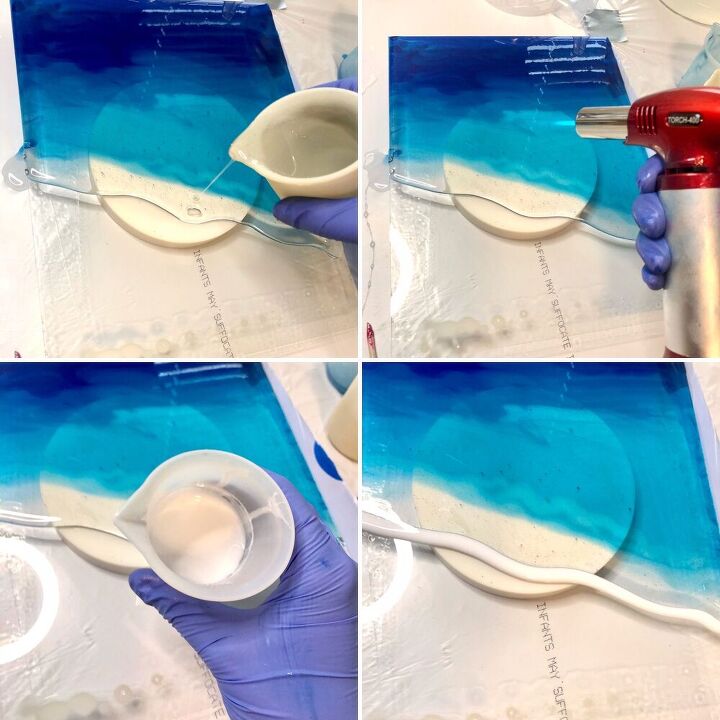
Then with your clear resin add a wavy shore line to each panel below the blues. Now blend the join between the blue and the clear shore line so that the 2 aren’t so conflicting.
Now add a thin line of white resin on the outer edge of the clear resin shore line and use your blow torch to pop all the little bubbles that have naturally form in the process.
SEA BREEZE
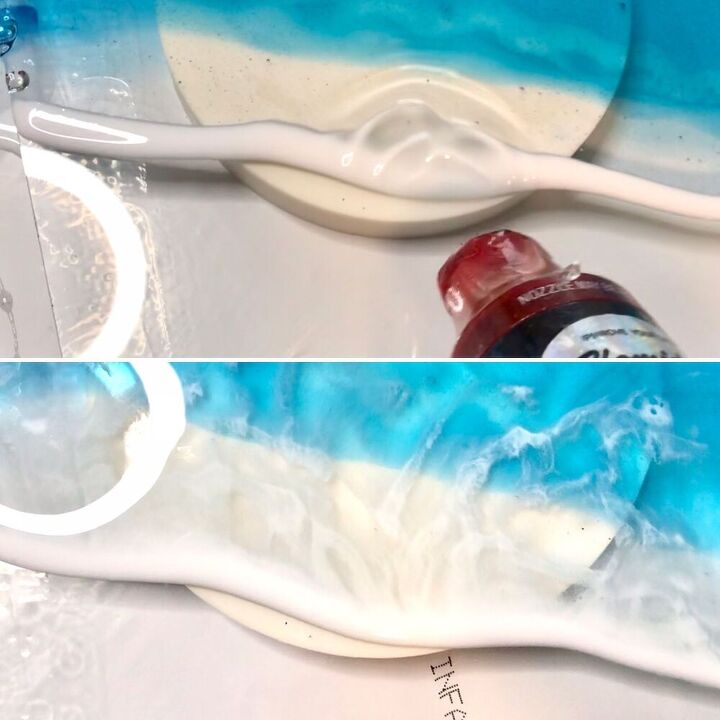
Holding the heat gun at about a 45 degree angle, blow the white resin into the clear resin all the away along the white resin line.
Then holding the heat gun at about an 80 degree angle, blow into the waves you’ve created to spread them out a little and create a foamy look.
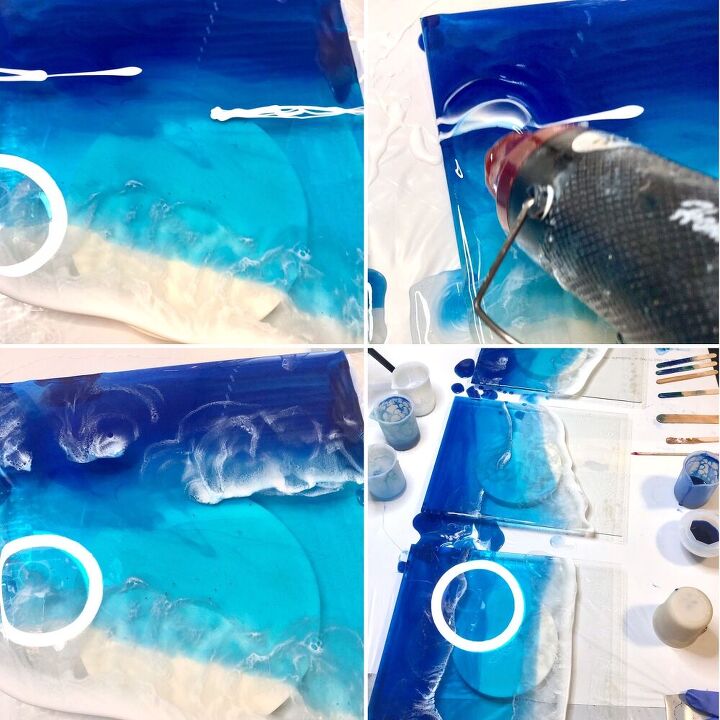
Add some more white resin lines higher up in the darker blue resin to give the appearance of further back waves and use the same technique as before to blow them out.
Once you’re happy with how your waves are positioned, use a quick blast of the blow torch to break up your waves further and create more lovely little cells for the most natural finish.
Allow the resin to cure for approx 12 hours.

PEEL
Once your resin has fully cured, turn over each panel and peel off the latex. This will loosen all the overhanging resin drips so they should come free easily. Use a knife to pick off any stubborn ones.
CLEAN UP
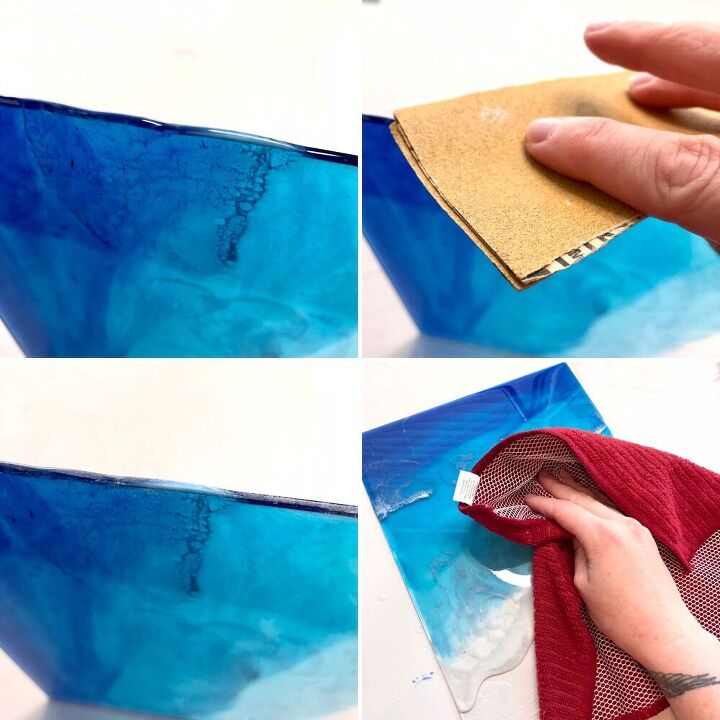
Sand off any rough or particularly bulbous edges to make sure the panels fit nicely back in their frames.
Use a cloth to wipe the panels clean of smudges and dust.
RE-FRAME
Bring back your empty frames and replace each panel face-down into them.
Crimp the little tabs back on themselves so that they overhang enough to keep the glass in the frame but not enough so that they’re visible when the pictures are back the right way around. Turn each picture the right way around to make sure they don’t show each time you crimp a new one and clean up any smudges as you go.
HANGING
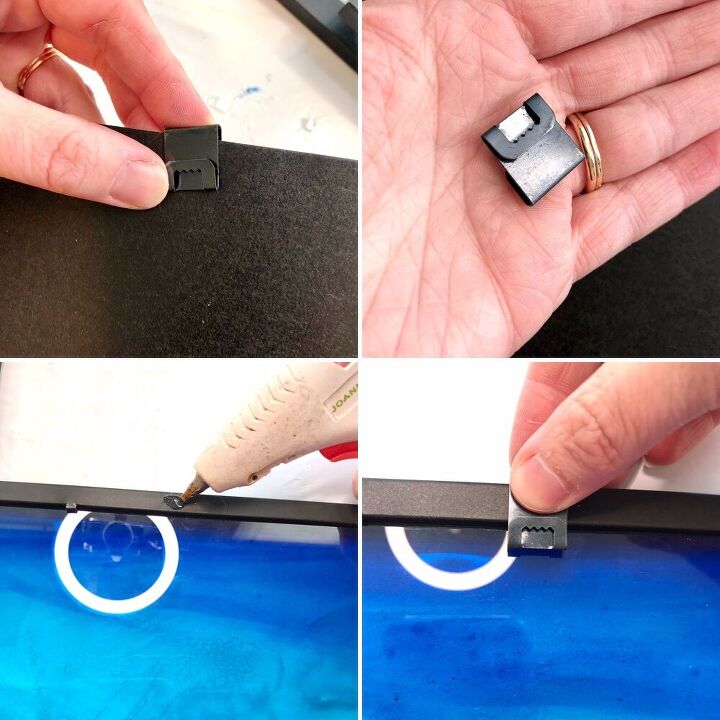
Remove the little metal hooks from the cardboard inserts that you took out of the frames earlier and hot glue them to the backs of your frames so that they can still be hung up on the wall.
Make sure you glue them on very securely....I learnt this the hard way because one of my hooks came loose when the picture was hung up and broke 
FINALLY
All that’s left to do is hang your pictures up and admire you’re handiwork
These pictures will be up on my ETSY STORE to buy if you’re interested along with all my other handmade pieces so please visit and have a look at my creations. Link in opening paragraph.
Thank you so much for reading and if you have any comments or questions, please drop them below and I’ll be happy to respond.
Stay safe and happy crafting x


Frequently asked questions
Have a question about this project?
Love this how do I post my projects I work on? I do tumblers never tried a glass picture but this is beautiful. Please let me know how to add things to my page if you would thank u n god bless
What tint brand did you use for your colors?
Did you use mica? Alcohol ink?
I have everything need except liquid latex. Hot glue peels off glass so I would assume I could use that instead?