


Wine Bottle Apothecary Jars DIY
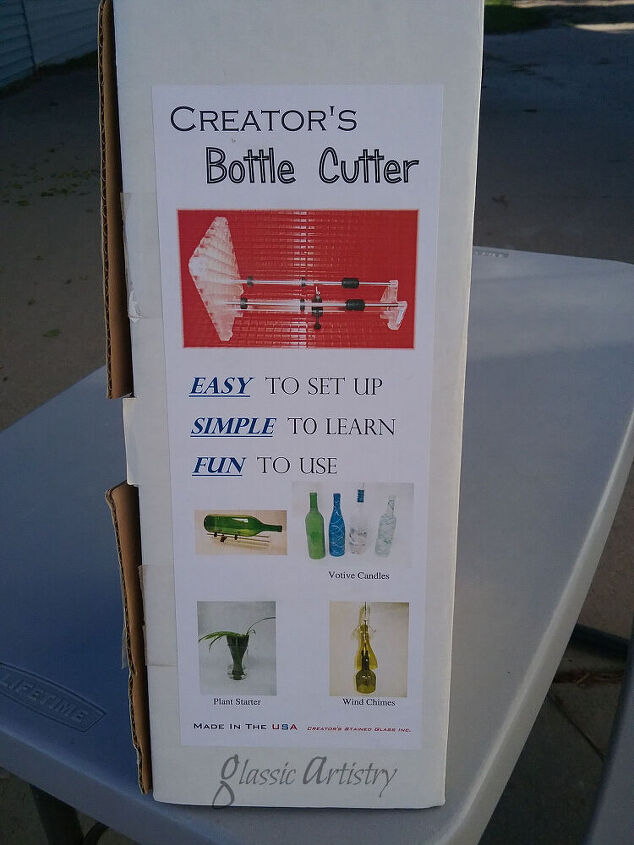
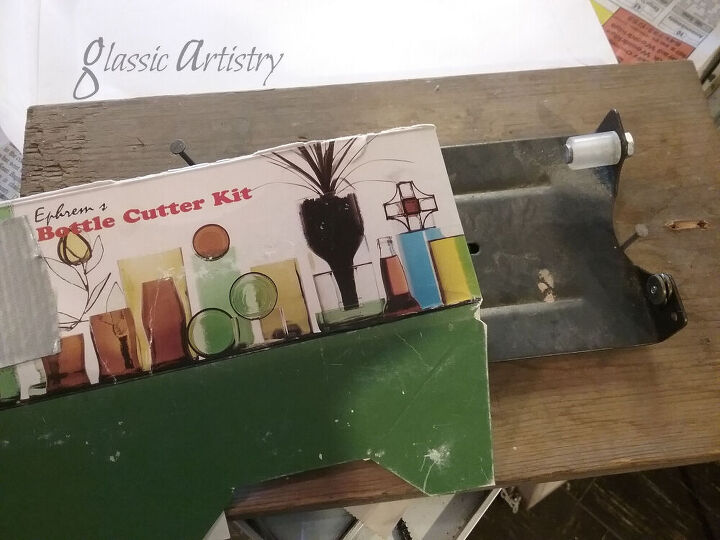
Re-purpose some of those wine bottles! A bottle cutter or wet saw will be needed. I used the Creator’s Bottle Cutter, but have had great success with the Ephrem’s Bottle Cutter too. Both are easy to use and have clear instructions included. The Ephrem’s Bottle Cutter is less expensive and needs to be attached to a board before using.
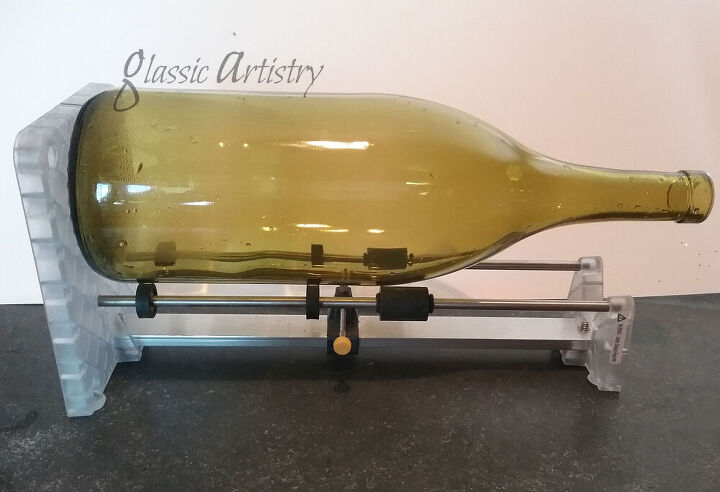
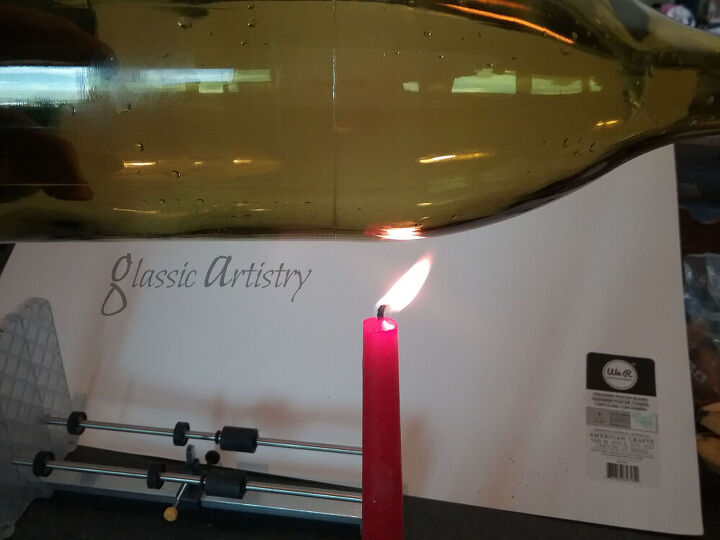
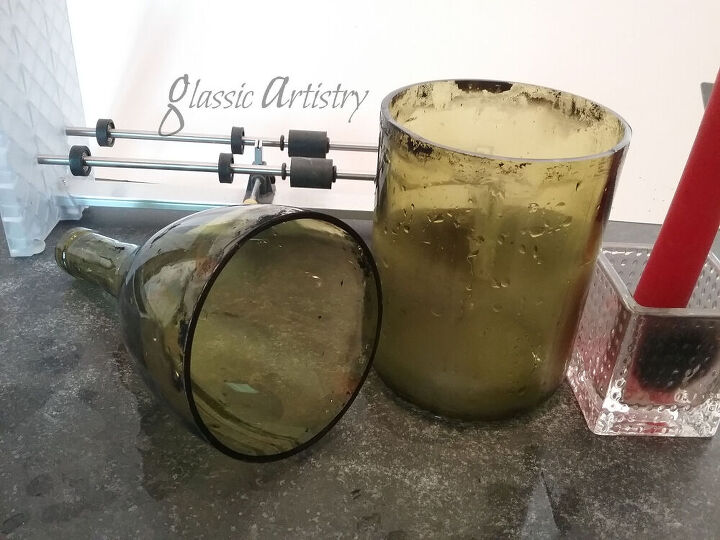
Place the bottle in the cutter. With even pressure while turning, score the cut line on the bottle. Rotate the score line about ¼” over a candle flame for about a minute. Holding the bottle at the top and bottom, plunge it into a bucket of ice water to easily snap apart. I cut three bottles of different sizes and colors. Sand the cut edges with 150 grit emery cloth to smooth and remove the sharp edges.
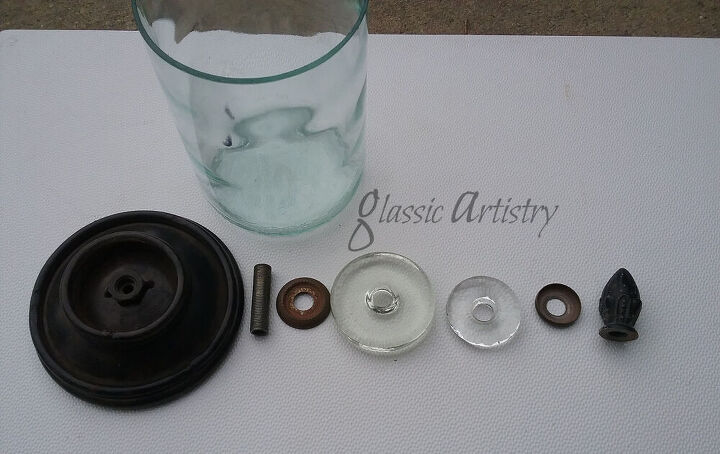
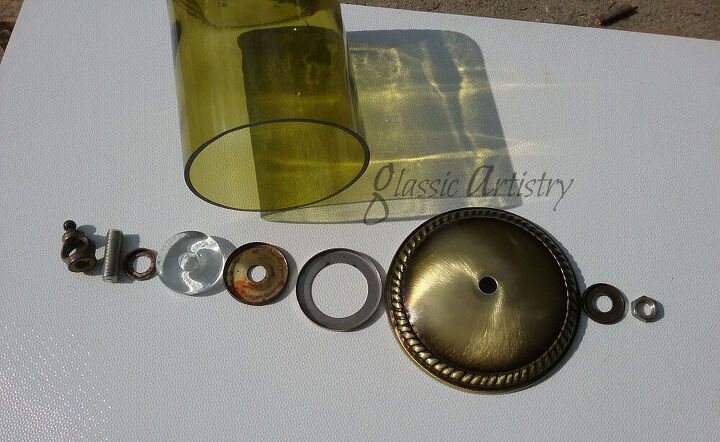
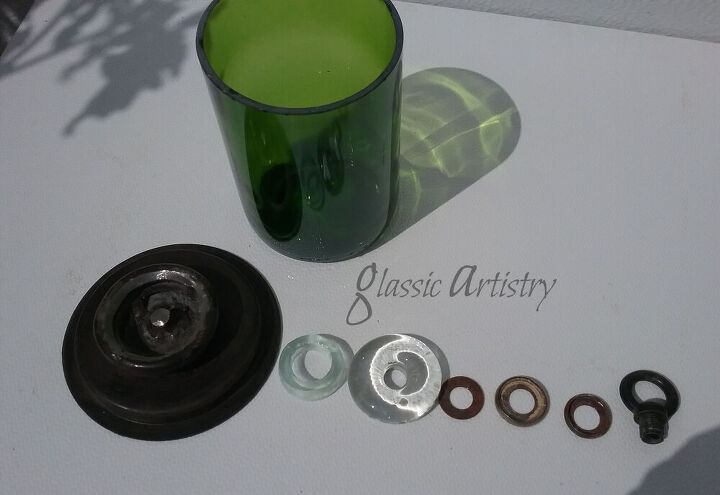
The funniest part of this project is making the lids. I began by parting out a bent pair of garage sale candlesticks. They were chock full of some beautiful heavy glass donuts, and I was able to use the top and base too. The rod was cut out, and my husband used a die grinder to remove some excess solder. A die grinder isn’t hard to use, I just don’t like the noise or the flying sparks it makes.
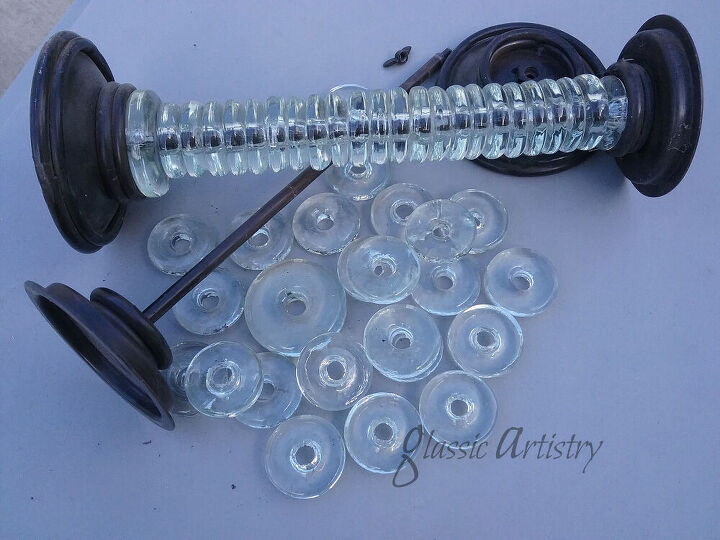
I'm a big collector of lamp pieces, finials, hardware, and all sorts of small odds and ends. I love finding ways to use them in my projects. It was among this conglomeration of a collection that I was able to find more pieces that would cover the bottle openings, stack, and fit well with the glass donuts, and top them with a finial.
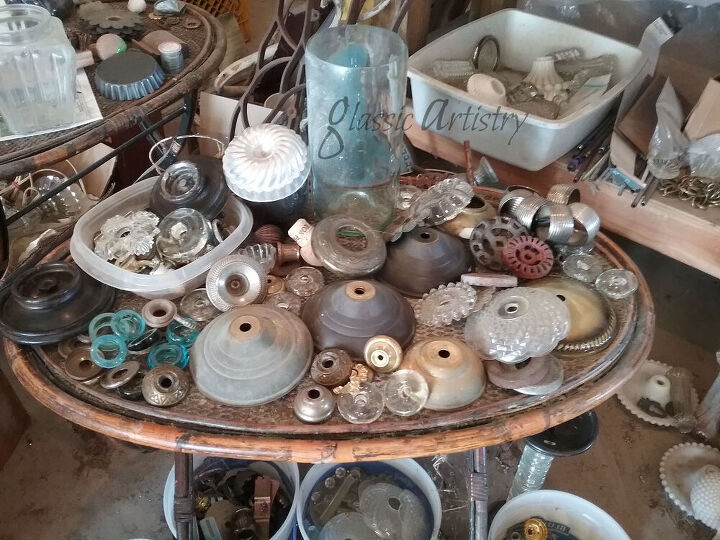
When happy with what I had, I laid the pieces out in the order they would be stacked and took a picture. This way I can remember how they go back together after the painting process.
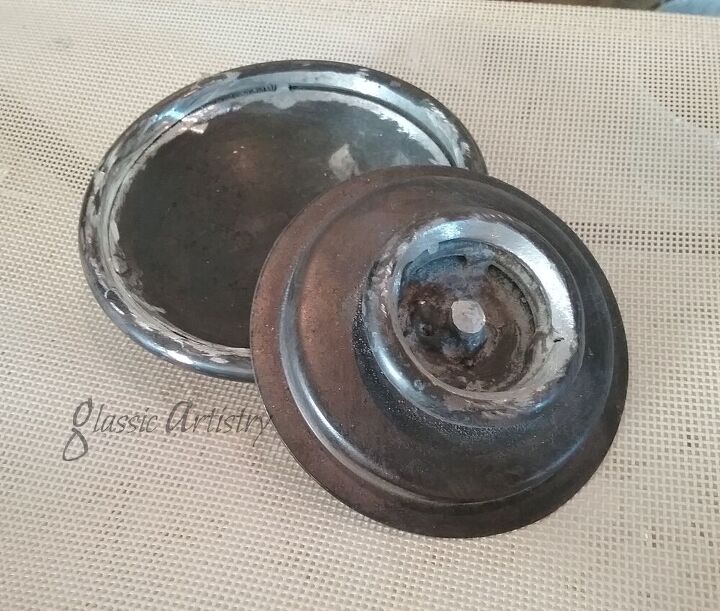
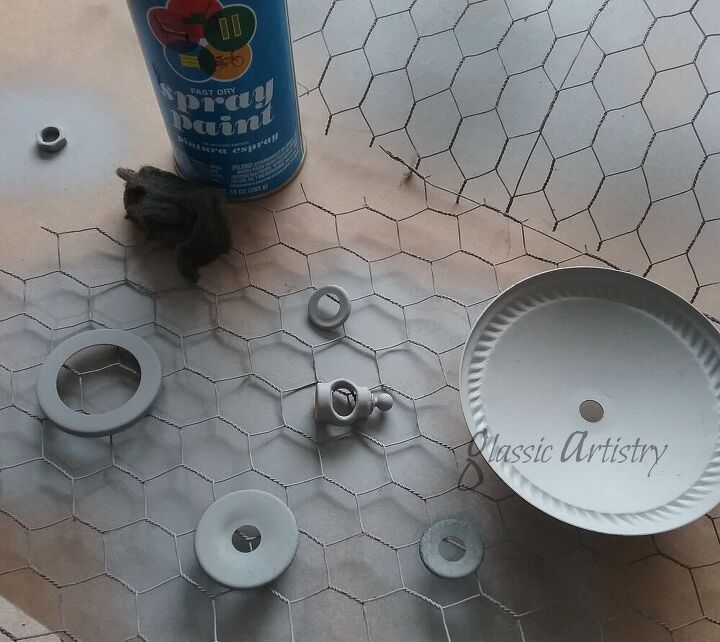
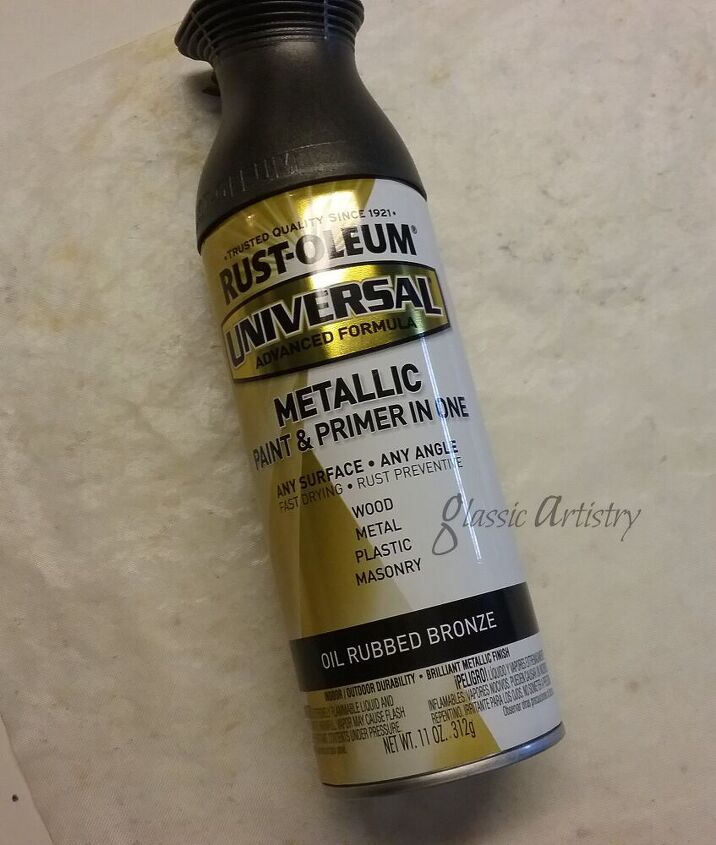
Clean and sand the metal pieces with steel wool. Prime and paint, let dry.
As you can see in the laid out pictures above, short threaded rods were used on the two larger lids because there were holes to accommodate them. They screwed together quickly. The smaller lid was glued together with E6000. I glued it in small steps, letting it dry between steps, to assure it would stay straight. When using glue, scratch away a small area of paint on both surfaces where glue will touch. Glue can sometimes soften or eat through paint.
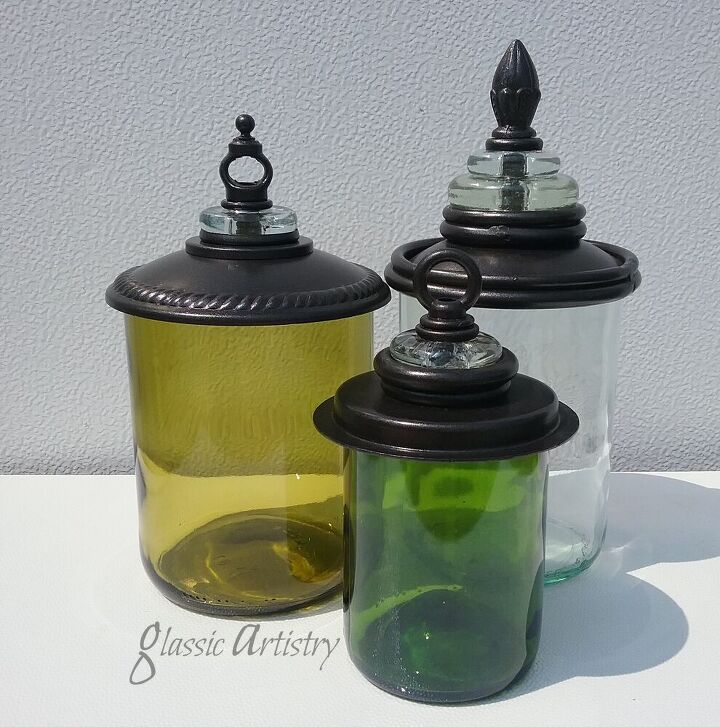
I'm very pleased with the results. What do you think? This is a condensed version of my blog post. Please click on the link to my blog to read the post in it's entirety.
Resources for this project:
See all materials


Comments
Join the conversation
-
So very creative! Beautiful job! tfs
-
Love it! 💙


Frequently asked questions
Have a question about this project?
Where on earth did you get the glass washers?
Does the glass cutter cut the big wine jug"s? I would love to make cloche's out of them.