


Repurposed Antique Table (DIY Desk)

Do you have an old table that you just can't part with? Or maybe one that you found on Facebook Marketplace that you really don't need? I find myself facing the latter predicament quite often - swooning over FB Marketplace items that I just don't have the place for, particularly an antique table I recently came across. That was a problem UNTIL I learned that I would be working from home at least part time this school year and decided to create a little office space for myself. Better than getting an office space was finding a home for this antique table!
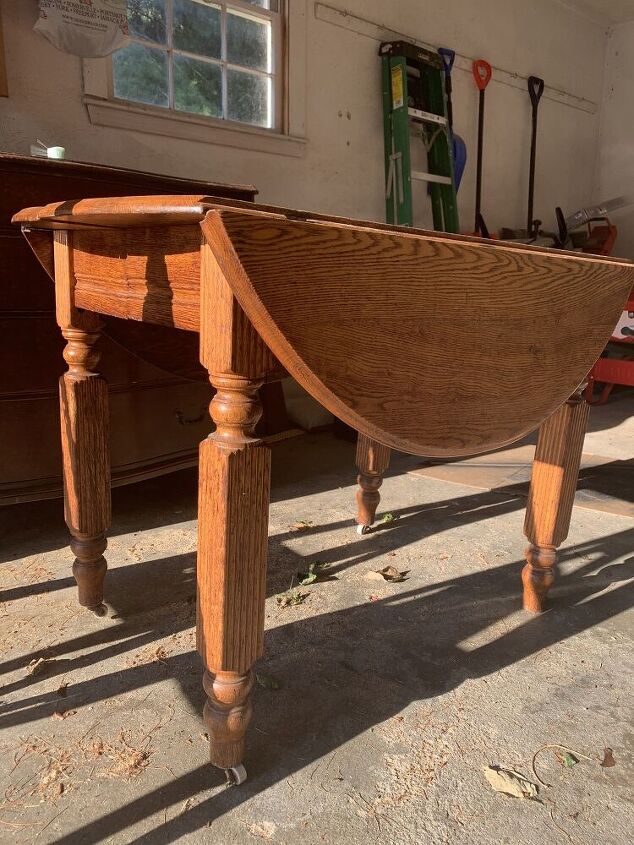
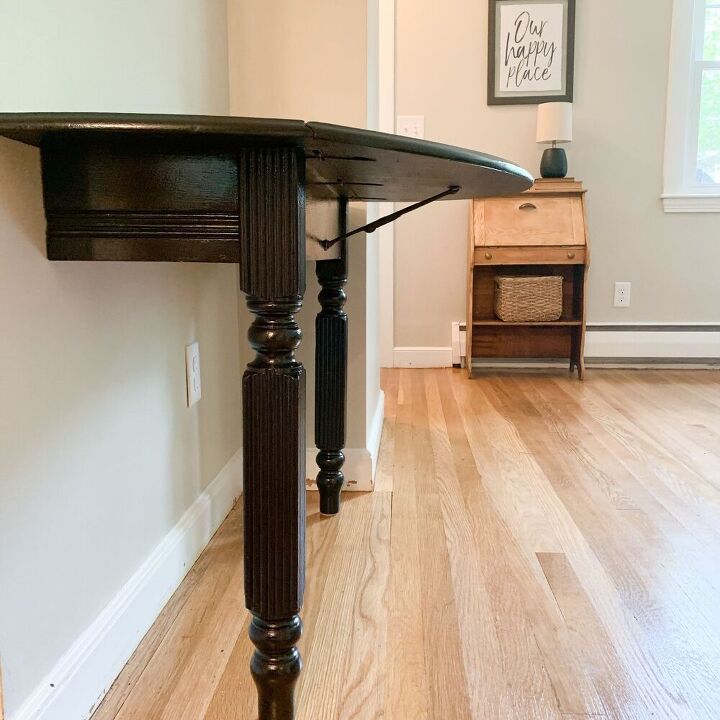
I didn't have much space to work with, which is why this table was perfect! My plan - use half of this table (yes, literally separate it down the middle) and attach it to the wall to create my desk. The folding side created the opportunity for me to expand my workspace when using the desk or leave it down and let the table function as more of a console table.
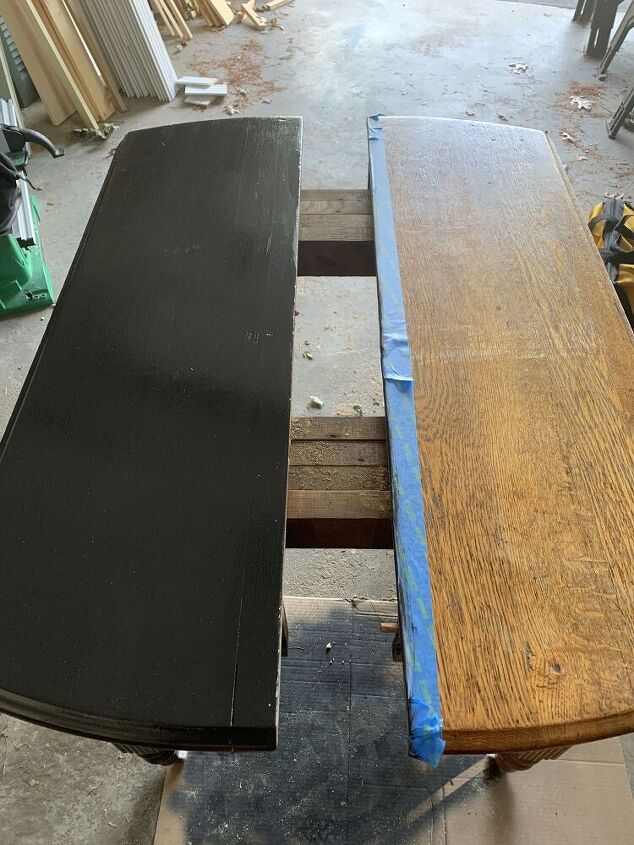
I used a paint sample from Lowe's mixed with BB Frosch to give the table a beautiful black color. Chalk paint will work as well! I used a clear satin polyurethane on top of the paint to protect the surface.
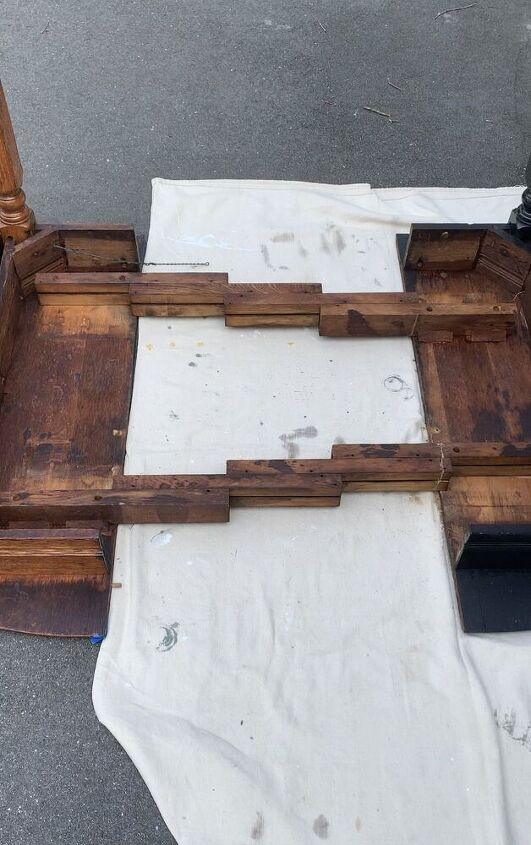
Depending on the type of table you have, this step will vary. You may need to literally cut the table in half (maybe with a circular saw) or you may get lucky and be able to to unscrew a couple bolts like I did here. The two halves of the table separated to create room for leaves in the middle, which allowed me to pull it apart and find the easiest way to permanently separated the two halves.
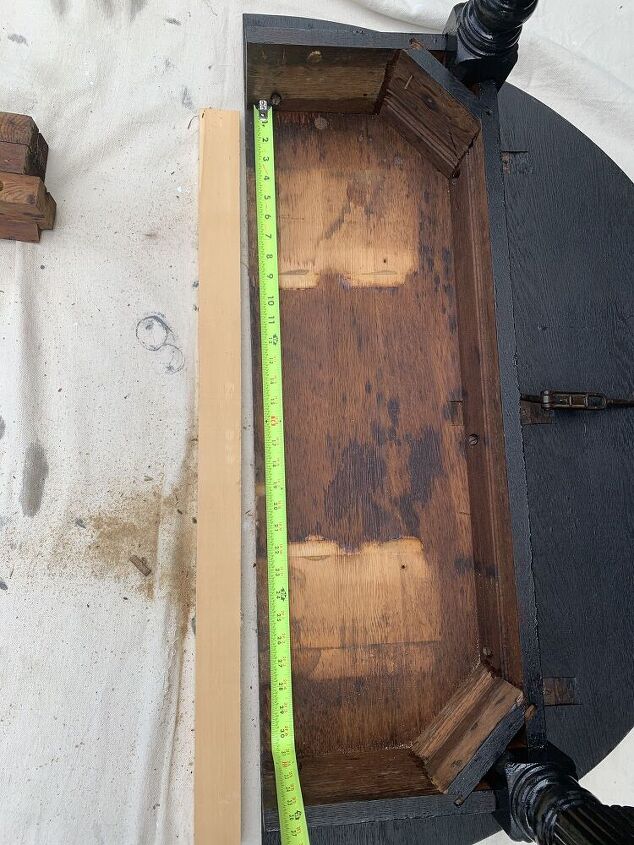
I used a 1x3 to attach my table to the wall but decided it would be easiest to attach this piece to the table first (if I had attached it to the wall first the placement would have had to be PERFECT in order to get the table to sit right on it).
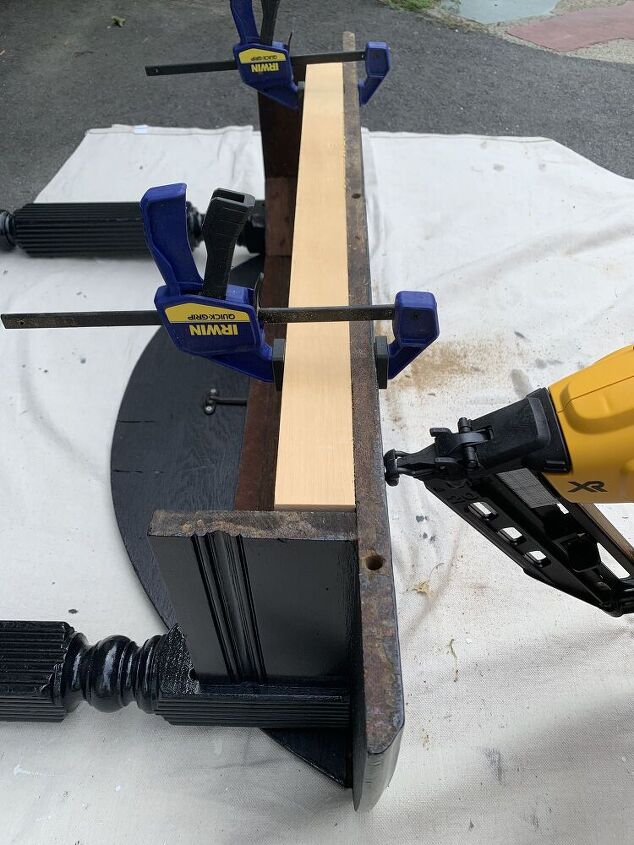
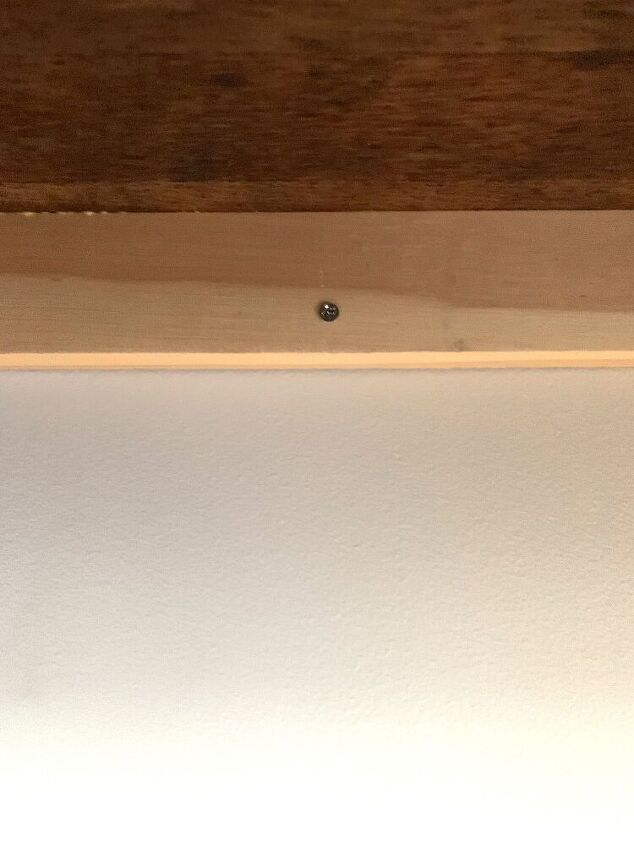
I used wood glue, wood clamps, and my nail gun to attach the 1x3 to the table. I chose to put three nails in the top of the table to secure the 1x3. Because this side sits close to the wall, you are barely able to see these nail holes.
I positioned the table against the wall so that the feet were flat on the ground and the 1x3 was flush against the wall. I climbed under the table and used 2in screws to secure the 1x3 to the wall (after having previously marked the studs).
Ta-da! Now I have an awesome little workspace that just needs a chair. When I'm not using it as a desk, I fold down the side of the table and put some frames on it so that it functions as a console table.
*The cost for this project will vary based on how you acquire the table you'll use.
**The time for this project accounts for letting paint dry before you can attach the table to the wall.
Resources for this project:
See all materials


Comments
Join the conversation
-
Great JOB, super idea… thanks for thinking out of the box for those of us who can’t afford …. (Noted the nasty comments on devaluation of table…). Love that it is used n loved for its use by someone who invested “time” to make it even more beautiful! Thank you!
-
Cassandra, I am late to the party but wanted to add - it takes courage to cut up old furniture. You nailed it. I wouldn't say this if the piece had been museum quality, you made use of a bulky piece transformed it into a something prettier and more useful. Kudos


Frequently asked questions
Have a question about this project?
What do you know about the age and origin of the table you used? I ask because I have a wonderful and large dining table with THE SAME LEGS and the same underside. Mine is oak. I love it and I love what you have done with yours. If you have info, thank you for sharing with me. Julie Dahl purrplsage@frontiernet.net