


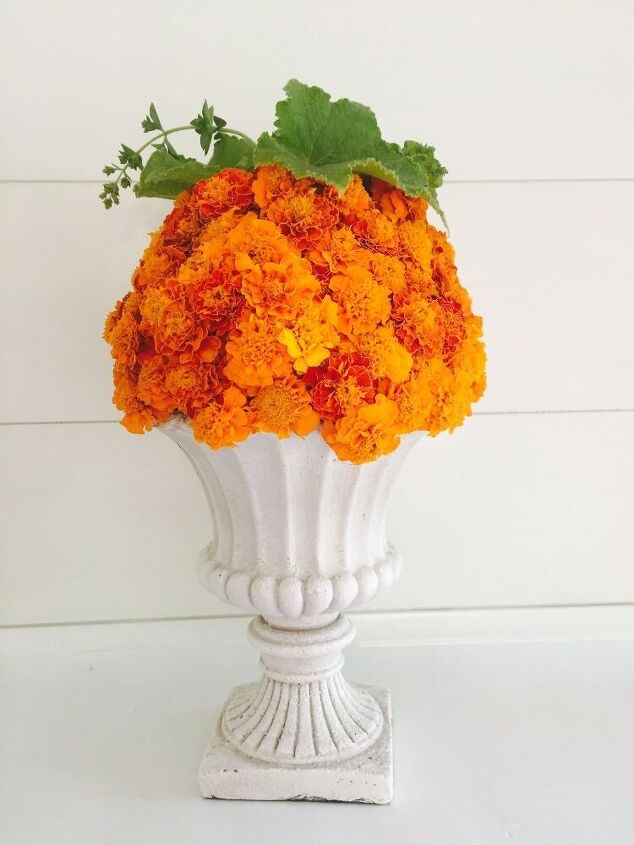
Easy Marigold Pumpkin Tutorial
A couple of years ago I had like a bajillion marigolds growing in my backyard and I had seen this idea on Better Homes and gardens so my daughter and I decided to try and make this Easy Marigold Pumpkin Tutorial for you!
You can use any type of vase you might have but I would use one that has room for water once it created. You will need to add water occasionally to keep it from dying.
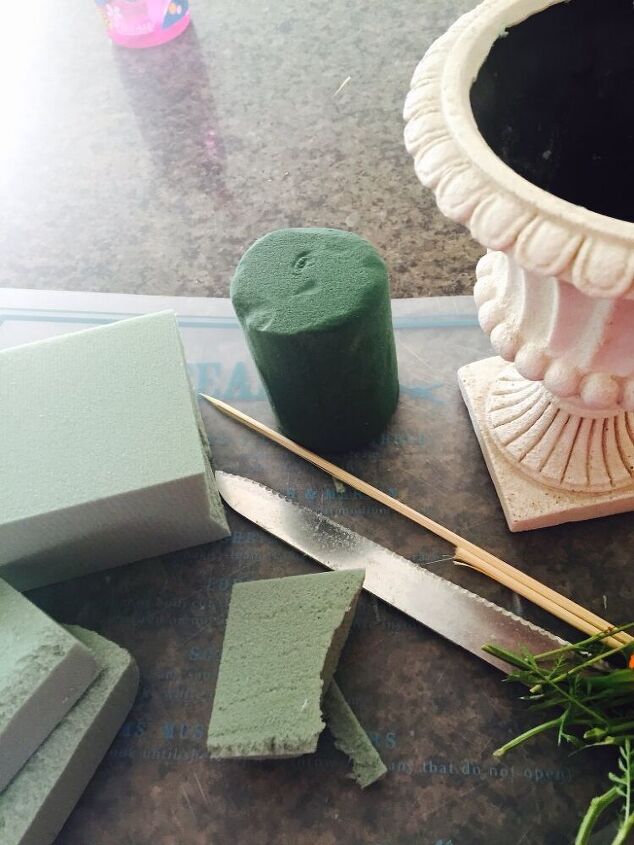
- Small Urn or vase
- Wet Floral foam
- Dry floral foam is needed
- Lots of marigolds
- Wooden skewers
- Knife
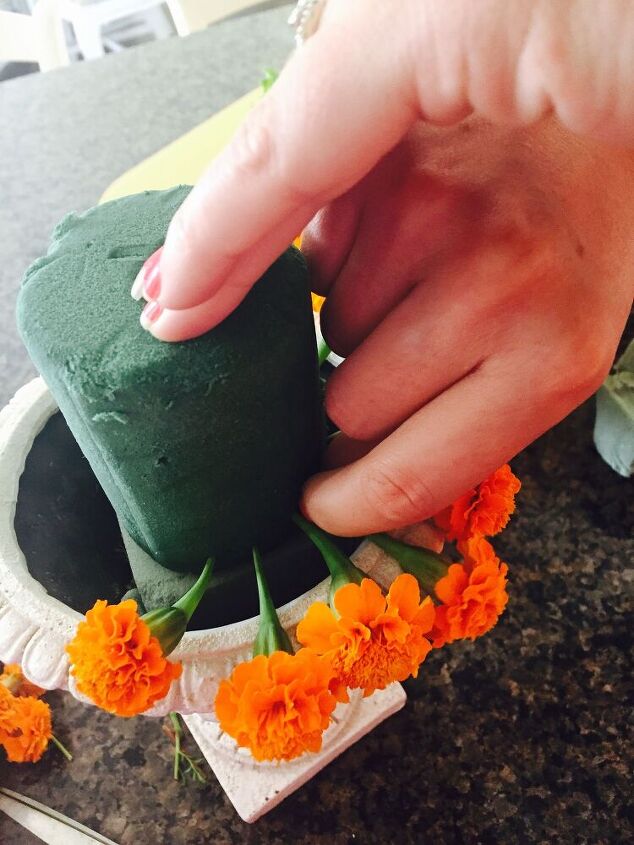
We used a couple of small urns that I had in my storage of vases that I thought would make this marigold pumpkin look cute but you can use whatever you have! The urn was a little deep so I used pieces of dry floral foam to put in the bottom of the urn and then added some wet floral foam on top. (soak your wet floral foam for about an hour or until soaked through)
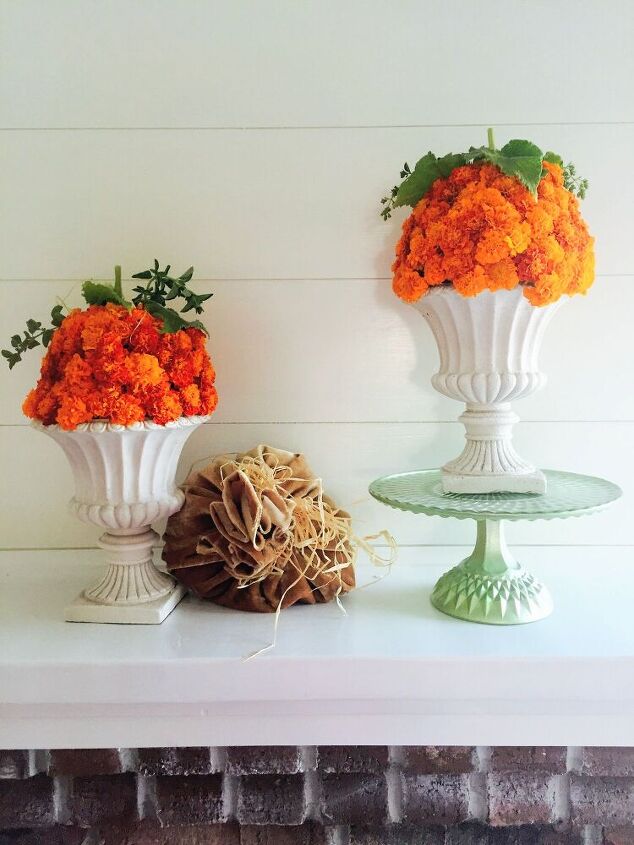
Now you can start adding in the marigolds! I love using marigolds for centerpieces because they grow in abundance and they look so bright and happy. You can see another one of my easy marigold centerpiece ideas here in my simple fall tablescape using marigolds.

Once I placed the dry floral foam in the bottom of the urn and added the wet floral foam it was kind of wobbly, so we used a bamboo skewer to attach the two floral foams together. It worked perfectly! In the future I would probably of used only the wet floral foam because it dries out fast.
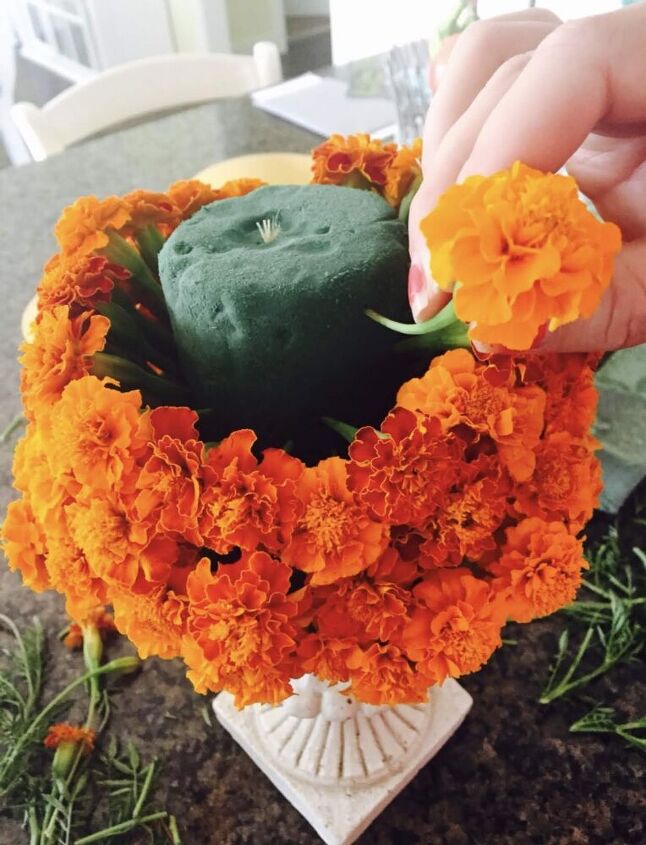
Simply poke marigold flowers one by one into the wet floral foam starting at the bottom. As you poke the flowers into the foam leave a little a little space in between until you have covered the entire piece of foam.
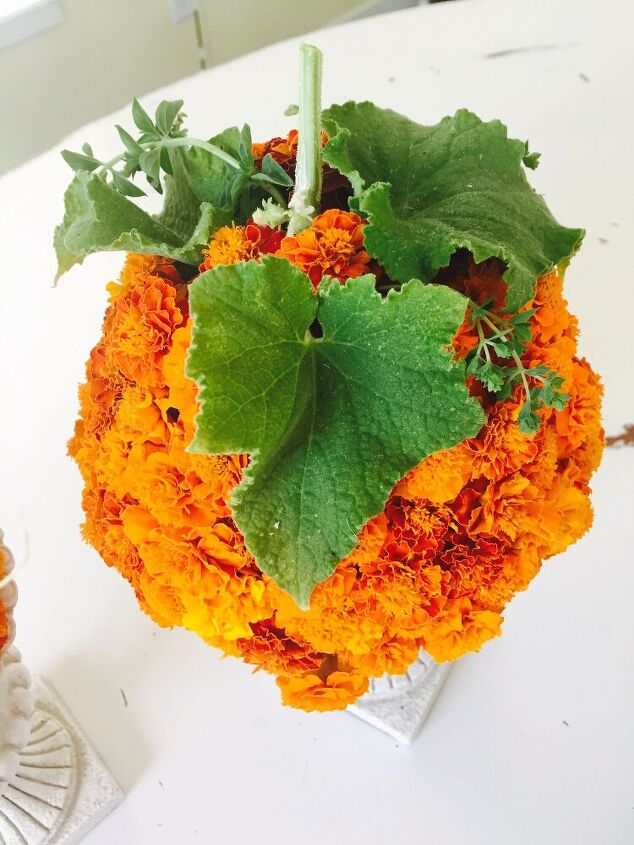
Fill in spots where there might be gaps with smaller marigolds so it looks nice and full. For the top of our pumpkin we added in some green leaves to make it look more like a pumpkin. I have a video on the blog showing how we made this cute marigold pumpkin.


Comments
Join the conversation
-
Necee thank you so much! I would love to see it when you are done! 👍🏻
-
I love this so much!!!!


Frequently asked questions
Have a question about this project?
This is just beautiful, but how long will it last since it is just cut flowers. Do you water it like they were in a vase
Do you have any problems with your Marigolds drawing bees? My Mother told me that she had read that they would supposedly repel bees. We planted a bunch close to the doors of the house and garage. However they were covered in bees all summer long. And hubby and I are both very allergic to bees!!