


Updated Bathroom Vanity Using Concrete!

I love the look of concrete countertops, but they can be expensive, messy and a lot of work! Instead, try this easy DIY concrete countertop using a concrete overlay - and its cost effective!
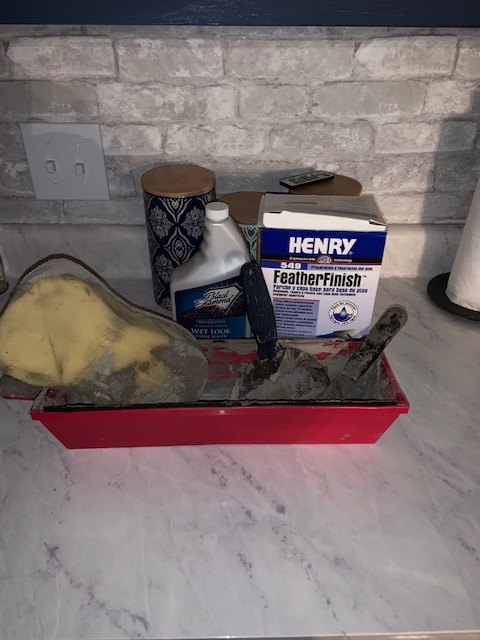
For this project you will need to following items
- Henry's feather finish concrete overlay
- Bucket to mix cement
- Fine grit sandpaper
- Large sponge
- Plaster tools
- Concrete sealer
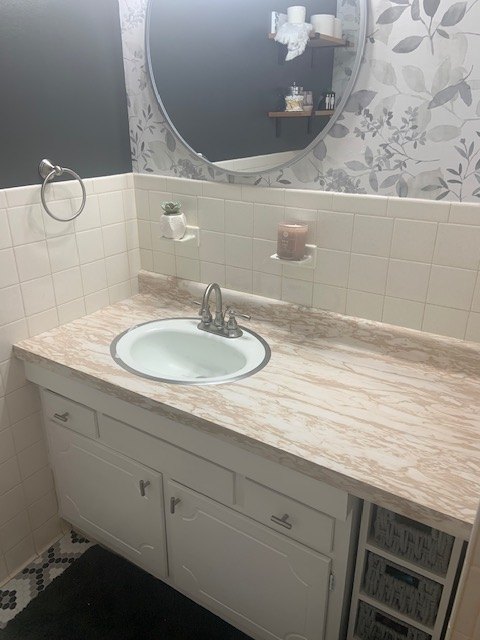
To begin, make sure your surfaces have been lightly sanded and washed and dried thoroughly. The sanding is important, especially for the sink to allow the concrete to adhere to the ceramic.
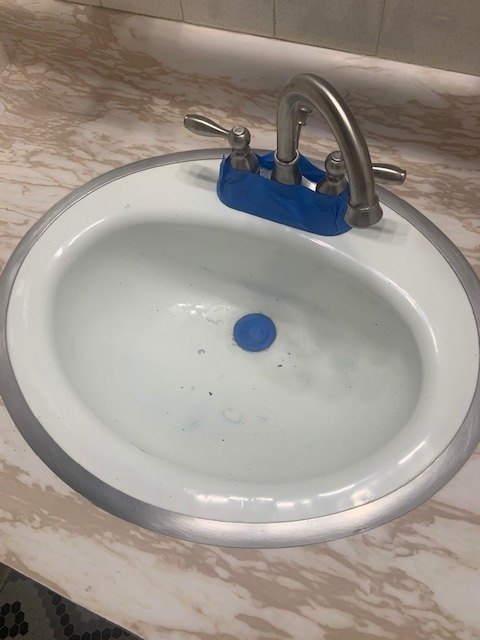
Be sure to tape off all areas (faucet, walls, edges).
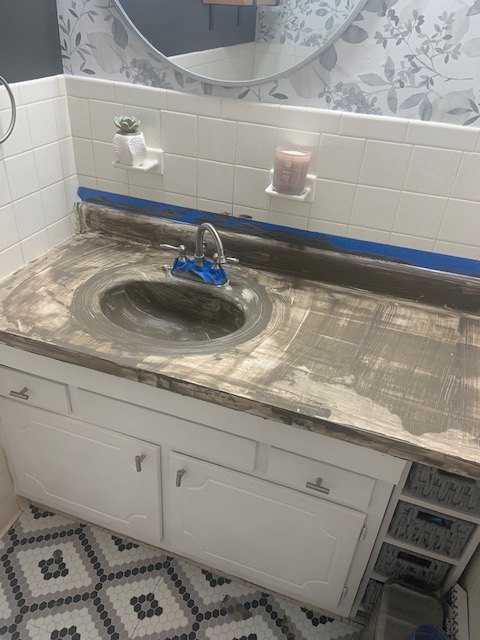
Mix the concrete with water until it's about the same consistency to pancake batter. Once this is mixed, apply your first layer of concrete directly onto the counter and sink. You will not get full coverage on this first layer, don't get nervous! You will be applying a minimum of 3 layers, this first one if just a skim coating to get you started.
Once you apply the concrete, use your plaster spatula to get a smooth surface. Scrap off any excess concrete back into your bowl. Let this first layer sit for 30-60 minutes before applying the next.
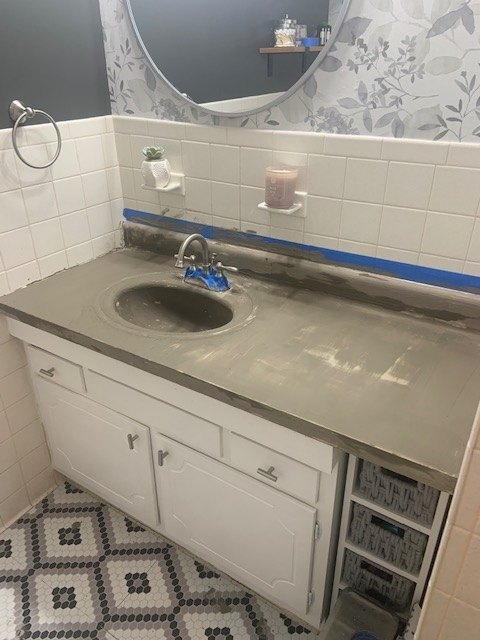
As you apply the second coat, you may not still get full coverage, again...this is ok! Using your spatula smooth the surface. Then take your sponge and use that to get the surface smoother - you can moisten the sponge slightly if you find that you are removing the concrete.
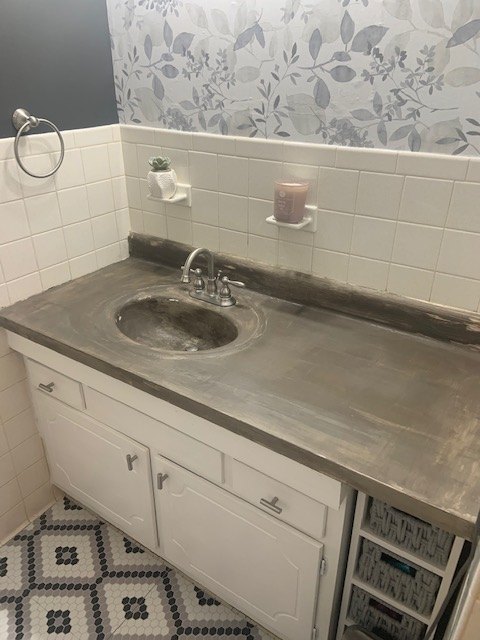
You will build up this surface until you have full coverage, waiting 30-60 minutes between each layer. I typically do 4 thin layers of concrete.
Be sure your coats are applied thin and using the sponge to smooth in between coats.
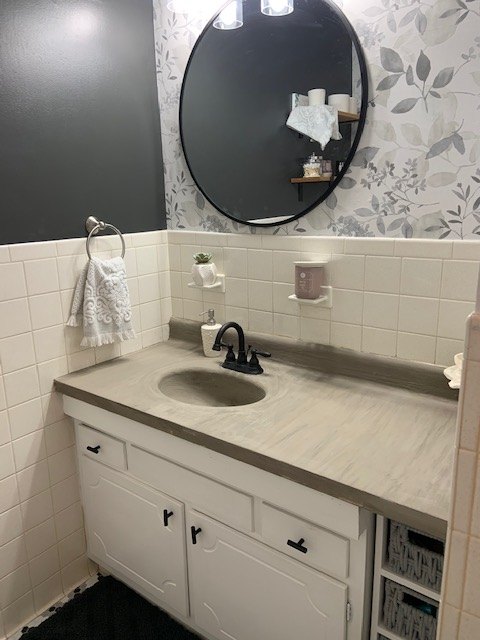
Once the concrete is completely dry, it will lighten in color and be rough to the touch. Take your fine grit sandpaper and lightly sand the entire surface to get any small bumps and rough surfaces out. Take a damp cloth and wipe the entire counter down to remove the dust.
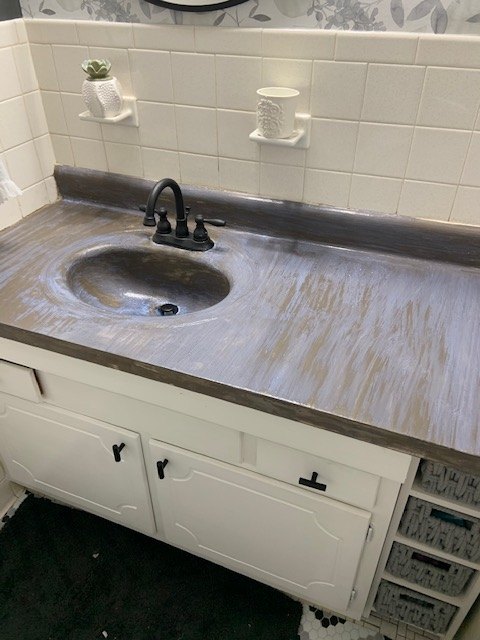
Lastly, you will use a concrete sealer to seal your counters and protect them from water. Using the directions on the bottle, apply several thin coats of your sealer until you have complete coverage. Again, I use about 3-4 coats - going extra heavy around the drain where water tends to pool.
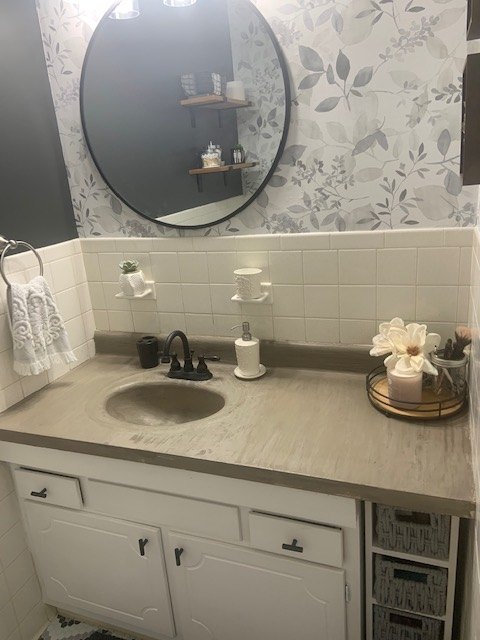
Once your counters are completely dry they are ready for use! I prefer to leave my concrete a little more "rustic" and not perfect, I like to see the depth of the layers etc. They can be wiped with normal cleaners etc.
Resources for this project:
See all materials


Comments
Join the conversation
-
We had a regular sink like that and over the years, it rusted out around the drain. So how would you replace the sink if this happened? We easily replaced ours.
-
Nice results. It's got to feel good to have a change anywhere in the house that you have been wanting to get. :-)


Frequently asked questions
Have a question about this project?
Am I to understand that you do NOT remove the current top such as formica or anything else rather you tape off the exisiting tile, etc, tape off and apple concrete???
How did you cover the edges of the countertop? Does it drip onto the floor when you cover them?
Can you do this in shower over tile