


Painting the Fireplace Bricks

Hey there! Well, we're still doing stuff over here at the Texas Blue Bungalow!
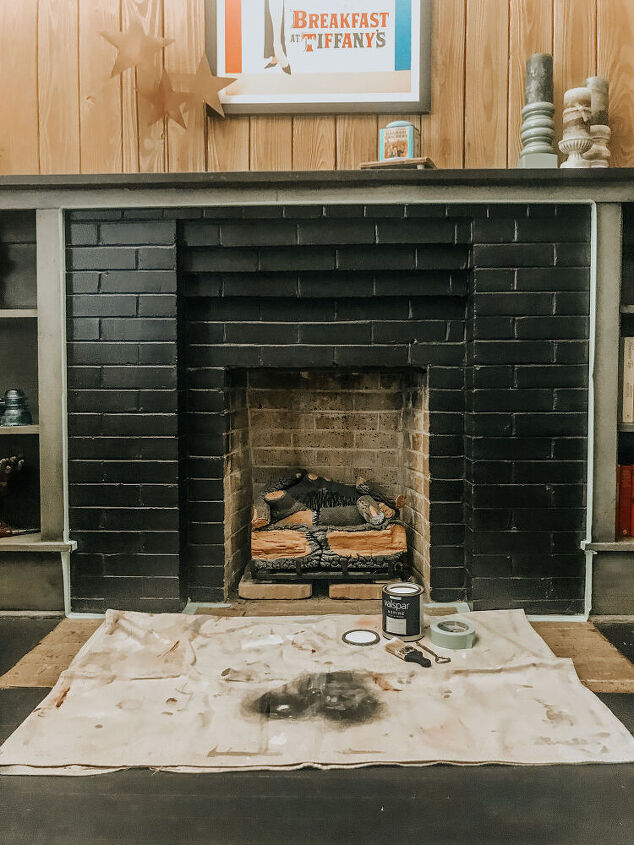
I think I may have mentioned before that all the paint colors were really dark here when we moved in. We don't really care for the dark paints on every surface, so slowly I'm changing it.
You will need:
Painter's Tarp
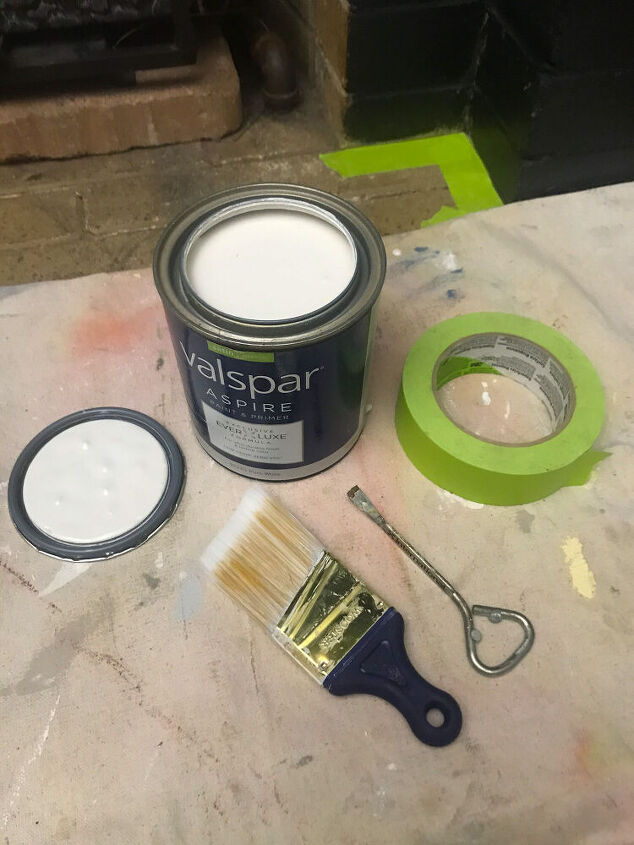
Paint
Paint Brush
Painter's Tape
I pulled out my trusty painting tarp and some paint I found in the shed and got to work.
CLEAN ALL SURFACES:
First before starting, you will need a clean work surface. I dusted the bricks down and then ran the vacuum hose over the entire area for a clean painting surface.
It's hard to see, but I first taped off all the edges with some painter's tape so I didn't get white paint on anything I didn't want to.
These little angle brushes are my favorite for painting with. It fits nicely in my hand and I can cut the paint into almost exactly were I need it in, especially tight places. Also, everyone needs a paint key to open your paint cans!
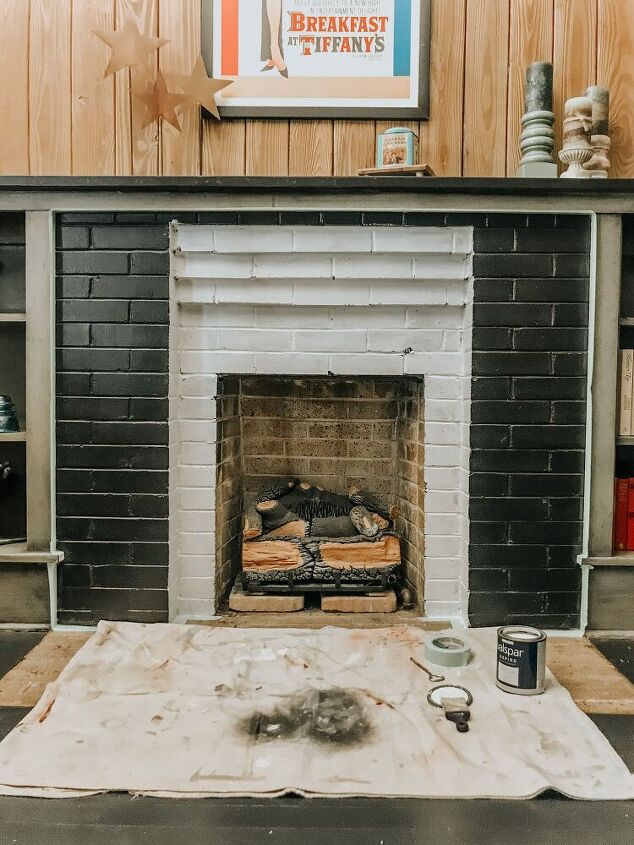
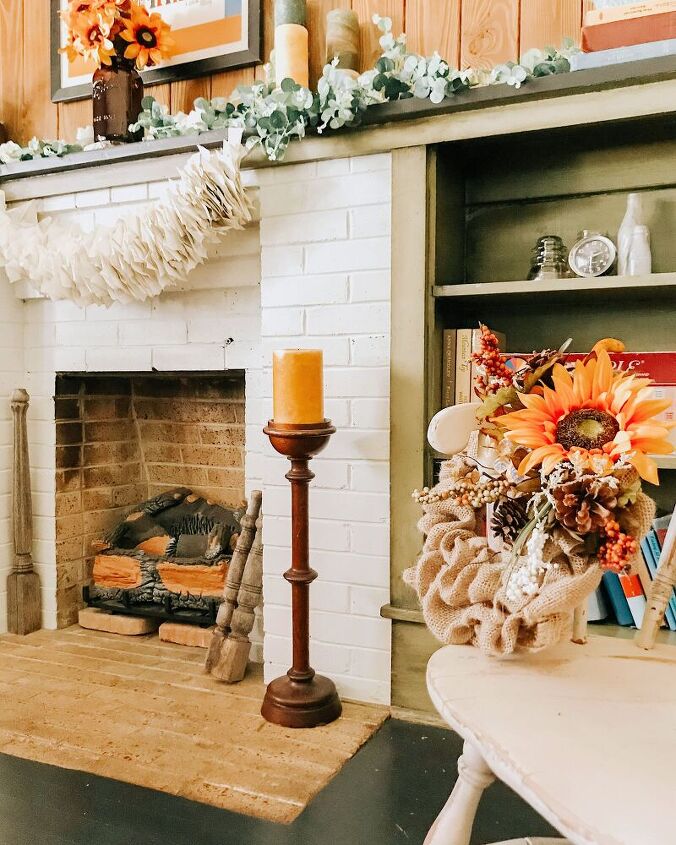
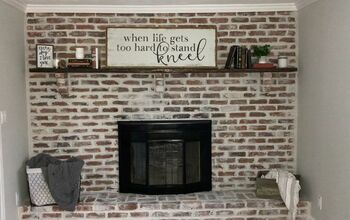
I started on the inside section and then moved my way out. Obviously its not done, but at this point I knew I was going to love it! It already looks 1000% better!
I always allow my paint to dry for about 15 minute before I peel off the tape. At this point, IF your paint got under the tape somehow, you can clean it up with a damp rag. After clean up, allow the paint to cure for at least 24 hours before touching or decorating the area.
Since my hubs had to work late on a Saturday night, I did this little impromptu job after I got home from work that evening. It took no time at all to complete. Mostly I just had to wait until the paint dried to add a second coat and keep three nosy cats out of the wet paint. Black was a bit harder to cover up, so I kept having to touch up here and there when the paint would finally dry completely.
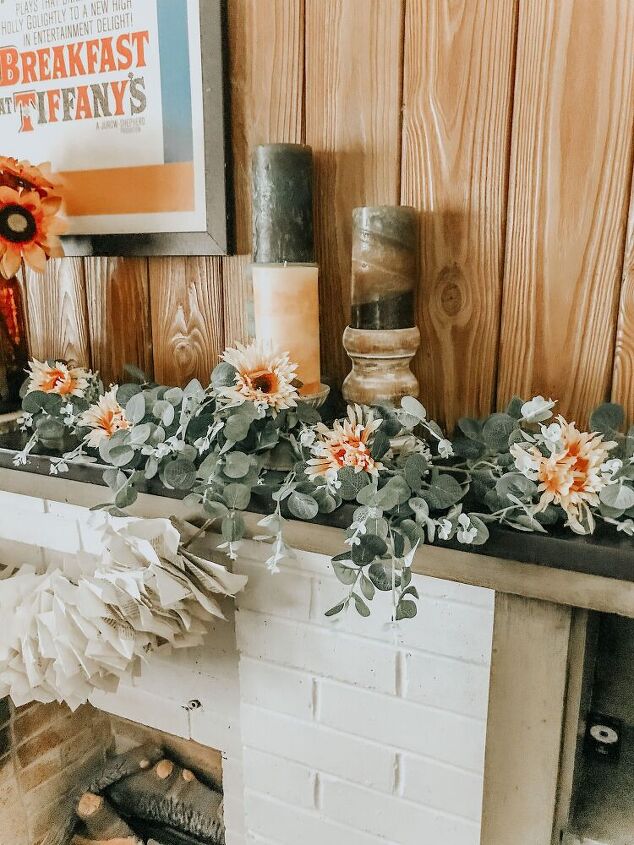
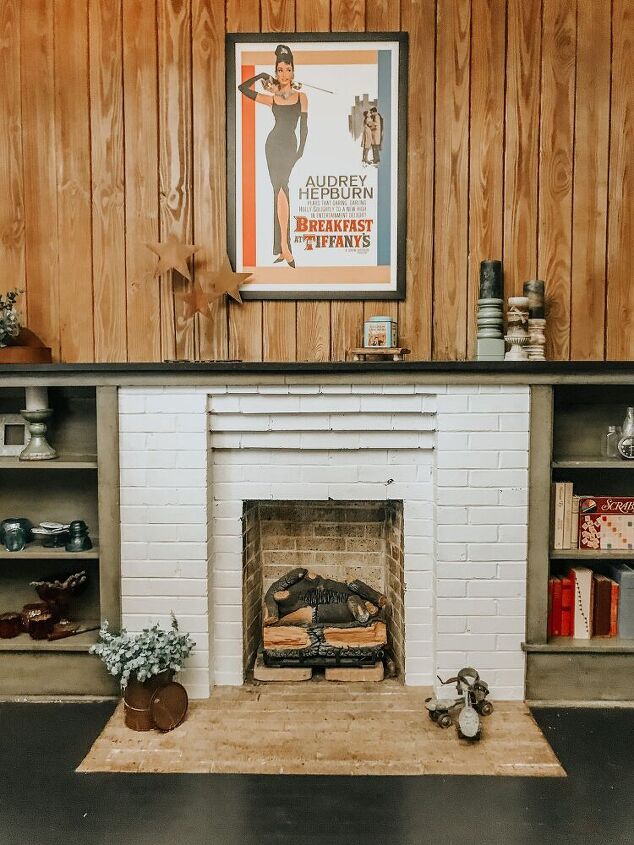
Isn't it fun how a little paint can change a whole room? Since I already had everything I needed on hand, it was a FREE project for me. Those are the BEST kind!
Do you ever grab a can of paint and just start painting? Did you love the results? Let me know down below.
Thanks for looking! :)
Resources for this project:
See all materials


Comments
Join the conversation
-
Looks good, now paint the interior and hearth.
-
I am getting up my courage to whitewash my red brick fireplace and raised hearth.
I used white chalk on it to simulate the look to see if I liked it, if not I could wash it off. It is a big job...wall to wall brick and hearth. I am going to go for it when the weather is nice and I can open the doors to dry it.


Frequently asked questions
Have a question about this project?
Do I need a certain paint to paint my brick wall and fireplace? I heard about brick anew but pretty expensive! But don't want it to peel.Any suggestions? Thanks
OMG too cool looking!! But I'm in LOVE with your garland!! May I ask where you got it?! Thanks!
Since you were covering black paint, why didn't you prime it first?