


Farmhouse Buffalo Check Pumpkin DIY
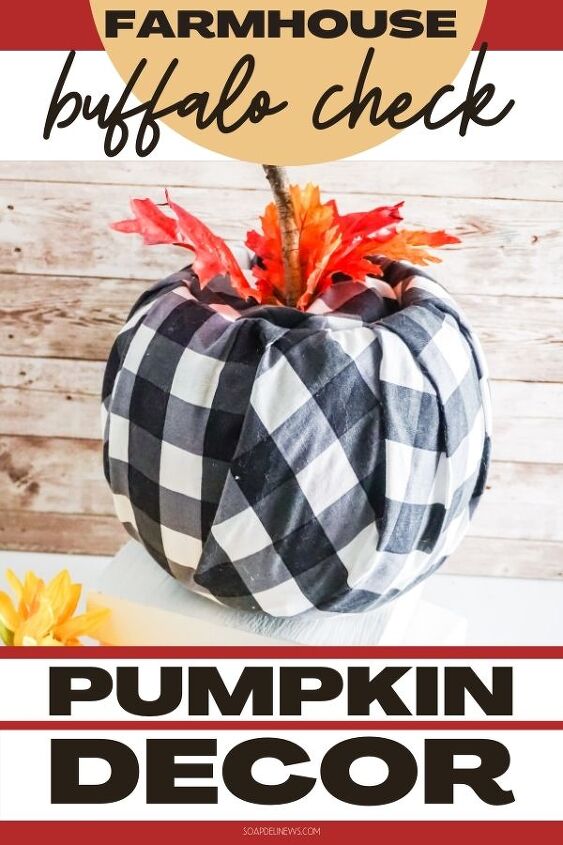
Learn how to craft this farmhouse buffalo check pumpkin for your fall decor! This farmhouse inspired fall decor idea for the home is an easy fall craft for adults. It’s made using a Dollar Tree plastic pumpkin bucket and pool noodle, black and white buffalo check fabric, fake floral leaves and a foraged stick.
Sewing has never been my strong suit. My mom, who was a home economics major in college in the sixties, did her best to teach me how to sew. I even had some minor instruction in junior high school. Unfortunately, it didn’t really stick. While I played around with sewing after college, I found I was always fighting my sewing machine. It would constantly come unthreaded. And dragging out the manual to rethread the darn thing was super challenging for me. Not to mention the drama of stitches getting snagged in the fabric. Sewing really wasn’t something I ever found the patience for. That’s part of the reason why I love this buffalo check pumpkin project so much. There’s no sewing required!
Luckily, making your own pumpkin fall decor doesn’t have to be expensive or difficult. In fact, it’s really quite easy to design and create fall crafts for your home without having to learn how to sew.
This DIY farmhouse buffalo check pumpkin makes the perfect addition to your fall home decor. These fall pumpkins look great as part of a table centerpiece as well as in a grouping on for a fall front porch display. Or give these fun pumpkin crafts a home on your fireplace mantel surrounded by acorn crafts and autumn leaves.
Ready to decorate your home with this fun fall decor idea? Then let’s get started on this adult fall craft for DIY farmhouse buffalo check pumpkins!
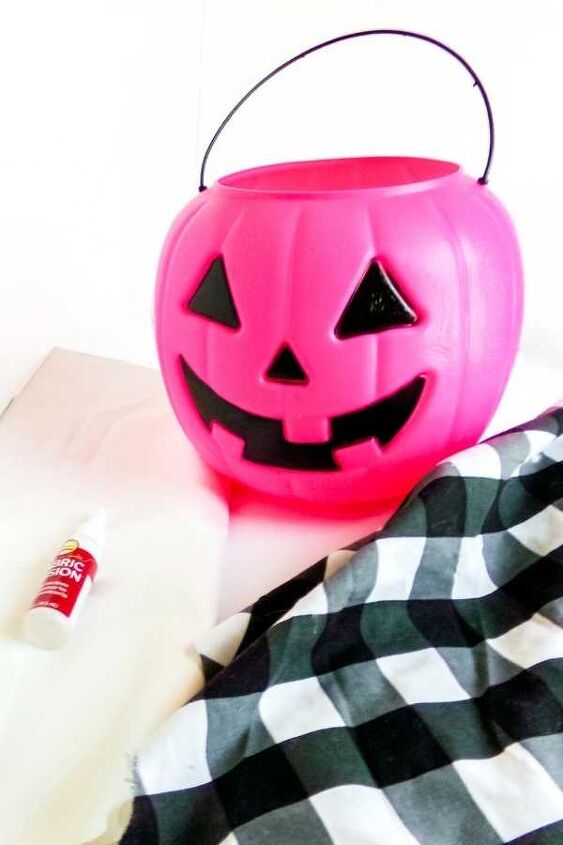
To get started making a DIY farmhouse buffalo check pumpkin, first cut the handle off the plastic pumpkin bucket using wire cutters. You only need the plastic pumpkin for this fall craft idea, so you can discard the handle once it’s been removed.
Next, use the fabric scissors to cut off a small 8-inch by 8-inch square of buffalo check fabric from one corner of the yard of fabric. Set the fabric square, along with the remaining buffalo check fabric, aside to use later.
Now open the yard of white fabric onto a tabletop. Place the plastic pumpkin bucket in the center of the fabric.
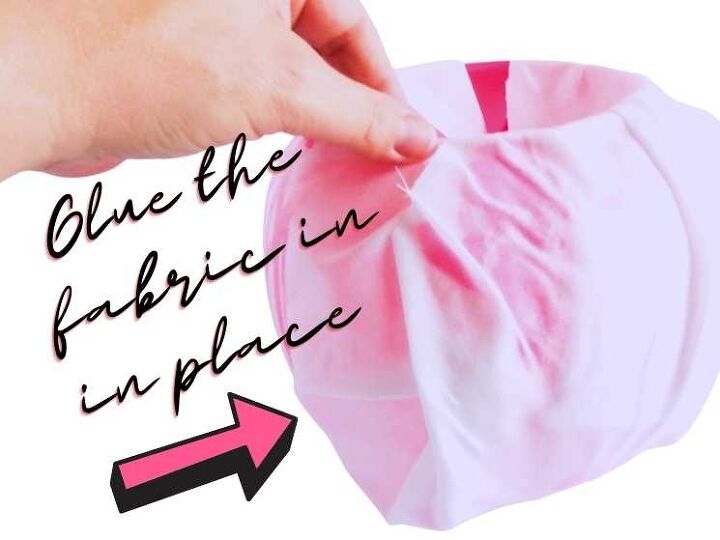
Next, place a line of fabric glue along the outside of the plastic pumpkin bucket.
Begin wrapping the bucket with the white fabric. To do this, pull one corner of the fabric over the pumpkin until snug. Create pleats with the fabric by letting it naturally fold on itself. Tuck the corner of the fabric inside the bucket. Then hot glue the fabric in place inside the pumpkin, to keep it in place.
Next continue working with the white fabric in 1-inch to 2-inch wide sections. Pull a piece of the fabric into the pumpkin, creating pleats in the fabric around the outside of the pumpkin, as you did previously. Continue all the way around the pumpkin, fitting the white fabric inside the pumpkin.
While the white fabric may seem unnecessary, you do not want to skip this step. The fabric covers the pumpkin so that the color of the plastic pumpkin doesn’t show. This prevents the actual color of the pumpkin from showing through the white parts of the buffalo check fabric of your final farmhouse buffalo check pumpkin.
Once the pumpkin is covered in white fabric, open the larger piece of buffalo check fabric on your table. Place the plastic bucket in the center of the fabric. You’ll now repeat the same process with the buffalo check fabric as you did using the white fabric, but without the fabric glue.
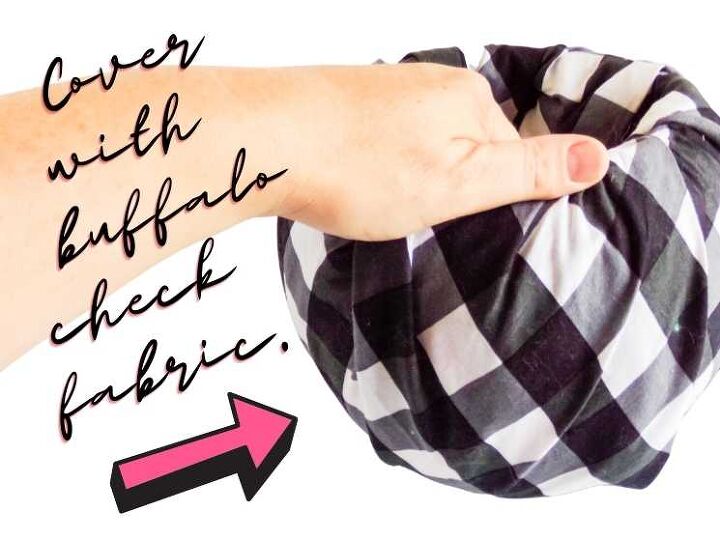
Wrap the pumpkin bucket with the fabric by pulling one corner of the fabric over the pumpkin. Then pull it snug. Let the fabric naturally fold on itself, so that it creates pleats. Then tuck the corner of the fabric inside the bucket and hot glue it in place inside the pumpkin.
Working in 1-inch to 2-inch wide sections, repeat the same process that you implemented prior. Pull a piece of the fabric into the pumpkin, creating pleats in the fabric around the outside of the pumpkin. Continue all the way around the pumpkin, fitting the fabric inside the pumpkin. Use the hot glue gun to secure the fabric in place, if needed, inside the pumpkin.
Once the plastic pumpkin is completely covered with the buffalo check fabric, cut a 8-inch tall piece of a thick pool noodle. If you aren’t able to locate a thick pool noodle, or if you’re using one of the standard sized pool noodles, cut 3 8-inch tall pieces and hot glue them together side-by-side into a bundle. Alternately, you can also cut down a rectangle of the floral foam to serve the same purpose.
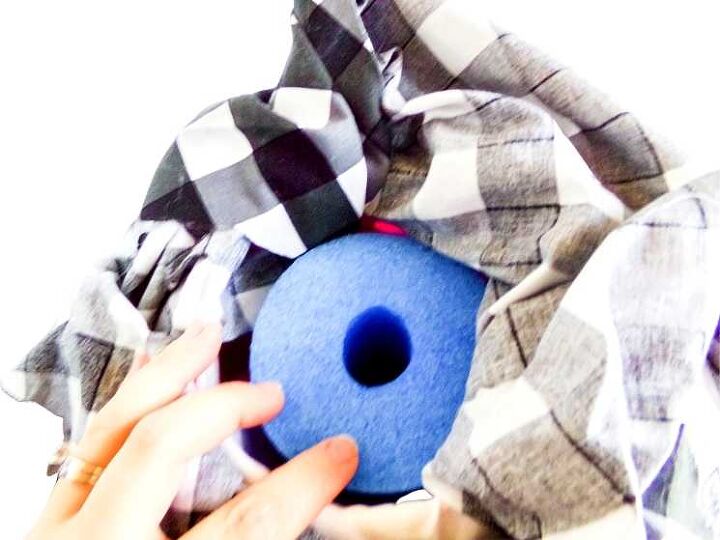
Place the resized pool noodle inside the plastic pumpkin, in the center of the opening. Then hot glue the pool noodle into place. The top edge of the pool noodle, or floral foam, should be even with the top of the pumpkin. If not, simply trim the pool noodle down to size.
Now hot glue the edge of the 8-inch by 8-inch square of buffalo check fabric on top of the pool noodle. Affix the edges of this fabric square to the inside of the pumpkin edge. This piece of buffalo check fabric will cover the pool noodle as well as close the opening on top of the plastic pumpkin.
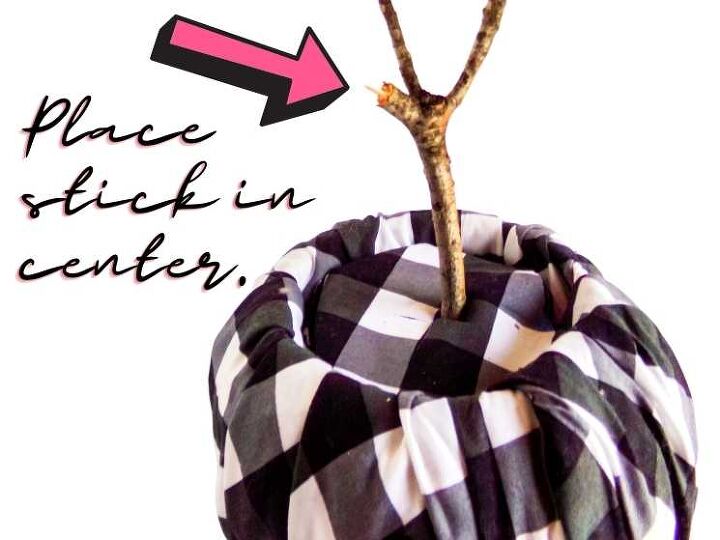
Next, use the fabric scissors to cut a hole in the center of the fabric you just glued onto the top of the pumpkin. The hole should be cut so that it is just wide enough for the stick to be inserted.
Now slide the stick you foraged into the hole in the top of the pumpkin. Then hot glue the stick into place.
Finally, add the faux fall leaves to the top of the pumpkin around the stick. To do this, simply arrange the leaves as desired around the stick and hot glue them into place. Your DIY buffalo check pumpkin and fall decor idea for the home are now complete!
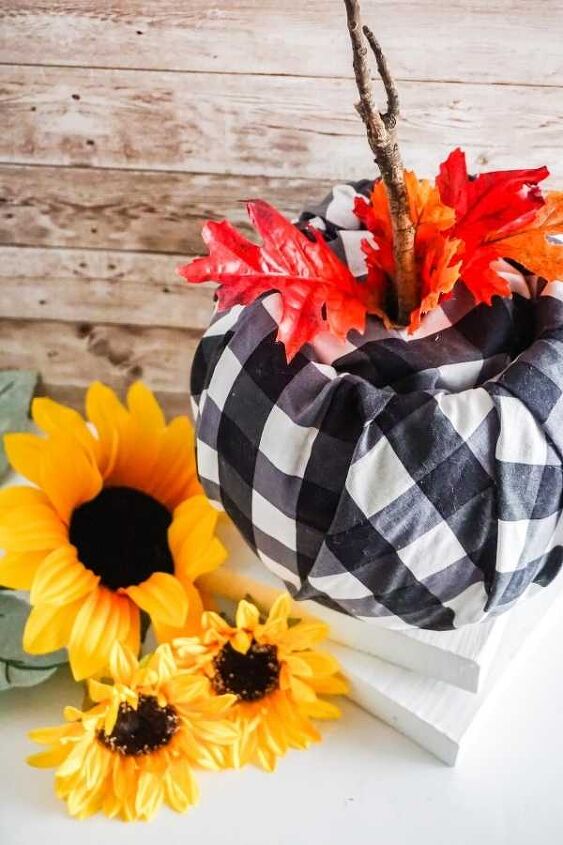
Place your farmhouse buffalo check pumpkin on a shelf, table or mantel to decorate your home for autumn. Or create additional farmhouse buffalo check pumpkins to create a grouping for covered fall porch decor.
Resources for this project:
See all materials


Comments
Join the conversation
-
Yes definitely. I already have the fabric the glue , and the pumpkin! Great instructions BTW😊
-
Wow, this is so creative! Love it😻😻😻


Frequently asked questions
Have a question about this project?
Wouldn’t it have been cheaper and easier if you just spray painte the pumpkin white?