


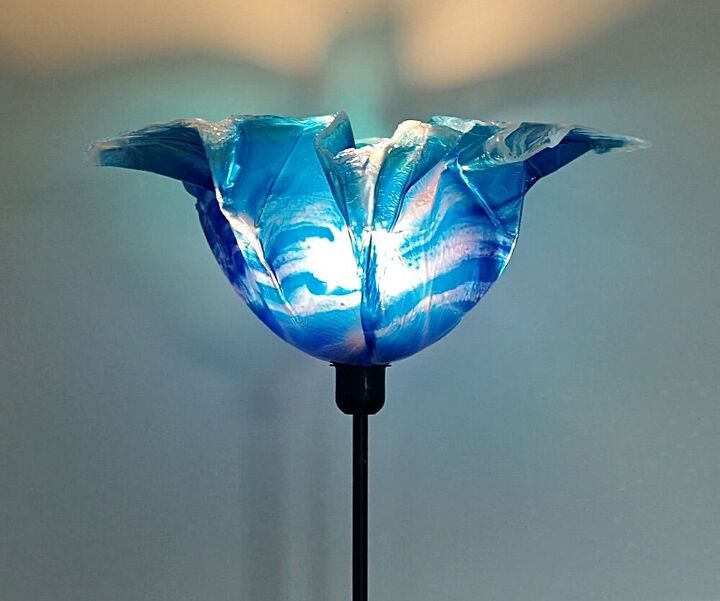
Resin Beach Lampshade

Hello everyone! Here’s another easy-peasy resin tutorial for you today! Hopefully by now if you follow my projects on here you’ll be all tooled-up and ready to go.
However, if not, have no fear, everything you need will be listed below along with my DISCOUNT CODE for resin products with a company that also offer FREE SHIPPING!
I also have an Etsy store if you don’t already know so I’ve added the link below where you can buy all my handmade pieces.
This project is so easy and versatile, making it the perfect craft to brighten up any room!
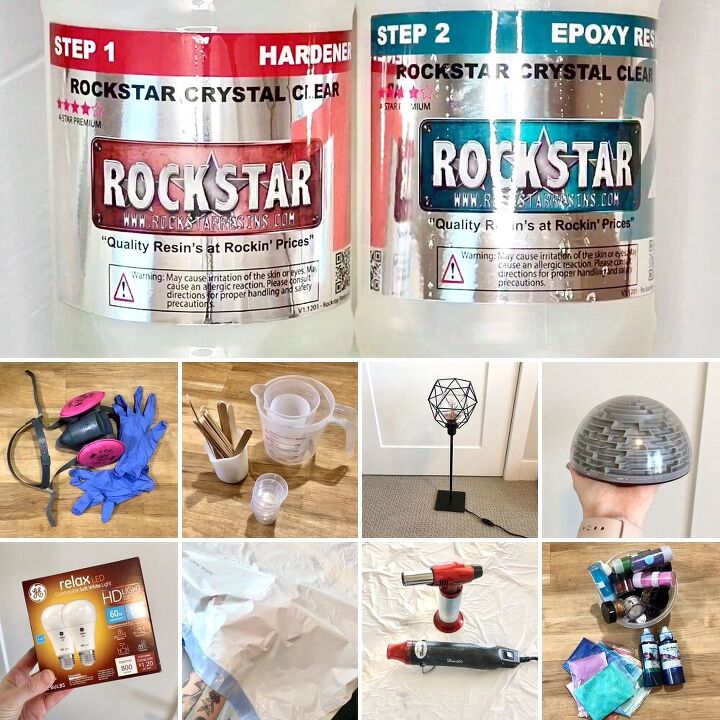
- Resin - I’m using Rockstar Resin’s 4 Star 1:1 Thin Coat formula. Use this link to get 10% off your order with code HANNAH as well FREE SHIPPING!
- Respirator or a well ventilated work space
- Measuring jug
- Mixing cups and sticks
- A lamp that you want to re-vamp
- Something dome-shaped
- Appropriate bulbs (I had to change the existing one)
- A large plastic sheet
- Heat gun or blow torch (heat gun will work best)
- Colourants
- A plastic ‘Stopper’ that is the same size as your lamp screw
 Click above to watch my YouTube video of this project
If you prefer to watch tutorials rather than read them, click my video above!
The 4 Star Thin Coat resin I have chosen to use will give you a work-time of about 30-45 mins once fully mixed. A very generous work-time. The full cure time is approx 12 hours.
If you’re looking for a great, inexpensive, reliable brand to start you off, I highly HIGHLY recommend Rockstar Resins. They offer free shipping and you can also get a further 10% off your purchases using my discount code. All details are in the product list above.
Mixing:
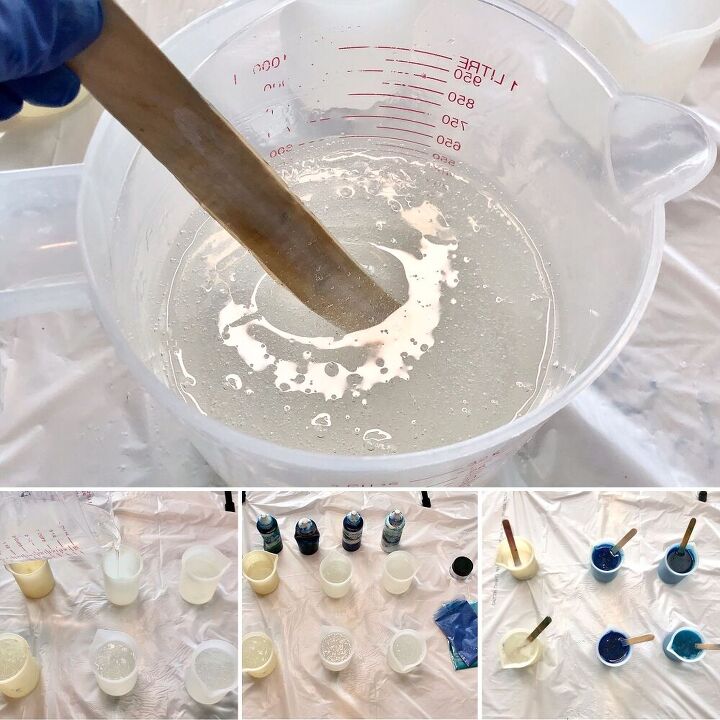
Mix together 600mls of resin.
To do this, 300mls of hardener is added to my measuring jug first, followed by 300mls of resin. Mix the 2 together thoroughly for at least 5 mins. I usually mix a lot longer just to make sure I get a rock hard cure at the end. Make sure you regularly scrape the sides and bottom of your jug when mixing to combine both parts completely.
With my now fully-mixed 600mls of resin, I pour this into 6 smaller silicone containers ready for colouring.
I colour 4 of these in a variety of blues using liquid and mica pigments as follows:
Darkest blue - 3 drops of purple, 3 drops of blue, 1 drop of green and blue mica powder
Next darkest blue - 4 drops of blue, 1 drop of purple, 2 drops of green and bluey-green mica powder
Next - 3 drops of green, 2 drops of blue and bluey-green mica powder
Lightest - 1 drop of blue, 1 drop of green and bluey-green mica powder
I colour another one white using white liquid pigment and then leave the last container of resin clear.
Now set these aside to prep your plastic sheet.
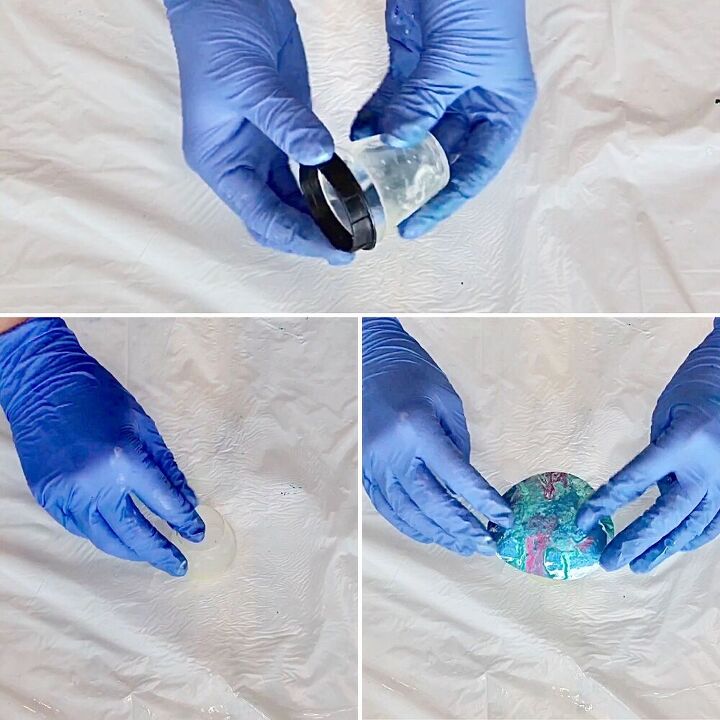
Lay out your plastic sheet and place in the middle your plastic ‘stopper’. I used a small mixing cup that was exactly the same size as the screw for my lamp/lampshade. Then place something weighted on top to ensure no resin seeps underneath.
The reason for this step is so that once your resin has cured, you will have the perfect sized hole to thread your light fixture through with no need to cut or sand your resin.
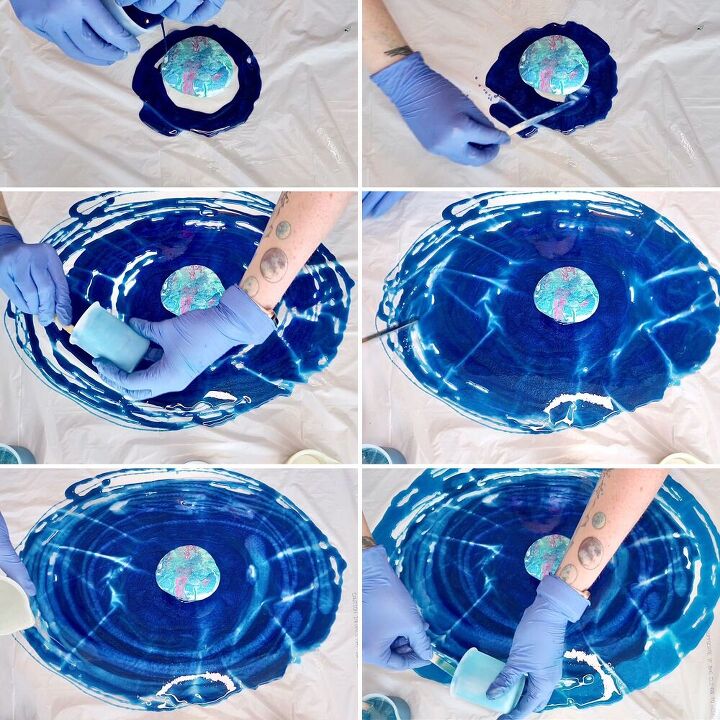
Bring your resin containers back and one by one, add rings of colour around your plastic stopper.
Make sure the first resin ring reaches all the way up to your plastic stopper.
I started with my darkest blue first and with each new ring got lighter and lighter. To softly blend where each colour joined the next, I slightly overlapped them.
I also added a few thin rings of clear resin as I went along which I feel gives a really interesting look to the other colours, breaking up the ‘blocky’ look. Keep at least half of your clear resin back to add last.
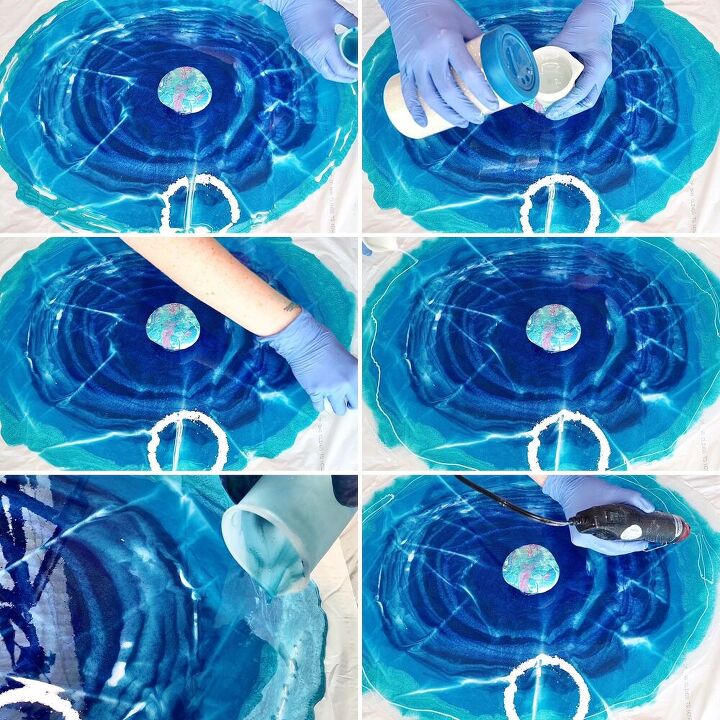
I added the rest of the clear resin after my lightest blue ring. I added clear glitter to my clear resin before doing so to add a little extra sparkle (optional!).
I then added thin laces of the white resin to the outer rings to create a wave effect. My colours were to represent the ocean so this worked well.
Then using the heat gun, I pop bubbles and blew-out the little white laces into the clear resin to create little cells that look like wave foam. Take care not to melt the plastic sheet whilst using your heat gun.
If you want to use other colours all together then you absolutely can, the basic steps are still the same and you can add them in any order you like.
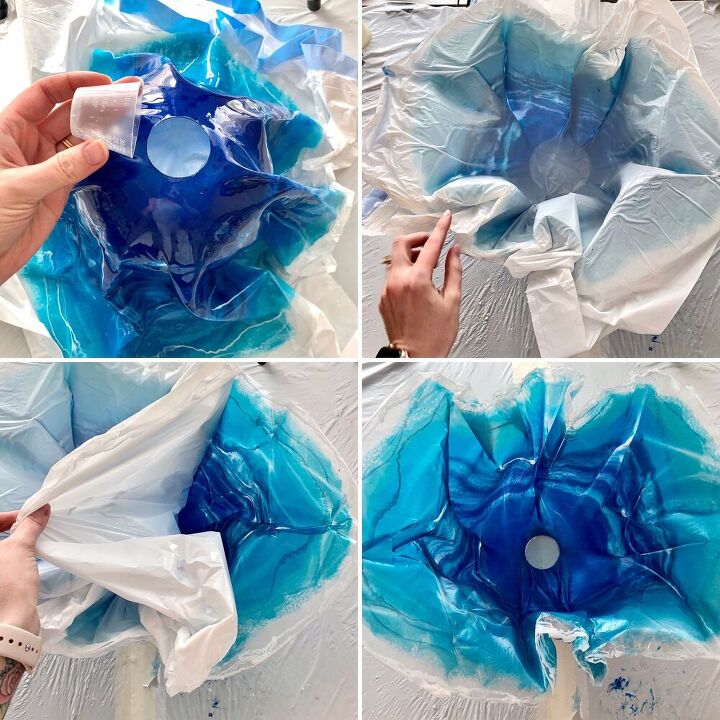
Once you’re happy with how your ovalish shape looks, leave to cure for about 5 hours. This will be enough time so that the resin isn’t fully set but can be handled and shaped before leaving to fully cure.

After 5 hours, you can now handle your resin.
Slip your hand underneath the plastic sheet and elevate your resin oval so that you can place your domed item underneath it. I placed my domed item on top of another to give it the required height. You’re aiming for a tulip like shape/drape.
If your resin folds are a bit rigid and stubborn, you can use either your heat gun or blow torch to slightly re-heat the resin so that it becomes malleable. This will allow you to shape your future lampshade a lot easier.
Once you’re happy with your shape, leave to fully cure for the remaining 7 hours.
Once fully cured, removed first the plastic ‘stopper’ from the centre. this should leave you with a perfect circle for threading onto your light fixture.
Then peel away the plastic sheet from the inside of your resin lampshade.
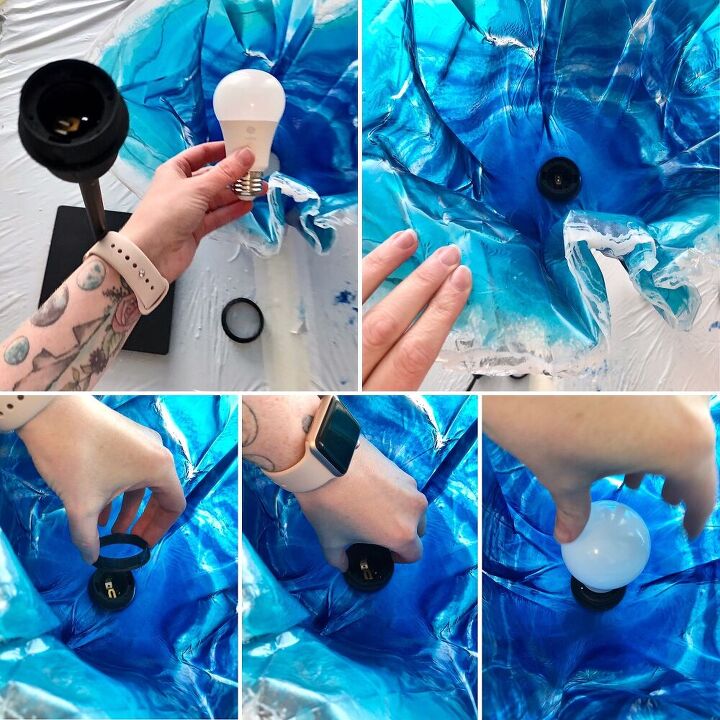
Moment of truth! It’s time to reassemble your lamp using your new lampshade.
If the hole for your light fixture happens to be too small, just sand some resin away. But hopefully, if you picked a stopper that was the right size, there will be no need to do this.

All that’s left to do now is plug it in and switch it on!
Thanks so much for checking out my tutorial today! If you have any questions at all then please just drop them below and I’ll be happy to get back to you.
I also have an Etsy Store where I sell all my handmade resin items. It would mean a lot to me if you took a little look 
Thanks again, and happy crafting! X


Comments
Join the conversation
-
Very pretty
-
Beautiful, fresh idea... thank you!


Frequently asked questions
Have a question about this project?
what kind of plastic sheet? Where would I get this?
Would it be easier to shape if you wait 4 hours instead of 5 hours? It's beautiful
Can you cut open a heavy duty trash bag to use for the plastic sheeting?