


Simple Upgrade. BIG Impact.

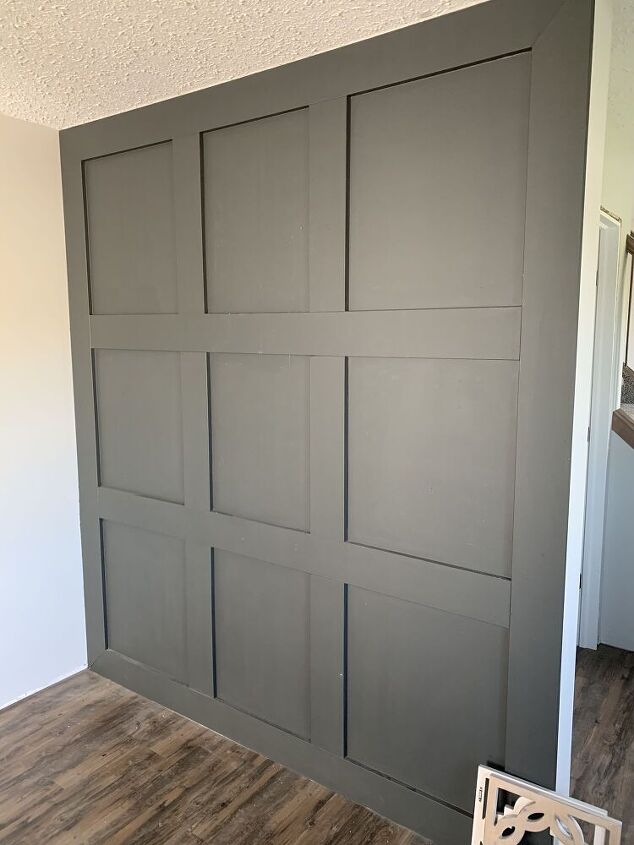
I have always loved this wall in my house. However, sometimes you just have the desire for change.
I wanted to do something to this wall that would be Impactful but also didn’t want to spend days wrapped up in an upgrade. So, I decided to frame the preexisting squares.
Follow alone with me as I show you how much this simple upgrade changed the look of this Space.
- paint in the color “black”
- paint brush and roller
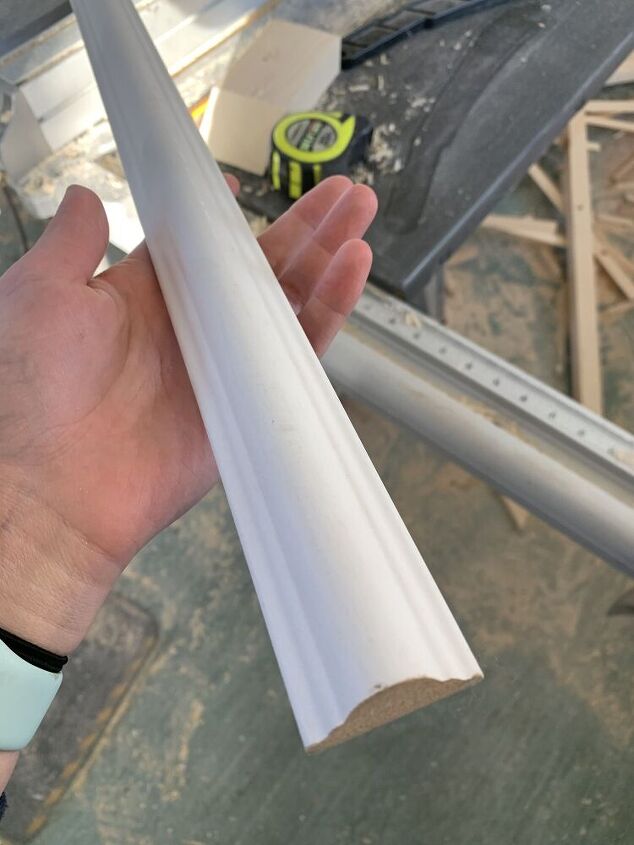
- Decorative trim (for my space I used about 80’)
- filler
tools
- Saw
- brad nailed
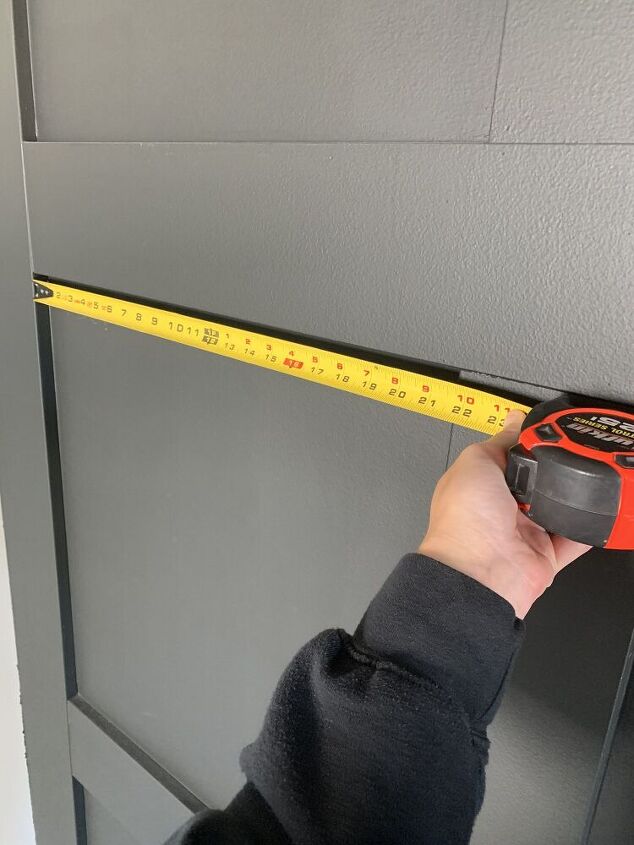
I measured out all the squares and the cut all the pieces I needed. I cut the corners at 45 degree angles.
I made sure to measure each individual space since for some reason my spaces weren’t all exactly the same.
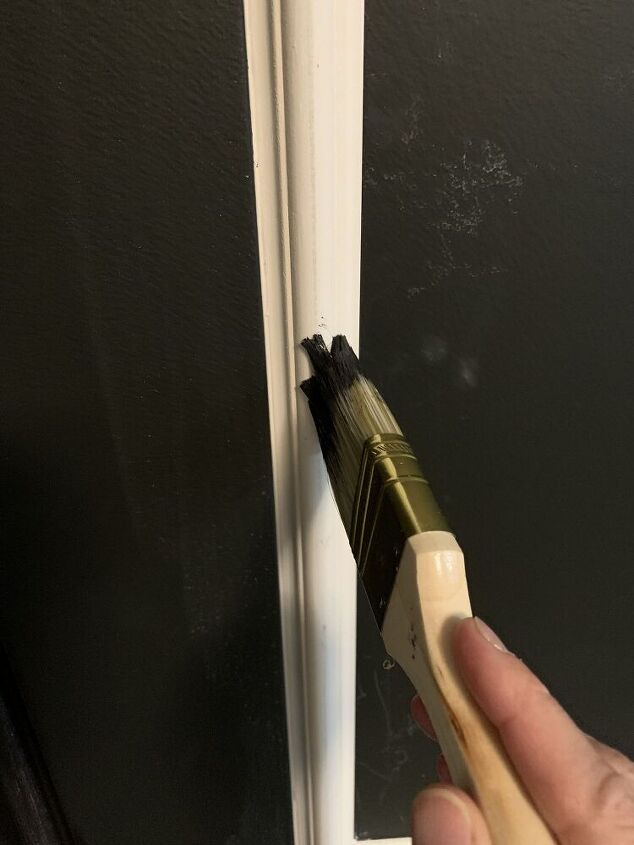
After you secure all the pieces, fill the nail holes with filler.
Allow the filler to dry, lightly sand and the paint all the wall.
After everything was painted, I still felt that my wall needed something.
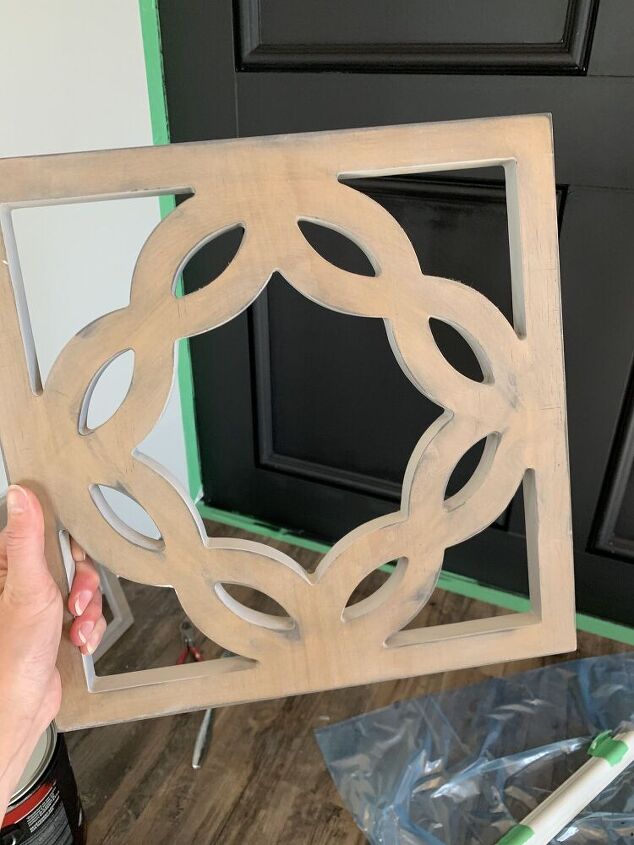
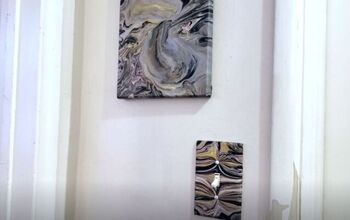
I found two of those decorative wall hangings in my storage room and decided to give them some new life
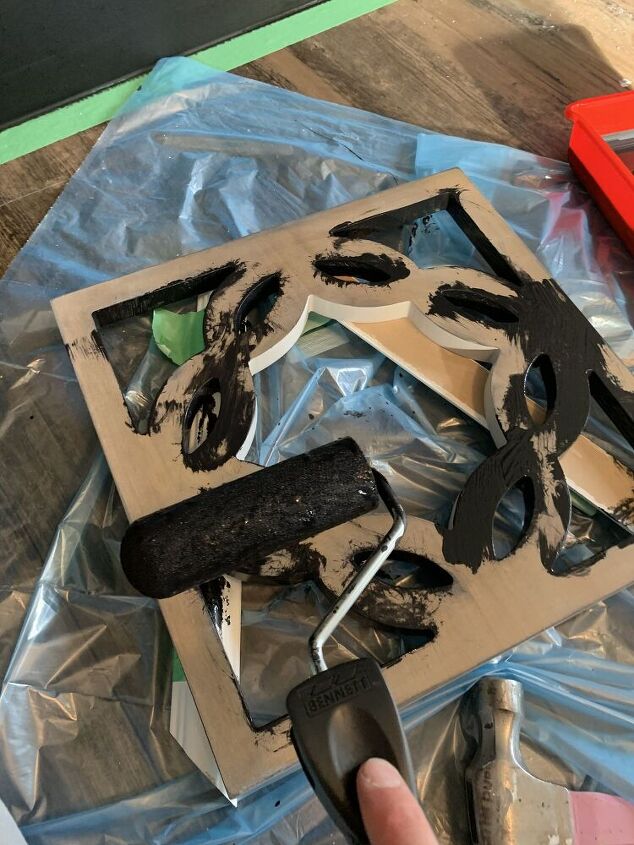
I painted these black to match the wall.
Once these were dry I cantered them in the middle row of the wall. I only had two, even though there were three spaces in the middle, I figured it didn’t matter to much since once I added a bench with some pillows and plants you wouldn’t even notice the bottom one didn’t have one.
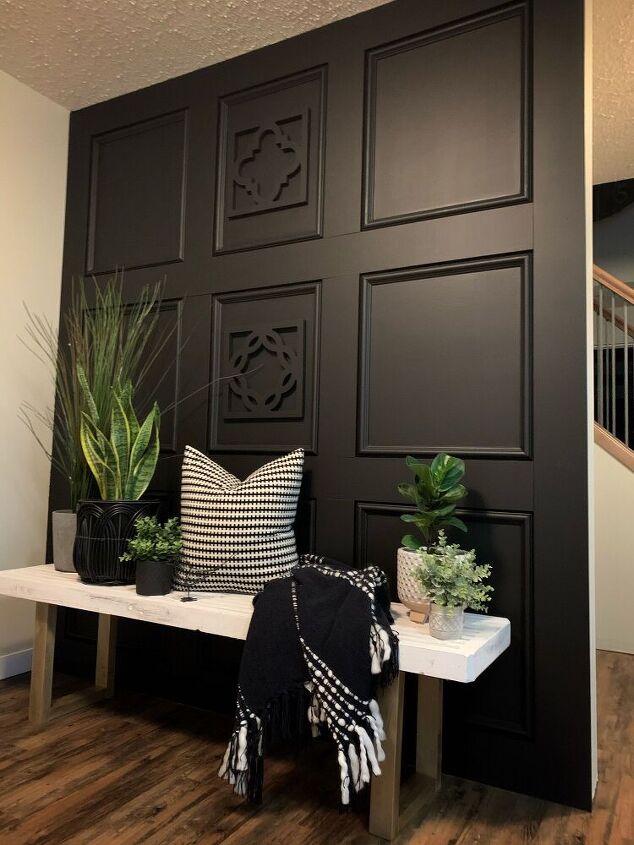
I made a new bench (post on that to come) , added a blanket, pillow and some greenery.
I absolutely love this wall. I adore what the wall hangings bring to the look. The simplicity of framing the pre existing squares brings such a wow factor. Such a simple way to bring new life to this wall without putting a huge hole in your pocket or taking up days of your time.
Thank you so much for following along with me. Be sure to follow along with me on here, HOMETALK, as well as Pinterest and INSTAGRAM
Cannot wait for our next DIY together
xo
Amber


Comments
Join the conversation
-
Love this! You certainly have a flair!
-
Fantastic job....adding those two pieces to two of the squares makes it stand out more....I love it. Thanks for sharing.


Frequently asked questions
Have a question about this project?
After watching the video, I thought the white moulding looked pretty cool too. Just another thought, with the white moulding, it would make a great 'picture gallery' wall. (Just for a different look). 😉
What brand and color black is this? Thanks!
I see these videos sometimes and I think it gives a classy look. Love it. All of my walls are textured. Could I still do this?