


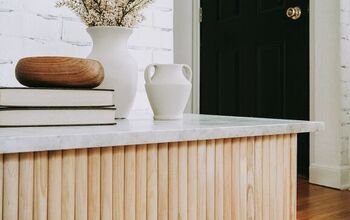
Make Your Own Faux Marble Table With This Easy Tutorial

It’s really cool when you can take something ordinary and turn it into something truly special. It’s even cooler when you can do that yourself. I took a plain white IKEA table and by using some Epoxy and some different colorings was able to turn it into an absolutely stunning faux marble table. With this project you can totally personalize the colors and depths to your own taste and current home decor, so don’t be afraid to make it your own. Keep reading to learn how to do this yourself.
Tools and Materials:
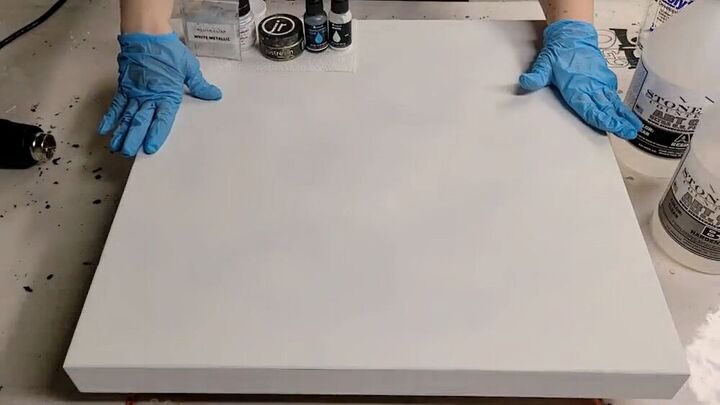
- White side table, already thoroughly sanded, and legs removed (I got mine from IKEA)
- Epoxy Art Coat, A and B
- Epoxy Counter Coat, A and B
- Mica powder (in the color of your choosing)
- Dye
- Plastic cups
- Mixing tool (I used popsicle sticks)
- Gloves
- Heat gun
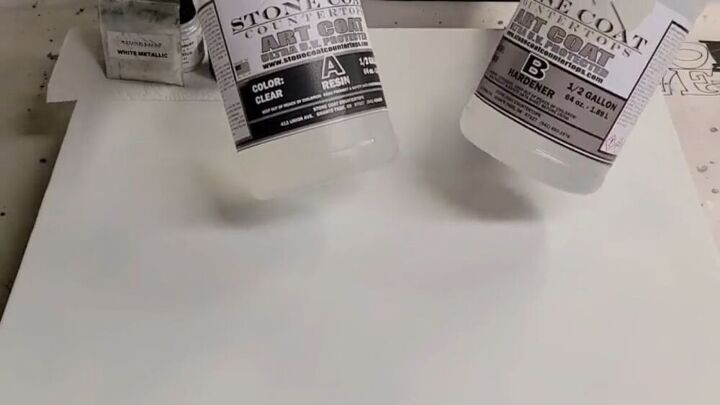
The first thing you’re going to do is mix your Epoxy. I used equal parts Resin and Hardener. Mix them together thoroughly because this is our base for the whole project.
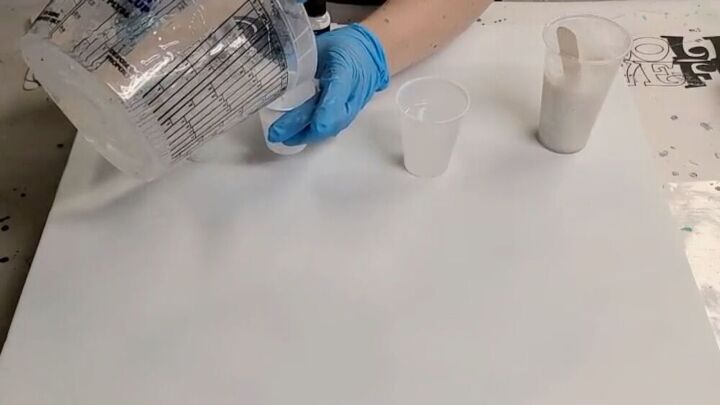
Once your Epoxy is thoroughly mixed, you’re going to use that to create your different colors. I took four plastic cups and poured clear Epoxy into them before adding the coloring. Since my table was mostly white, I mixed Metallic White powder into a large cup of Epoxy. You need about 10-15% of the powder to the Epoxy. Into the white I also added a bit of Interference Blue Mica Powder from Alumidust, which is metallic white with a blue tint.
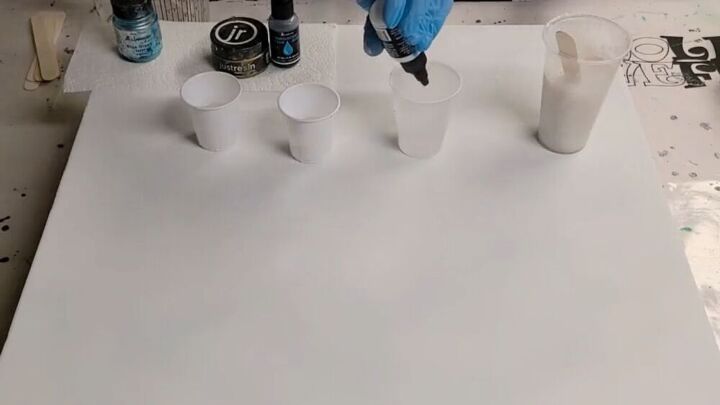
You’ll be needing a lot less of the other colors, so I used much smaller cups. There are three additional colors to mix. In one I used plain white dye from Alumilite. In the next I used about a drop of Alumilite Ocean Blue as well as some Alumidust Blue Green powder. The last cup I made was gold. For this I used JustResin Gold paste. Once you get all your colors added, you want to make sure to mix them very thoroughly.
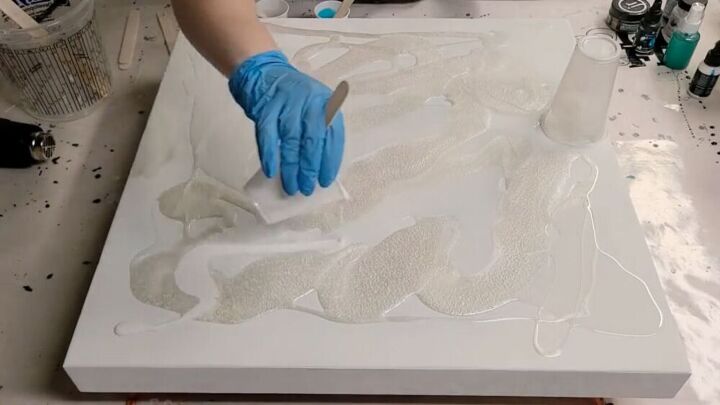
Since my table was white already, I decided to use that as part of the design. So I poured some of the clear Epoxy and spread it around, but only on some parts of the table, just to add some depth. Then I poured a lot of the metallic white, as that’s my main color, followed by some of the regular white. I call this “the ugly stage” so don’t worry about pouring it in a pattern or anything like that. Just have fun with it.

Use your hand or a paintbrush to smooth down your Epoxy all over the table. Make sure to smooth out all your sides as well. When you’re smoothing out the intersection of two colors, I recommend patting down instead of rubbing. This will prevent your colors from completely blending into each other.

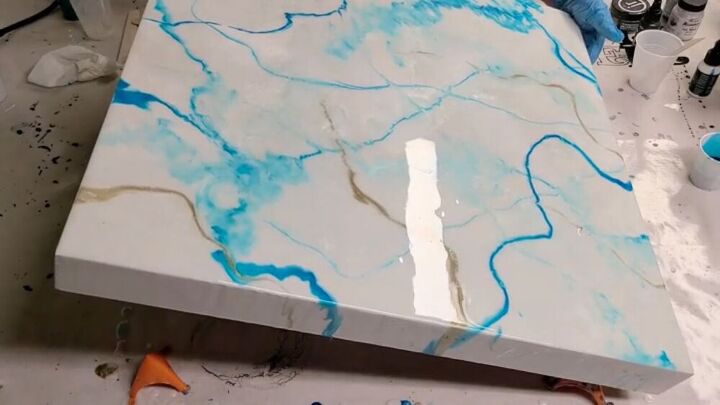
It’s time to add your color for some interest. Since you need a lot less of this one I used a stick to spread a bit of it around and create some veins.
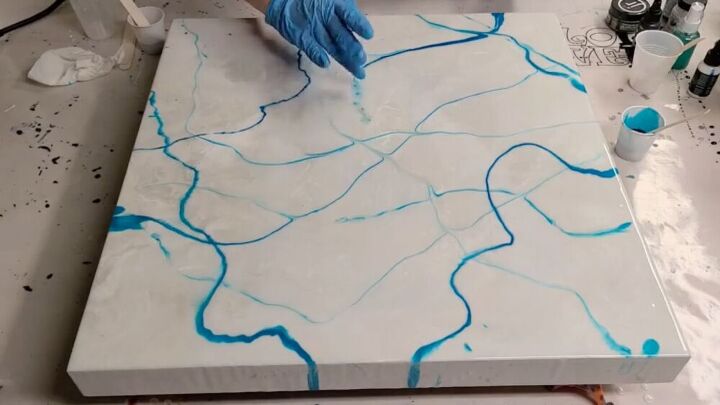
I used a heat gun to help blend it in a bit and soften some of the lines. But I wanted to blend it in more so I used a finger to tap down some of the lines. This is totally a matter of personal preference, so you can choose how you want your lines to look!
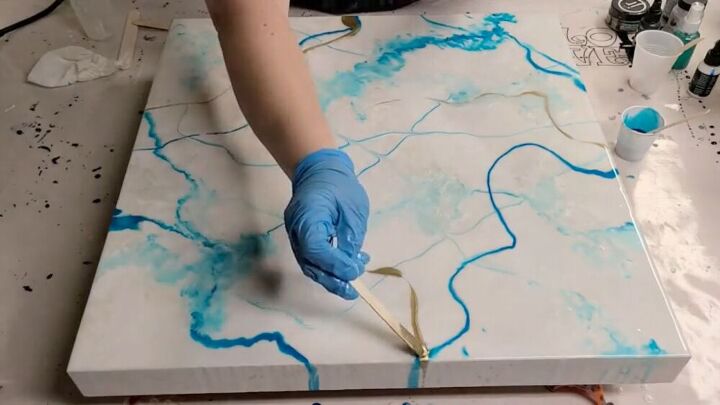
Now I added in some gold veins around it to really make it pop. I used even less of this than the blue, just to add a little bit of interest.
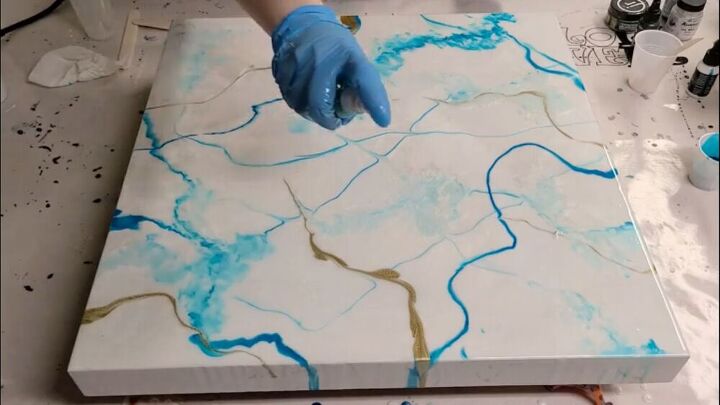
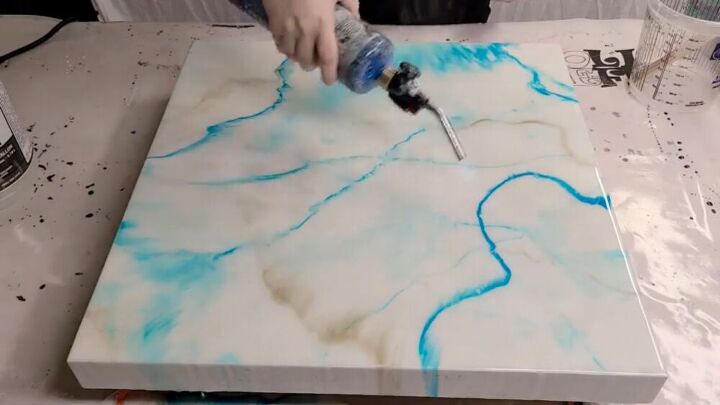
This is just a little something I like to do to give it an extra bit of depth. I mixed some 91% isopropyl alcohol with teal mica powder and sprayed it around the table in order to fracture it. If you want some bigger fractures you can spray it into your hand and flick it onto the table.
This is a totally optional step, and I didn’t do much of it, but you can also tilt your table in different directions to get the veins to flow a bit.
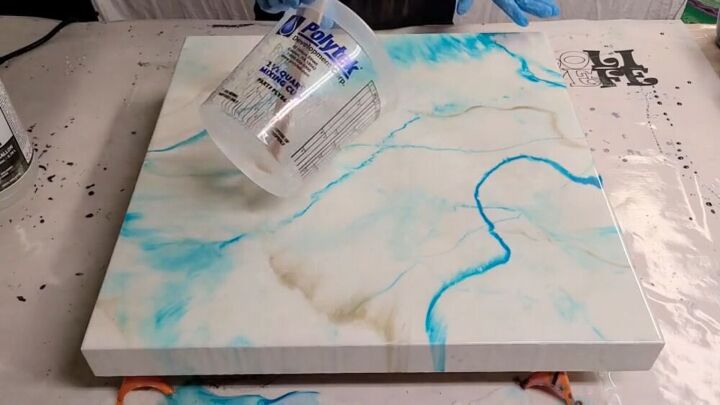
Once my table was completely dry, I lightly sanded it with 220 just to give it some grip. I then mixed equal parts of part A and part B countertop epoxy and poured it onto the table. I like to pour it all in the middle and then use my hand in a circular motion to spread it outwards. Make sure to get all the sides.
Now you just have to torch it and you're done! When it comes to torching you want to move across quickly and make sure not to stay on one spot for too long. Once you’ve done that, all you’ve gotta do is sand off any drips and reattach your legs and you are done!
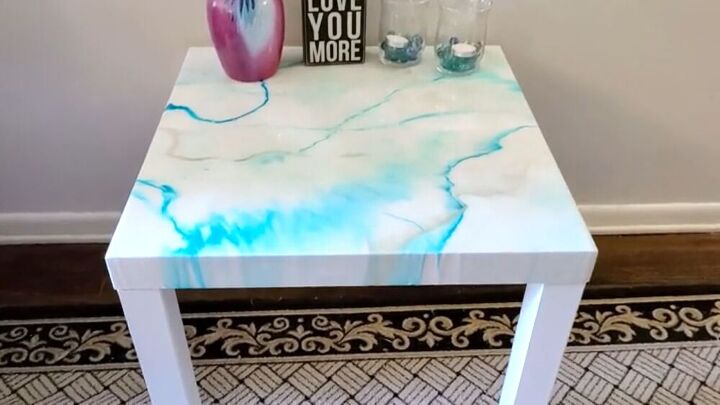
And there you have it! I LOVE how my table turned out. The color I chose fits in perfectly with my home decor and it really brings something special to the room. It was also so fun and relatively easy to do, so it’s definitely something I can see myself trying again. Especially since each one can be customized in a different way. I’d love to see the personal touches you put on your own table, so definitely show me in the comments!
Resources for this project:
See all materials


Comments
Join the conversation
-
I think next spring, when I can do this outside (covered to keep dust/insects/rain off) I will try this, but too much odor for me at this time of year...I have seen the Stone Coat Epoxy commercials, but those are pros doing it...not someone at home. Thank you!
-
Never mind i think I figured it out. It is a tibbon already painted, that I am seeing lol. Sorry😀


Frequently asked questions
Have a question about this project?
Can this be used outside?
I really like this. Can you explain the gold please? I saw supplies said paints and dyes. But the picture shows a stick or brush with the gold but some kind of ribbon up in the air attached. Can you clarify the picture please?
Has anybody seen, or done this on kitchen countertops? It seems like the epoxy would hold up better than just paint.
Thanks!