


Before and After IKEA Dresser Makeover

Looking for a fun furniture makeover?
This creative IKEA dresser makeover transforms a simple basic dresser into a beautiful, stylish piece of furniture. Add an scarf organizer to the side of the dresser.
All you need for this project is paint, wood, new hardware and these step-by-step instructions.
Here's a little before and after project and how to add a little organizing to a basic IKEA dresser.
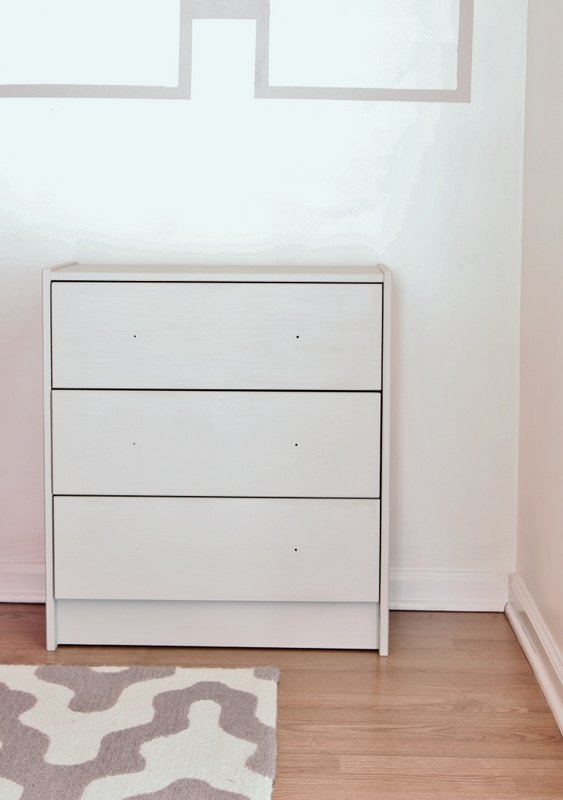
Here's the original dresser. This is a basic Rast IKEA White Dresser.
Start the project with a base coat of paint.
Sand lightly.
Prime the dresser.
Then paint with two coats of SW Repose Gray.
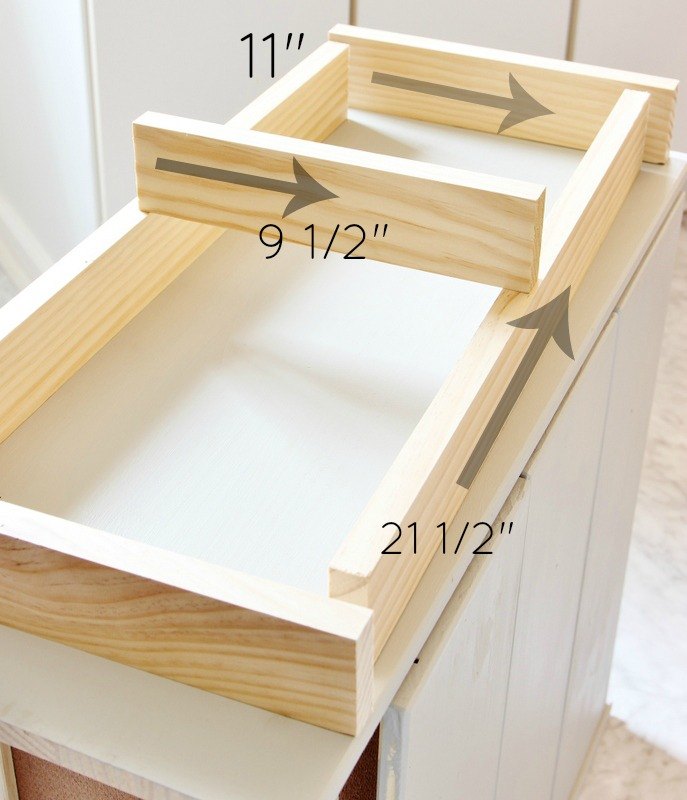
Construct the sides of the dresser with 1" x 3" pieces of wood. Start by cutting out 2 pieces of 21 1/2" of pine board.
Next, cut 2 pieces of 11" pine board.
Next cut out 1 piece of 9" pine board.
This is the frame for the scarf organizer.
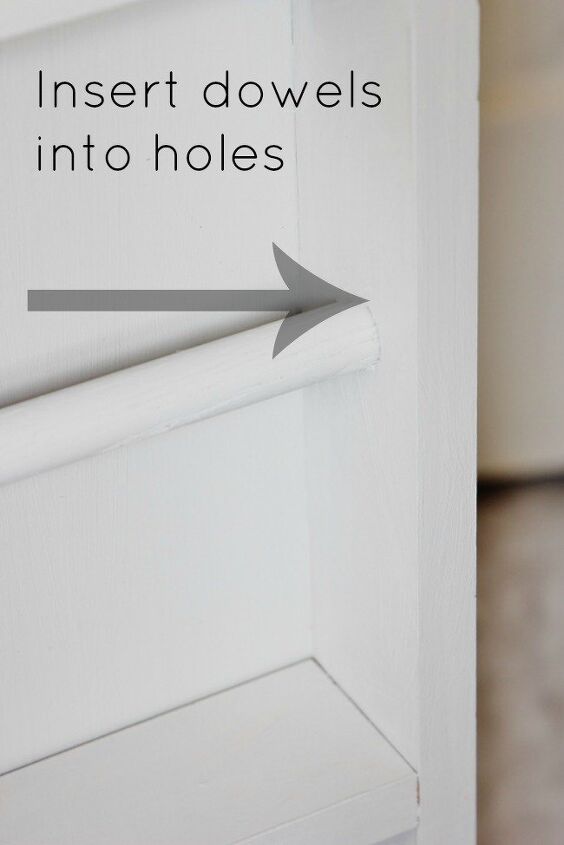
Drill evenly spaced holes in the sides of the 21 1/2" pieces. Adjust the sizes of the holes to the size of your dowel rod.
We used 1/2" dowel rods, so we drilled the holes slightly larger.
Cut the dowels about 9 1/2".
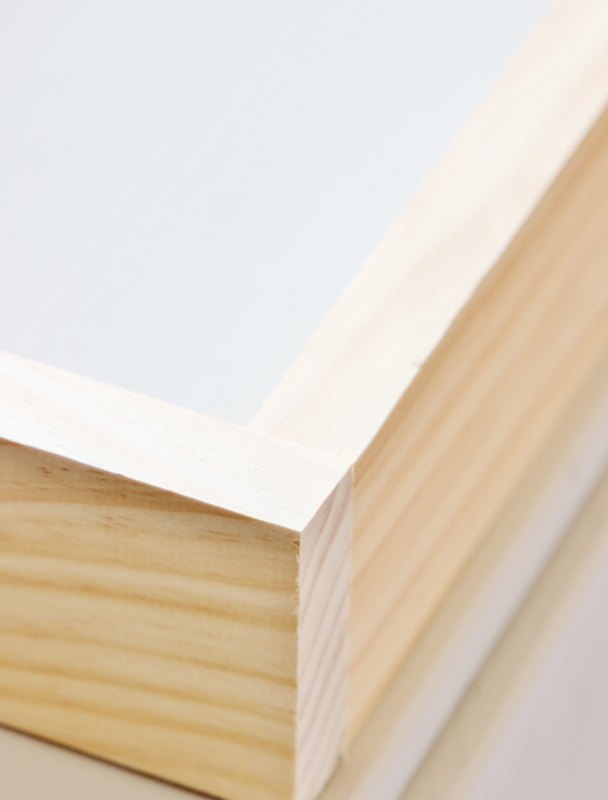
Assemble and glue everything in place.
I used wood glue to attach all the pieces.
You can either clamp them together or use painter's tape to hold them together.
After the glue dries, nail the longer pieces of board to the side of the dresser. Then nail 11" pieces of board to the top.
Lastly, nail the 9" board to the center of the frame.
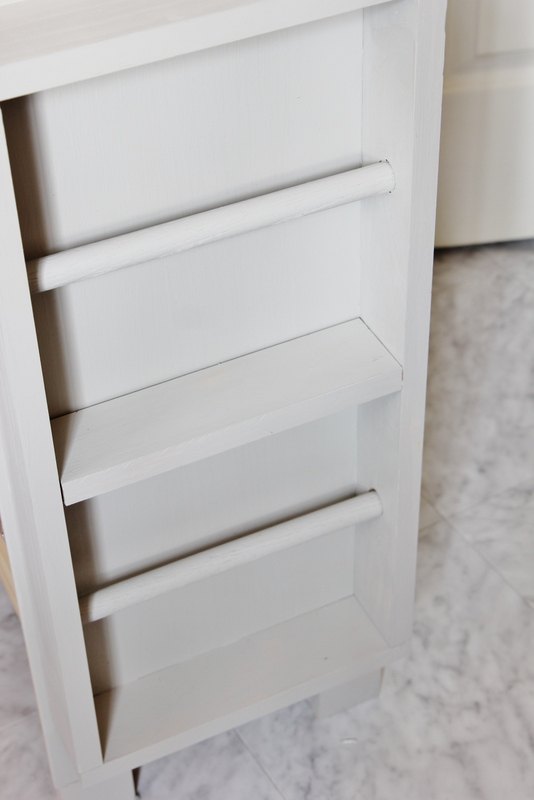
When you are finished it should look like this.
Let it dry and paint it with the coat of SW Mindful Gray to match the rest of the piece.
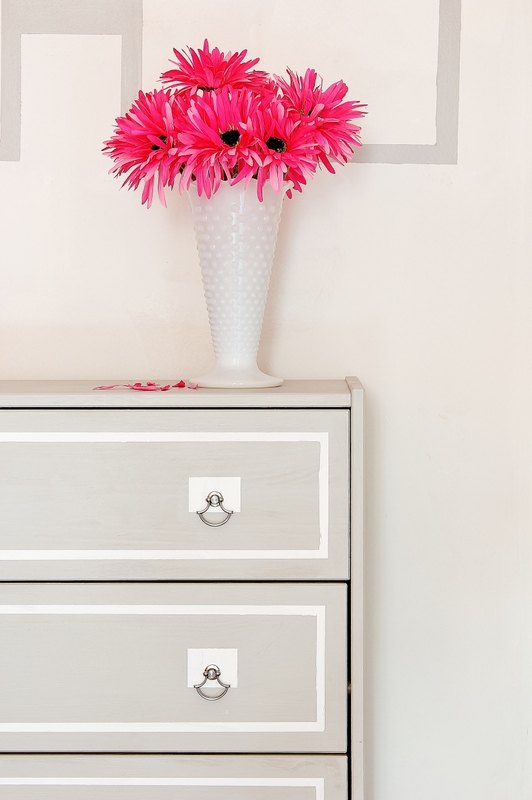
I finished the piece by taping off the front drawers with tape and adding a white border and a small white square around each of the knobs.
I really wanted to highlight how pretty they are.
I love the look of these knobs.
I painted the white square around them to add architectural interest to the piece.
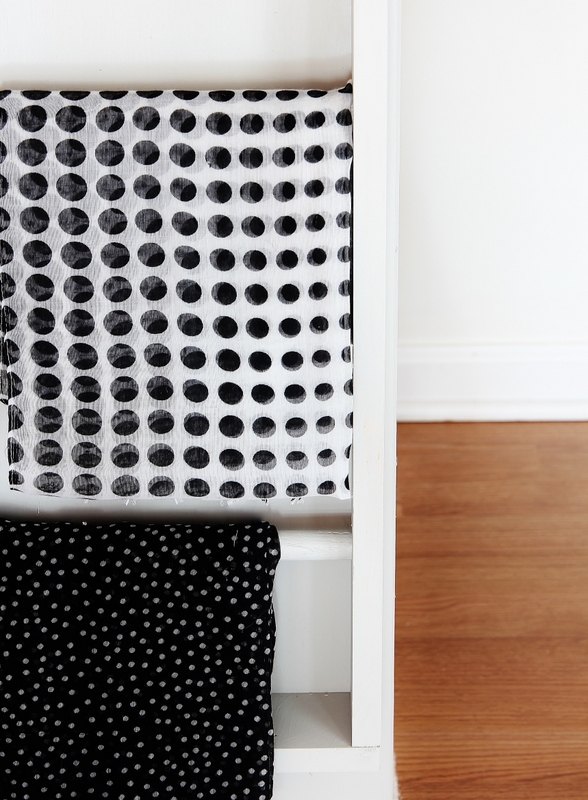
Now the sides of the dresser are ready for organizing.
You can add scarves or jewelry or belts to the dowel rods on the side.
Here's how I added scarves to the dresser.
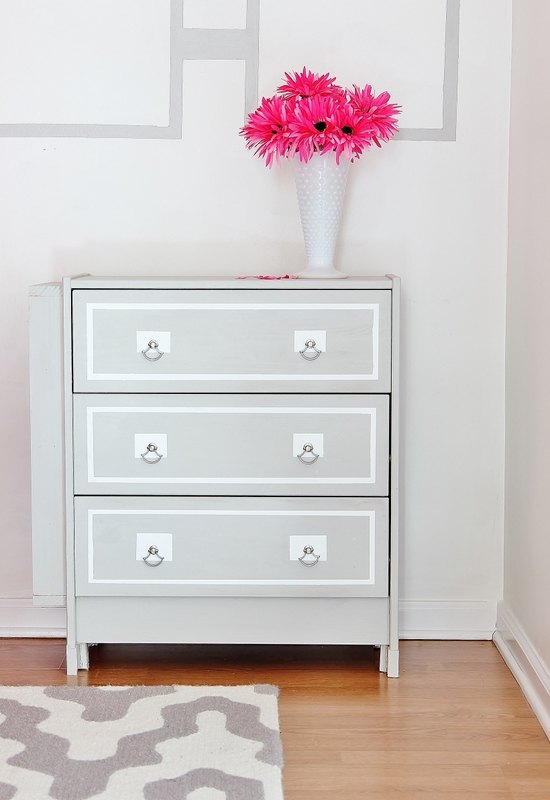
Here's the finished dresser. It's a super functional piece that works in a smaller space and doubles the storage space of this dresser.
Looking for other furniture projects like these? Here are some of my favorite furniture makeovers:


Frequently asked questions
Have a question about this project?