


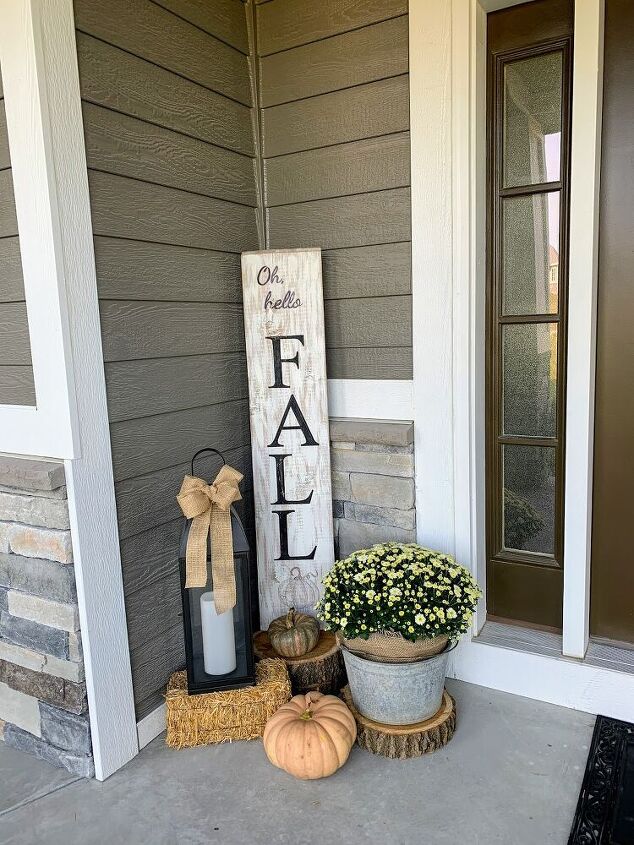
How to Make Your Own Fall Front Porch Sign
Tall, wood porch signs are so popular right now, and I really wanted one to decorate my front porch for fall. I’ve seen them in so many different places, but could never convince myself to buy one, because I would always think to myself, “That would be so easy to make myself…"
Well, I finally got around to doing it! And I was right– it WAS so easy! Even better, I did not spend one single dime making it! I used stuff I scrounged up from around the house. This project was free, fun, and turned out fabulous.
Let me show you how you can make your own.
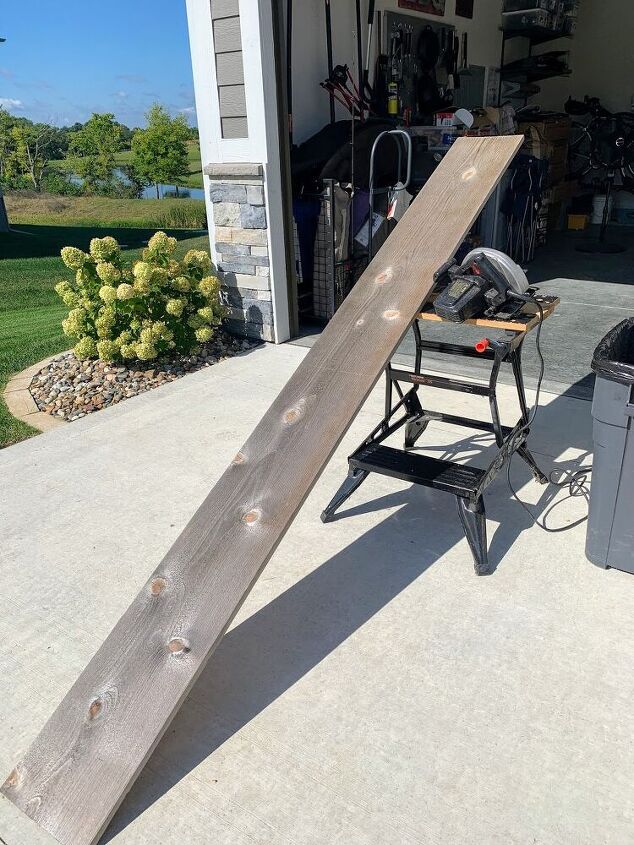
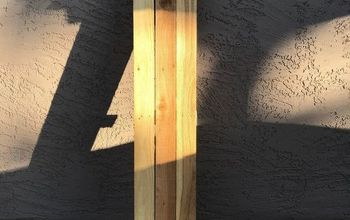
This 107″ long scrap of cedar was left over from the construction of our deck two years ago. It has been sitting outside, exposed to the elements since then, which gave it this wonderful, weathered barnwood gray coloring on one side!
The other side was still a golden cedar color, which gave me a great idea: I could use both sides, and have a reversible porch sign for more than one season, with two very different looks!
Plus, as an extra bonus, this piece of wood was long enough to cut in half, giving me enough wood to make 2 reversible signs for 4 different occassions!
I used this piece of cedar, because it was free and available, but you can totally use whatever you can find. My finished sign measures 53.5″ x 12″ , but that’s not written in stone. That’s the great thing about making your own–you can customize it to whatever size works for your purpose, or whatever piece of wood you can come up with.
And don’t worry about the type of wood. Anything will work for this, especially if you are going to paint it.
I decided to leave the weathered gray side alone, for another sign, which I will add to the back later.
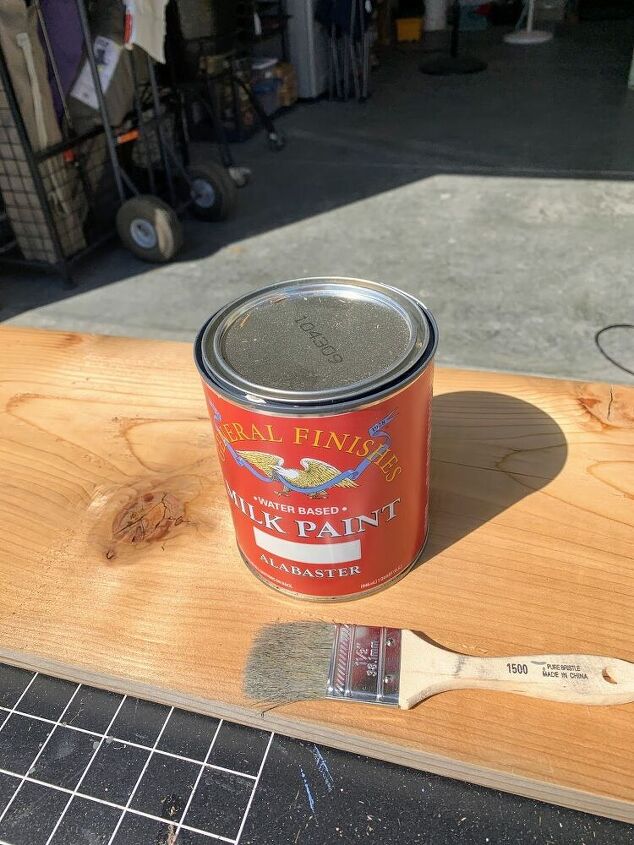
For my Fall Porch Sign, I wanted a distressed white color, so I flipped my board over to the cedar-toned side, and got out my quart of General Finishes Alabaster Milk Paint, which was leftover from a previous project.
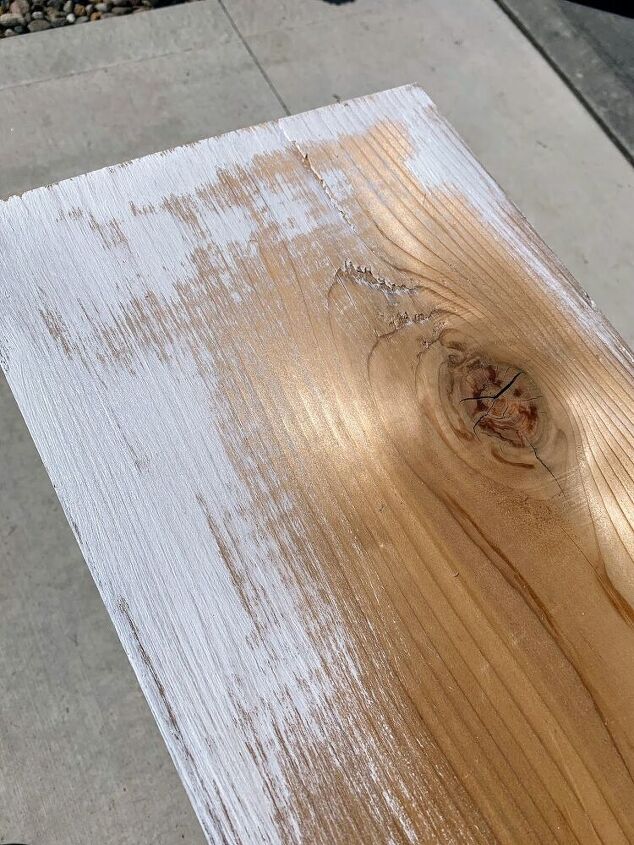
Because I didn’t want a solid white paint job, I used a chip brush, and dipped just the edge of the bristles in the paint, gently dry-brushing it on. I made sure to leave plenty of the wood and knot holes showing through.
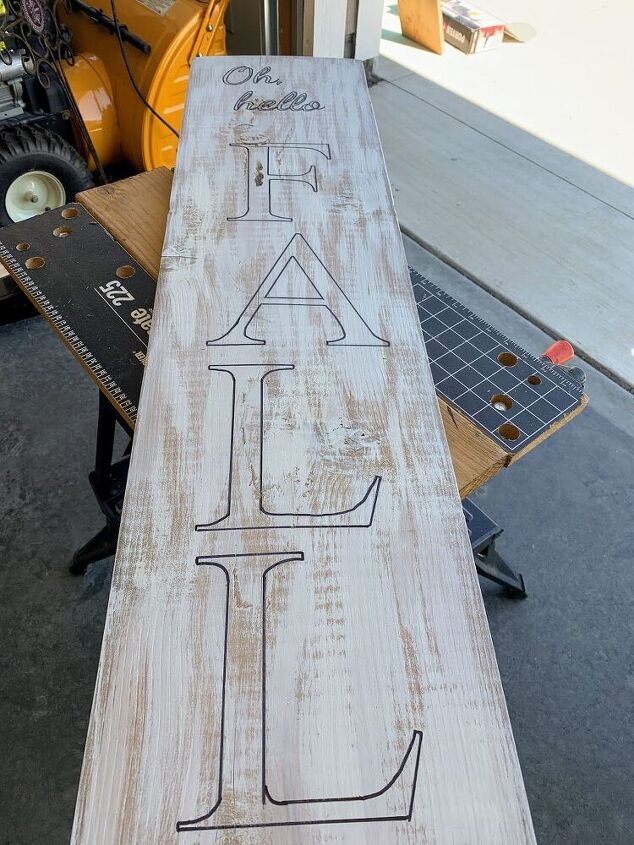
If you have stencils, or a Cricut, you could do this part quite easily. I don’t have either, so I used my tried-and-true pencil tracing trick.
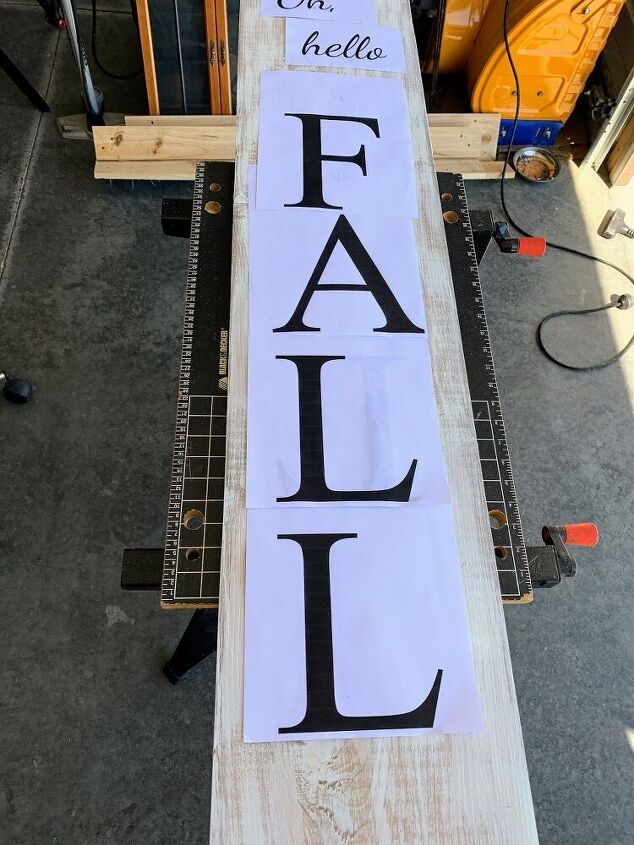
I printed out the lettering that I wanted on regular printer paper. Then, I laid it out on the wood to make sure it was in the arrangement and spacing that I wanted.
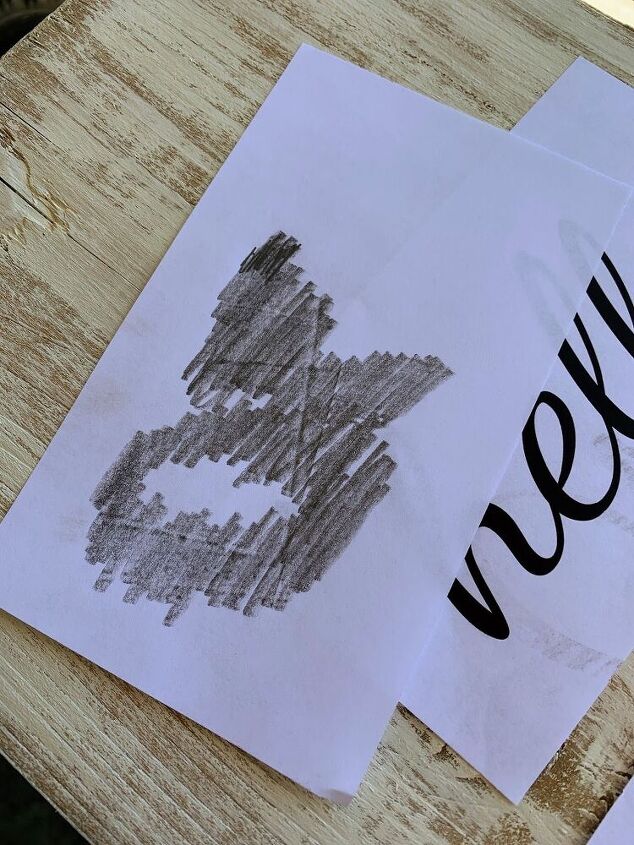
Next, I flipped the paper over, and using the side of my pencil, I shaded on a heavy layer of pencil lead on the back of each letter.
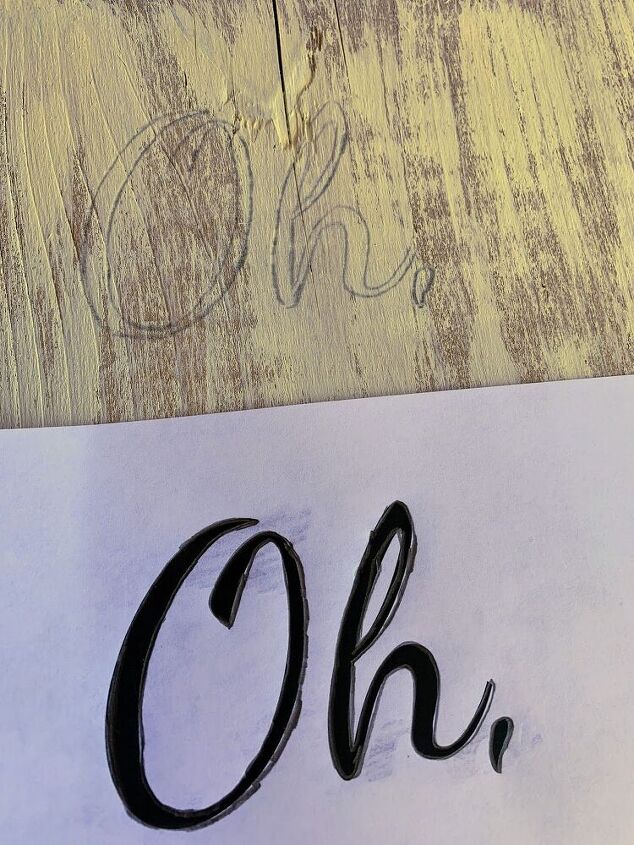
Then, I positioned the lettering how I wanted it on the wood, and traced over it using firm pressure.The lead will transfer onto the wood. I found it worked best to use a mechanical pencil without any led for my tracing, as it allowed for a firm pressure, without the lead tearing the paper.
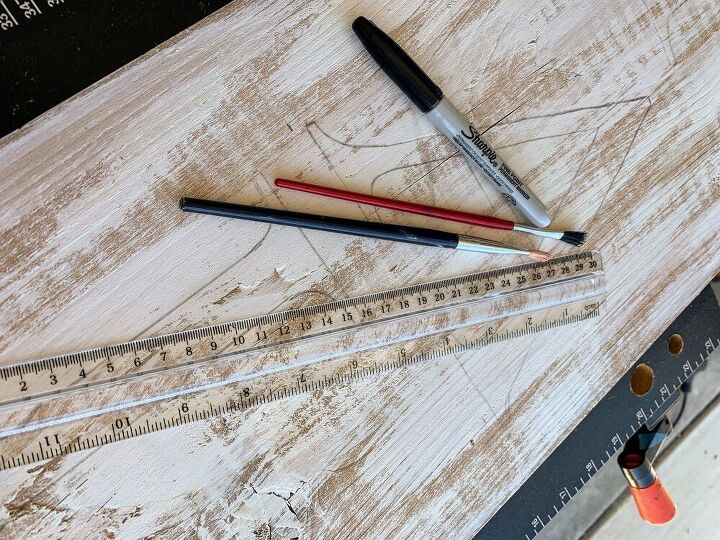
Once the letters were transferred onto the wood in pencil, I used a Sharpie to outline them. This ensured a nice clean outer edge to the lettering.
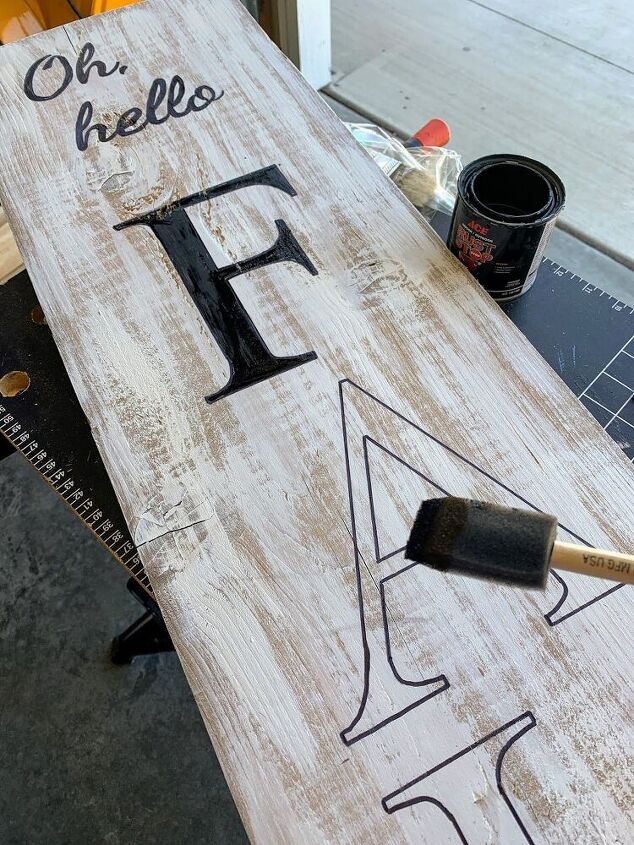
A small foam brush with straight edges worked best for my block lettering, because I was able to dip just the edge of the foam brush in the paint, and gently dab it along the straight lines of my letters, before filling them in.For the “Oh, hello” lettering, I used a tiny watercolor brush.

At the bottom of my sign, I added a rustic pumpkin using the same print- and-trace method. Again, I outlined it with a Sharpie (this time silver) and shaded it in with colored pencils! Yes, colored pencils.
Because my sign is going on a covered front porch, and won’t be exposed to the elements, the colored pencils worked great. They allowed me to shade where I wanted to, while still allowing the distress of the wood below to show through.
If you’re going to have your sign someplace where it will be exposed to weather, I’d definitely spray the finished project with a clear coat sealer.
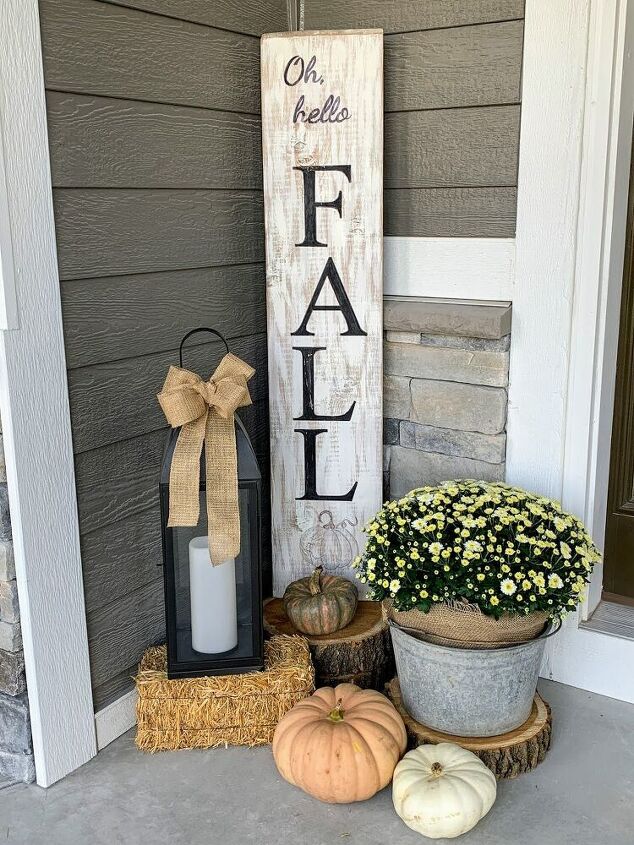
I used a couple of wood slices under my sign, to give it even more height. Then I accesorized with things I also dug up from around my house. Other than the mums and the pumpkins, I didn’t spend any money on this project.I still have the gray, weathered, back side of this sign to create something else later. Maybe for Christmas? Or maybe just a “Welcome” sign that can be used any time of year? So many possibilities!
Happy Fall Decorating!
-Niky @ The House on Silverado
Visit my blog to see my whole Cozy Fall Front Porch, including my DIY sign. 🍁
Resources for this project:
See all materials


Comments
Join the conversation
-
Really pretty especially with all of your other decorations. Your letter transfers were a lot of work. I'm just wondering why you didn't just use carbon paper to do your transfers with? It would have been a lot easier and faster to transfer your lettering that way. I also wonder why you didn't shade your cute pumpkin in with a little bit of orange and brown coloring? Can hardly wait to see how pretty your other 4 signs turn out. Thanks for sharing your pretty ideas!
-
Hi Ardale, thanks for your kind comments. I didn't have carbon paper available when I was making the sign, so decided to use this method that works just as well. All that is needed is a pencil, which most people have.
I wanted my pumpkin to be a white pumpkin. The great thing is that I can always shade it in later if I want more color.


Frequently asked questions
Have a question about this project?
Love it!!!! 🧡🎃
What site did you go to to print out those letters?