


Desk / Storage for a Small Space

My daughter has a very small bedroom, roughly 10 x 10 feet. She recently informed me that she’s “so over pink walls.” LOL So I painted her room in warm earthy colours that she picked out. I also gave her room a good clearing out to get rid of old toys and clothes, etc. The only thing she wouldn’t let me purge was her large collection of stuffed animals!
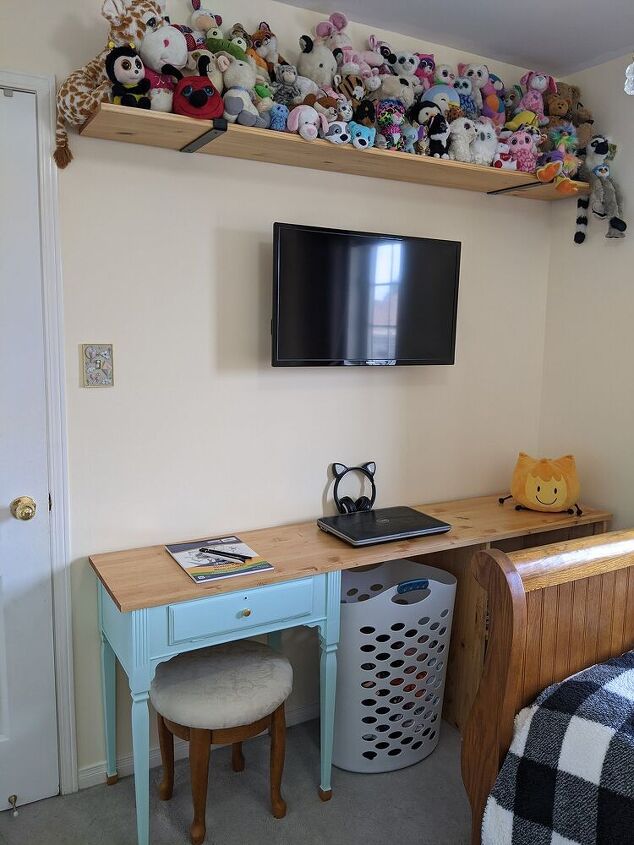
Once everything was painted and purged, I really wanted to find a space for her to have a little desk area, with some shelving for additional storage. I also needed somewhere to put all those stuffed animals! And I wanted to find a less obtrusive spot for her laundry hamper. There was only one small space that I could use to incorporate something, to hopefully achieve some of the items on my wish list.
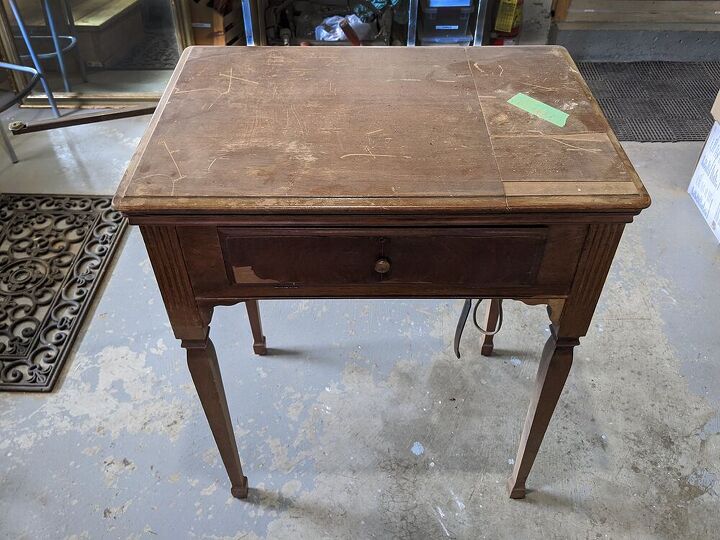
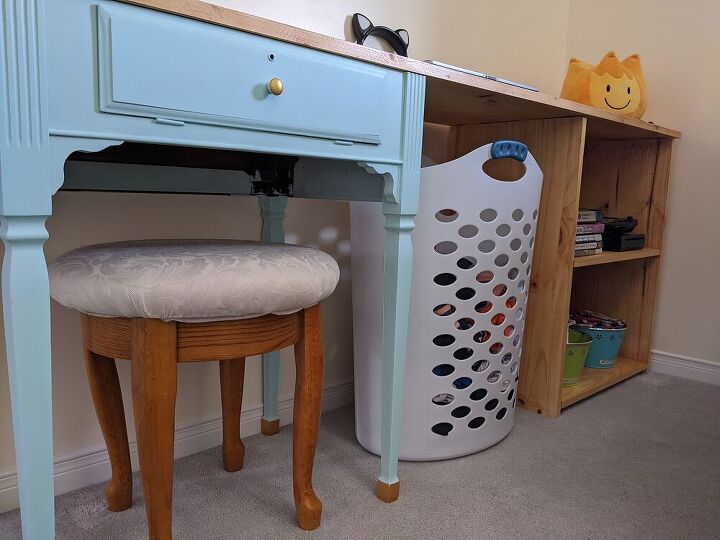
I had bought an old sewing cabinet at auction for $2 a few months ago - and because it was the prefect height for a desk, I decided this would be my jump off point for this project.
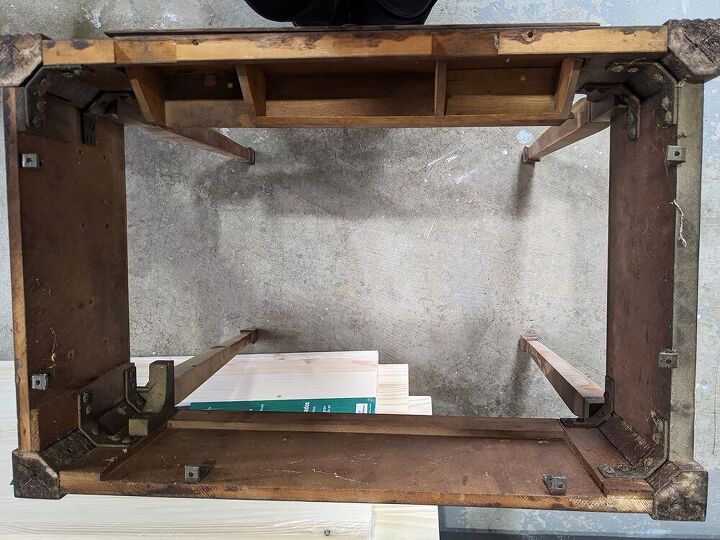
The first thing I did was remove the broken sewing machine (which I donated) and all the other sewing related fixtures inside the cabinet. I used a flat-head screw driver to take everything apart. I recently learned a tip that really helped with that--If you tap the end of your screwdriver with a hammer (when it’s lined up with the indent on the screw) it wedges into the screw and makes removal of flat head screws much easier! I also removed the fold out top completely. I left the brackets that held the original top attached to the cabinet, so I could re-use them later.
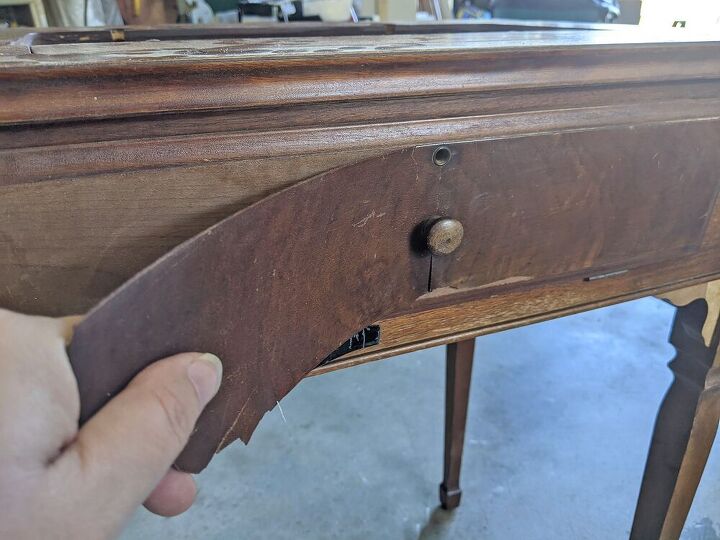
The veneer was cracked and peeling on the drawer front. I used a little pry bar to push under the veneer and it all came off much easier than I expected! Likely because the piece is so old.
I picked up four pieces of wood at Home Depot for this project:
- ¾ x 16 x 72” laminated pine
- ¾ x 16 x 72” x two laminated whitewood
- 12 x 27” laminated whitewood
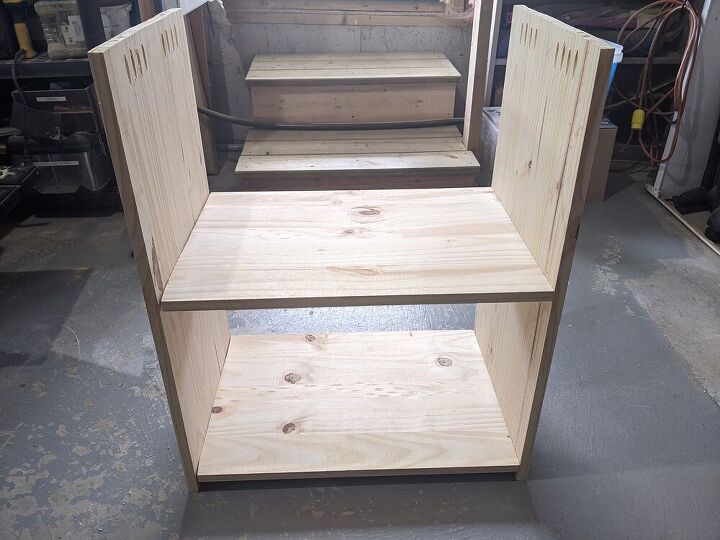
I cut two of the 16” boards to build shelving, using a jig saw. I cut two pieces at 30” to use as the sides (the same height as the sewing cabinet) and two pieces at 22.25” to use as shelves. Then I drilled pocket holes into the ends to attach the pieces.
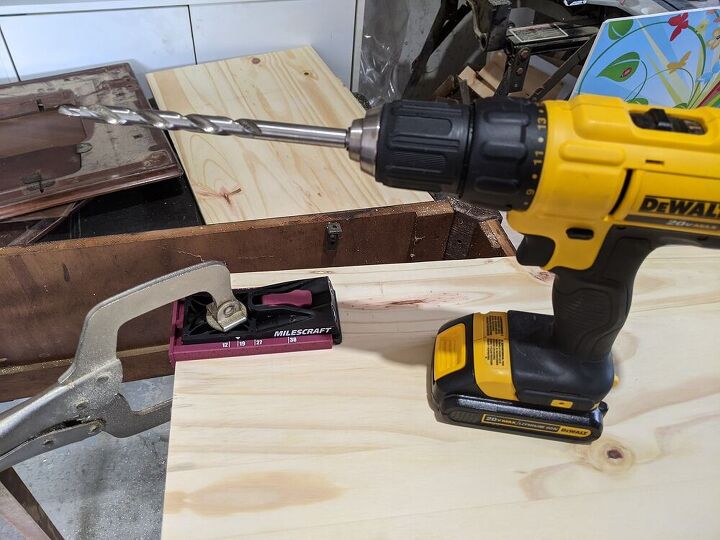
Turns out I forgot to place the ‘stop collar’ on the drill bit and went too far with my holes. So the holes went all the way through and the screws had nothing to sink into.
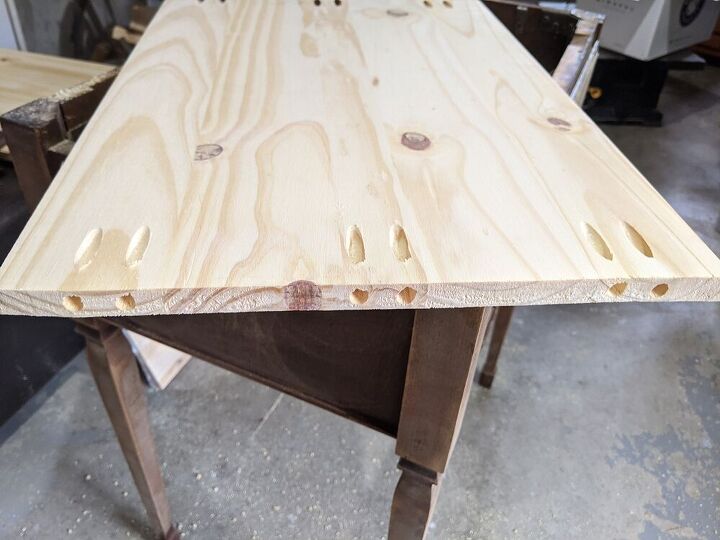
Fortunately, it was on the undersides of the shelves and wouldn’t be visible, so I just drilled new pocket holes, using the stop collar for the correct depth.
Then I attached the sides to the shelves using pocket screws. I attached the bottom shelf 1” up from the floor and the second shelf in the center. On the shelf ends that I cut myself, I used wood filler to smooth out any gaps in my cuts where the pieces joined. (In hindsight I probably should have had my four cuts done at Home Depot. This would have saved me some work and the cuts would be perfectly straight.) Then I sanded all the wood pieces and the sewing cabinet using 220 grit sandpaper.
Back to the sewing cabinet: The back of one section of the compartments inside the drawer didn’t have a back on it, so I attached a paint stir stick so the items in that compartment wouldn’t fall out once the drawer was closed.
I gave the cabinet a good cleaning with TSP and painted it blue. There was some bleed through after the first coat so I gave it a light spray with wood finish before applying the second coat of paint.
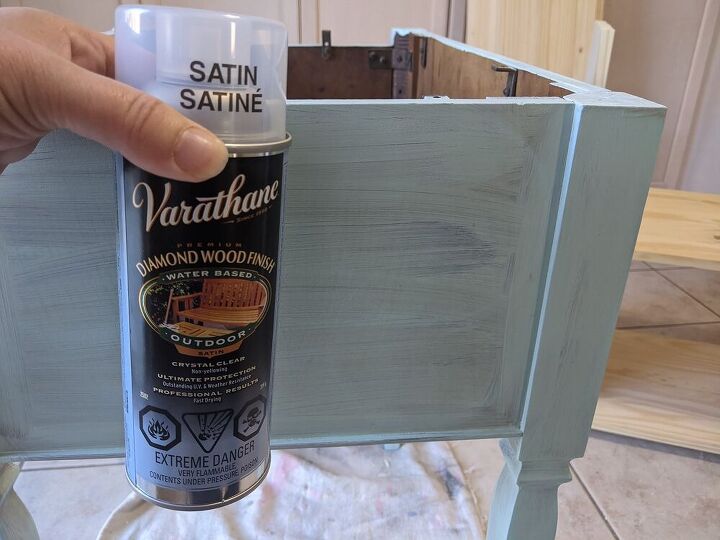
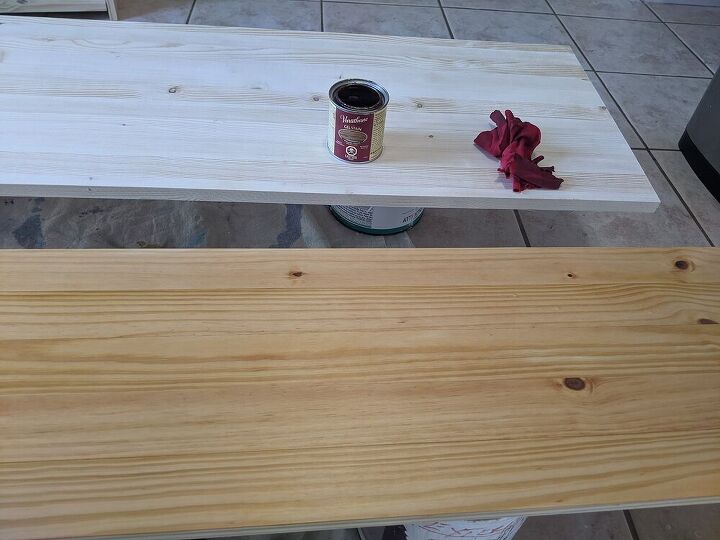
Then I stained all my wood pieces with gel stain, applied with a cloth. I let my daughter choose the stain colour as well. Once dry I sealed with a clear finish, applied with a paint brush.
Once they were stained, I decided gold dipped feet on the sewing cabinet would tie in nicely with the stain colour! So I painted the feet, and the little knob on the drawer, gold.
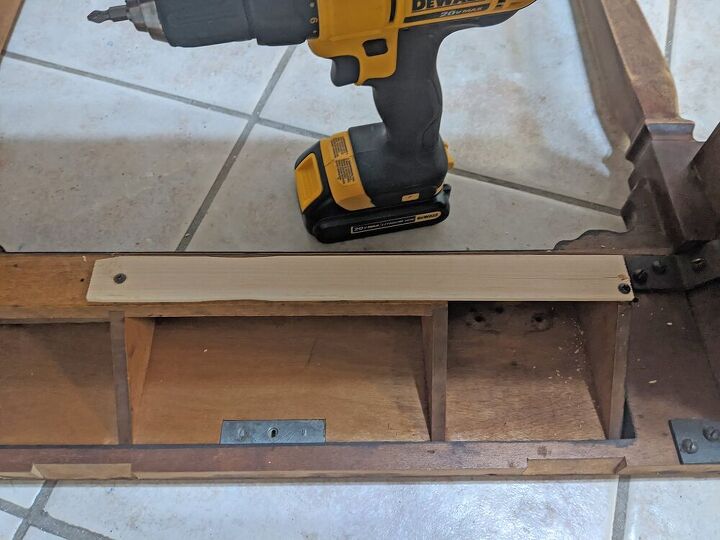
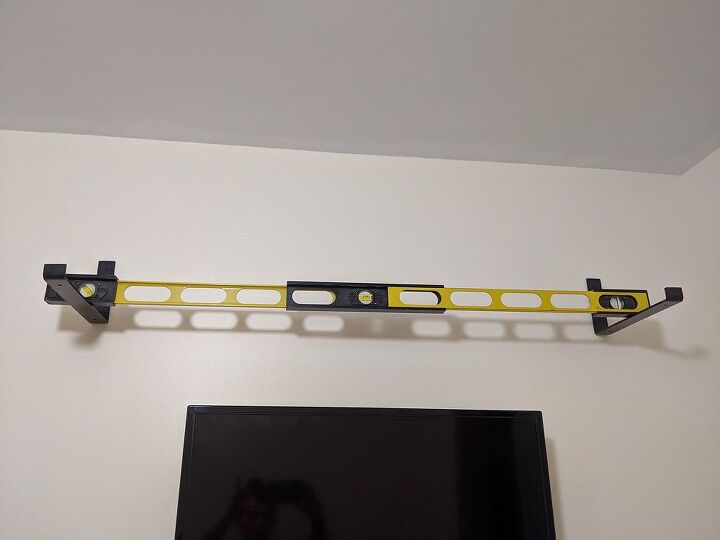
Then I brought everything to my daughter’s room and pieced it all together. I attached the 12” wood to the wall using black brackets. I screwed the brackets into the wall studs and screwed the wood to the brackets. I used an extendable level to make sure it was perfectly straight.
Then I attached the other board to the top of the sewing cabinet on one end, screwing into the same brackets that held the original top. The other end I attached to the shelving by screwing into the pocket holes in the top of the side pieces.
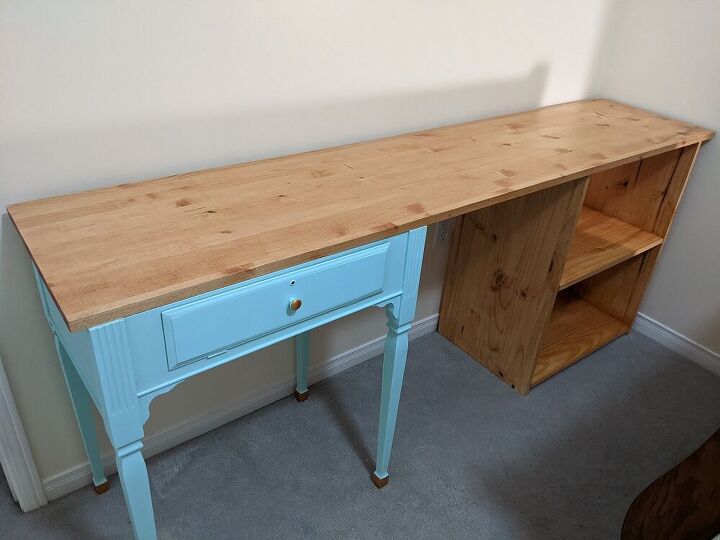
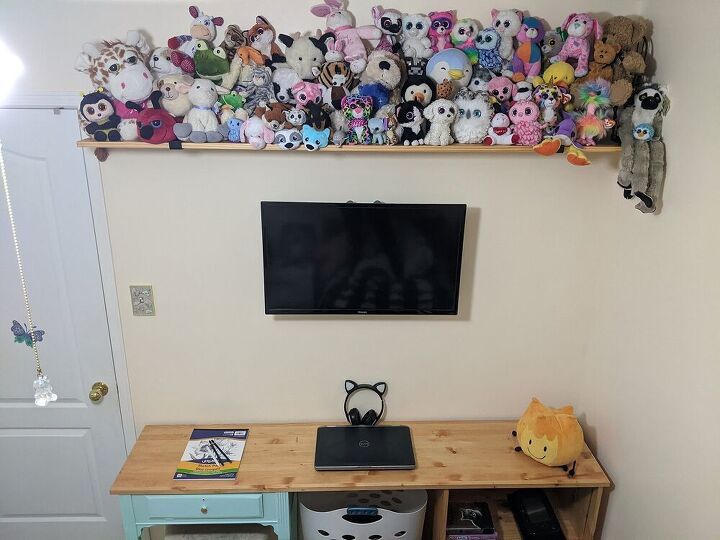
I placed her gazillion stuffed animals on the top shelf and slid her laundry hamper into the space I had allocated. I have an old stool that belongs to my vanity set that I pushed under her desk to use for now. I’ll either find her another one or paint this one to match later.
This project didn’t take much effort and it checks off all the items on my wish list. I just hope my daughter likes her newly updated tween space when she gets home from her dad’s. 😊

Resources for this project:
See all materials


Comments
Join the conversation
-
What a terrific use of old cabinet and great use of the space. Best I have seen in awhile.
-
Holy Smokes! That went in a very surprising direction! I simply love it! What a great way to inhance a sewing room or any room! I sure will keep that one in mind!


Frequently asked questions
Have a question about this project?
Interesting idea! Aren’t all those stuffed toys dust collectors though?
Hey Valerie, Nice job! With all your skill at building, why didn't you just make two book shelves at each end and have her seating area and hamper area in the middle? Just asking, I wish I could do 1/3 of what you did here..... Thank you for sharing!!