


DIY Vertical Shiplap (Cheap & Easy)
If you are looking for a cheap and easy DIY project to instantly update your home, give DIY vertical shiplap a try! The modern look of the shiplap installed vertically works perfectly with the modern farmhouse home.
If you love this project, grab your quick start DIY guide & subscribe to our blog!
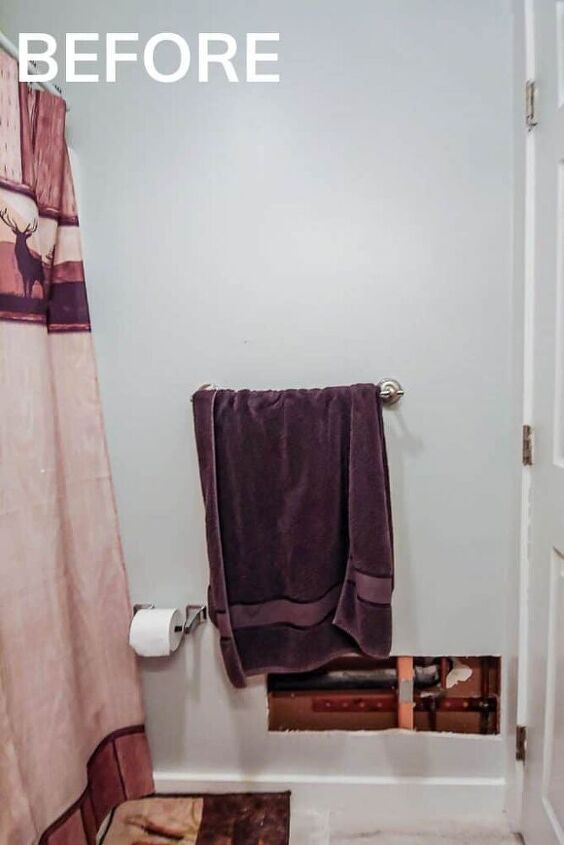
I couldn't wait to try my hand at faux shiplap again in our guest bathroom makeover, but this time I tried something new - VERTICAL SHIPLAP!
Step 1. Prep the wall.
The wall that you are installing the vertical shiplap on should be clean and flat.
Step 2. Prime or paint wall.
If you have large patched areas on the wall like I did, you can start by applying a primer to the wall.
If your wall doesn't have large patched areas and is already painted, you can start by painting the wall behind the shiplap the color that your shiplap will be.
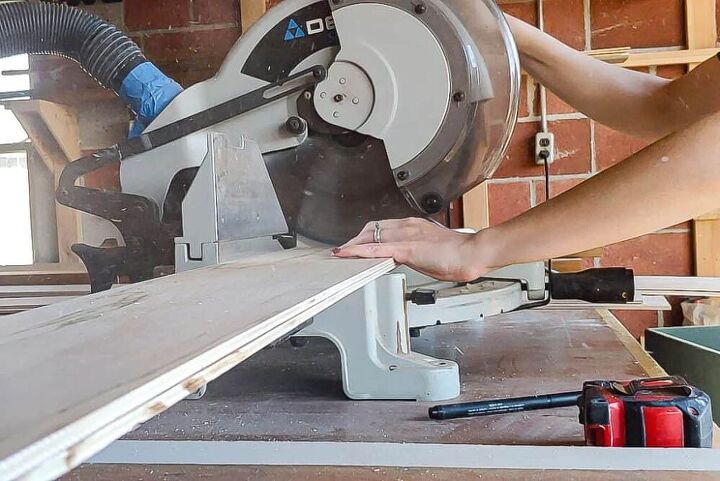
Step 3. Cut plywood down to size.
Using the table saw, rip the 1/4" plywood sheet down into slats. The width of the shiplap is up to you, but we used 6 inches for our vertical shiplap wall.
Step 4. Prime all sides of shiplap slats.
Painting shiplap is always easier before installing.
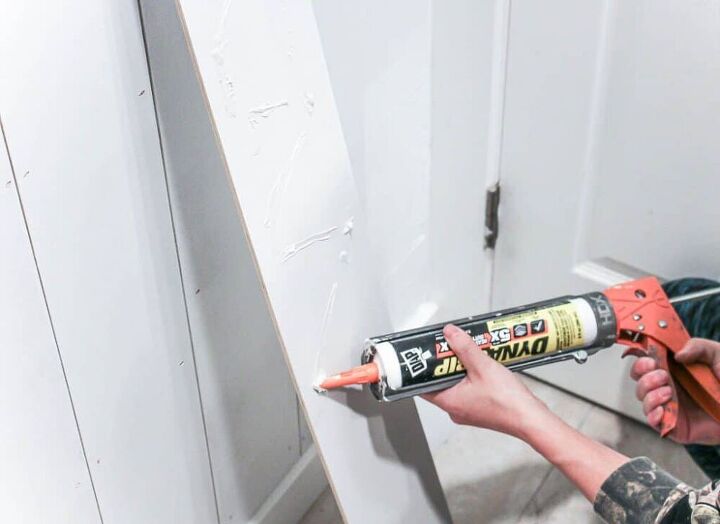
Step 5. Attach shiplap to wall vertically.
Start at one corner and work your way across the wall. To attach the vertical shiplap to the wall, apply construction adhesive to the back of the shiplap slat and press hard into place. Making sure your first piece is level and then nail or staple into place.
In between each piece of vertical shiplap, use a nickel as a spacer. I slid the nickel up and down and used it as a spacer guide when attaching each slat to the wall.
Step 6. Add trim.
If you're taking your vertical shiplap partway up the wall like, attach a piece of trim to the top of the shiplap slats with construction adhesive and staples to finish things off.
Step 7. Fill holes.
Next you want to fill all nail or staples holes with spackle and a putty knife. Wait to dry and sand smooth.
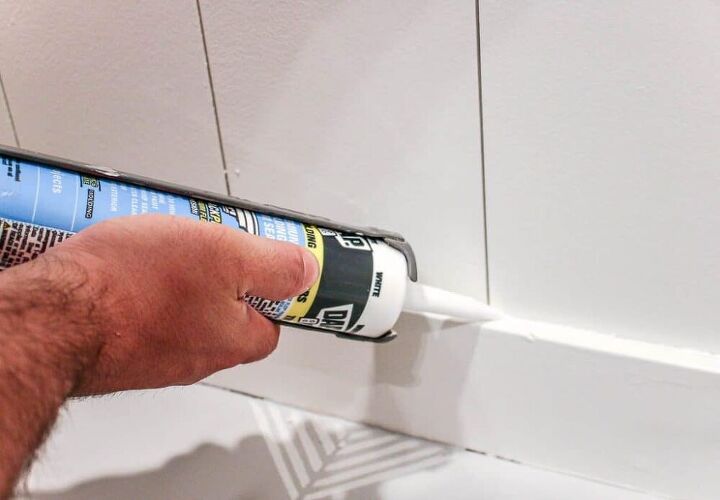
Step 8. Caulk corners and edges of shiplap.
Step 9. Paint vertical shiplap.
I did two coats of this color in a semigloss finish, which is the same paint that we use on all baseboards, trim and doors in our home.
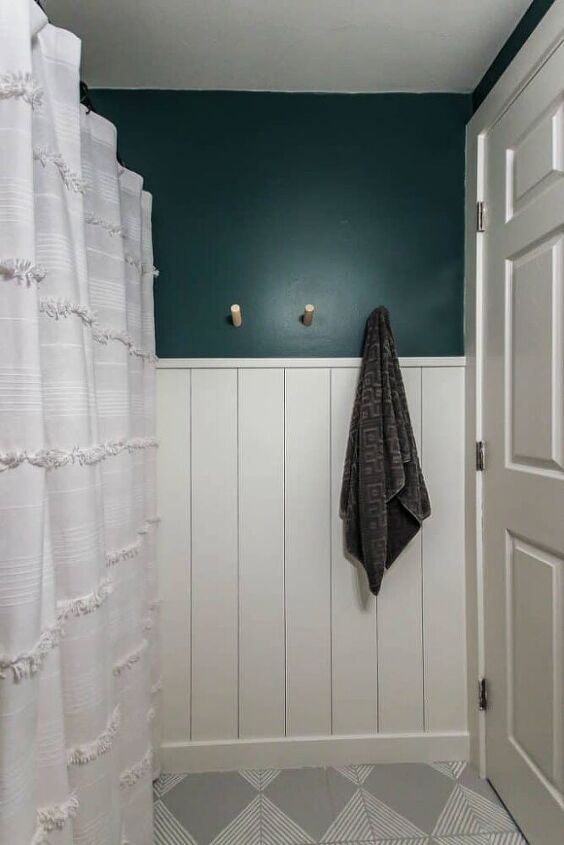
Doesn't the vertical shiplap look great??? It looks great with our newly painted tile floors too, don't you think?
Resources for this project:
See all materials


Comments
Join the conversation
-
It looks great. How did you attach the towel hooks? Can they be bought?
-
Love this. What a difference it makes.


Frequently asked questions
Have a question about this project?
Looks great ..... so fresh! One question...if you glue the boards to the wall, will that damage the drywall if you decide to remove it? Nailing could be an option?
You said above to caulk corners and edges of shiplap. So, are you saying that you caulked in between each piece of shiplap?