


Create an Amazing Moroccan Fish Scale Tile

I love working on new projects and creating exciting pieces. That’s why I couldn’t wait to get started on making a fish scale mosaic tile! If you are looking for a unique piece to add to your aesthetic, this is the one! Follow my easy, step-by-step tutorial and get started on creating these amazing tiles which are made from 3 simple ingredients in your kitchen! This guide will show you all the tips and tricks to creating this beautiful mosaic masterpiece!
Tools and Materials:
- Flour
- Salt
- Water
- Paint
- Topcoat
- Tile adhesive
- Tile grout
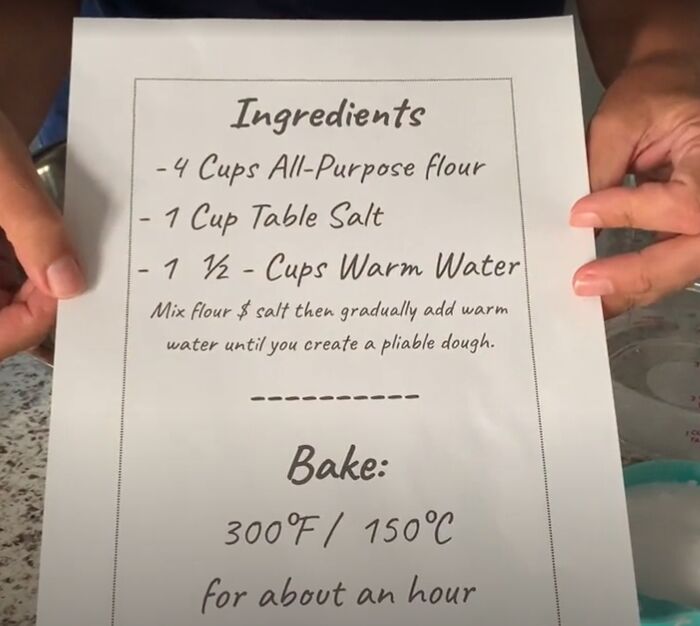
Before getting started on these amazing Morrocan fish tiles, let’s take a look at the easy recipe. All you need is flour, salt, and warm water! The best part is that all these ingredients can be found in your kitchen!
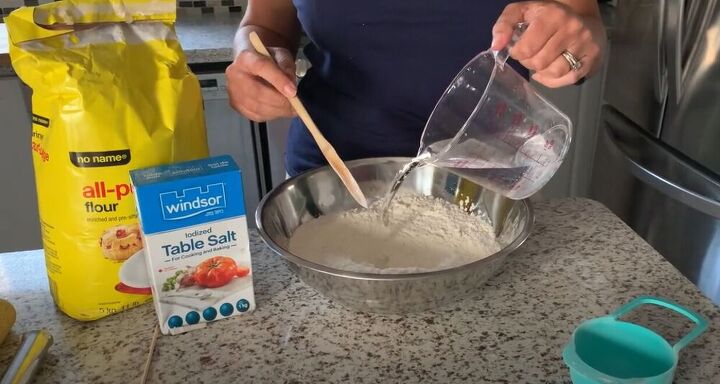
I started by pouring my flour and salt into the mixing bowl. I slowly started pouring my water in, mixing as I poured. A good tip is to use warm water as It makes it much more pleasant to touch the dough! I mixed the ingredients until I got a playdough consistency.
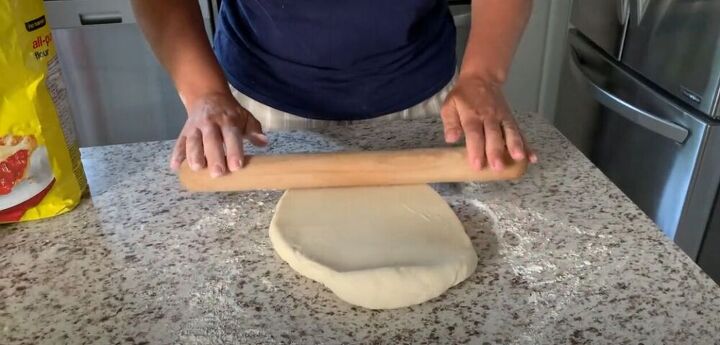
With my pliable dough at the ready, I added a bit of flour to my surface and smoothed out the dough using my rolling pin. I rolled the dough until it was about an eighth of an inch.
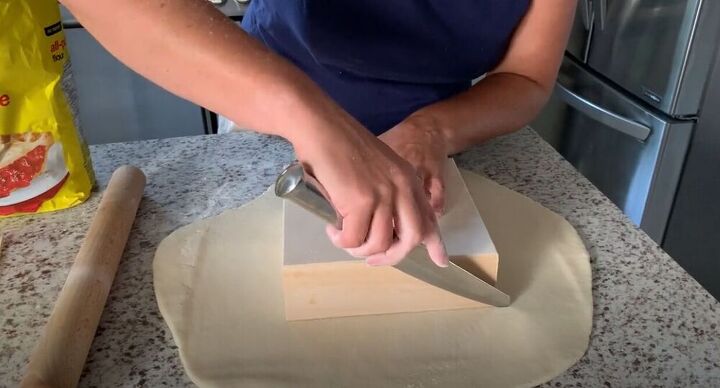
To get the shape I needed, I used a square, wooden panel and cut around it.
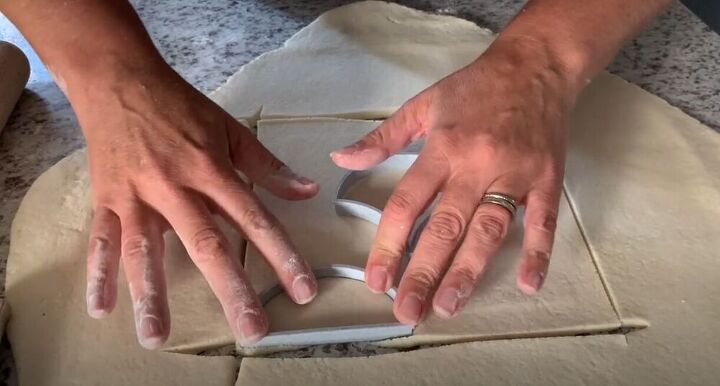
I then used these fantastic little cookie cutters to help create the Moroccan tile shape.
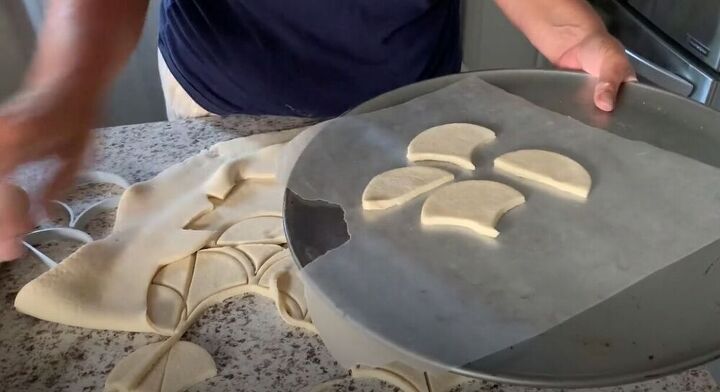
I popped the little cut-outs onto a baking tray and was ready to put them in the oven. I started by baking them at 150 degrees celsius for about 15-20 minutes. I then made sure to check that they didn’t have any bubbles. If the dough does bubble you can always use a kebab stick to pop them and then flatten them down.

This next step is where all the fun begins! My mosaic pieces were out of the oven and rock hard so I moved up to my studio. I started by putting the mosaic puzzle together on a wooden box. I placed the tiles, trying to create the desired look.
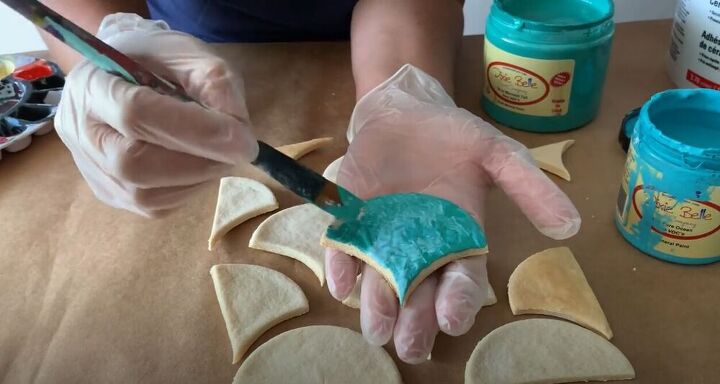
I am always drawn towards blue shades but you can choose whichever color you like for your mosaic. I used three different Dixie Belle shades of blue and started painting my pieces. The paint doesn’t have to be perfect because we are trying to create a ceramic look. I decided to add a few more colors and ended up painting some tiles with acrylic paint using pink shades and some purple shades too. I love playing with different colors and paint techniques and in this project, it’s recommended!
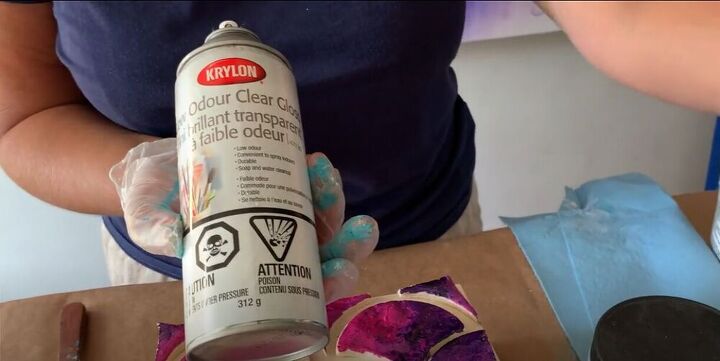
To give the tiles a bit of extra gloss and protection, I used a topcoat. Any topcoat will do the trick!

I carefully took my tiles off the wooden panel and placed them in the same order I had set earlier. I started spreading tile adhesive over the top of the panel. It’s better to be generous with the adhesive!
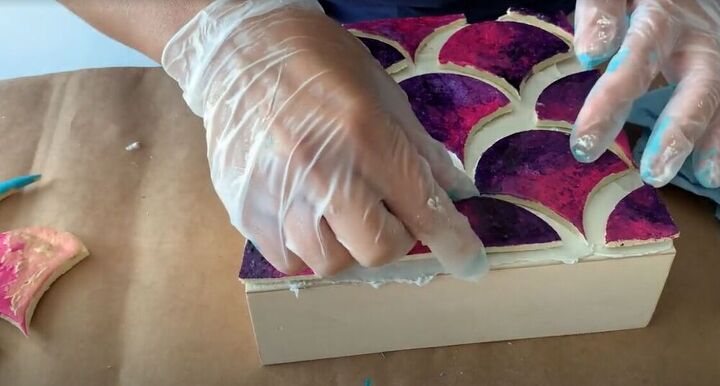
I carefully placed the tiles on the adhesive in the order I had made earlier. Once I was happy with the look, I pushed them as deep into the tile adhesive as they could go. I then left the adhesive to dry overnight.
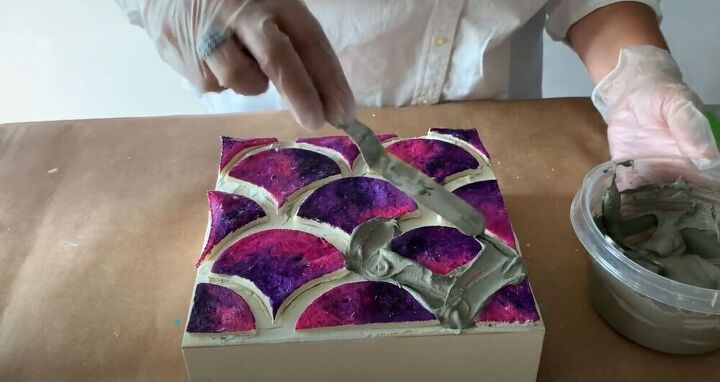
I mixed together some grouting until it was a peanut butter consistency and began to add it between the tiles. I left the piece to dry for another 24 hours. It’s very important to have sealed the tiles before adding grouting to this mosaic.
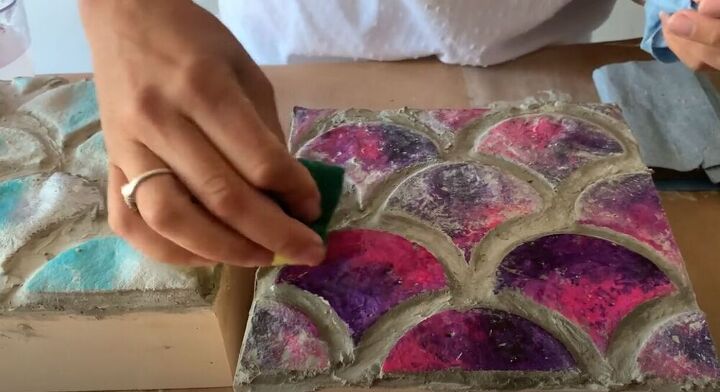
Once the grouting had dried, I used a damp sponge to wipe off any excess grouting on the tiles. I loved seeing the colors shine through again in this step! I gave my tiles one extra coat of gloss because I can’t get enough shine and it really gave them a perfect finish!

I absolutely adore these amazing Moroccan fish scale tiles! Where would you put these in your home? Let me know in the comments below!


Comments
Join the conversation
-
I love this project... I think my 10 year old granddaughter .. very talented.. Would love to do this as a family and then use in her bedroom 😊
-
you could use these anywhere or with any design not just fish scale....great idea


Frequently asked questions
Have a question about this project?
Would these work as a kitchen backsplash?
will they work in kichen or outdoorsy
What is the ratio salt to flour ?