


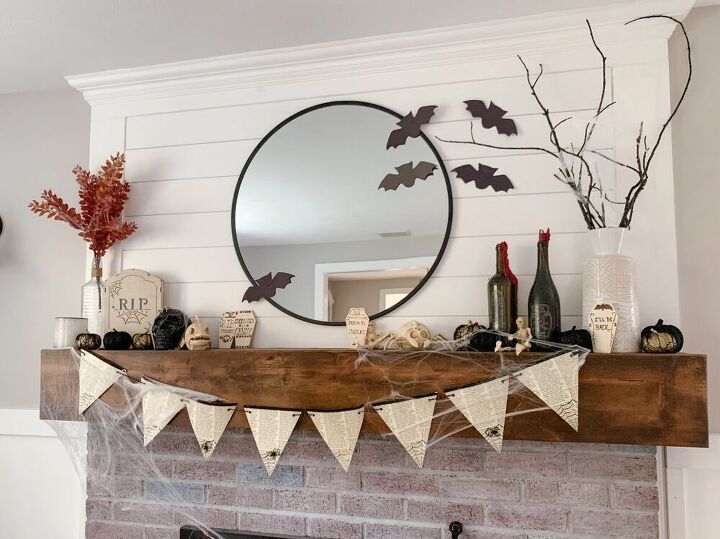
Easy DIY Glass Engraving and Wood Burning Halloween Projects

Growing up, Halloween was always a favorite holiday of mine! The creepy decor, dressing up, candy…it’s every kids dream come true! Interestingly though, as an adult my Halloween decor has been minimal at best. This year I’m changing that with some DIY engraved glass Apothecary bottles made from old wine bottles, and some DIY tombstones with wood burned designs. Read below to learn about the MakerX tool by Worx Tools that I used to create this super cute decor!
Disclosure: This post was sponsored by Worx Tools but the opinions and project ideas are my own.
For this project I am using a tool called the MakerX by Worxs Tools. It is a Dremel like tool that comes with lots of different attachments and has so many functions and different functionalities and I can’t even list them all here! I’m using this tool and its attachments for airbrush painting, glass etching or engraving, and wood-burning.
Apothecary bottles
Have you ever run across the super creepy yet gorgeous Halloween apothecary bottles they sell in the home stores? The look is incredible but the price tag, not so much, especially not for seasonal decor that gets less than 30 days display time. After a little brainstorming I thought, why can’t I make some thing like this with all the leftover wine bottles in my home?! The answer is, you totally can!
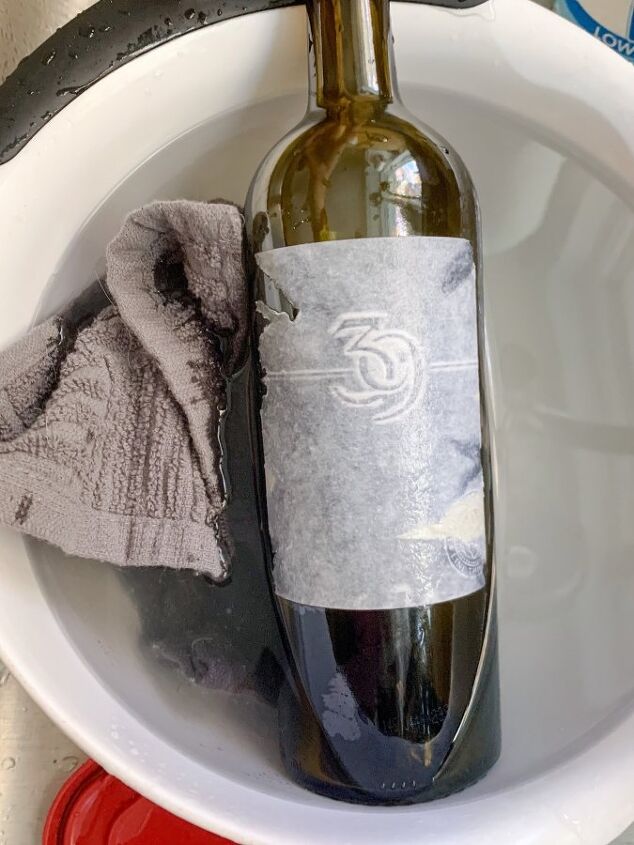
Start by removing the label and all of the excess adhesive. Do this by soaking the bottle in some warm soapy water, peel off the label, and scrub the remaining sticky stuff with a scrub brush or sponge. Once it is clean, just pat it dry.
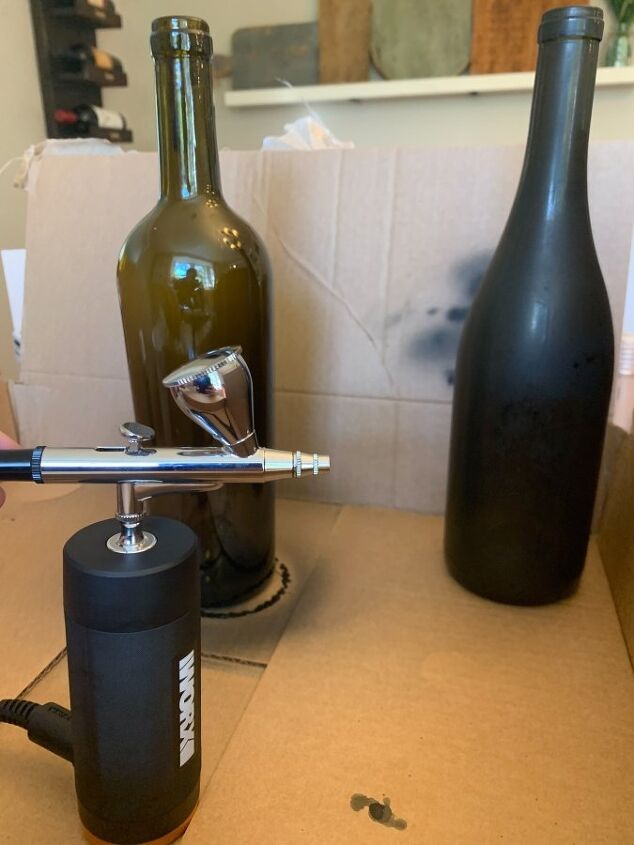
Though this step is totally optional, I opted to paint my wine bottles black to keep with the creepy Halloween vibe. Using the airbrush attachment for the MakerX, I painted the wine bottles with two coats of black flat acrylic paint. There is a paint specifically made for airbrush machines. That said, if you do not have that paint you can water down acrylic paint and thin it to a 50-50 water to paint ratio.
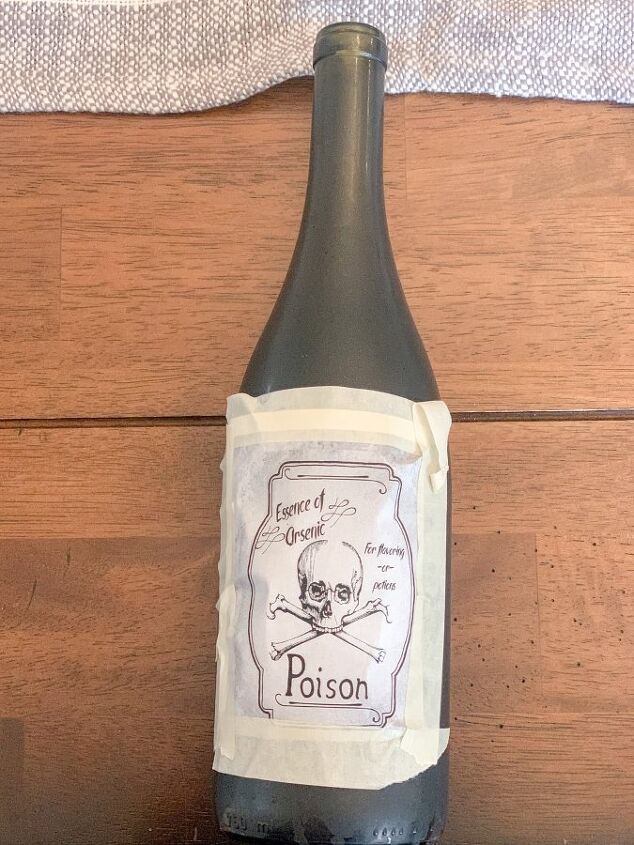
There are lots of great free printable’s available from different blogs which you can search for and find on Pinterest. I found these super cute Halloween apothecary bottle labels that I printed and taped directly to the bottle for the outline of the design.
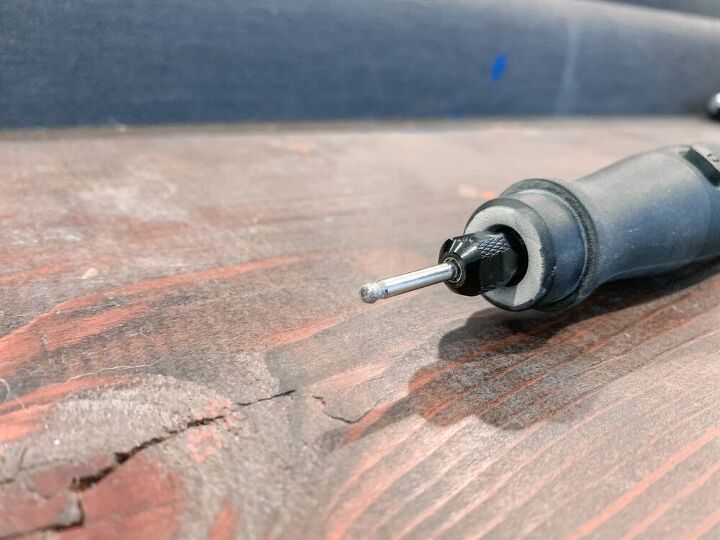
Using the small ball engraver head, I lightly went over the design until the tool went through the paper and contacted the glass bottle. You will want to go over your design very slowly so as not to rip the paper and also to maintain control of your engraver tool.
Once you’ve gone over the design lightly once, remove the paper. You may need to go over some or all of it a second time to achieve the desired look. Wipe off the dust and you are all set! I don’t recommend wetting the design as water can remove the paint and also makes the design a little harder to see.
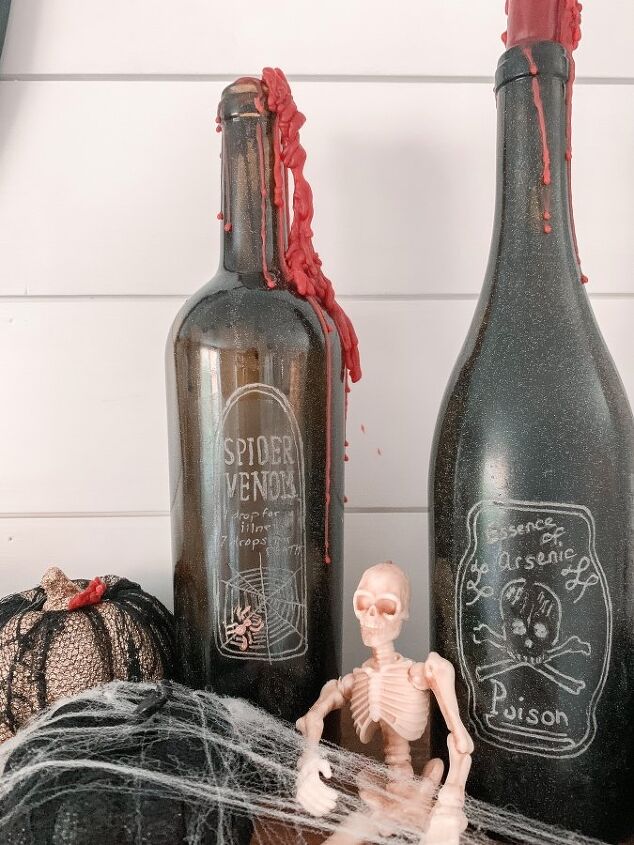
This bottle was finished off with a bit of transparent glitter top coat spray. For the reasons above regarding getting your design wet, cover your engraved design with tape prior to spraying with the glitter spray. Alternatively, you could do the spray first prior to doing your glass etching. Lastly, find a red tapered candle, light it, and wait for the super fun red drips to add a bit of blood like gore to this project!
Wood Burned Tombstones
These cute little tombstones are the perfect way to add a vintage rustic vibe to your creepy mantle! They are small and originally intended to be used as a garland which would also be super cute!
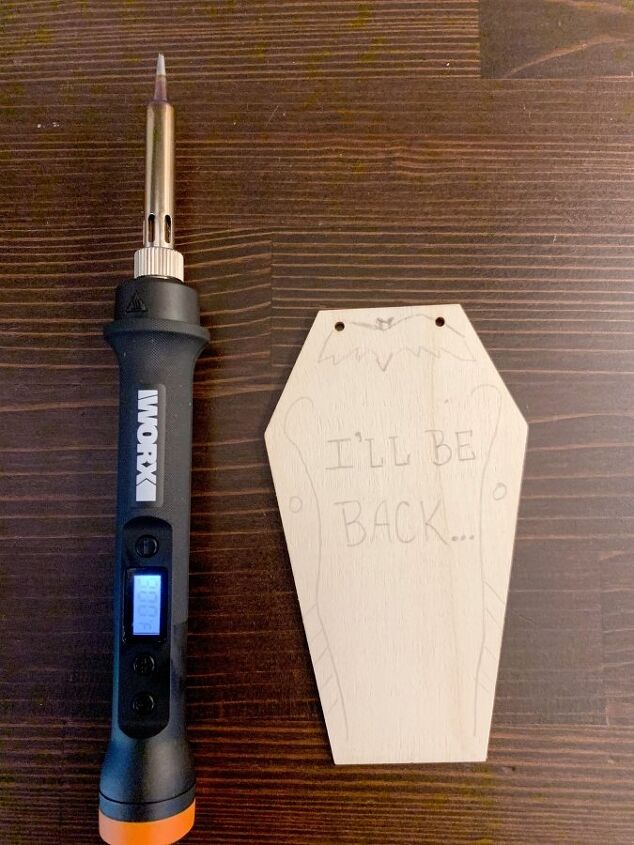
Using a pencil, lightly draw your design on the tombstone. Using the MakerX wood burning attachment, select the tool tip best suited to your project. After a little experimenting, I found that the medium sized pointed tip was easiest to work with.Set the tool to 900 degrees. I know that temp sounds insane, but the hotter the tool, the better/faster it works. This tool literally heats up in seconds so don’t leave it unattended!
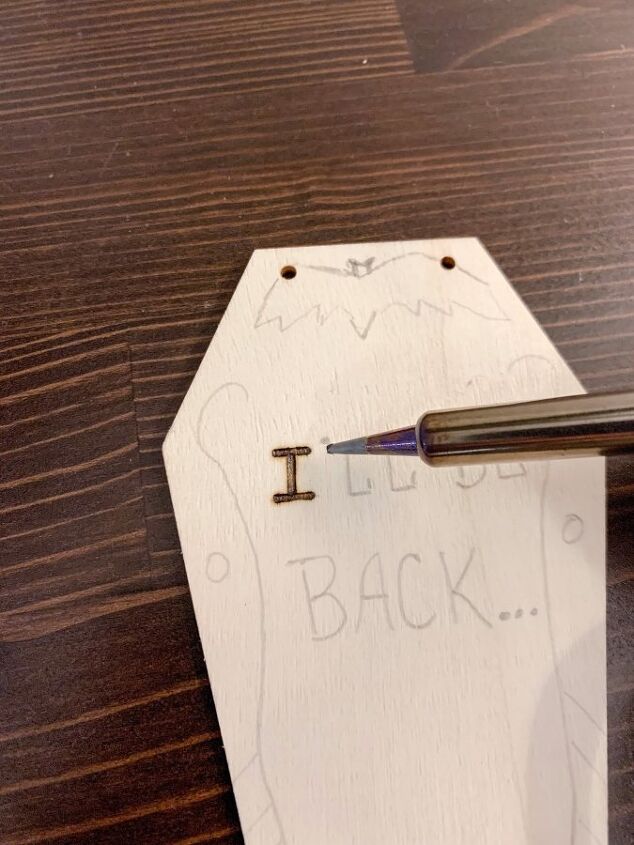
Take the MakerX wood burning tool and carefully and slowly begin to trace your design. The longer you hold the tool in one spot, the darker it will be and vice versa. So you want to move at a steady pace to get an even design. Straight lines are easiest so use very small motions to work through any curves.
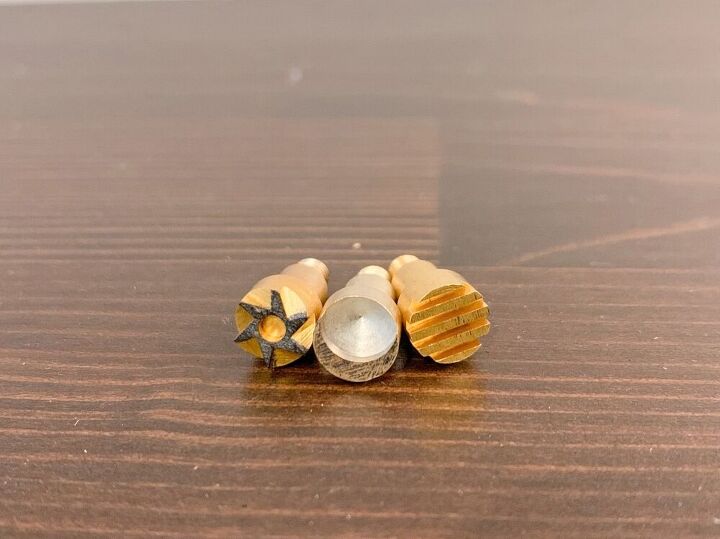
I also played with some stamp attachments just to add a fun and more polished look to these tombstones! Mine were left unfinished but a light stain could be applied after and would also look great.
And there you have it! Two super cute yet spooky DIY Halloween decor projects using just one tool (the MakerX by Worx Tools) and it’s multi functional attachments! I love how they turned out and can’t wait to use these same techniques for some personalized wooden ornaments and wine glasses for the Christmas season!
Resources for this project:
See all materials


Comments
Join the conversation
-
Looks great! At first glance, I thought the wood burning tool was a bong. 😂
-
Great advertisement for WorX. MakerX, other unremarkable. I detest that Hometalk has become an advertising site


Frequently asked questions
Have a question about this project?