


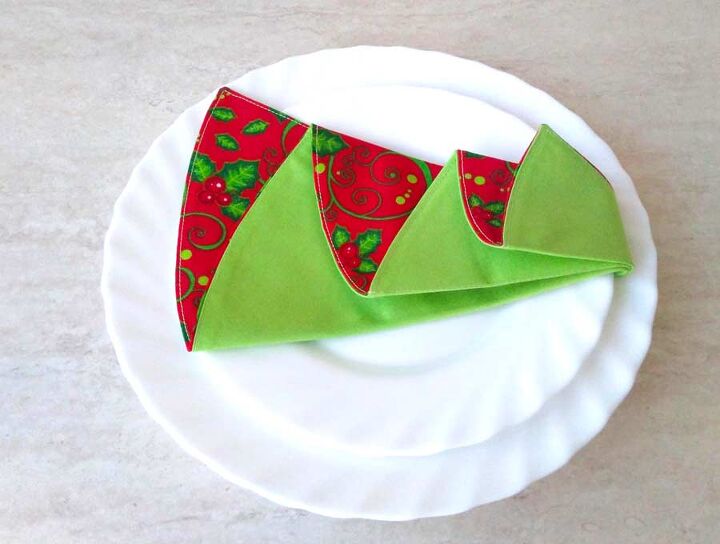
Christmas Tree Napkins
The trick to having your home give off that specific Christmas feel is in the small things, mostly decorations. Decorative lights, false snow drawings on the windows, mistletoe, and of course, DIY Christmas tree napkins!If you didn’t know about them up until now, you were missing out on something special, even though they’re unbelievably simple. With these napkins, your Christmas dinner table arrangement will truly be complete. They will surely become a regular part of your Christmas from here on out.
You can make these DIY Christmas tree napkins quickly and easily in less than half an hour, no matter how experienced or inexperienced you are in sewing. Follow our instructions in this tutorial to find out how.
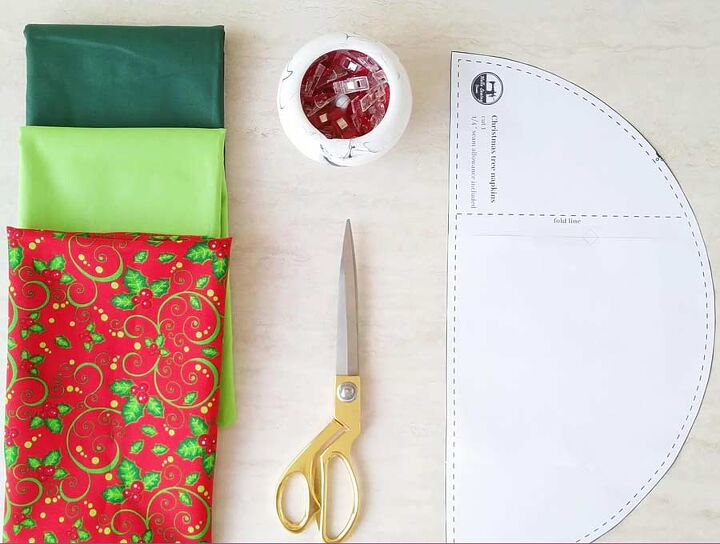
For this project, you will need the following items:
- Two pieces of cotton fabric or some other fabric adequate for napkins. Make sure that they are different in colors, try out a few different combinations, and see which one you like the most.
- Christmas tree napkin pattern (FREE download)
- Measuring tape or sewing ruler
- Scissors or rotary cutter and its mat
- Iron and ironing board
- Pins or clips
- Matching thread
- Sewing machine
Once you finish gathering everything from the list, you can begin making the DIY Christmas tree napkins.
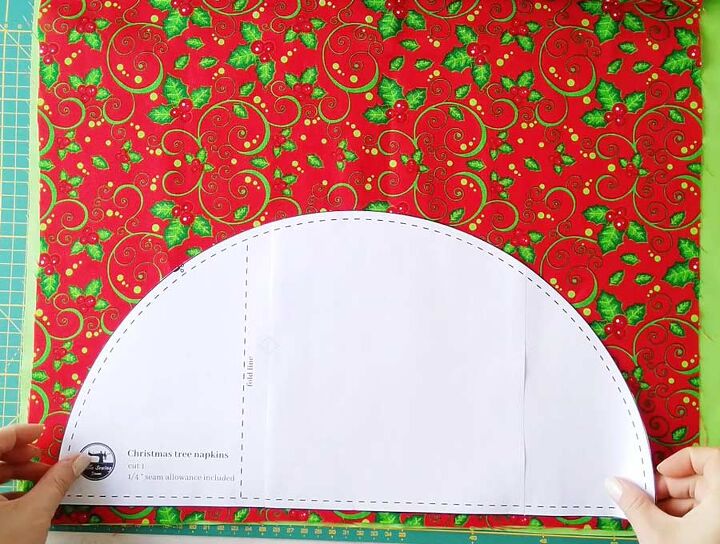
Download and print the FREE DIY Christmas Tree Napkin Pattern here in full size, US settings. Remove any excess paper from the pattern.If you don’t have a printer, you can make the pattern yourself. Just grab a pencil, a bit of thread, and a pin. Tie the thread to the pin and run it into the bottom edge of the paper. Tie the thread to the pencil and shorten it so that it’s 8.5 inches long. Then use the improvised tool to draw a semicircle around the pin. Cut out the paper and your pattern will be ready.
To prevent the napkins from deforming or shrinking later on, wash the fabric and iron it before you cut it.
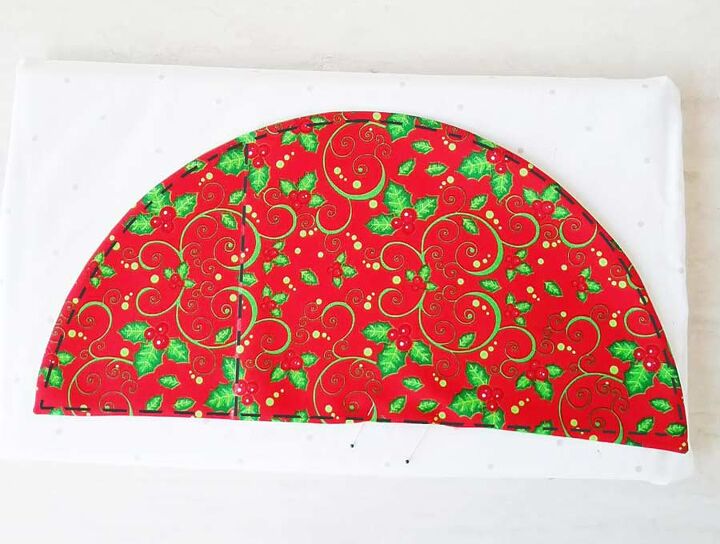
Put your fabrics over each other and align their edges. Put the pattern over them and cut out two identical pieces, one from each fabric.
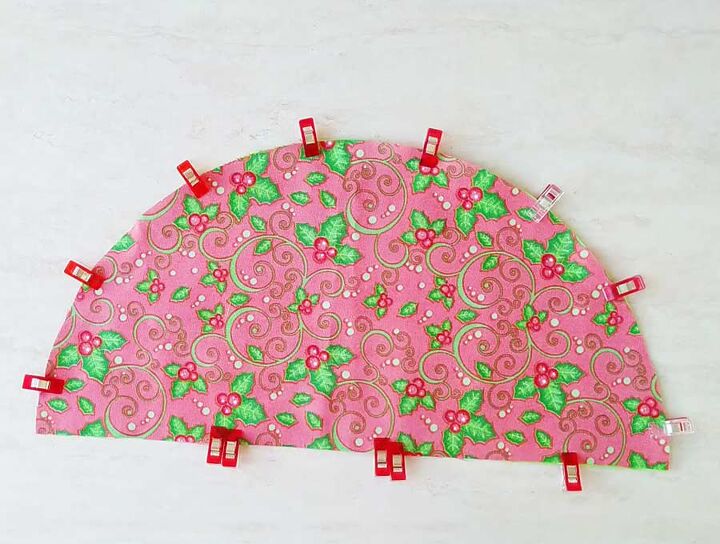
Place the fabric pieces on top of each other with their right sides facing inward. Align the edges and pin the fabrics together.
Sew all around the napkin, but leave an opening of about four inches on the straight side.
Make small cuts along the curve to allow the napkin to lay flat when you turn it. Clip the corners as well, and turn the napkin inside-out. Push out the corners with a chopstick or the back of a pencil.
Fold the raw edge where the opening is inward, and press it flat.
Measure out about five inches from the bottom corner of the napkin and mark it on the straight edge. Draw a line going from that mark, making it perpendicular to the straight edge.
Use a one-eighth inch seam allowance and sew all around the napkin. Start at the mark you made and when you reach it after sewing all around, stop, pivot, and sew along the line you drew. Backstitch the seam at its beginning and ending to give it extra strength.
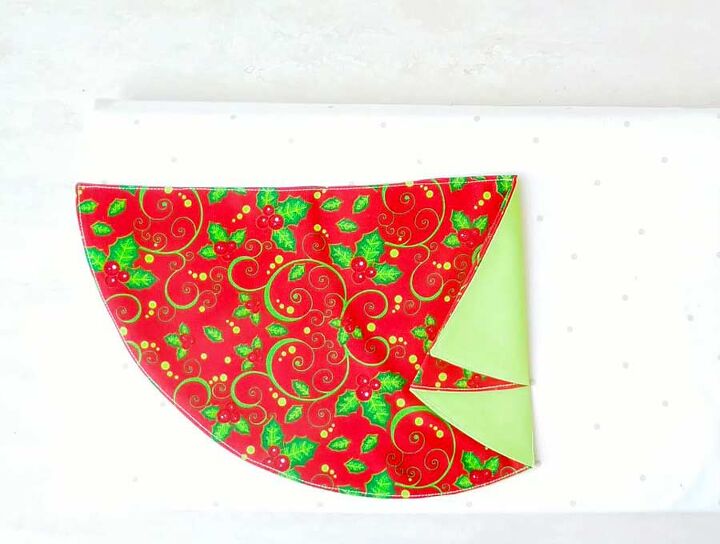
Start by folding the napkin over the folding seam you just made. Press the napkin flat.Fold the flap backward while holding the corner of it in place. When the curve becomes parallel to the straight edge of the napkin, stop and fold it towards the other side in a fan folding manner. Align that edge with the new fold and press everything flat. This is the trickiest step, so make sure to watch the video in my article DIY Christmas tree napkins tutorial

Flip the napkin to the other side and fold the bottom corner so that you align its crease and the fold from the previous step. Fold backward in a fan fold manner again so that you align the last edge with the last fold.
Use your iron to press the whole thing flat.
The napkin is ready for a meal!
What do you think about this project? Were you able to complete it? Tell us in the comment section below. These napkins make great Christmas presents for your friends and family, so go ahead and make a few sets!
Resources for this project:
See all materials


Comments
Join the conversation
-
CUTE, CUTE, CUTE....I'LL TAKE 8!!!!
-
Think this would be a fun grandmother-granddaughter sewing, learning, and togethernss project in these days of isolation. Voila, a gift for mom! Hardest part is getting out to select the material. Also wondering if red and green felt topstiched together would work as a decoration. Could be smaller to hang on the tree. Really clever idea! Thanks!


Frequently asked questions
Have a question about this project?
Can I get a pdf download
Can fat quarters be used for this?
Why do you need to stitch 5” in from the outer edge (fold line)? Couldn’t you just fold and iron along an imaginary line?