


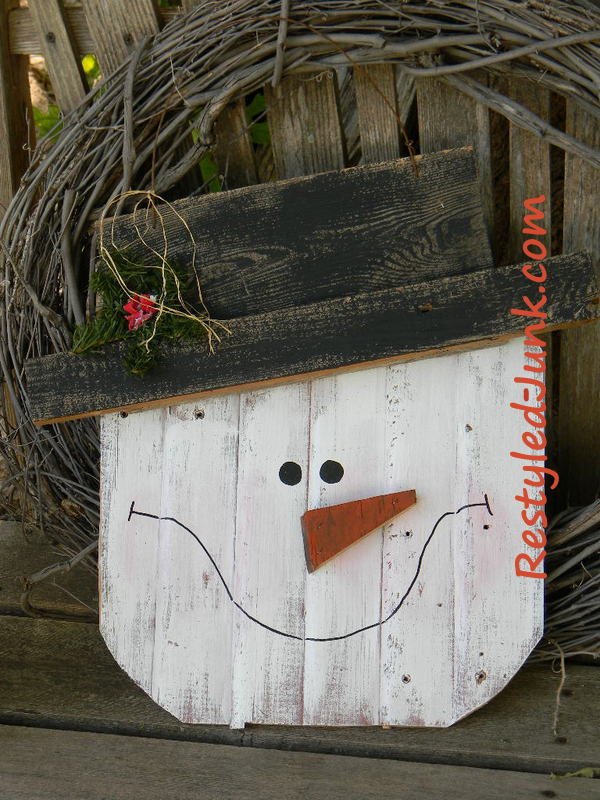
Rustic Wood Snowman Head
Add a bit of jolly to your door or outdoor space with a wood Christmas snowman. This happy Frosty is made using bits and pieces from your scrap pile. Bits and pieces are something I always have in great supply.
This Rustic Wood Snowman Head doesn't take long to make and you can leave him up all season long.
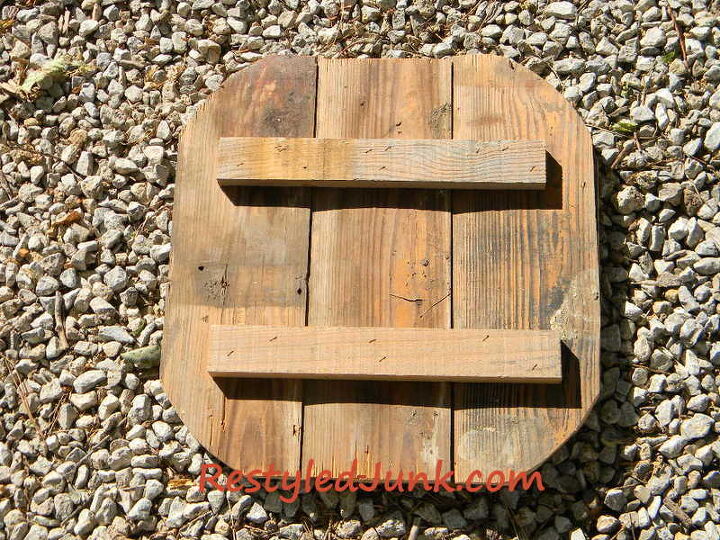
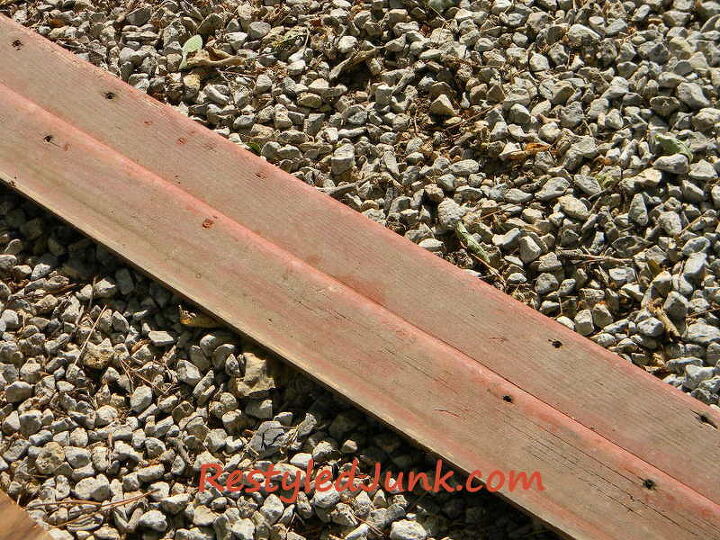
Cut three 16" lengths from 5-1/2" wide scrap wood. These are your head pieces. Cut two 12" lengths from 2-1/2" wide scrap wood for the back braces.
Lay the head pieces on your work surfaces with the fronts facing down. Place the long edges together and align the short ends even with each other. Arrange the braces on the back of the head pieces, across their widths. Evenly space the ends of the braces from the edge of the head shape. Attach the braces using wood screws or staples.
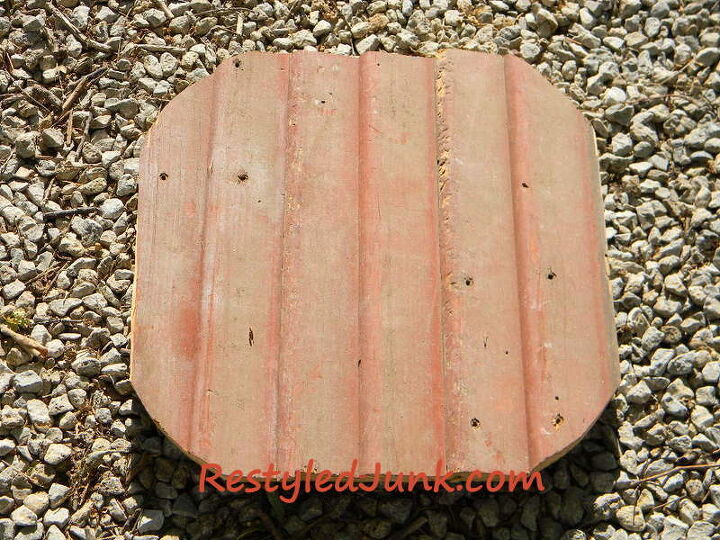
Using a jigsaw, curve each corner of the head to shape.
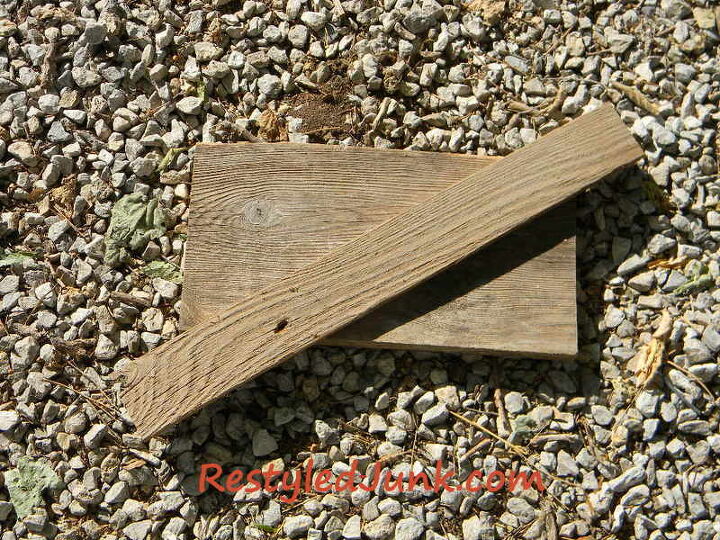
Cut a 13-1/2" length from 5-1/2" wide scrap wood for the hat and a 2 1/2" x 20" wood strip for the brim.
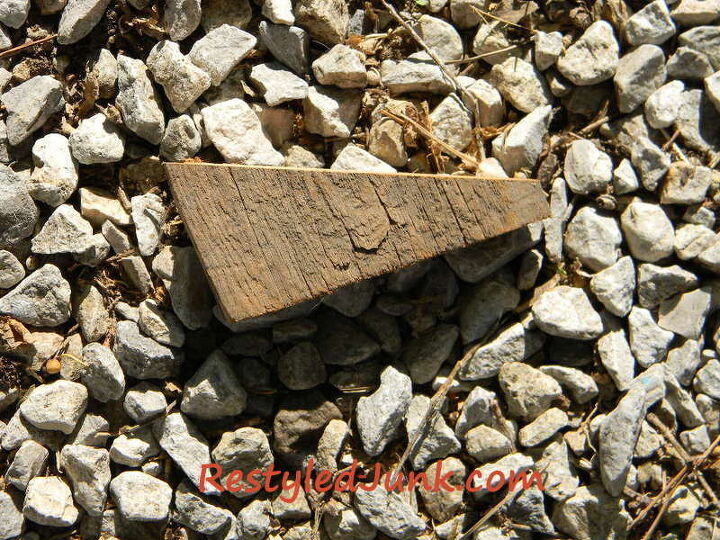
Cut a wood triangle that has a base approximately 1-inch wide and is approximately 4 inches tall for the snowman nose.
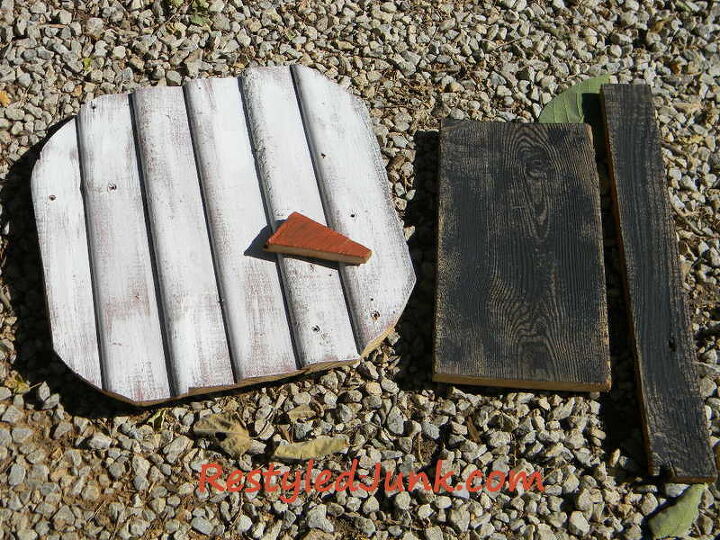
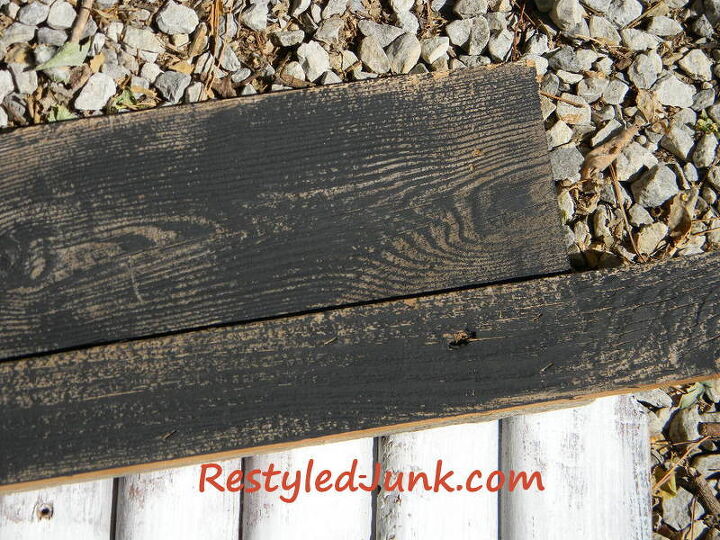
Dry brush the front of the head using white acrylic paint, the hat and brim using black acrylic paint and the nose using orange acrylic paint. Do not paint the edges or the back of the pieces. Allow the paint to dry.
Lay the hat top on the front side of snowman head. Center the hat with the left-bottom corner of the hat 4" below the head's top edge and the right-bottom corner 2" below the head's top edge. Apply wood glue between the hat and the head. Securely attach the hat using staples.
Place the hat brim over the bottom edge of the hat top. Align the long bottom edge of the brim with the bottom edge of the hat. Extend an even amount of the brim from both side edges of the hat. Apply wood glue between the brim and the hat. Securely attach the brim using staples.
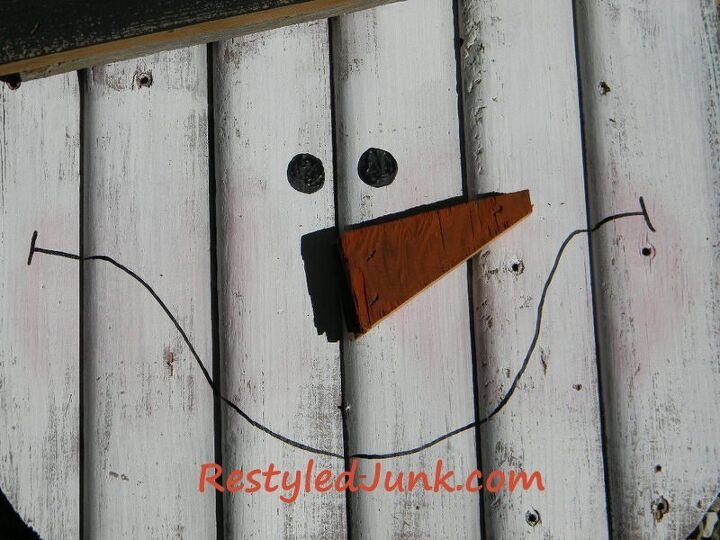
Using a stencil brush, lightly pounce two large cheeks on the face using pink acrylic craft paint. Center and glue the nose on the center of the face. Secure with staples.
Dip one end of a 1/2" dowel in black acrylic paint. Dot two eyes above the nose. Draw a large smile on the face using a black paint marker. Allow the paint to dry.
Attach decorative pine or a Christmas floral pick to the hat brim using craft glue and staples.
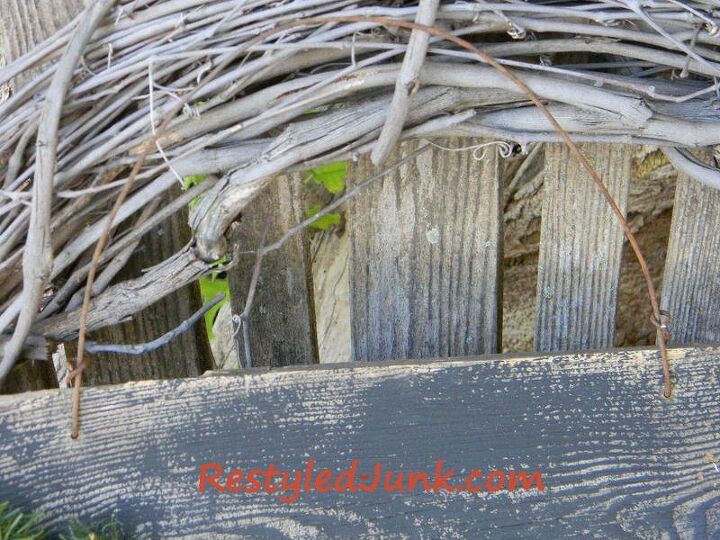
Measure down 1" from the top edge of the hat and 3" in from each side edge. Drill a holes large enough to accommodate your wire. Cut a 24" length from rusty baling wire using wire cutters. Insert the ends of the wire through the holes and twist to secure using needle nose pliers.
Hang and enjoy!
Resources for this project:
See all materials


Comments
Join the conversation
-
Cut little guy. Next year give him a body and put him on a stake in the ground.
-
First looked like another pumpkin but you made him lovely little friend. So fun thanks for sharing


Frequently asked questions
Have a question about this project?