


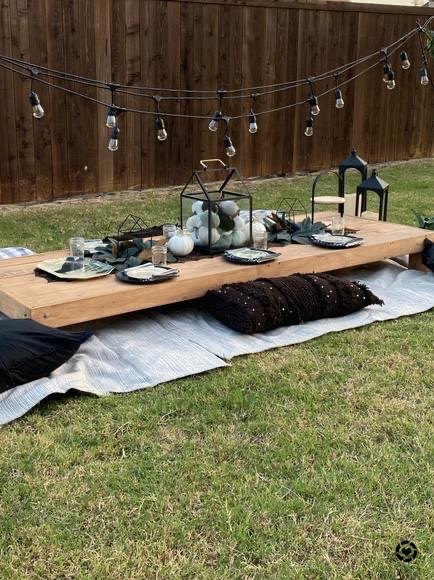
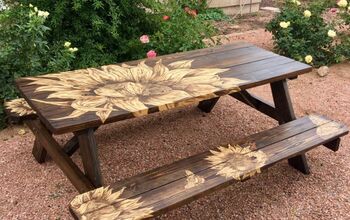
DIY Picnic Table
I wanted to created a nice space where we could hang out in the back yard. My goal was to scrap wood and other things I had on hand to make this come to life.
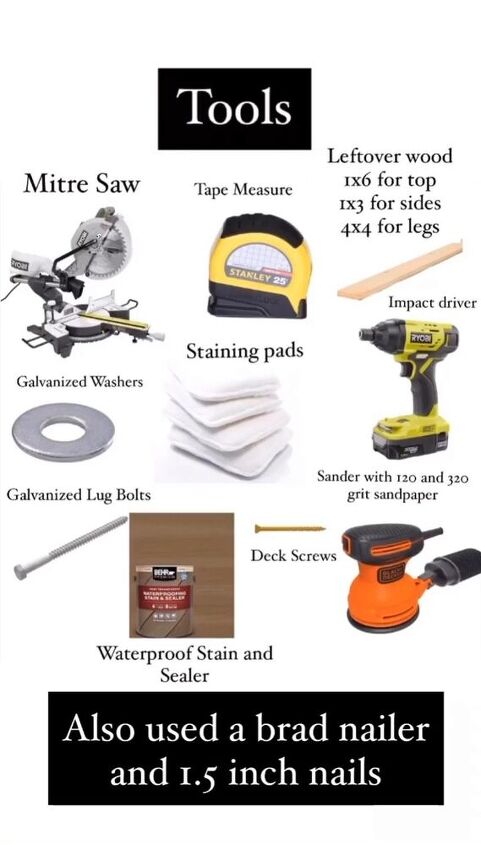
Gather Supplies:
- Lumber:
- 1x6 for Table Top
- 1x3 for Table Sides
- 4X4 for legs
- Galvanized Washers
- Galvanized lug bolts
- Deck Screws
- Staining Pads
- Waterproof Stain and Sealer in your color choice
- 1.5 inch brad nails
- Sandpaper 120 and 320 grit
Tools:
- Mitre Saw
- Impact Driver
- Sander
- Brad Nailer
- Tape measure
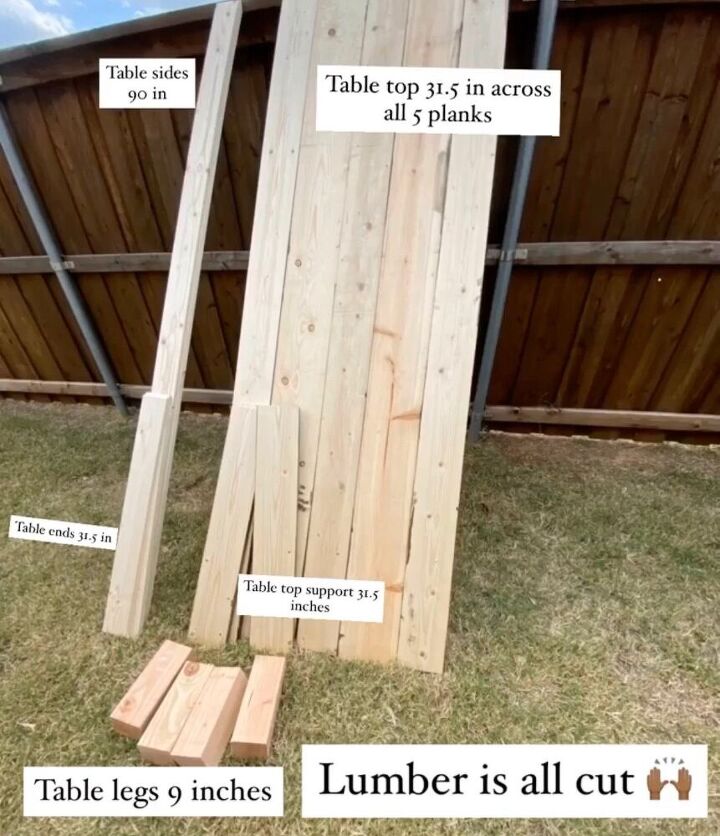
Next step is to cut lumber to desired length etc. See picture below for my detailed measurements.
Sand with 120 grit
Next is to stain. Apply 2 coats. I used a waterproof stain and sealer to guard from outside elements. Stain color is Castle Gray.
*Important to apply stain prior to assembly to get all the hidden parts
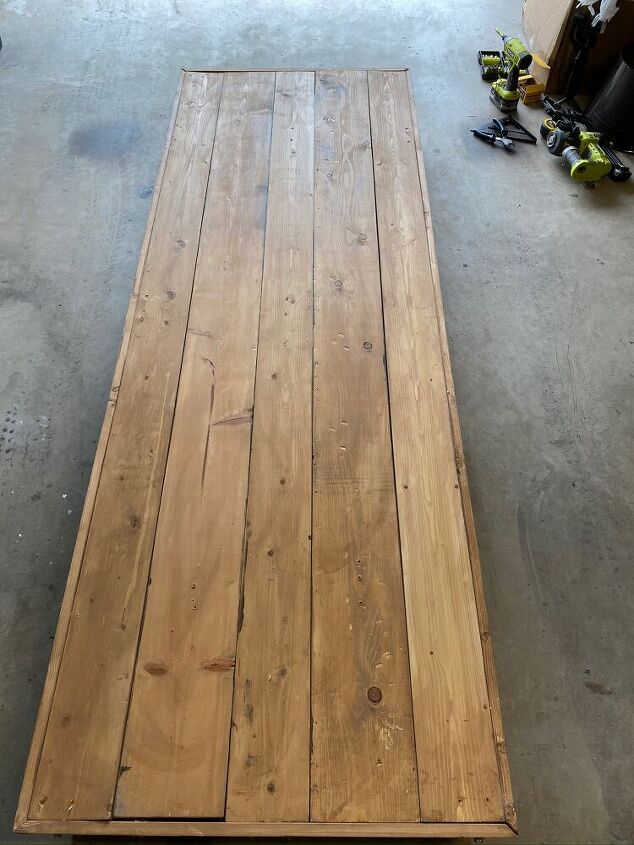
Here is what it looked like after. I wanted darker but since this is a budget DIY, kept as is.
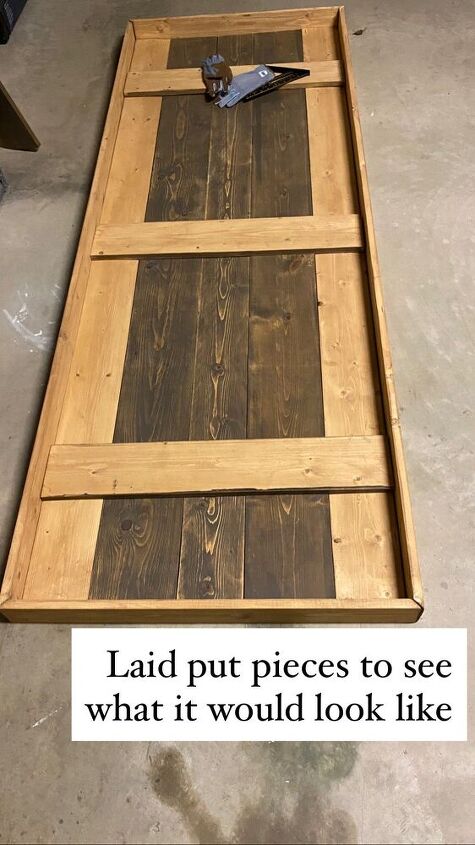
Once stain was dry, I brought it in and laid it out to see how it would look. You will notice the darker stain on the back. This was excess wood from a faux beam project that I did a while back.
Next step is to assemble. I used my brad nailer to attach the boards that lay across the table top in a diagonal manner.
Once done, I attached the sides with the deck screws to secure the table top.
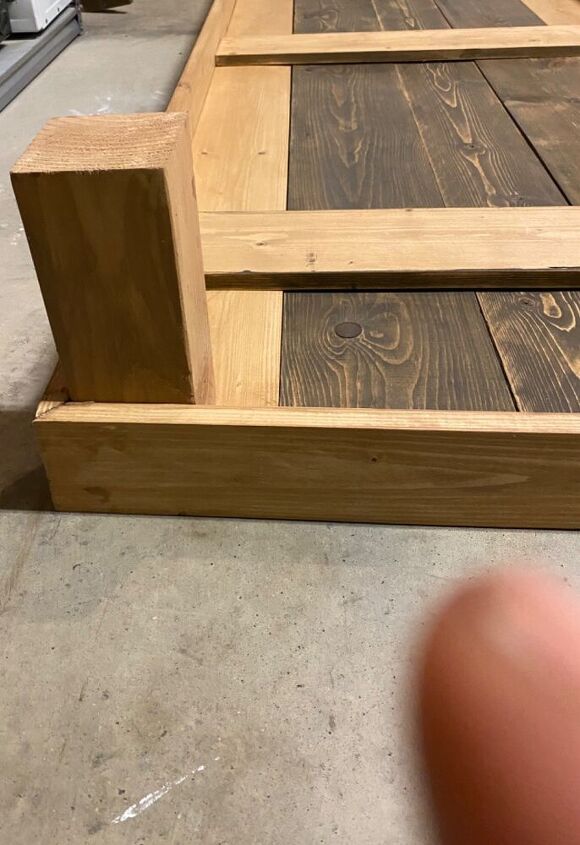
Next was to attach legs, using the lag bolts and washer. 2 lag bolts to each leg.
I also drilled 2 deck screws through the table top on each leg to add more securely to the top.
Final step was to sand with 320 grit and apply a 3 coat of stain. Let dry and then style
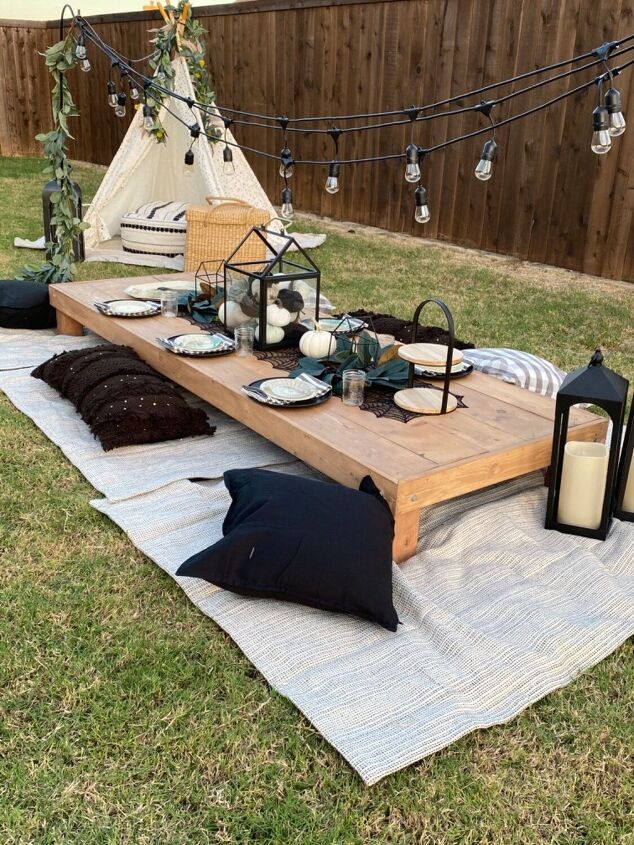
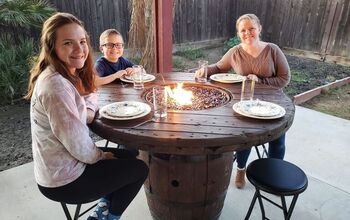
Reveal. This was a fun project to work on.
Resources for this project:
See all materials


Comments
Join the conversation
-
love it!
where did you get ⛺️ Tee pee?!


Frequently asked questions
Have a question about this project?