


Room Dividers Made From Fruit Boxes
With our upcycling idea of stacked and white lacquered fruit boxes, an individual room divider with plenty of space for books and accessories is created in no time.

If two areas are to be created in large rooms, room dividers are a good choice. If you want to be quick, you can create a nice visual separation with stacked, white painted fruit crates. The highlight of the boxes: you create storage space, because they can also be used as shelves.
- 7 old wooden fruit boxes
- white acrylic lacquer or clear lacquer
- Painting paper or foil to lay out
- Countersunk universal screws, 3×16 mm
- Multi-sander
- Fine spray system
- Cordless screwdriver
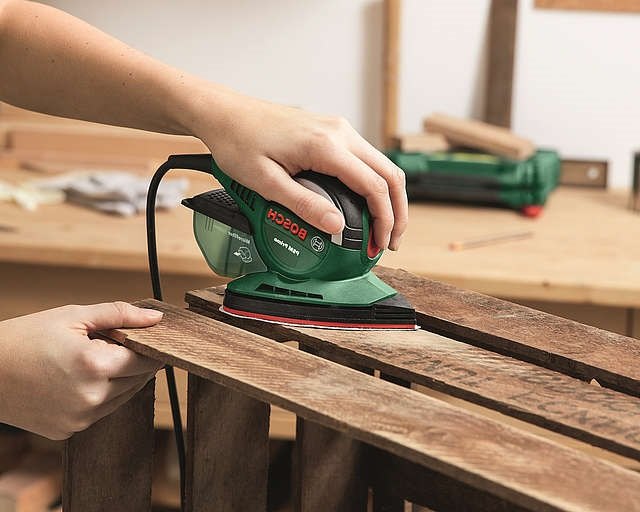
First, sand down all the surfaces of the fruit crates with the multi-sander. The more thoroughly and finer you sand, the smoother the surface will be. Start with 120 grit sandpaper and finish with 180 grit paper. It’s best to work outdoors and with a face mask. Then carefully dust the fruit boxes.
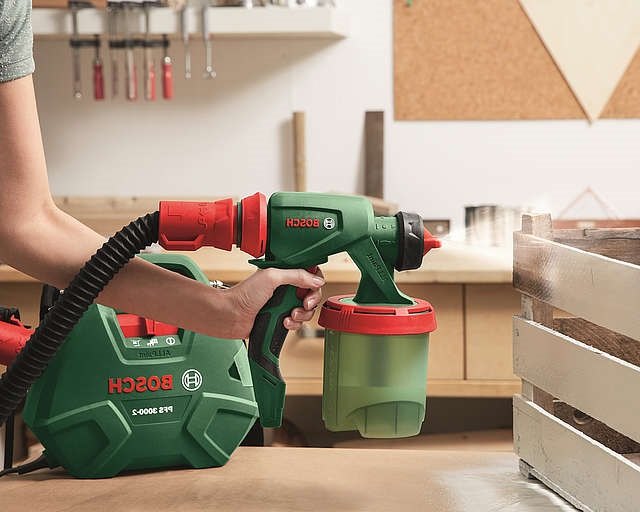
If you want to keep the natural color of the fruit crates, use a clear coat. We decided to paint it white. First, line the painting area with paper or foil. Then paint the fruit crates inside and out with at least two layers of white acrylic paint until the color has completely covered. Because of the gaps, it is best to use a fine spray system. Then let it dry well.
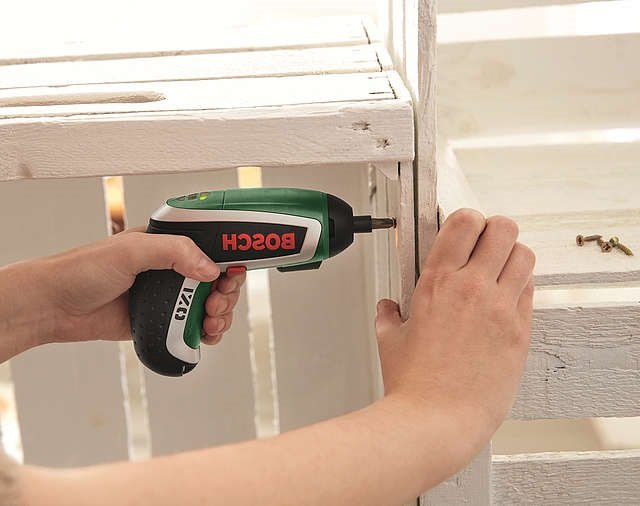
Now you stack the fruit boxes on top of each other as desired. So that the room divider is stable and no box falls down, you screw the individual elements together with the universal screws. For even more stability, you can mount the shelf on the wall with dowels.
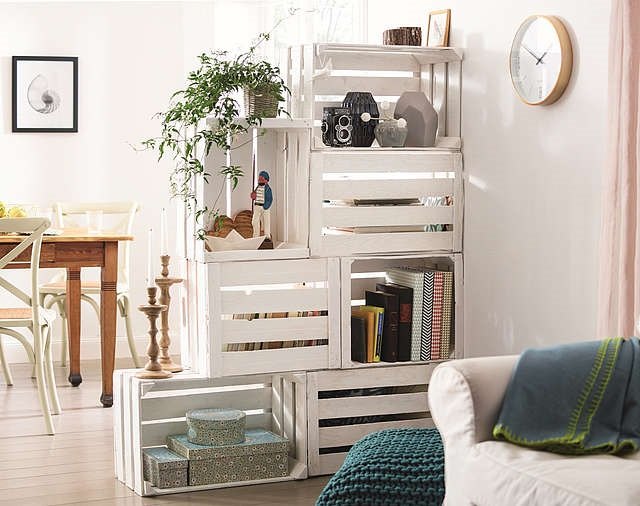
Your individual room divider is ready.
Resources for this project:
See all materials


Comments
Join the conversation
-
Looks great plus so versatile!
-
Wow! Great look and idea!!


Frequently asked questions
Have a question about this project?