


How to Replace A Sash Cord In Windows
Do you have an old home? Does your home have old windows with weights? Well our home was built in 1929 and still has some of the original windows. We had to do some repairs to them. Besides some windows not opening at all, when we did pry them open, they wouldn't stay open. We had a consultation with a window repair person who serves the area, and his wait list was over one year! We didn't want to wait so long, and he was willing to give guidance. Our windows unfortunately don't have a stop trim that allows for easy access to the weight. This meant the fix was a bit more labor intensive. If your old windows are in need of repair, specifically replacing the sash cord, read on!
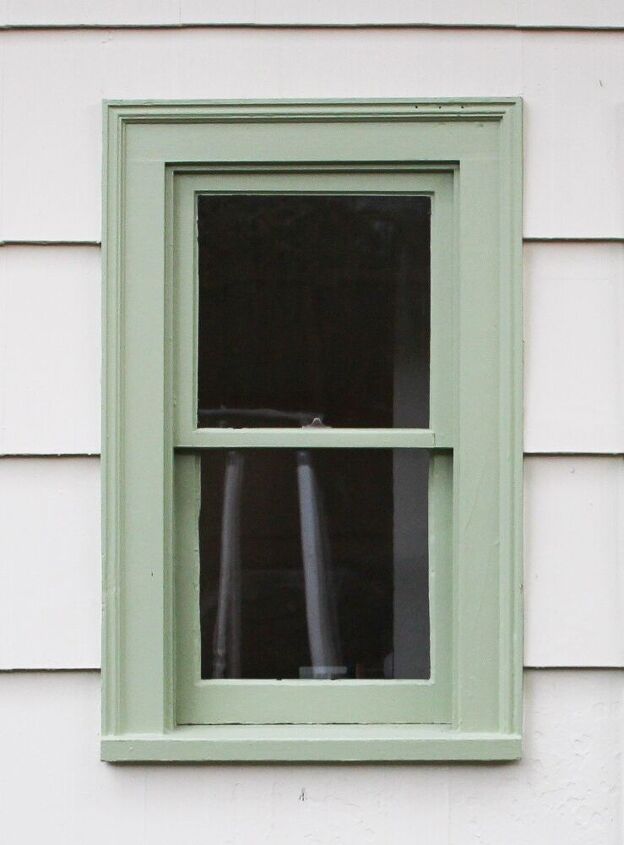
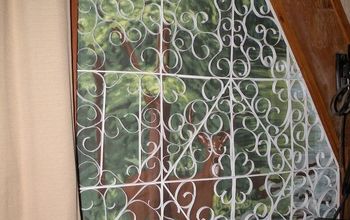
Some of our windows had been replaced over the years, but others like this one above are original to the house. We love the look of these windows, but needed to do some repairs to make them functional. The sash cords had been painted and the windows themselves had been painted shut.
If you are renovating a house, make sure to check out these other posts for inspiration:
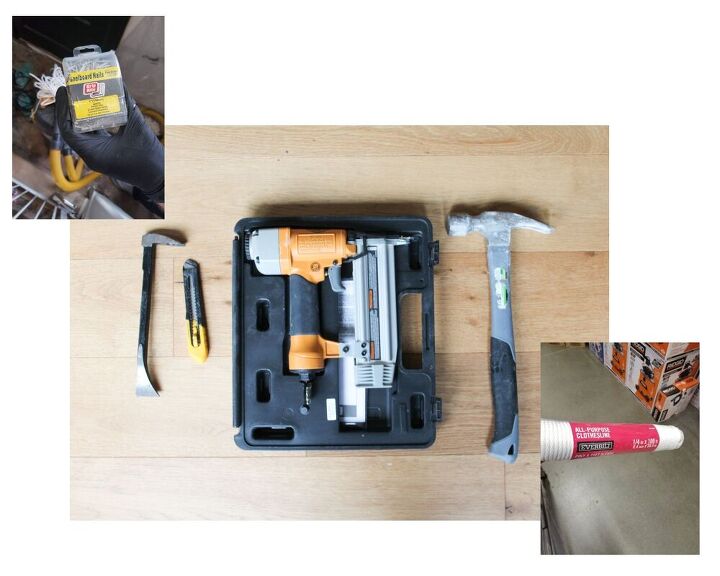
We used just six materials to replace the sash cords. You can buy cord specific for window sashes, but this one has worked just fine for the last couple years.
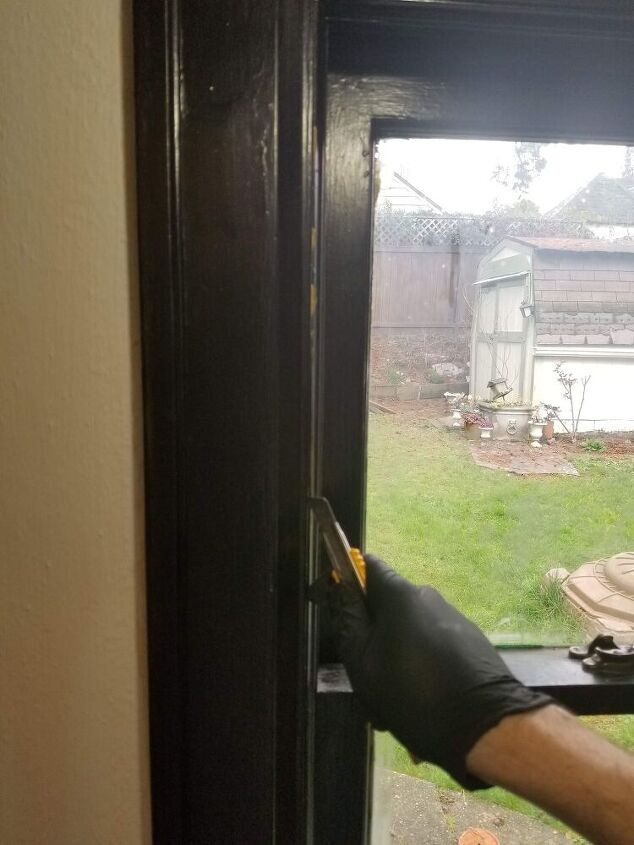
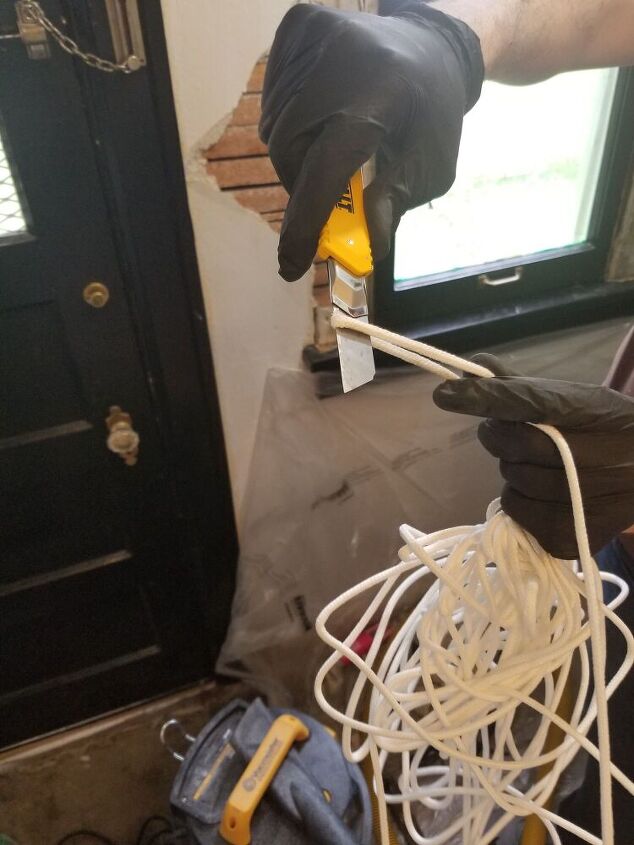
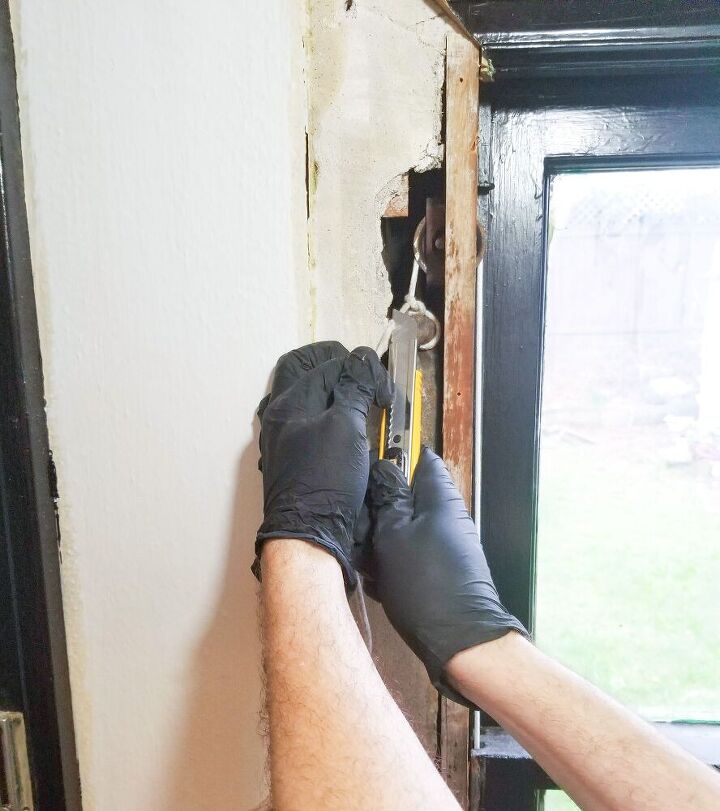
Step 1 Using the utility knife cut along the sash.
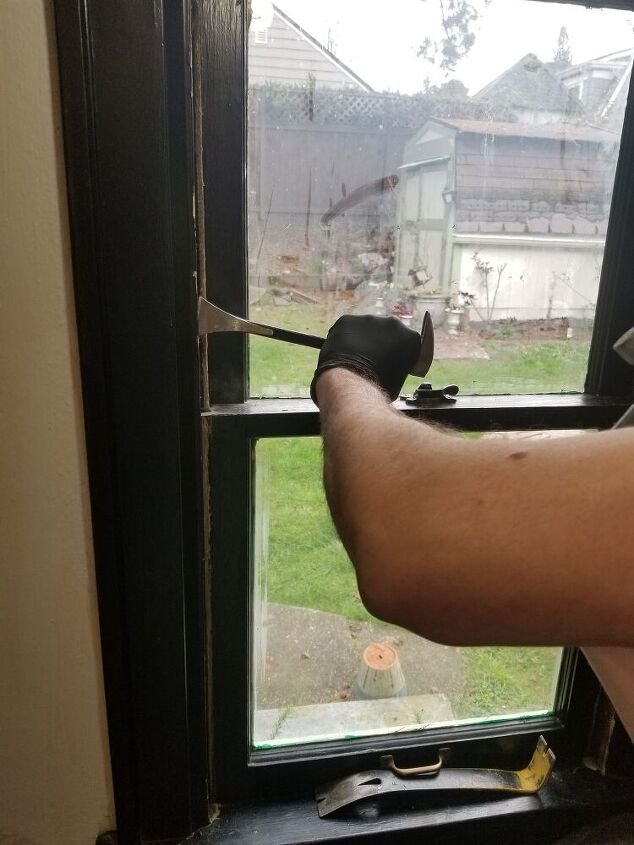
Step 2 Pry to loosen the moulding by using the mini crowbar and hitting the end with the hammer.
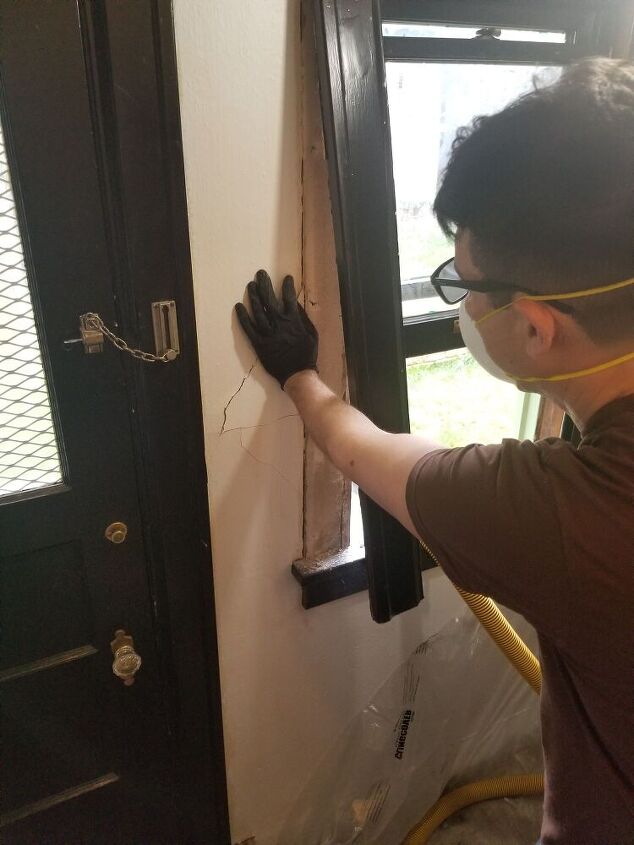
Step 3 Use your hands to pull moulding off the wall.
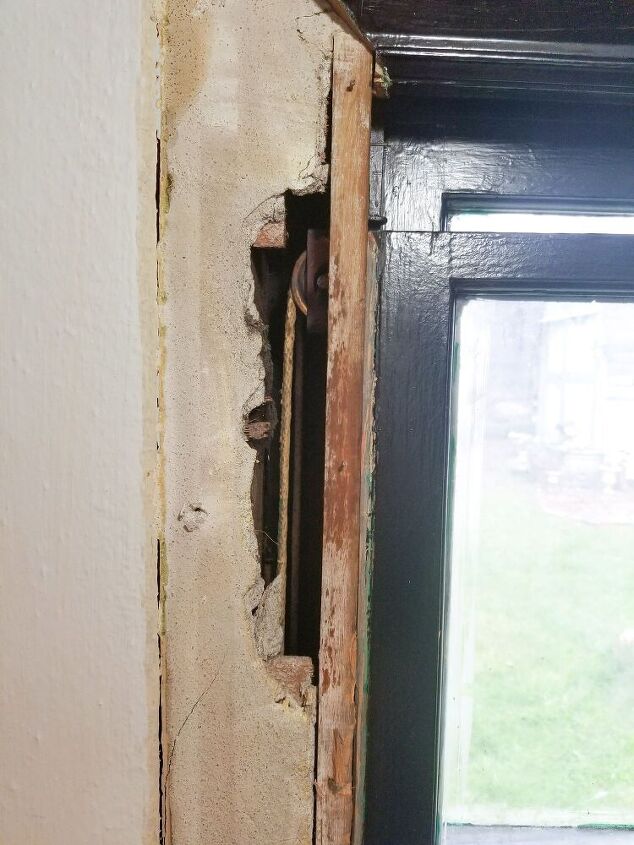
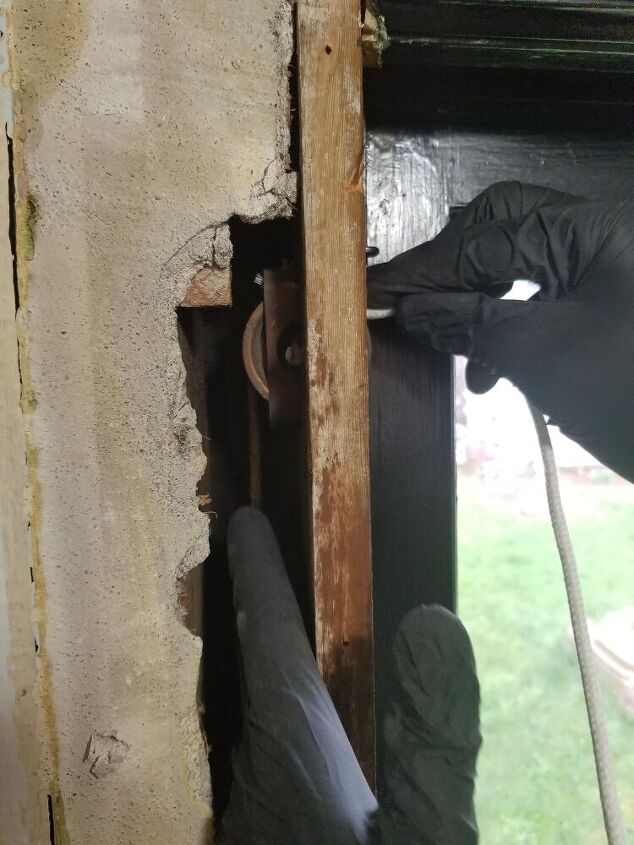
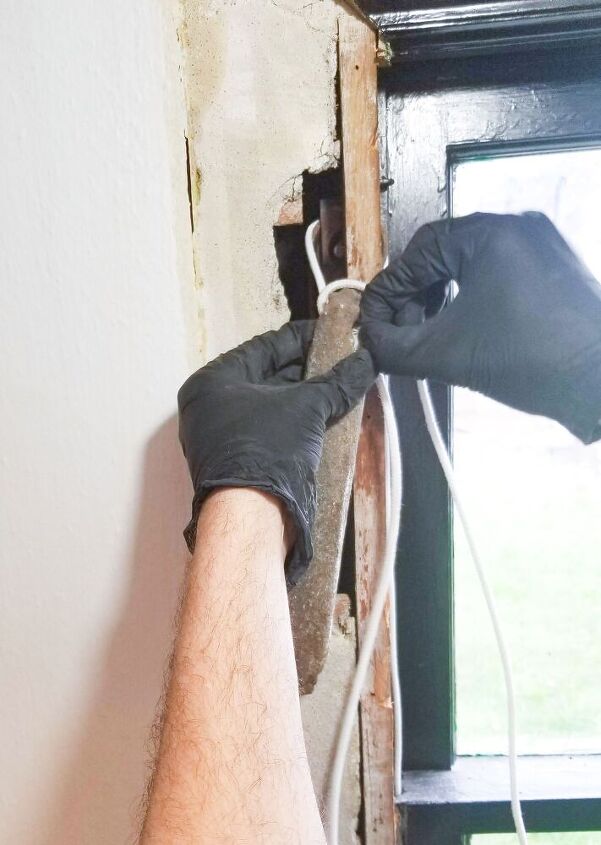
Step 4 With the moulding pulled off, you will see the pulley, cord, and weight exposed.
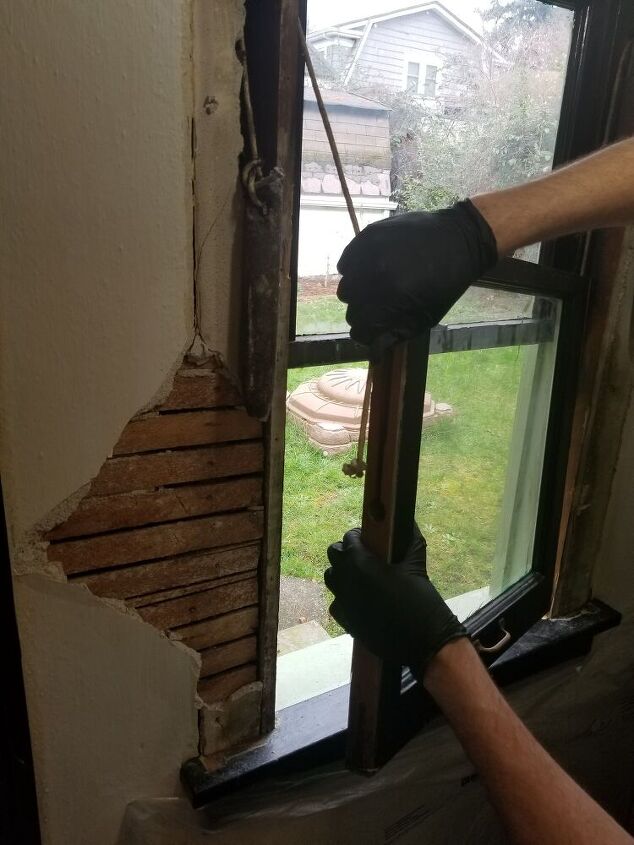
Step 5 Pull window loose to get to the cord.
Step 6 Cut old cord from weight.
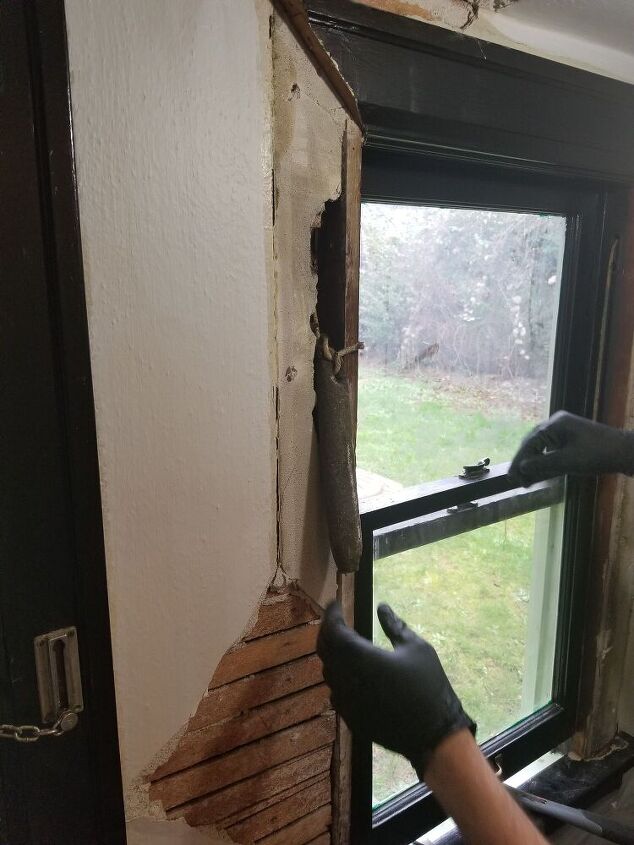
Step 7 Cut a length of new cord to the same size as the old cord.
Step 8 Feed cord through hole to wrap over the pulley.
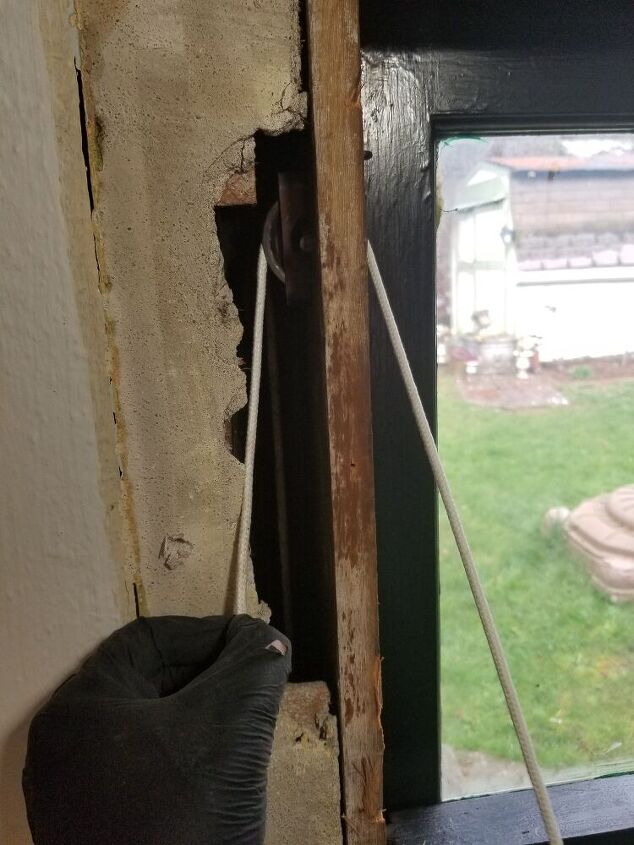
Step 9 Pull string over the pulley and through to the other side.
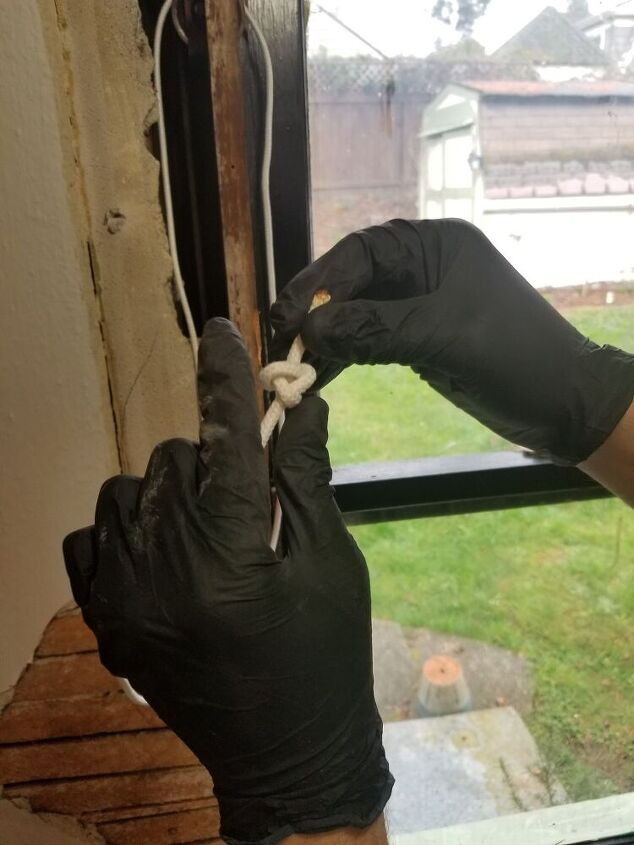
Step 10 Tie a knot to fit into hole in window.

Step 11 Fit new cord knot in window hole and nail down in place.
Step 12 Loop cord through weight hole and tie a knot.
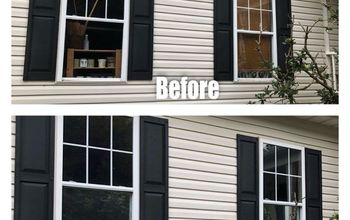
Step 13 Cut excess cord from weight. Repeat this process on the other side. Test out by opening and closing window. The window should now stay open, as well as open and close more smoothly.
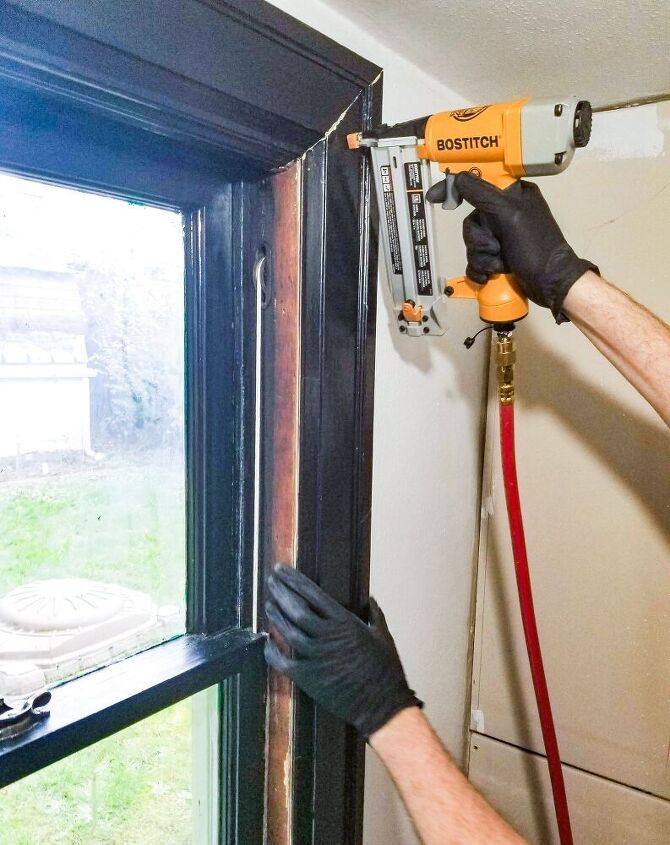
Step 14 When you are done, nail trim back in place.
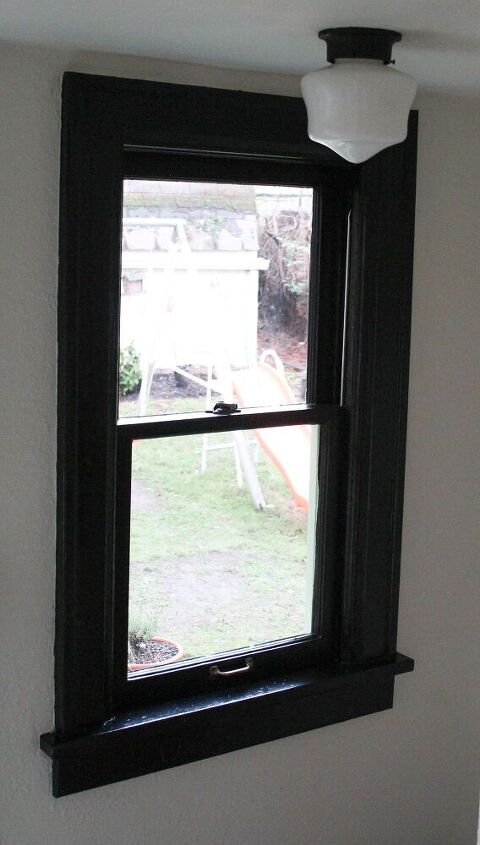
This space is our back landing that leads to the backyard. To the left is the backdoor and to the right facing the window, is the staircase leading to the basement. I wish I had taken better "before" pictures of this window. When we moved in the trim was brown and under the brown there were signs of a previous kelly green! There were also bars on the window, and the already small dark space was even darker. Now we can open this window for cross ventilation, or to holler out to the kiddos.
Some notes on materials- the nail gun is the most expensive on the list. Ours was about $120, but we already owned one before starting the project. We also already had the hammer and utility knife. So if you already have some of these tools, your costs will be less than I listed!
Thanks for reading! Have you ever repaired an old window? Let me know in the comments section!

Comments
Join the conversation
-
Most situations you just pull the stop trim off. The window has a "door" held with a screw to access the weight. There is no need to remove the window trim and get into the wall.
-
This is awesome! I need to do this to my windows as well. I love the look of my old windows and this inspires me to finally restore them. Thanks!


Frequently asked questions
Have a question about this project?